You can hybridize your own hardy water lilies. It is not too difficult with a little preparation. Give it a try. You just might produce a new cultivar that is worth naming and registering!
Water lilies produce a solitary flower, but they cannot be self pollinated within that single flower. There are some exceptions, but not in the hardy varieties.
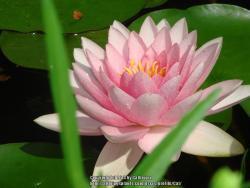
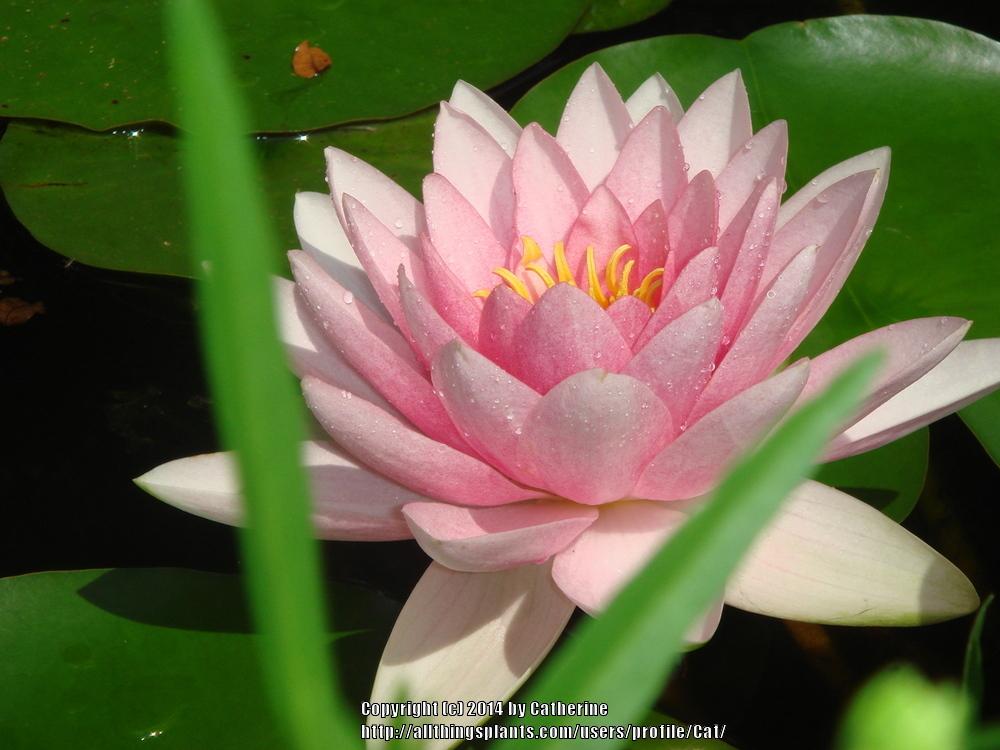
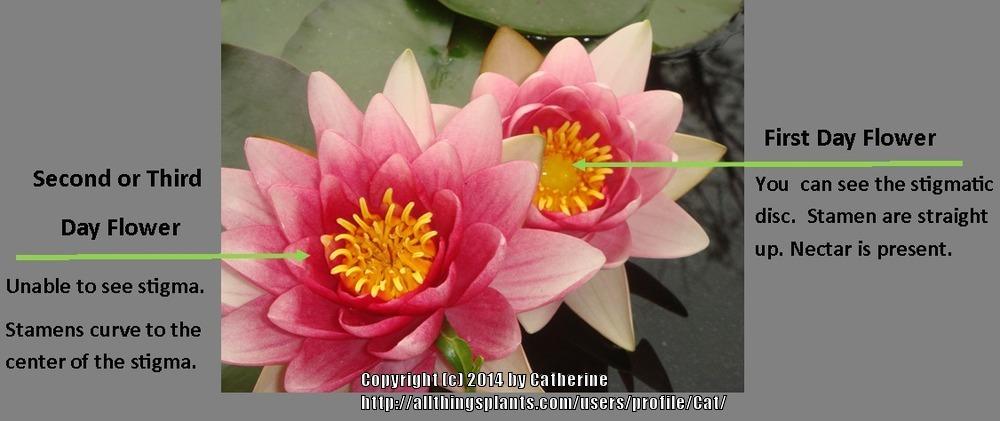
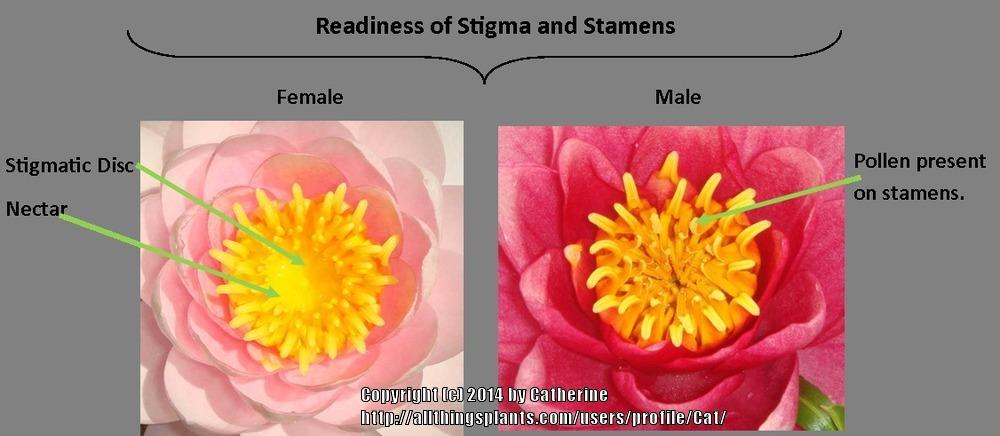
Hardy water lilies produce leaves or pads that come in a variety of shapes and sizes. The flowers float on the surface of the water and can be up to 12” wide. They come in many colors, such as red, white, pink, yellow, and peach. The plant grows from a rhizome that runs horizontally under the surface of the soil. Each flower blooms for approximately three days. The stigma is ready to accept pollen from a different flower on the first day of bloom, but the pollen in the same flower is not ready to shed until the second or third day of bloom.
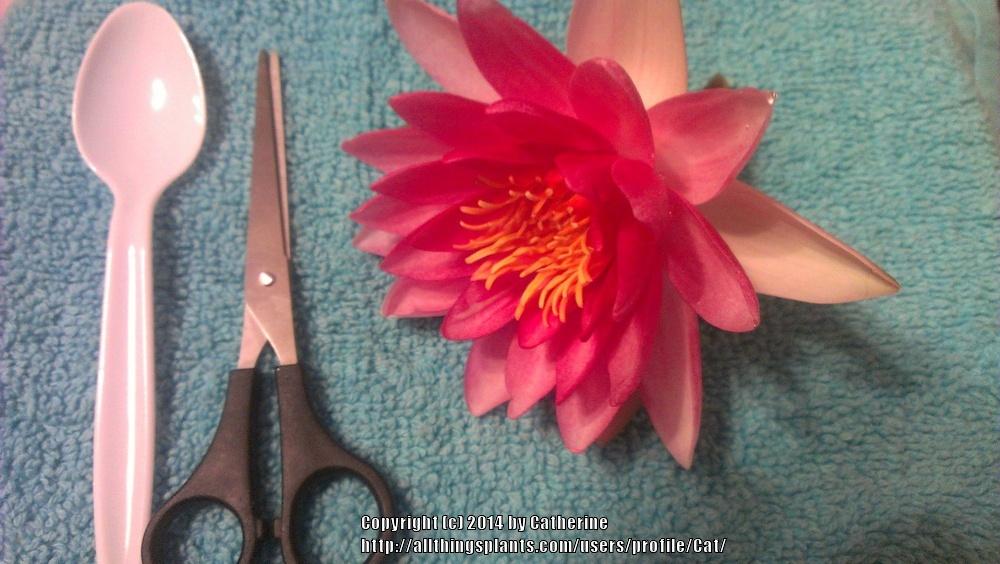
There are a few items you will want to gather before you perform your pollination cross. I had most of them already around my house.
1. A note book and pen/pencil, for keeping track of your crosses
2. Small clean artist type paint brush
3. Small net bag or cheesecloth (worked fine for me)
4. String/Yarn
5. Scissors
6. A stake/pole or other way to secure the string
7. Garden/plant tag or slip tag
8. Spoon
9. Pipette or syringe if using nectar from another female flower
10. Zip close plastic bag
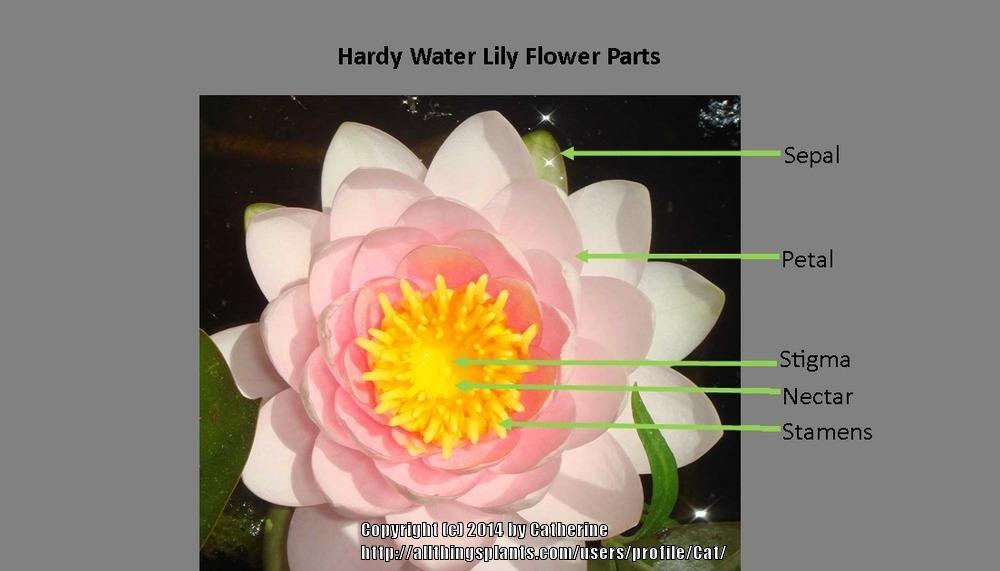
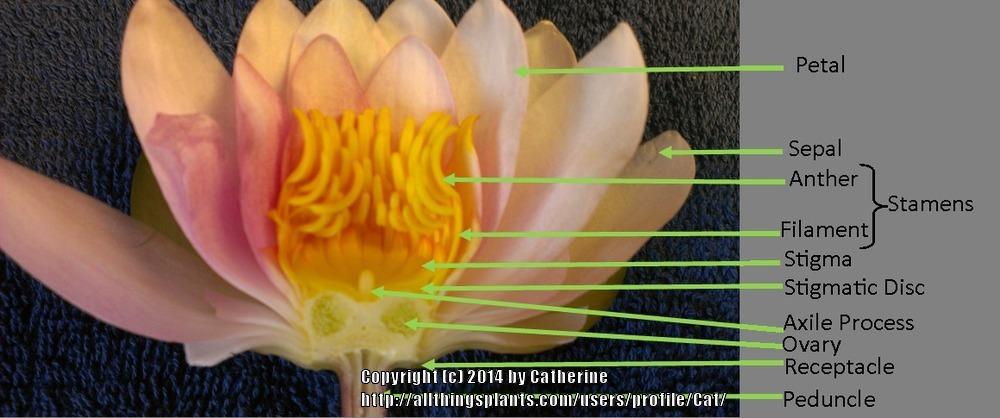
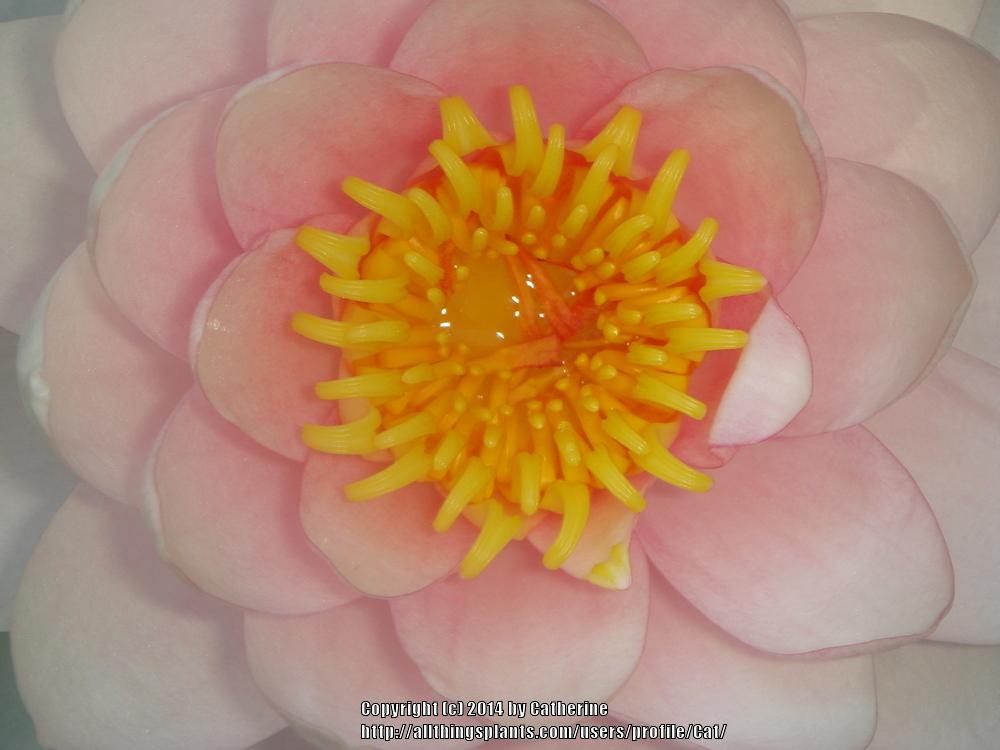
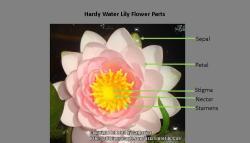
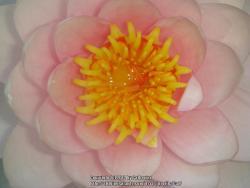
You will need to know the parts of the flower before you attempt to hybridize. The stigma is located in the center of the flower and contains stigmatic fluid (nectar). Nectar can be found on the first day of blooming only. The nectar is surrounded by stamens. Petals and sepals are the outer surrounding parts.

Before you perform any cross pollination, it is important to know the difference between first-day, second-day, and third-day blooms. The stigma becomes receptive on the first day while the stamens are ready to shed pollen on the second and third days.

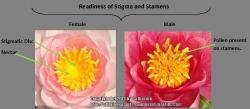
The time of cross pollination will depend on the parents. The female flower should be used on the first day of bloom, when the stigma is receptive to pollination. Nectar must be present for the pollen to germinate. Anthers/pollen should be collected from a second or third-day male flower. You should be able to collect plenty of pollen from the top of the anthers at this time.
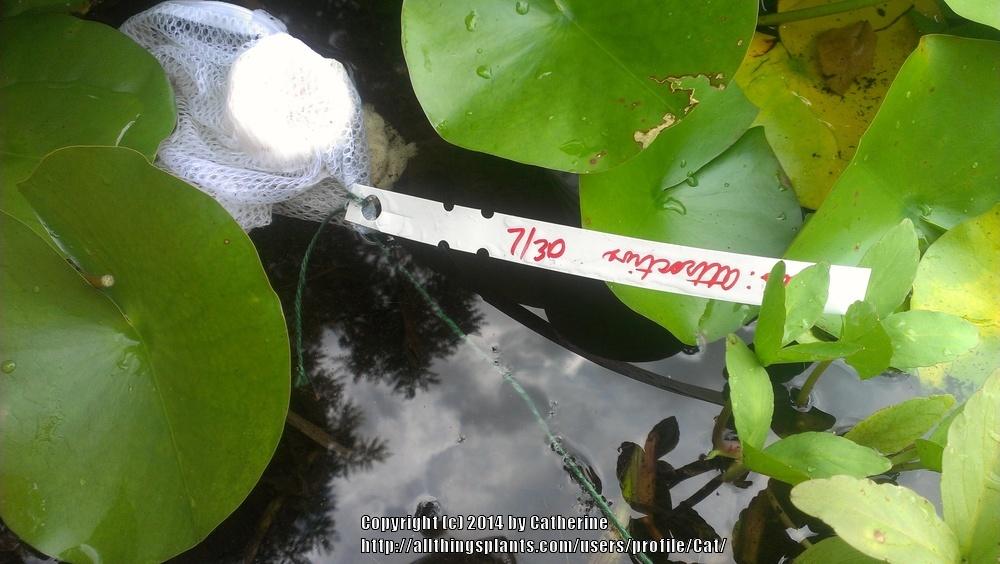
Be sure to pick your parent flowers ahead of time. You may want to place a net bag or cheesecloth over the flowers to prevent accidental pollination and/or contamination from insects. You should already have a male flower that has been open a day or two when your female flower opens on the first day. Nectar
MUST be present in the first day bloom! You can use some from another first-day flower if there isn't any, but you must be careful not to contaminate your cross.
Once you have your parents picked out, it is time to pollinate the female flower. You need to take the pollen from the male flower and mix it with the nectar of the female flower. You can gather some pollen on a clean paint brush, and cut the stamens into a spoon or what ever works best for you. Collect the pollen from a male flower that has been in bloom for two or three days. The anthers should be open to release the pollen. Early morning is best, usually between 8 am and 10 am.

Place the anthers into the stigmatic disc of the female flower and stir with your paint brush to distribute the pollen. Next, cover the pollinated flower with cheesecloth or a thin net bag. Tie up the bag with the string and add your tag. You will want to note the date and the pod and pollen parent details on your tag before attaching it. Attach the string to the stake or pole to secure.
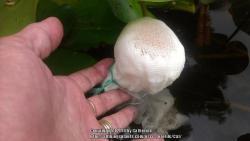

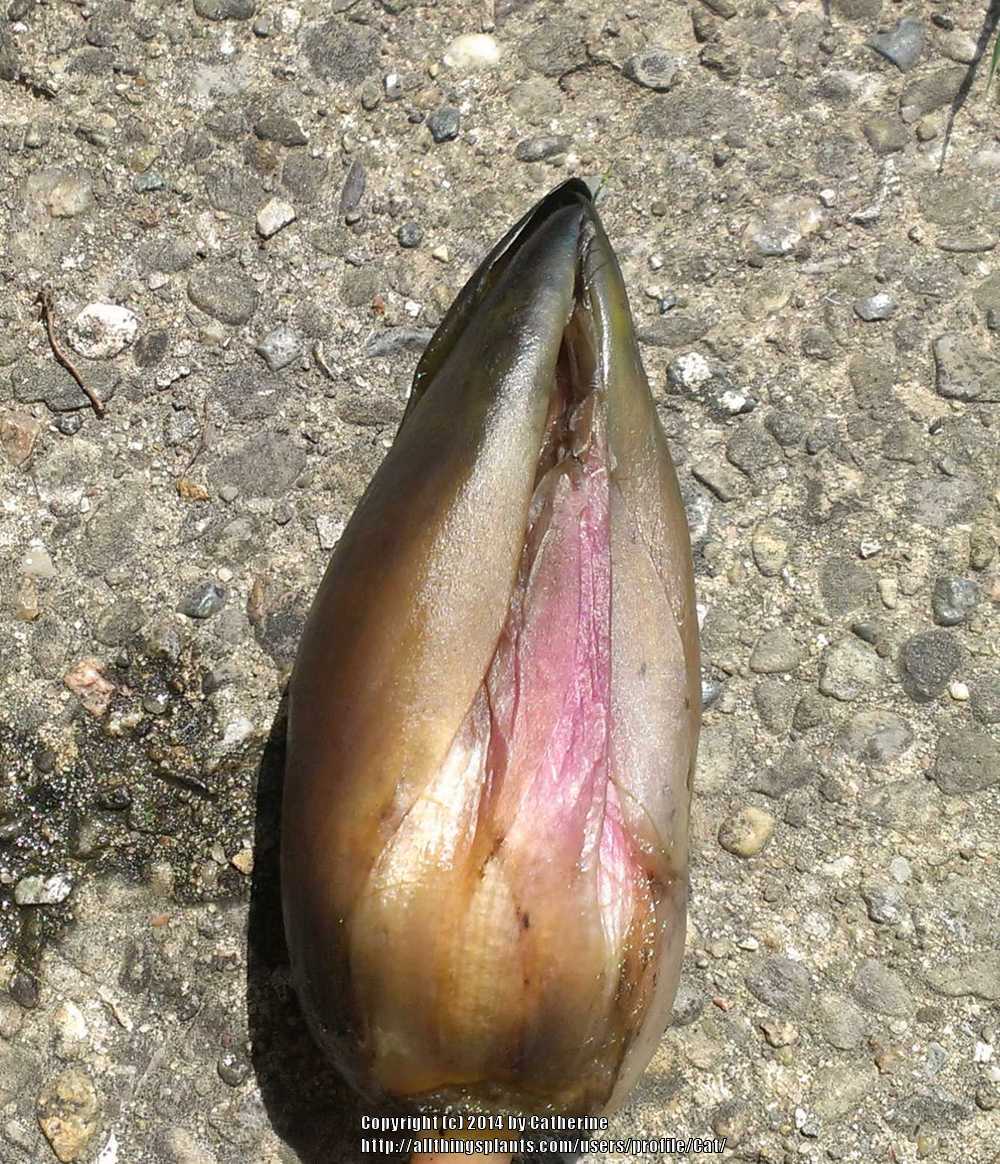
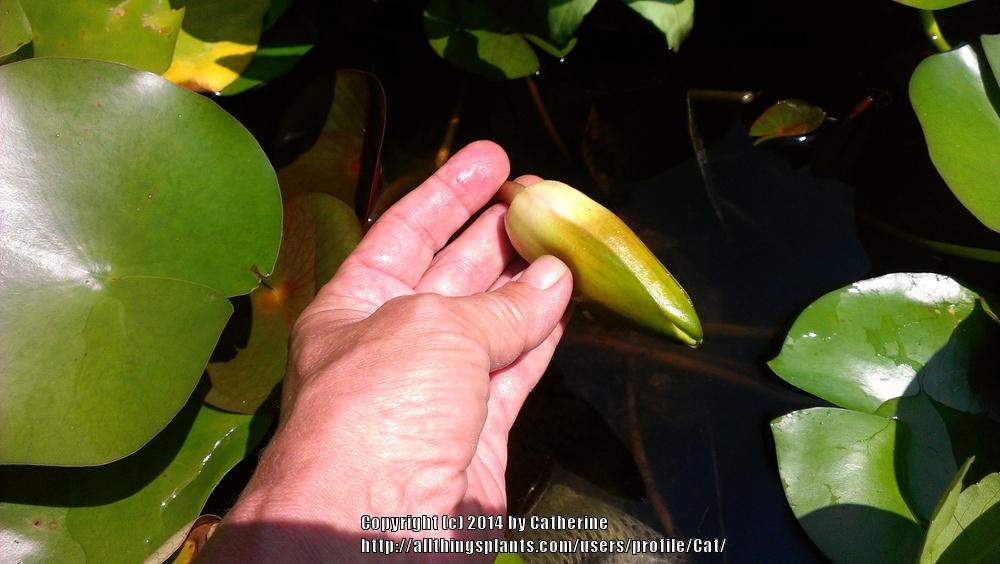
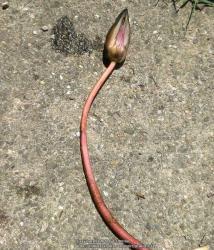
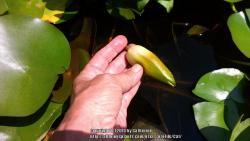
Approximately five days after blooming, the pollinated flower will start to sink beneath the water. Leave the flower for two more weeks and observe any changes. If the flower rots, there is no fertilization or seed set. If the petals and sepals remain, the ovaries will enlarge to become a pod. You can also periodically check the peduncle. If fertilization has taken place, the peduncle will corkscrew or spiral. I have included pictures of both for comparison.
No fertilization has occurred
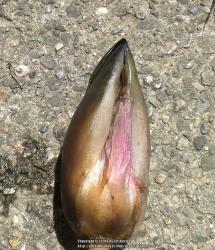
 Successful Fertilization
 See You For Seeds In Part 2