
The leaves have dropped from the trees, the summer vegetable and flower gardens are finished, and Mother Nature is providing an abundance of organic matter for you to make into compost. Even if you live in an area where you've planted fall gardens for a winter and early spring harvest, this is still the time to make compost. Making compost is one of those "feel good" fall activities. You feel good about cleaning up the yard and making something as valuable for your garden as compost ... for free! Gardens receive many benefits from annual additions of compost. Compost helps sandy soil retain water, helps clay soil drain better, makes nutrients more available to plants, and supports soil microbial activity that defends your plants against disease.
Starting a compost pile is as easy as following a cooking recipe. Just get the right ingredients together, mix them well, and let it cook. In a matter of months you'll have finished "black gold" to mix into the soil of your flower, herb and vegetable gardens.
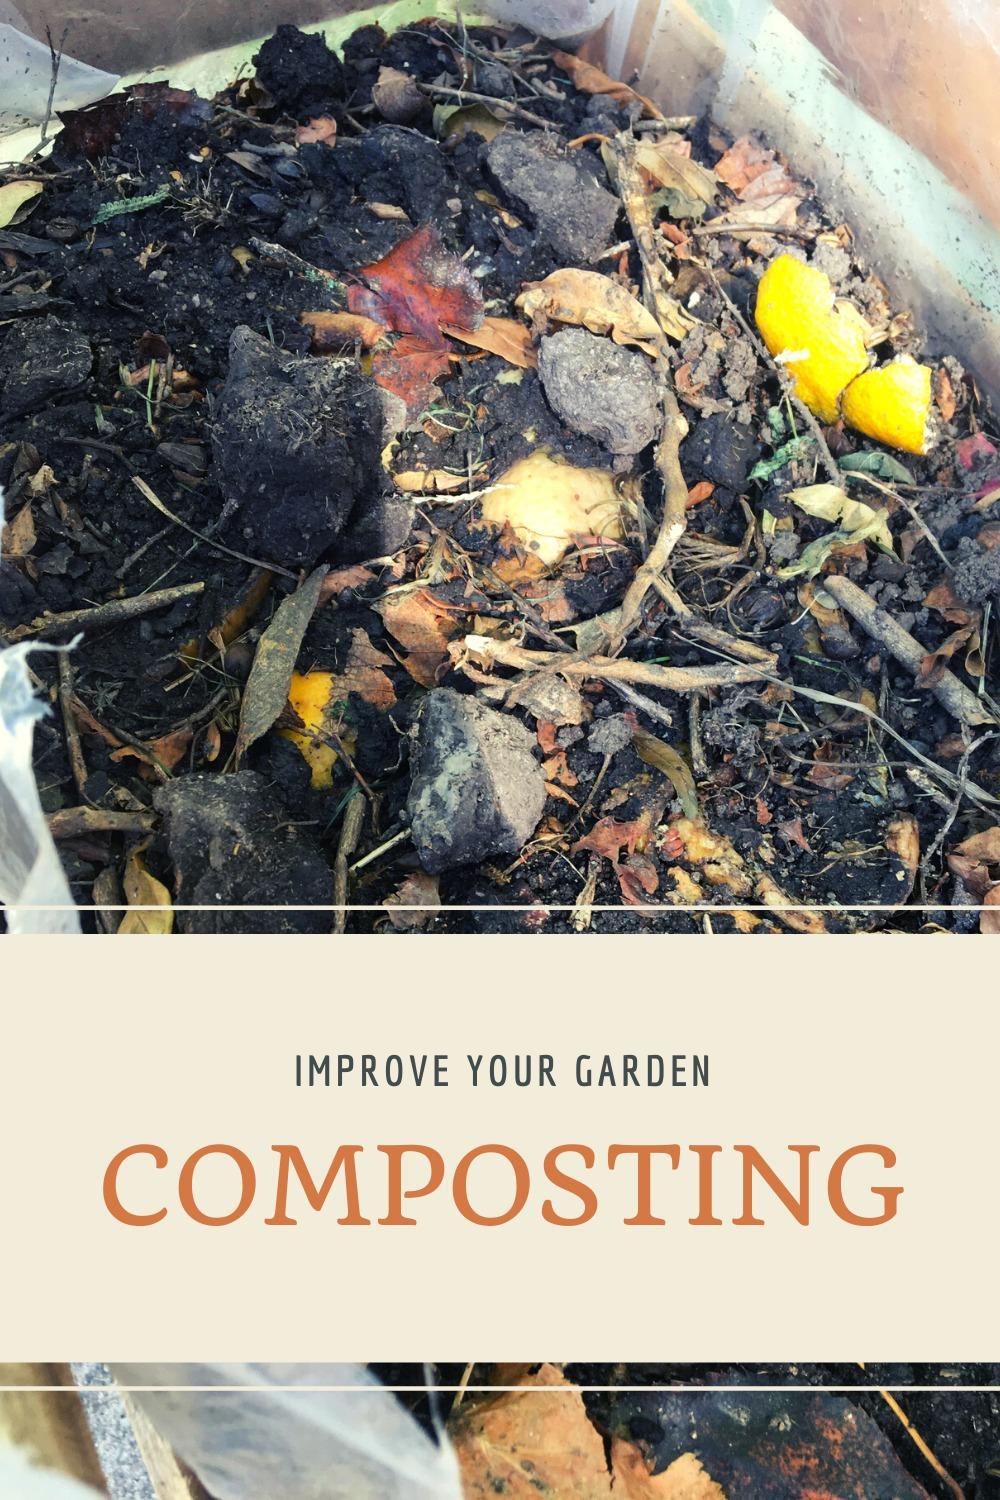
Compost IngredientsCompost is decomposed or well-rotted organic material. It can be made from a variety of organic materials, such as vegetable waste, leaves, grass clippings and animal manures. Making compost is very simple. Think of it as making a lasagna. Alternate layers of brown (high in carbon) ingredients and green (high in nitrogen) ingredients -- adding some water between each layer -- until you fill the container. Then let it cook until done.
Materials To Use
? Brown plant materials, such as leaves, old grass clippings, shredded paper, peat moss, hay and straw.
? Green plant materials, such as fresh grass clippings; vegetable kitchen wastes (including coffee grounds and egg shells); yard waste (weeds, small twigs); disease-free vegetable plants; and cow, horse or chicken manure. If you are low on green materials, you also can use high-nitrogen organic fertilizers, such as blood meal and cottonseed meal.
Materials To Avoid
? Items that should be kept out of compost include meat and bones, large amounts of wood chips or sawdust, pet manure, herbicide-treated grass clippings, perennial and seed-bearing weeds, diseased plants and, of course, anything metallic or plastic.
Making a PileTo get started, find a place for your compost pile that's convenient to your kitchen or garden and has well-drained soil. In cold areas, locate the pile in a sunny spot and use a black plastic container to help the pile heat up faster. In warm summer areas, locate the pile in the shade so it won't dry out too quickly.
Although not required, a wire, wood or plastic container keeps your compost pile looking neat and helps prevent animals from scattering food scraps. Lay a sheet of galvanized wire hardware cloth under an open-bottomed compost container to prevent rodents from burrowing into the pile.
You can make a compost bin from materials as simple as heavy duty wire caging, wooden pallets nailed together, or old lumber formed into three walls with a removable fourth, front wall. Make sure your bin is at least 3 feet square, comes apart or opens easily, and allows plenty of airflow into the pile. Commercial composters -- made from wood, plastic or metal -- can be more attractive and make composting neater. Compost tumblers are barrel-shaped drums on pedestals. Although they generally don't hold as much organic matter as bin-type containers, they are easy to turn and can make compost more quickly.
Once you have the container built or chosen, it's important to remember a simple composting principle: everything decomposes. It's up to you to decide how quickly you want compost to happen. Even if you made a pile of vegetable debris or leaves and just left it, it would eventually decompose. The beauty of constructing a pile properly and making sure it has the proper amounts of air and water is you can make higher quality compost more quickly.
Here are five simple steps for making compost:
As the material begins to decompose, the center of the pile will heat up. However, the heating doesn't extend throughout the pile. To ensure that all materials break down, you'll need to mix the pile. After the center heats up and then cools down (up to several weeks, depending on the time of year and size and composition of the material), turn the pile. Use a garden fork, composting tool or shovel to mix the contents, blending the inside and outside materials. Moisten the pile again after mixing. Repeat turning the pile once or twice. The compost is ready to use when it's dark and crumbly -- usually in a month or two.
Incorporate a 1- to 2-inch-thick layer of finished compost into vegetable and annual flower beds two weeks before planting. On poor soil, add a 2- to 3-inch-thick layer. For more on how to use compost in your vegetable garden, go to the Virtual Vegetable Guides at www.willhiteseed.com/store/asp/guides.asp
Question of the WeekOnions Rot in Storage
Q. My onions don't keep well in storage. They sprout and rot. How can I prevent this so I can keep my onions through the winter?
A. It's possible that you are storing your onions in a place that's too warm. To harvest and cure onions properly, wait until 75 percent of the tops have fallen over naturally before harvesting the crop. Store them in a dry, shady place with good ventilation, such as an outdoor shed or barn, for 10 days to two weeks. After the onions have cured, put them in slatted crates or mesh bags. Store them indoors in a cellar with low humidity and temperatures between 33? and 45° F.
Next year grow varieties that are bred to store well, such as Yellow Spanish, White Spanish or First Edition.
 Charlie Nardozzi is an award winning, nationally recognized garden writer, speaker, radio, and television personality. He has worked for more than 30 years bringing expert gardening information to home gardeners through radio, television, talks, tours, on-line, and the printed page. Charlie delights in making gardening information simple, easy, fun and accessible to everyone. He's the author of 6 books, has three radio shows in New England and a TV show. He leads Garden Tours around the world and consults with organizations and companies about gardening programs. See more about him at Gardening With Charlie.