Post a reply

Image
Sep 9, 2015 10:57 PM CST
Thread OP
Name: Linda
Bellevue, WA (Zone 8a)
Hi, I am embarking on a mission to create a concrete stepping stone pathway. I am planning to make round shapes using cardboard tunes and custom forms made from plastic lawn edging. I will share photos and my insights...please share your experiences too.
Image
Sep 9, 2015 11:24 PM CST
Thread OP
Name: Linda
Bellevue, WA (Zone 8a)
Thumb of 2015-09-10/In2art/211c33

This one is "spottier" than what I have planned...
Image
Sep 9, 2015 11:25 PM CST
Thread OP
Name: Linda
Bellevue, WA (Zone 8a)
Thumb of 2015-09-10/In2art/909d45

This one is more structured than what I have planned...
Image
Sep 9, 2015 11:50 PM CST
Thread OP
Name: Linda
Bellevue, WA (Zone 8a)
I purchased 1,800 lbs of quikrete (24 60# bags) on Craigslist. I have a 10' long heavy cardboard tube that is ~11.5" diameter. I plan to purchase concrete molding tubes in smaller diameters (they come in 6", 8", 10", and 12"). All of the cardboard tubing will be cut into 2"-2.5" lengths as molds. I plan to create larger diameter molds from plastic lawn edging. All will be sprayed with nonstick cooking spray.

It is best to pour the molds in place; but it is also best to excavate the pathway down the 2" for the stepping stones. I do not have the time to excavate the pathway before moisture will overtake the bags of Quikrete, so I plan to manufacture the circular stepping stones and store them until I can hire out the excavation.

I plan to pour the molds on the driveway and on my back patio. I will lay down heavy plastic and the cut forms...all will be sprayed with nonstick cooking spray.

Can anyone tell me how long I need to let them set before I can remove them from the molds and stack them for storage? I may need to re-use the driveway for additional batches.

Please share any insights or experiences that you might have.
Last edited by In2art Sep 10, 2015 12:50 AM Icon for preview
Image
Oct 17, 2015 5:56 AM CST
Name: Jeanne
Lansing, Iowa (Zone 5a)
Birds Region: United States of America Vegetable Grower
Linda, your stepping stone idea sounds great. I have been wanting to make some stepping stones also but have not gotten around to it. I want to make different shapes like hearts, fish, stars, etc. Here is a picture of some of the shapes that I found. How did you do with your stepping stone project?
Thumb of 2015-10-17/gardenglassgems/85e4fa
Yard decor, repurposing, and flowers,
Avatar for josebaca
Oct 17, 2015 7:08 PM CST
Name: J.R. Baca
Pueblo West Co. ( High Dessert (Zone 6a)
In2art;
Concrete is one of my many responsibilities as a maintence worker for one of the local school districs here, and without asking you a ton of monotonous tech questions about the TYPE of quickcrete, or the average weather, i. e.; moisture, humidity and temperature, it would be safe to remove the forms after a few hours of setting.

However; the thickness of your pour dictates the time needed to truly set. Also the longer the set the stronger they get, and if you plan on moving them more than a few times, you may want to consider reinforcing them with wire or fiberglass mixed in. If your mix has aggregets ( rocks ) in it , okay, but, if it doesn't then care must be taken during their set time because if they dry too fast they'll crack, so you must either keep them moist on top or work them over with a finishing towel after about an hour, again depending on the type you have. It may seem too hard but only for a while. If mixed right and worked back and forth, you'll be able to see the moisture come up, this is called the cream.

I've been thinking on doing something like that using cut sections of 5 gallon buckets and other circular forms of different sizes. something else you may want to think about is using polished or tumbled rock as an aggreget and after a couple hours run a steady stream of water over your pour while it is still in its form. I think you'd like the out come.
You can also pour only half and press in rocks to a desired pattern, just do a dry run first to make sure it all fits.

GOOD LUCK AND HAVE FUN!
Image
Oct 18, 2015 5:27 AM CST
Thread OP
Name: Linda
Bellevue, WA (Zone 8a)
The first batch was 1,800 lbs. The concrete mixer that I borrowed said that it would handle more than 4 bags (240 lbs) at a time, but it seemed really hard on the machine, so we wound up doing two bags at a time (120 lbs) and that was very manageable.

This was quickrete mix, so it did have aggregate already in bags. I left it for a few weeks before removing the forms and stacking them uncovered in the corner of the back yard where they will stay until spring...
Thumb of 2015-10-18/In2art/660efc
Image
Oct 18, 2015 5:38 AM CST
Thread OP
Name: Linda
Bellevue, WA (Zone 8a)
the second batch was 1,200 lbs. I made more of the larger forms out of left over black plastic grass edging (another recent project - garden expansion/grass removal), plus more of the slices of the sunsetter shade tube (it was VERY heavy duty cardboard. I happened by a friend's house the day it had arrived and asked her what she was going to do with the tube it came in, she was thinking it would be a lot of work to hack it up enough to fit in the recycling, so I just offered to load it into my minivan and take it away. It worked out really well.

on the first batch, I used one each of a 6", 8", 10" and 12" sonotube, plus part of the sunsetter tube (~ 11"), and of course, a few of the handmade larger forms. The second batch was mostly the large forms and some more of the sunsetter tube. Apparently, I never took a photo of the second batch.

here was the setup for cutting the tubes. It was a two-person job. I guided the tube on the saw blade...my helper, Mark kept forward pressure on the tube (to keep it against the fence) and rotated the tube. Once we got a rhythm going, we made short work of the cutting and the mixing/pouring.


Thumb of 2015-10-18/In2art/58fc7f
Image
Oct 18, 2015 5:44 AM CST
Thread OP
Name: Linda
Bellevue, WA (Zone 8a)
And here is the last (hopefully) batch. It was 1,440 lbs. I purchased two each 6" and 8" Sonotubes (I neglected to mention that all are 48" long) and used up the rest of the sunsetter tube. I did not re-use all of the homemade edging forms, as some of them had really wonky shapes after use/storage. they got better after sitting in the sun for a while and I re-taped and used the best of them. I purchased 30 bags of concrete mix, but we ran out of forms after 24 and called it a day. I also used a few XL Anderson drip pots that I had around...

all in all, I think I have a pretty good mix of sizes and hopefully it will create an interesting and unusual walkway.

If I find this thread again after it is all installed (more like remember to look for it), I will post finished photos


Thumb of 2015-10-18/In2art/f85694
Image
Oct 18, 2015 5:55 AM CST
Thread OP
Name: Linda
Bellevue, WA (Zone 8a)
Josebaca,

I read your reply after finishing the last batch, but I am curious about running water over them...what would that do? How would that work...logistically speaking? I could have set up a sprinkler in the area, but since they are about 2/14" tall, I could only run water over one at a time.

Could you elaborate on the process? maybe find a link to a photo of the finished look online? I wanted to put some circle shapes of varying sizes onto some of the units, but it was just too crazy with the pouring process, and I didn't leave myself much of a path to get back to the earlier ones. I DID put rings onto one of them in honor of the wedding anniversary of the couple who loaned me the concrete mixer (good friends). I had envisioned putting different sized circle indents on some...and allowing some of the circles to go off the edges. But I really didn't think ahead to tools to do it with (more circles in varying sizes). I thought of my set of round biscuit cutters, but they would have been pretty small, and I really didn't want to use them for this purpose. I used a couple of the cut sonotube rings for this...


Thumb of 2015-10-18/In2art/07213c
Avatar for josebaca
Oct 18, 2015 6:36 PM CST
Name: J.R. Baca
Pueblo West Co. ( High Dessert (Zone 6a)
Ma'am
If you use decorative rocks as an aggreget and run water over your completed job, the stone will be exposed. I don't know of any links I can send to you, and wouldnt be able to send them to you due to my lack of computer skills. If you look for tumbled rock or polished stones as an aggreget on the internet you'll find alot of neat ideas.
We had a teacher that wanted custom steppers in her Obama grant garden. We never get premixed concrete, so I went to our local sand & gravel Co. and found reasonably priced tumbled rock and used that for our aggreget, using a stepper form purchased a long time ago, we filled it then ran a slow but steady stream of water over it to remove the top cream. What was left behind was the aggreget that was about 1/4 of an inch above the rest of the form. It looked so nice that someone stole them! I took it as a complement. Glare
Avatar for Frillylily
Oct 18, 2015 6:41 PM CST
Missouri (Zone 6a)
I was one of the first 300 contributors to the plant database! Plant Identifier
If the weather freezes in your area I suggest a coat of Tompsons water sealer.
Image
Oct 26, 2015 10:52 AM CST
Thread OP
Name: Linda
Bellevue, WA (Zone 8a)
Josebaca,

thanks for the information. that sounds very nice and I may try it if I do another batch.

Linda
Avatar for Joannatmf
Mar 10, 2018 6:57 PM CST

Hello In2art,

Did you ever get the circular pathway installed? I would love to see how it turned out. My husband and I are wanting to do the same thing and I really appreciate you sharing how you went about making the molds.

Take care - Joanna
Image
Mar 10, 2018 7:00 PM CST
Name: Karen
New Mexico (Zone 8a)
Region: New Mexico Region: Arizona Region: Ukraine Cactus and Succulents Plant Identifier Plays in the sandbox
Greenhouse Bromeliad Adeniums Morning Glories Avid Green Pages Reviewer Brugmansias
I'd love to see pics, too.
Handcrafted Coastal Inspired Art SeaMosaics!
Avatar for Frillylily
Mar 10, 2018 7:43 PM CST
Missouri (Zone 6a)
I was one of the first 300 contributors to the plant database! Plant Identifier
looks like she hasn't posted for 9 months now Sad
Image
Mar 29, 2018 8:44 PM CST
Thread OP
Name: Linda
Bellevue, WA (Zone 8a)
Hi all, I have not been on this site for some time. I have not yet had the path installed, as it will require some other work (big project) first. Some of the area is sloped, and I would like to have some garden beds installed along the house, plus bring the drip irrigation around to that (I can do that myself). I need to hire someone with equipment to do grading, and then decide if I want to have steps of any sort or have the path slope downwards. I need to consult with a professional on the design, I guess. I also need to build a small retaining wall (likely poured concrete) and would like to install an artsy metal fence on top of that. I also need to figure out what to edge the beds with. I have in mind a design for a large, welded piece (somewhere between 6' tall x 8' wide and 8' tall by 10' wide). This would consist of a large rectangular frame (made of square steel tubing) with a metal grid on top of that, then many circular items welded onto that (some overlapping). Items I have collected so far are barrel bands, gears, a really cool old steering wheel, saw blades, and lots of other rusty stuff. This will likely happen after the re-landscaping, grading, retaining wall and path installation; and will serve as a trellis for a climbing rose. I plan to mount it (with hinges) between two metal posts most likely same material as frame, possibly larger scale. I want it hinged, so when the house needs painting, the rose can be chopped down and the 'trellis' can be swung away from the house.

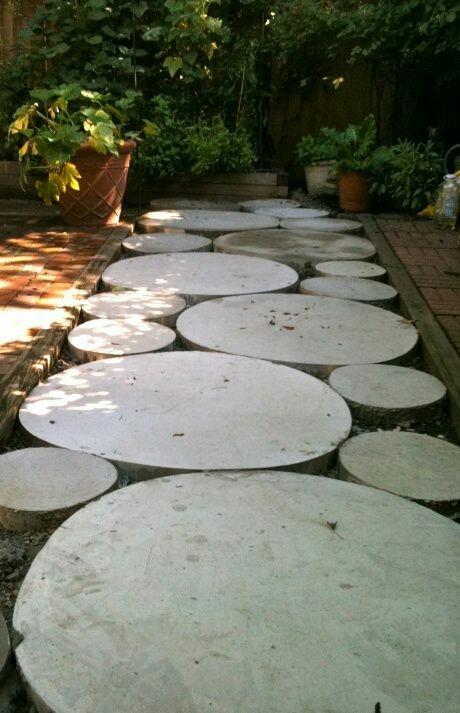
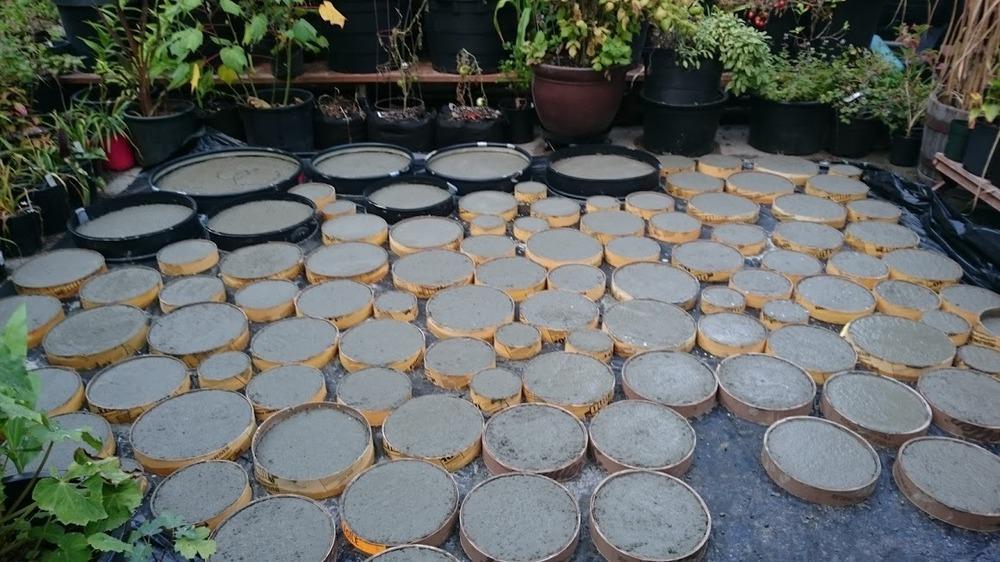
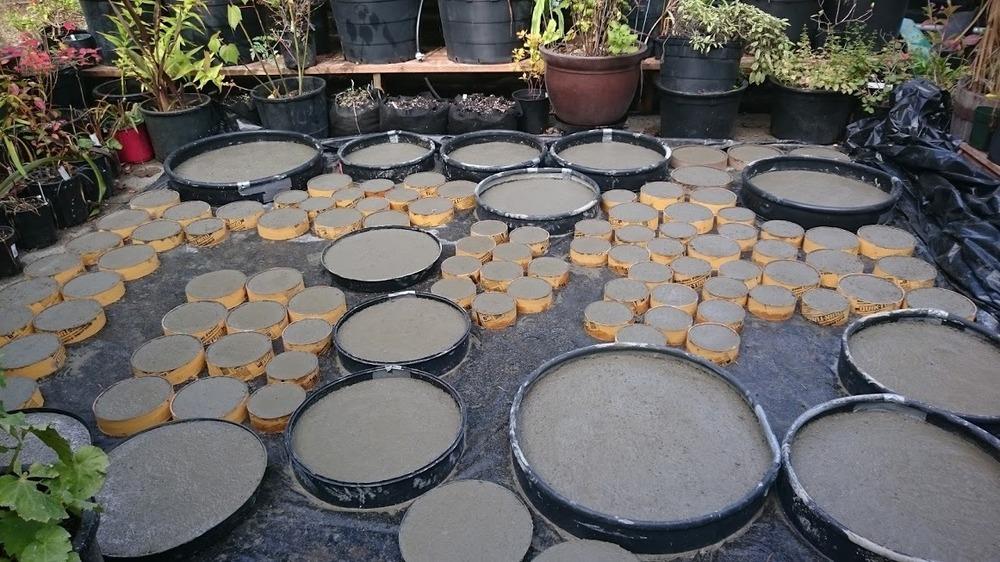
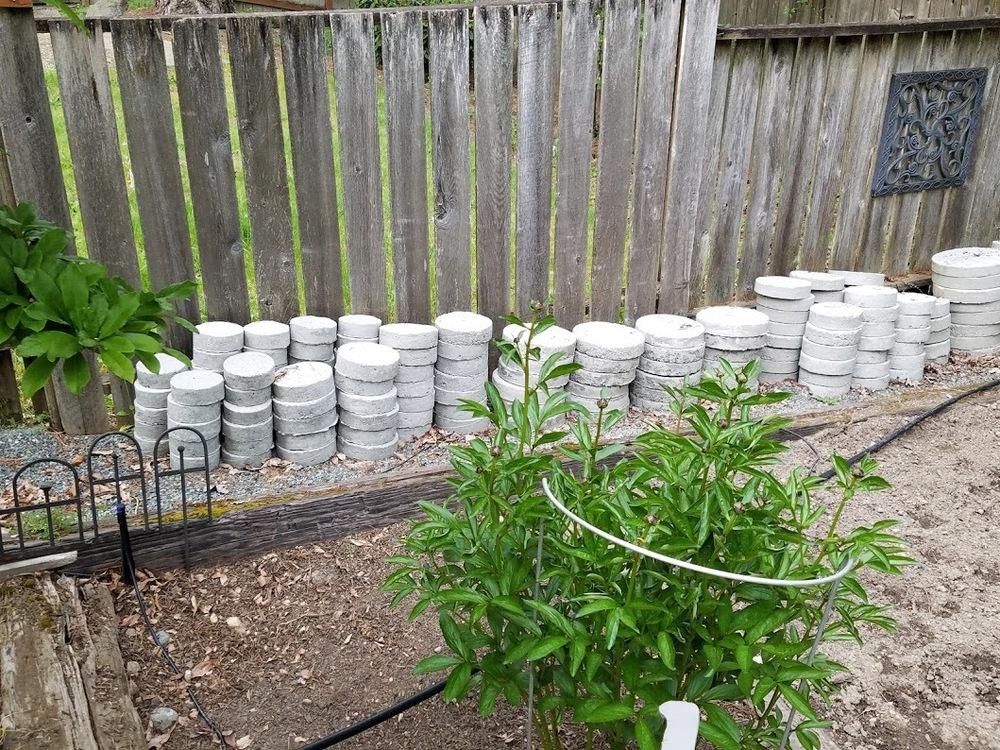
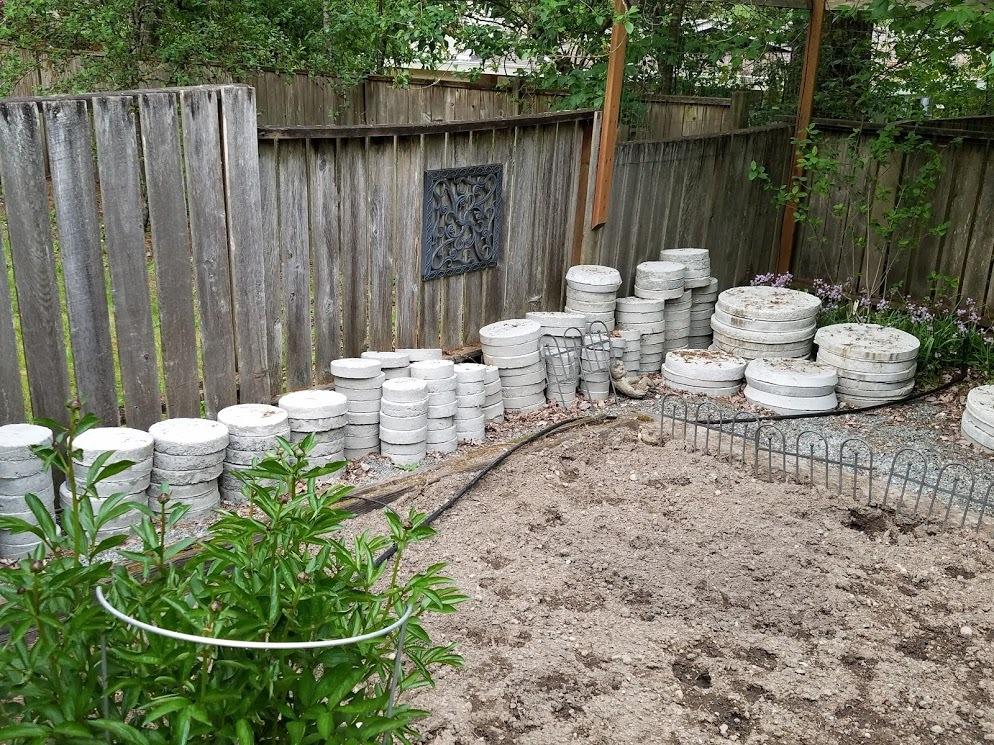
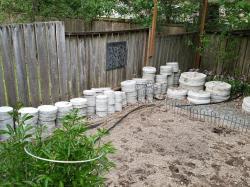
Meanwhile, my homemade rounds are all getting well-cured in anticipation of their new location.

Thumb of 2018-03-30/In2art/74d102


Thumb of 2018-03-30/In2art/ea8142

I have more great ideas than I have time/money/energy, but they will all eventually get done
Avatar for tiadoskocil
Apr 16, 2018 2:42 PM CST
Name: Tia Doskocil
Texas
Can't wait to see this finished product!
Image
May 10, 2018 8:51 AM CST
SE Idaho (Zone 5a)
Region: Idaho Roses
wow i think this will be amazing when your project is complete!
You must first create a username and login before you can reply to this thread.
  • Started by: In2art
  • Replies: 18, views: 23,120
Member Login:

( No account? Join now! )

Today's site banner is by Leftwood and is called "Gentiana septemfida"

This site is protected by reCAPTCHA and the Google Privacy Policy and Terms of Service apply.