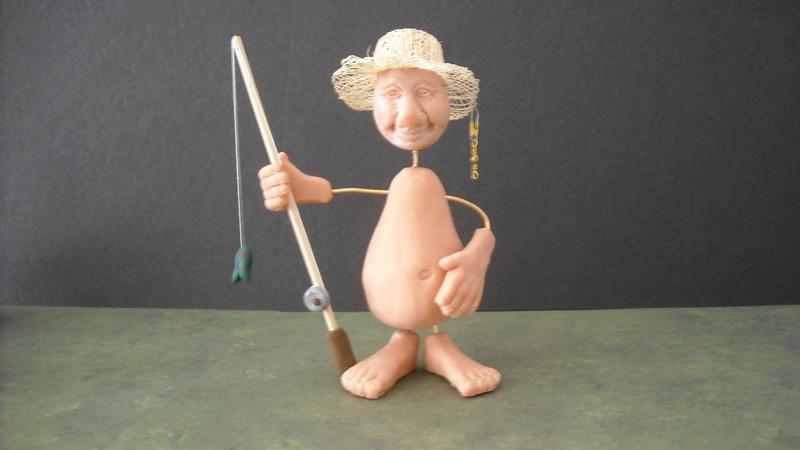
As promised, here's the tutorial for how I make my "Johns".
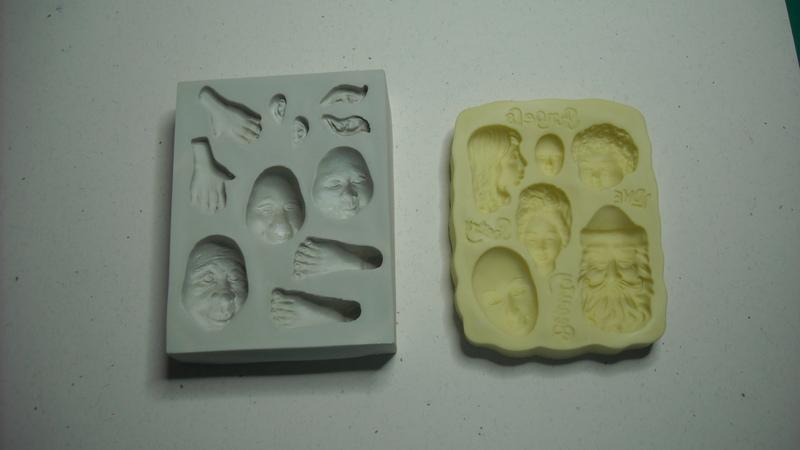
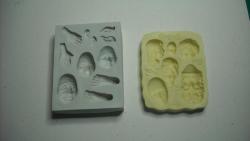
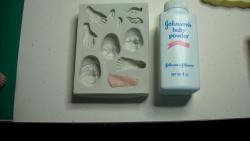
Here is how I make them. I am using Sculpey polymer clay but you can use any brand that you feel comfortable with. For this particular project, I used flesh colored clay and two different push molds.

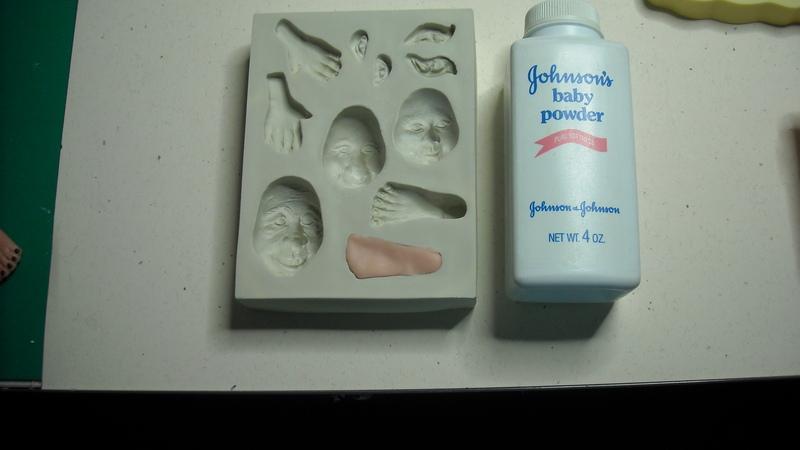
I use baby powder in my molds to keep the clay from sticking and making it easier to remove the clay from the mold. Just dust some into the mold and tap out the excess. You can also use cornstarch. Condition the clay well (I do one piece at a time) until it is nice and pliable. Roll it into a ball in your hands until very smooth, then roll it into a tube shape. Work the clay into the mold and smooth it down flat. If you have too much clay you can either pinch off some excess or, if it's not too much, just push it to the sides to overflow the mold. GENTLY remove the piece from the mold. If you have stretched or bent it a bit getting it out of the mold, it's very easy to gently push it back into shape, being careful not to mess up the little details. Any excess clay can now be removed using a sharp knife.
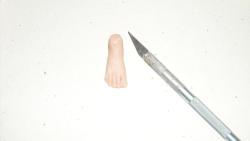
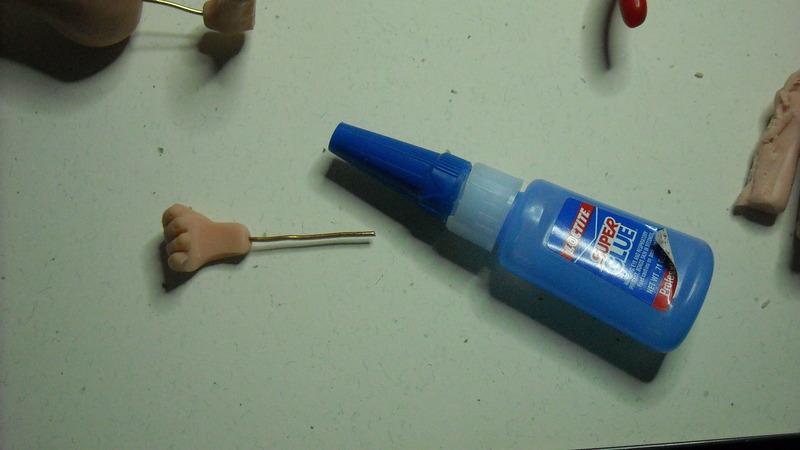
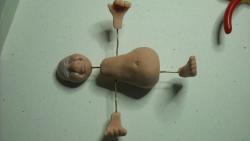
I used a nice medium weight jewelry wire for connections. Make sure to push the wire into the clay to make the hole before baking.

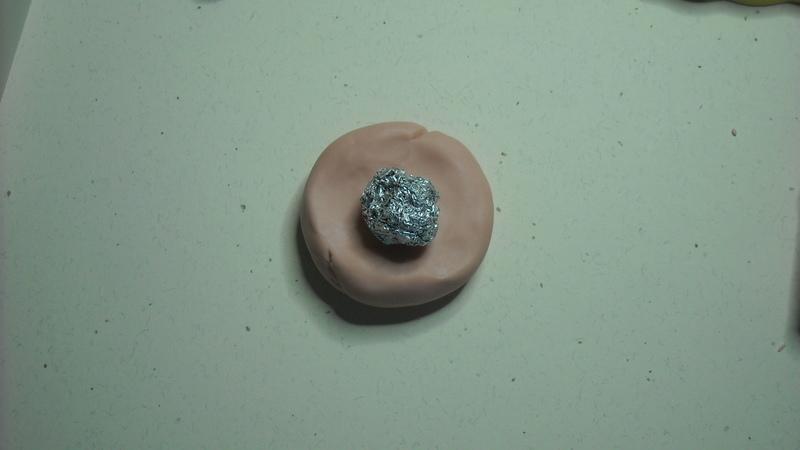
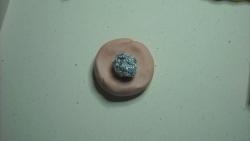
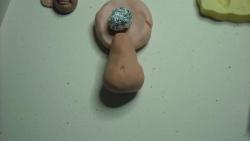
The body is free-formed. In order to not waste a lot of clay and to cut down on baking time, I take a bit of aluminum foil, about a 3 or 4 inch wide piece, and roll it into a ball. Take a good sized chunk of clay (you can always remove some as you are forming the body if you have too much, but it's hard to add more in if you did not take enough) and condition it well. Roll it into a ball in your hands then flatten it out a bit. Put the rolled up aluminum foil into the center of the clay and start forming the clay around it, creating a nice pear shape. Once you are satisfied with your shape, add body details if you wish. I take a small stick and gently roll it into the back to create buttocks and the use the end of the straw to make a little belly button. As with the hands and feet, you will need to take your wire and make holes in the body to connect the head, hands and feet. Since my beautician is female, I added a nice bust to her.
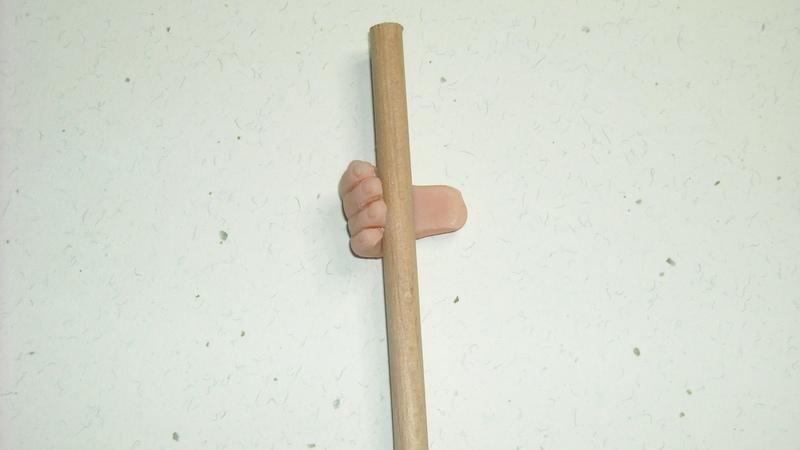
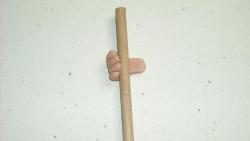
For my creations, I wanted them to hold something, so I take a small dowl and fold one of the hands over it. My beautician needed a hair dryer so I made one out of silver colored clay. Just create the general shape of what you want or go hog-wild and get in every detail. That's the fun of creating these. :)
Once you have all your pieces made and holes put into all the appropriate places, it's time to bake according to your clay's directions. Each brand of clay has it's own instructions so be sure to check the label. Use only an oven that will not be used for food purposes as the clay releases gases that you sure don't want going into your food! I bake all like-sized pieces together. I put the small items into an oven safe bowl and put that onto a ceramic tile that sits on the shelf of my toaster oven. Once everything is baked and cooled, it's time to put it all together. I clip the wire to my desired size and fit everything together to make sure it looks good. Once I am satisfied, I put a small dab of super glue on the ends of the wires and put them permanently into place.

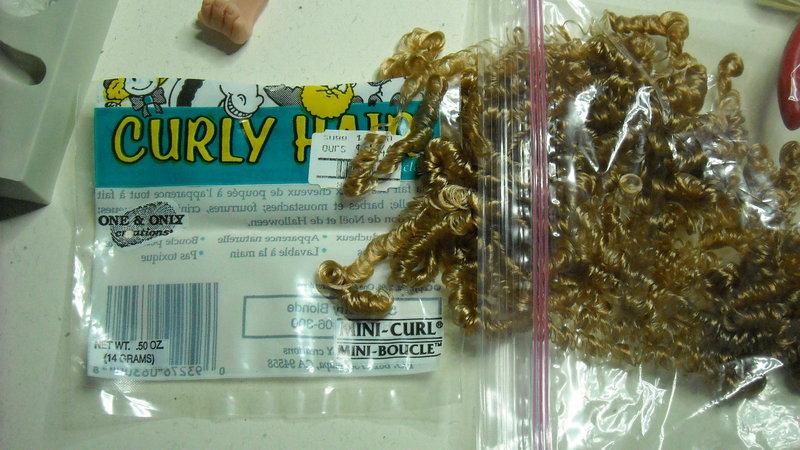
My John's all had hats so did not need any kind of hair. The beautician, on the other hand, needed some glorious hair! I took a package of curly doll's hair and cut ringlets off. I glued them on her head using Tacky glue. I used super glue to glue her hair dryer into her hand and used the finger of a rubber glove for her dress (but I will be changing that out for the end of a balloon as she needs to wear purple). You can go crazy with this and make her a smock or dress her however you wish. Personally, I wanted my beautician to look just a little trashy and wanted spandex but did not want the bother of sewing something. Rubber worked for me. :)

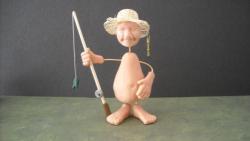
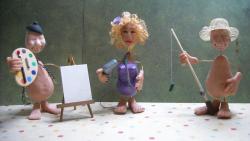
And here's the final project!!
Let me know if I missed something or if something is not clear enough. Have fun!!