Abstract
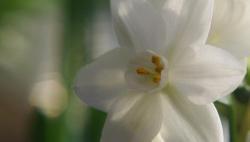
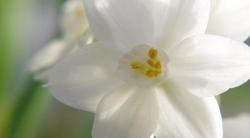
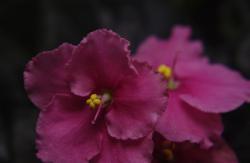
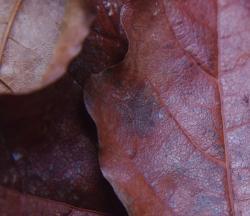
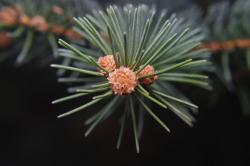
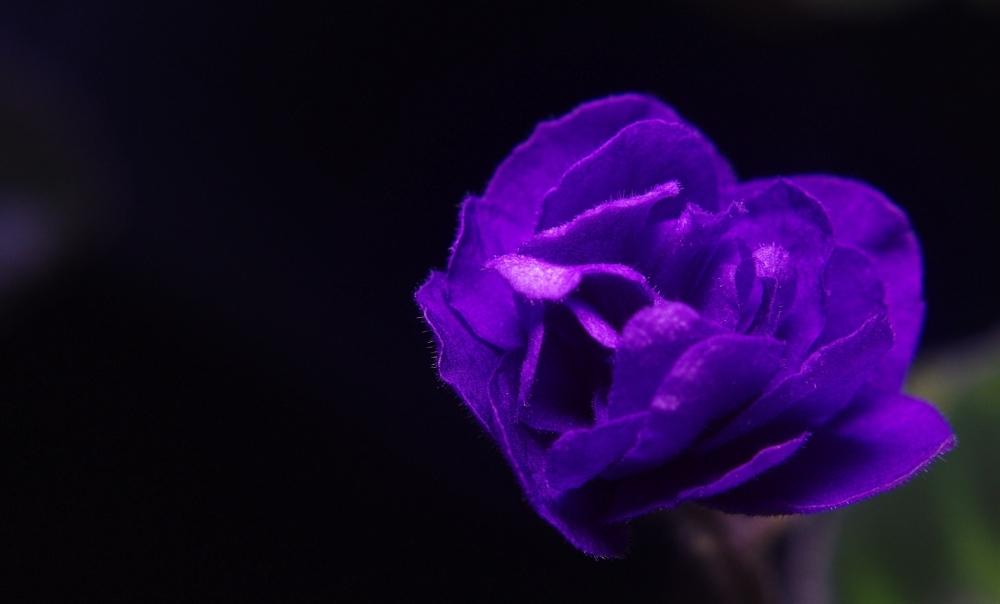
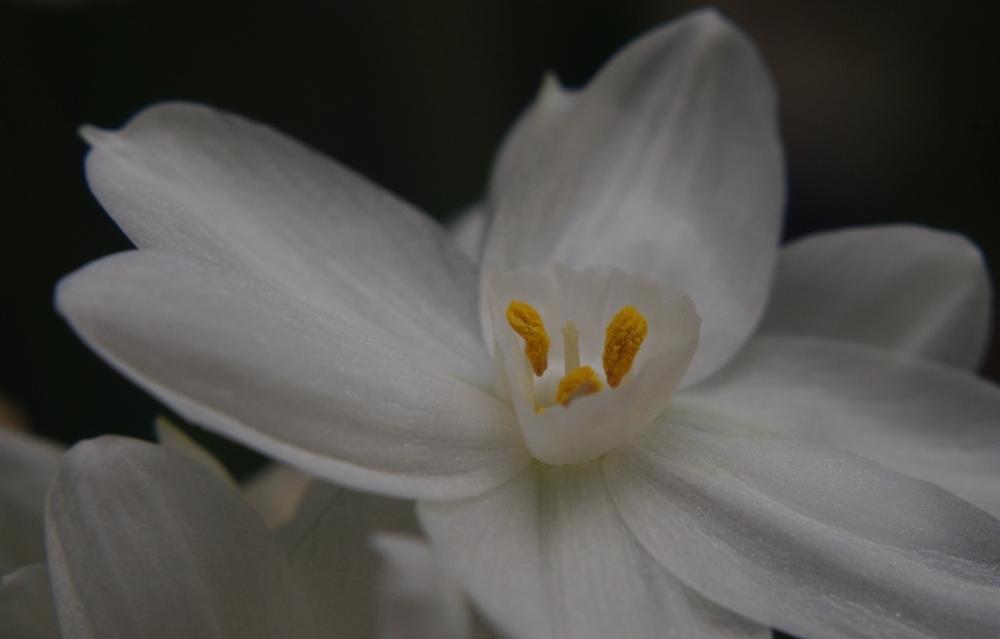
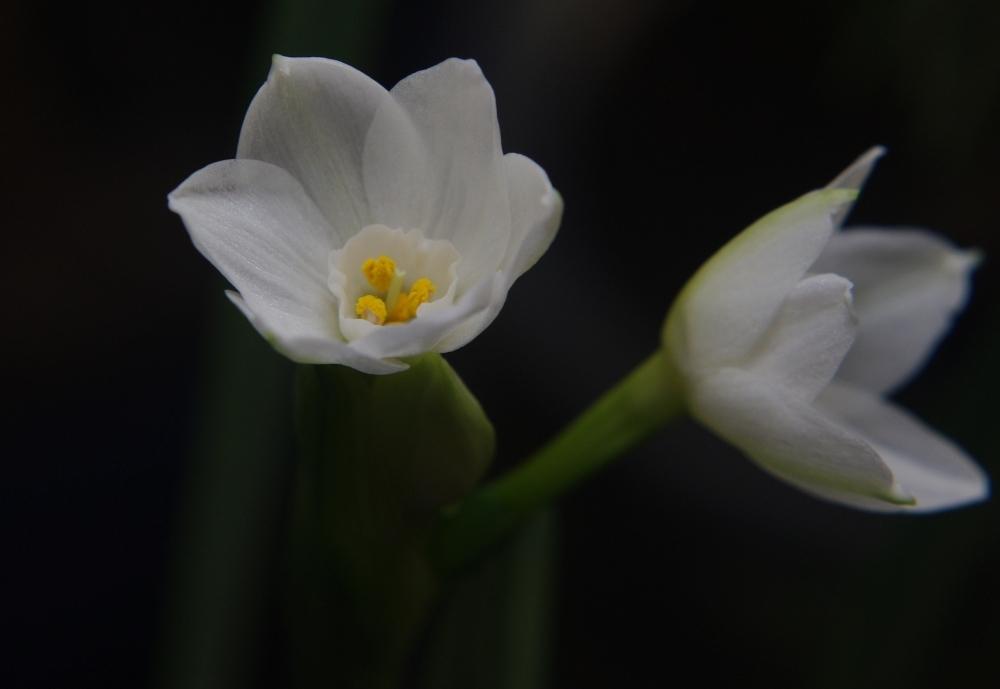
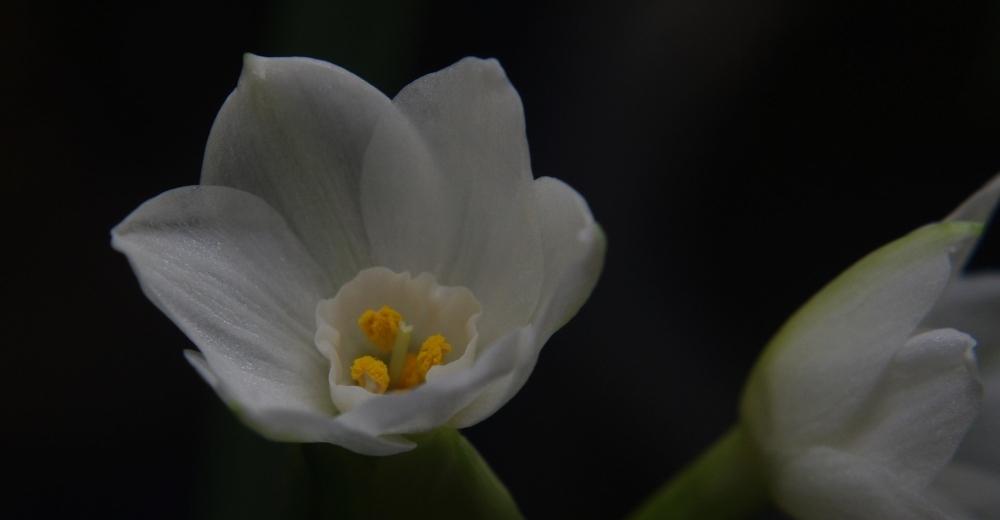
Using an inexpesive flash, two screw-on magnifiers, a kit lens, and some ingenuity, you can take very legit closeups in ANY light for about fifty bucks out-of-pocket using any DSLR. Here's an example of the results:
 Preamble
This is a continuation of this thread:
The thread "Simple close-up DSLR photography...Point-and-Shoot Simple" in
Photography Tips & Techniques forum
In that thread, I took a run-of-the-mill kit lens, screwed on a +2 and +4 magnifier, and got good results.
For this thread and the technique described in it, I add an aftermarket flash (which is identified in this thread):
http://garden.org/ideas/view/e...
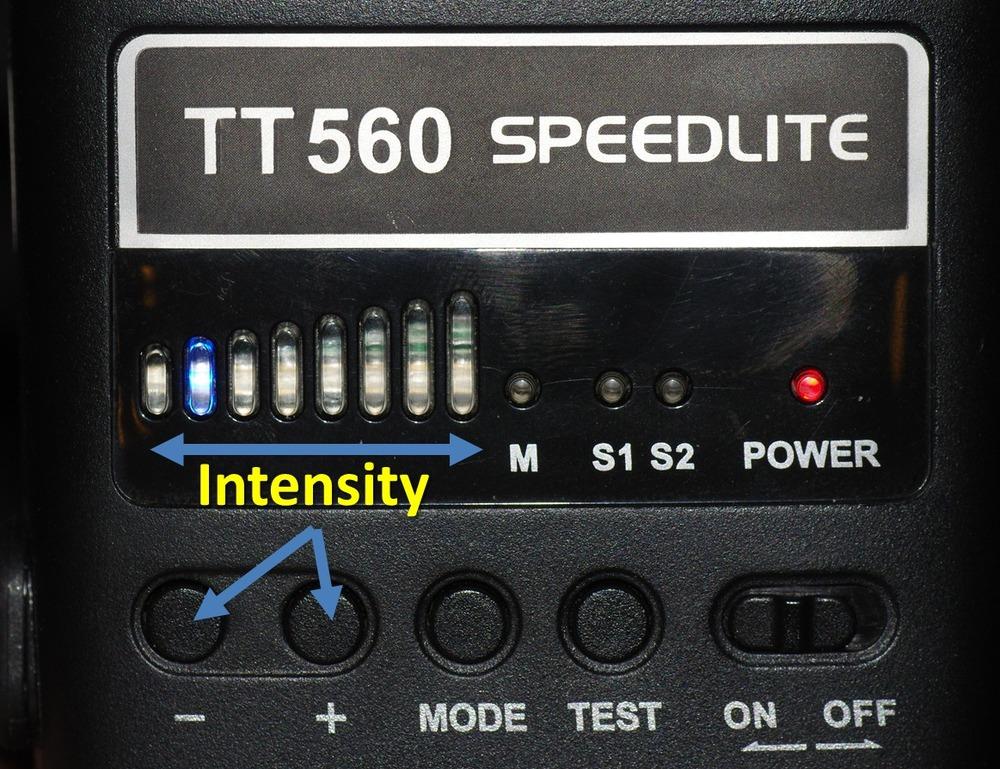
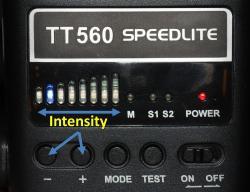
You can use any flash that allows you to control the intensity of the flash. This one has + and - buttons that increase and decrease the intensity:
For the purpose of this thread, it would be good if you knew a little about Aperture (f-stops)/ISO/Shutter Speed, but it's not entirely necessary to succeed with the technique described if you follow the instructions. You can learn more about those subjects in these two threads:
The thread "Photography 050: Light – ISO, Aperture, and Shutter Speed" in
Photography Tips & Techniques forum
The thread "How I learned about f-stops" in
Photography Tips & Techniques forum
Finally, if you have a legit 1:1 macro lens, the technique with the flash works wonderfully well, too. The only reason I used the screw-on magnifiers was to continue the on-the-cheap theme.
Also, if you try this technique, please post your results. I'm really interested.
The Construction
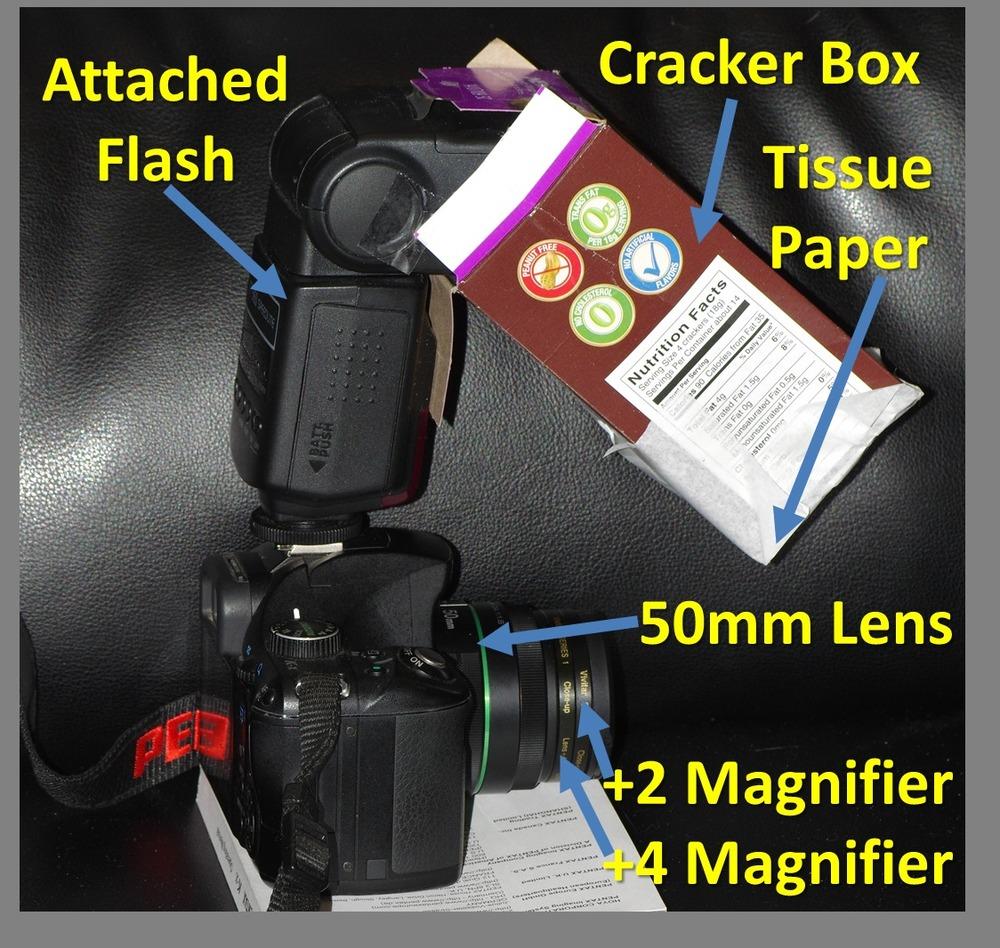
One thing that's tough when shooting close-ups is lighting them if they're not well-lit by natural light. The flash on your camera isn't designed to do this job because it is not aimed in the right place, and the attachable flashes are even worse given how high up on the camera they sit (relative to the lens). So, with this in mind, I decided that I needed to figure out how to aim a flash. To do this, I taped a cracker box to the flash and aimed it (more or less) at the focus point of the lens. Then I covered the open end of the cracker box with tissue paper to diffuse the light. See here:
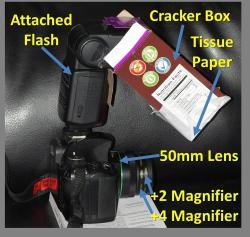
There's nothing more to it than finding the right size of box, quasi-aming it on/from the flash, and taping some tissue paper over the end of it. Close is good enough for this.
The Technique
In the other thread, the technique was to screw on the two magnifiers and go full auto - and let the camera determine the settings. For this technique to work properly, you need to take away the camera's ability to make choices for you about how much light to use -
you control the light on the flash itself - so the camera needs to be in manual mode.
Settings - Manual Mode:
f/7.1
ISO 400
Shutter speed 1/100
Auto focus (or not)
Feel free to ignore this part if it's too technical (and just use the settings above).
f/7.1 is a pretty good aperture on most lenses and it will give you reasonable depth of focus. If you're getting enough light, you can kick up the aperture to get more focus depth.
ISO 400 is about as fast as you can go before some cameras start getting noisy. If you're getting enough light from the flash, you can reduce it to 200 or 100...or if not, increase it to 800 and see if the shots are not too grainy.
Shutter speed is purely dependent on the camera - in that you want the quickest shutter speed that will fire the flash (to reduce the potential for blurring/not holding the camera still long enough. On the Pentax K-x, that's 1/100 (or maybe 1/125?). On my Pentax K-3, it's either 1/160 or 1/200. But the main thing is faster is better (and even I can hold the camera still most of the time at 1/100).
So with the camera set up on manual with the settings described above, attach the magnifiers (+2 and +4) and attach the flash. Use the + and - buttons (or whatever your flash has) and set the intensity to somewhere in the middle, select a subject, get good focus, and shoot. Then look at the results in the LCD screen. If it's too washed out, decrease the intensity of the flash. If it's too dark, increase the intensity.
And that...is all there is to it. You'll probably have to play around with it some and get a feel for it before you're entirely happy with the results, but it's easy. Even I get decent results.
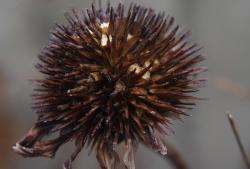
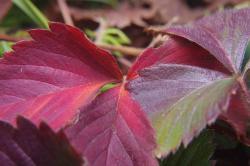
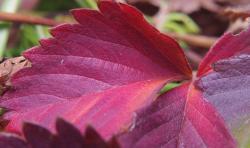
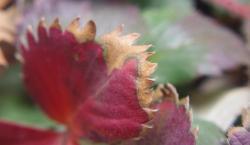
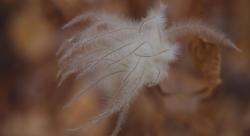
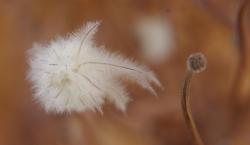
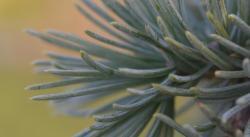
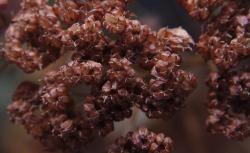
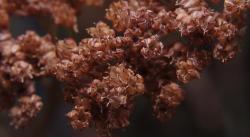
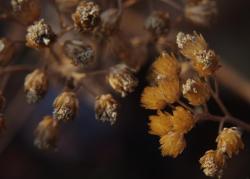
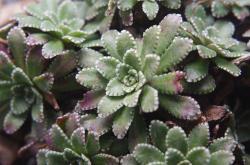
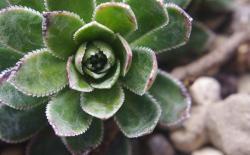
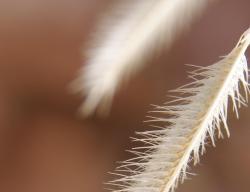
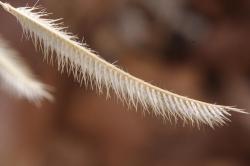
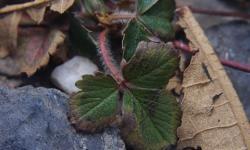
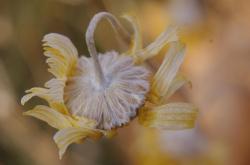
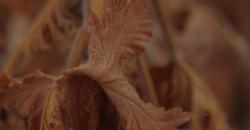
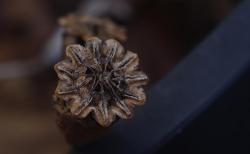
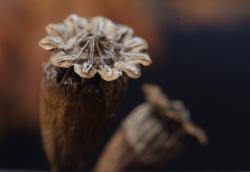
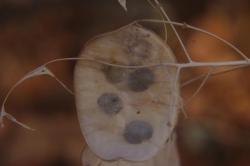
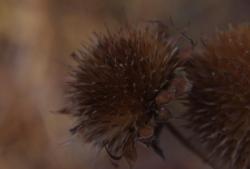
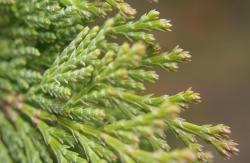
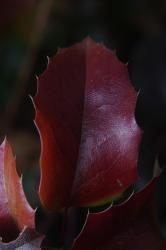
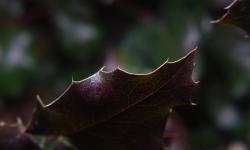
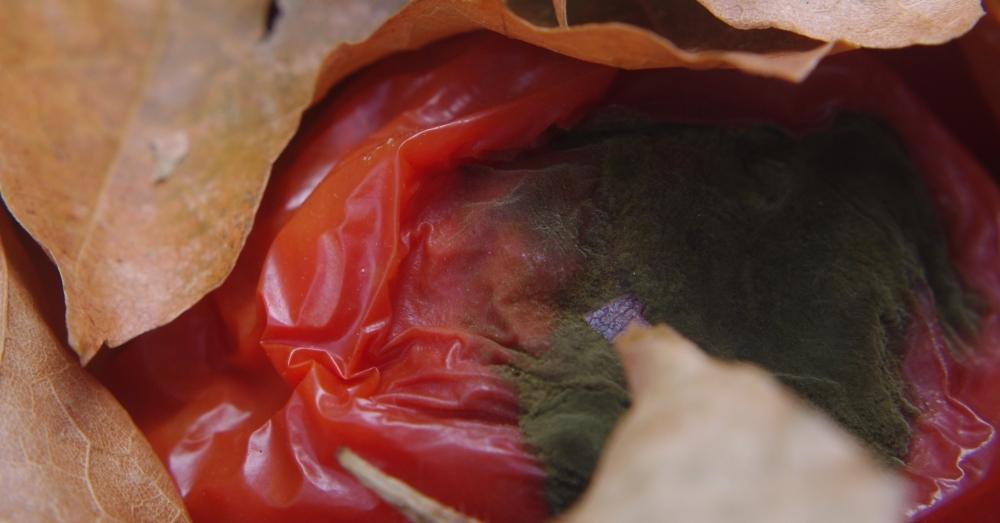
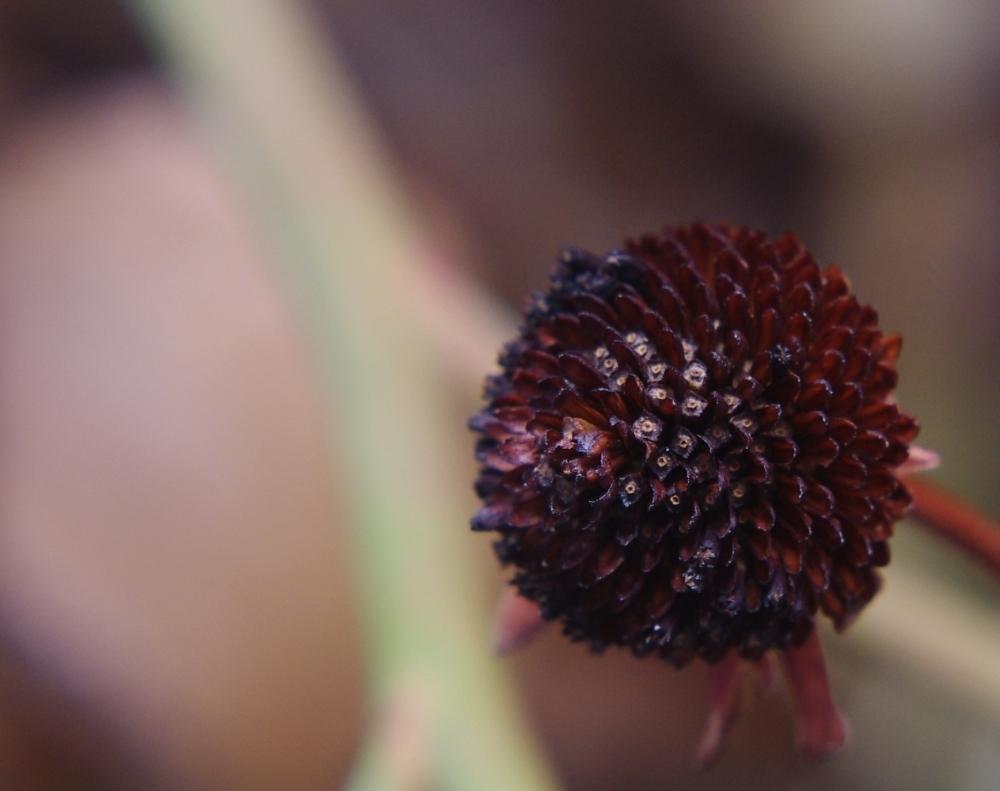
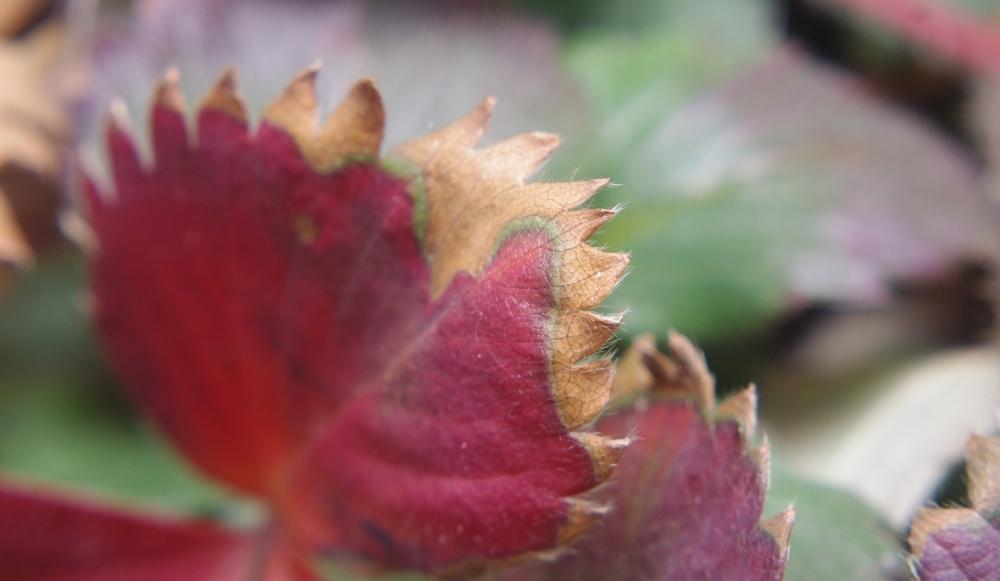
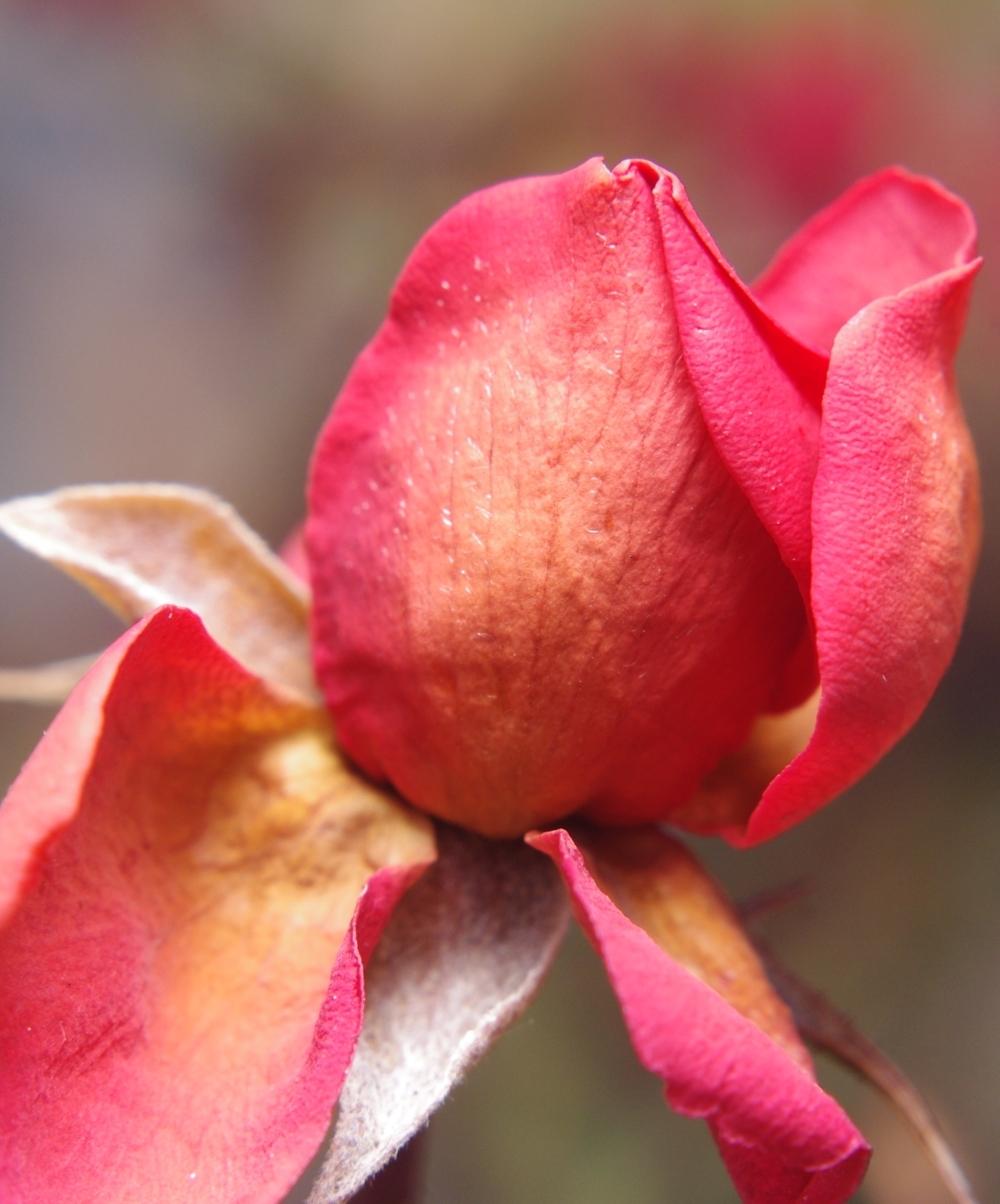
The Results
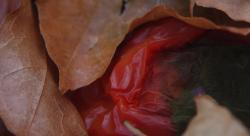
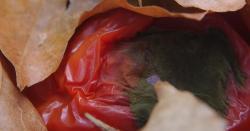
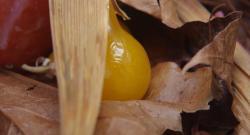
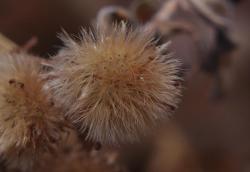
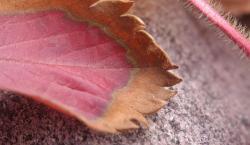
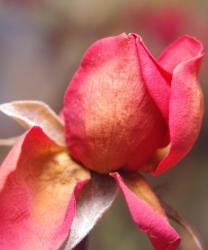
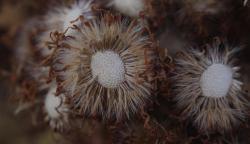
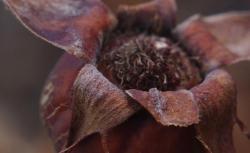
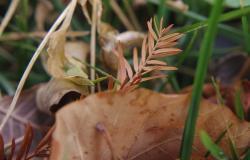
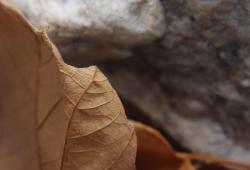
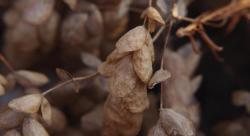
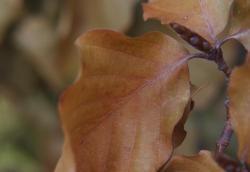
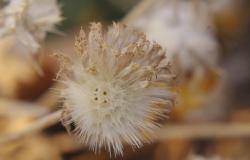
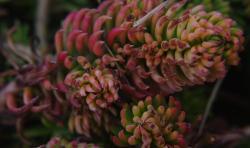
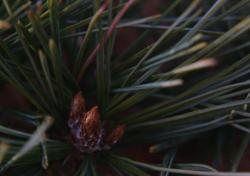
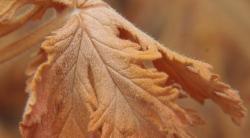
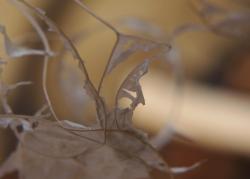
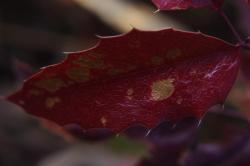
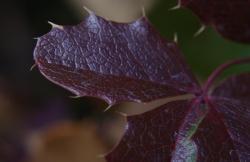
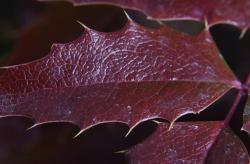
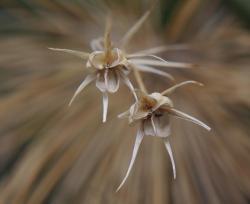
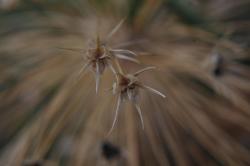
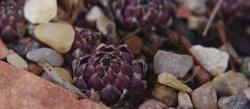
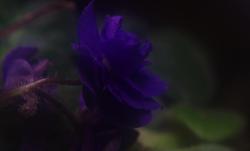
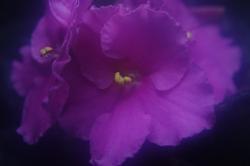
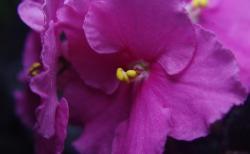
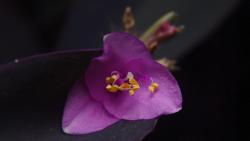
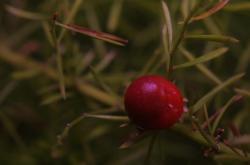
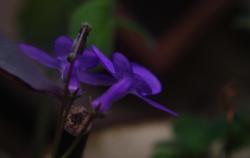
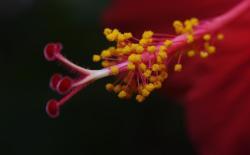
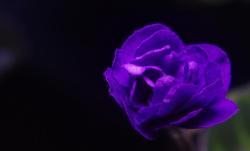
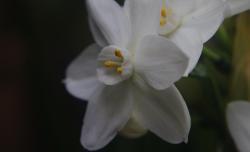
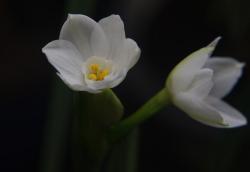
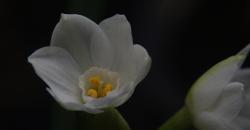
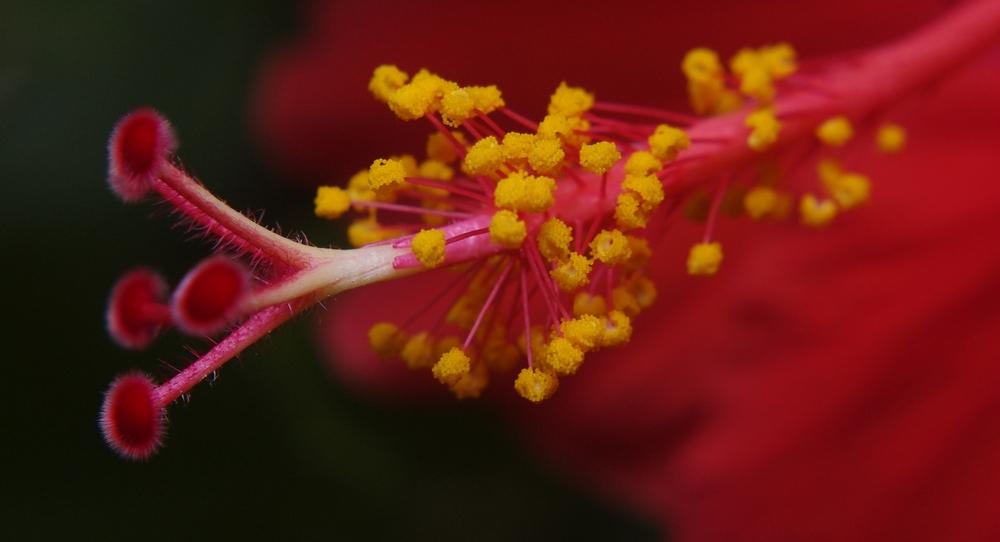
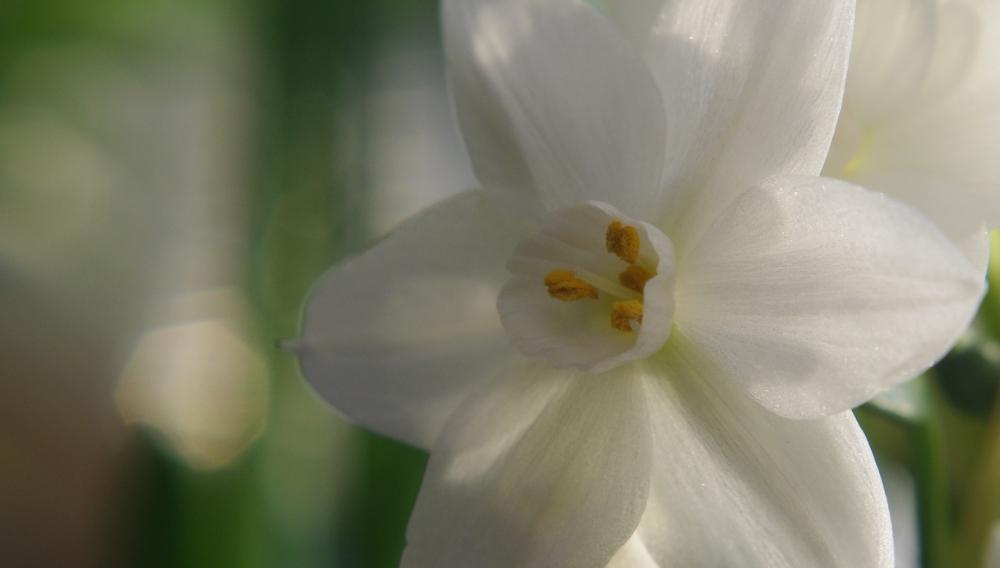
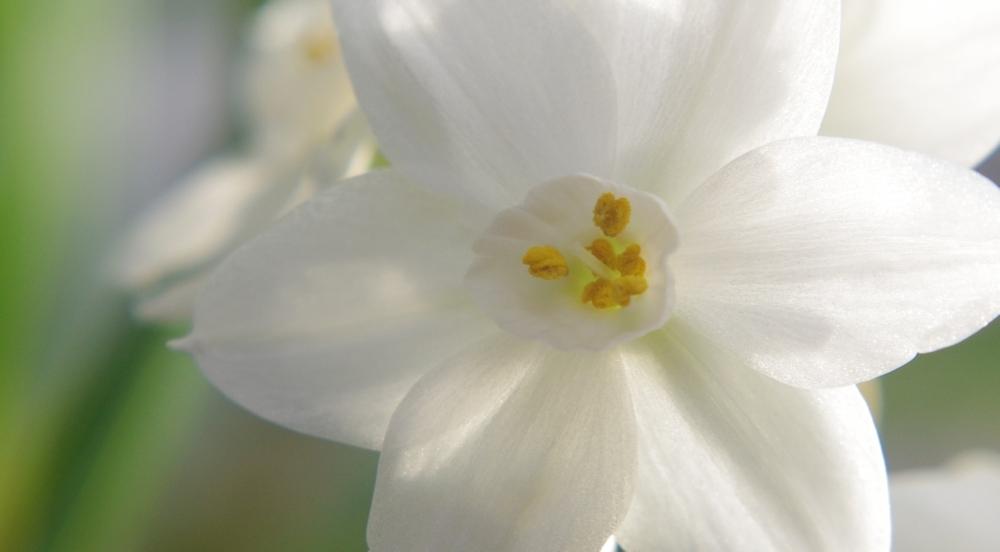
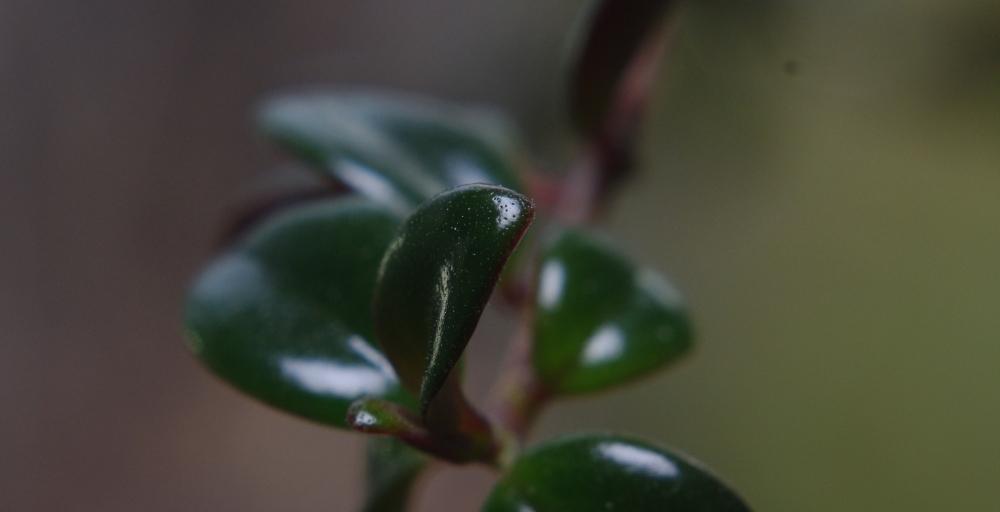
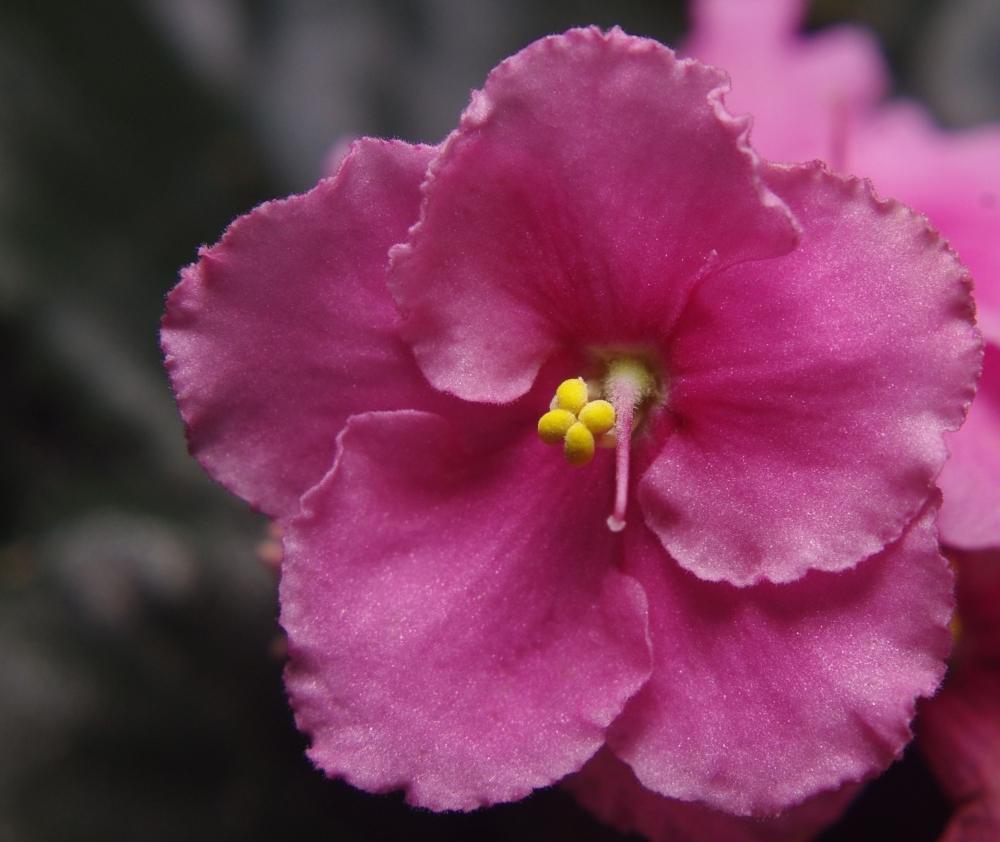
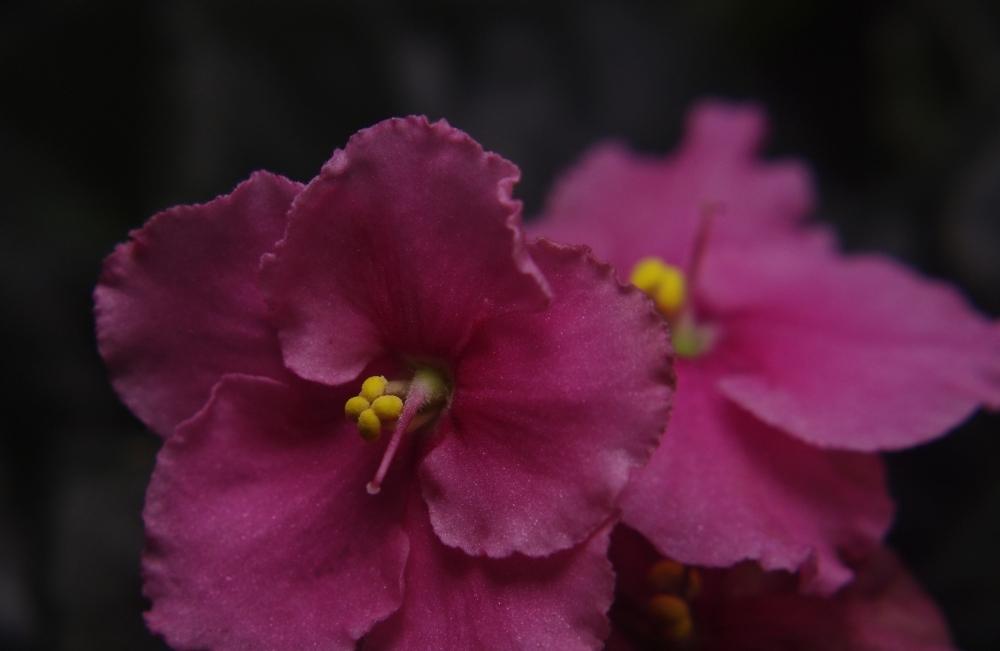
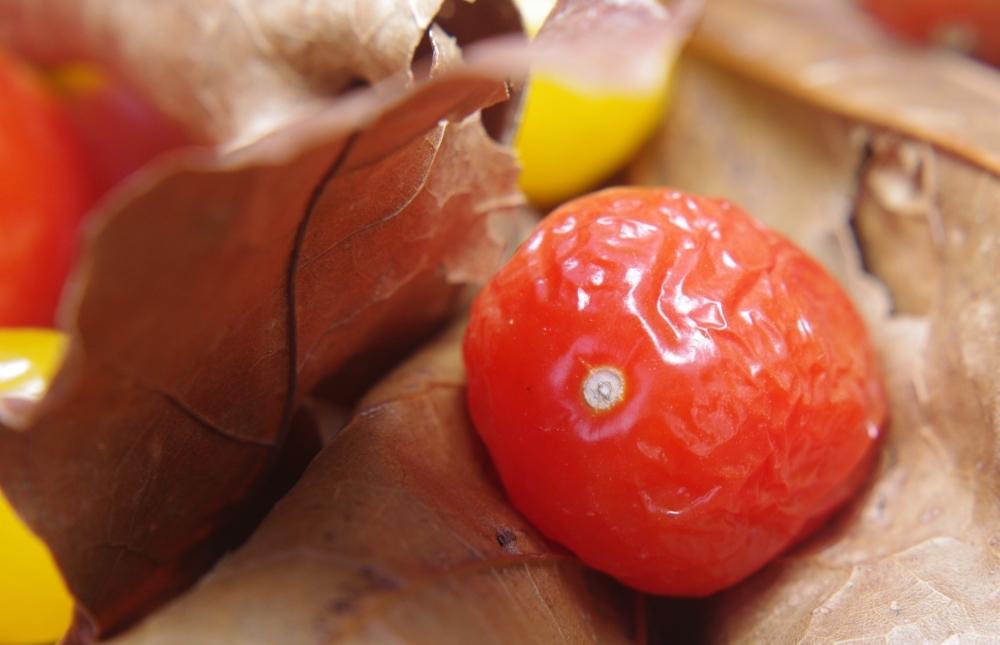
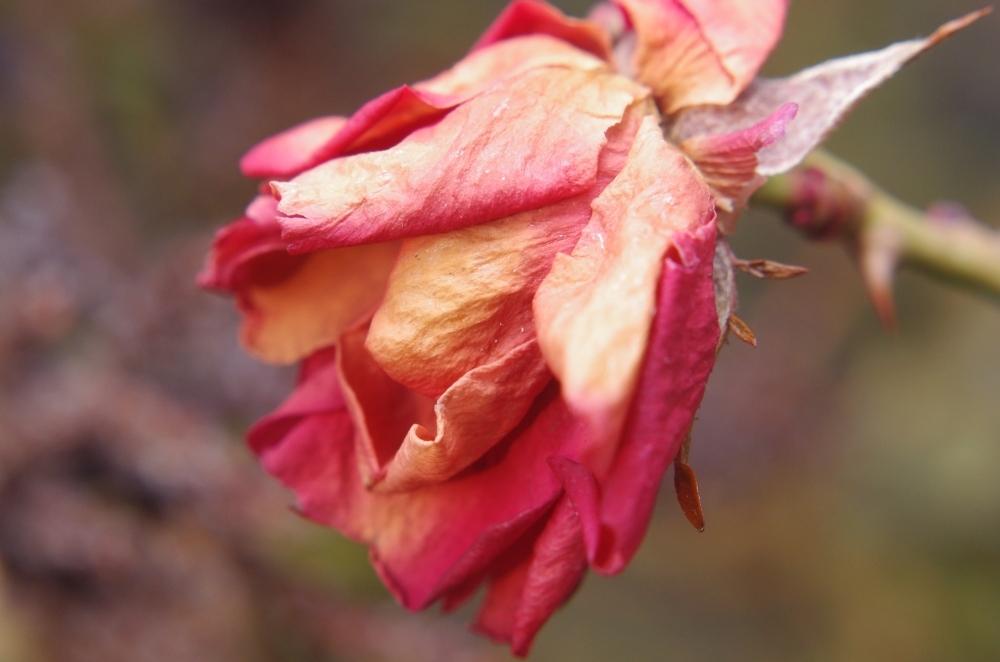
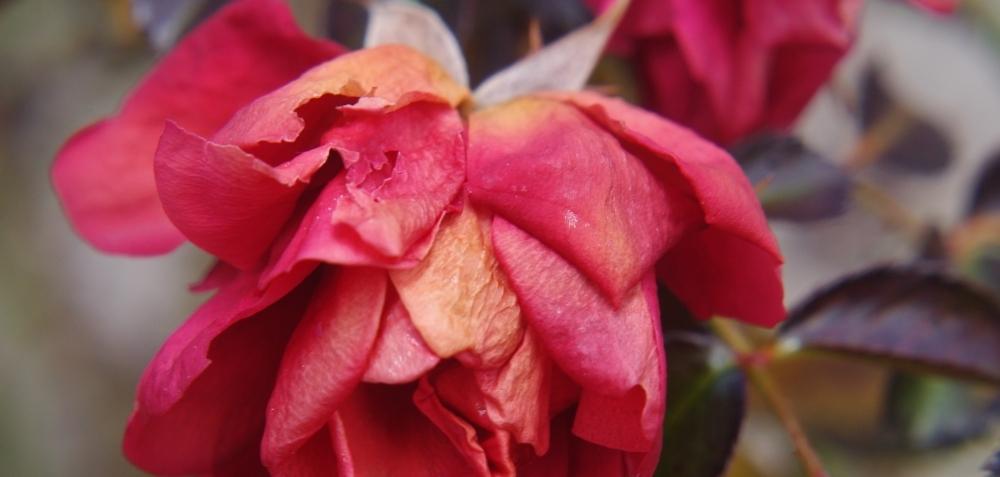
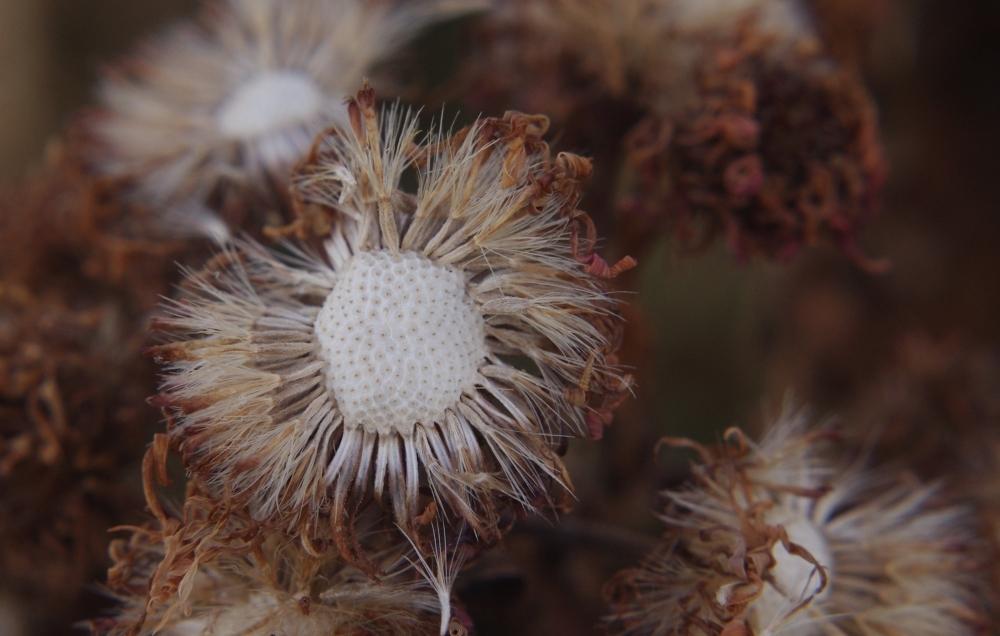
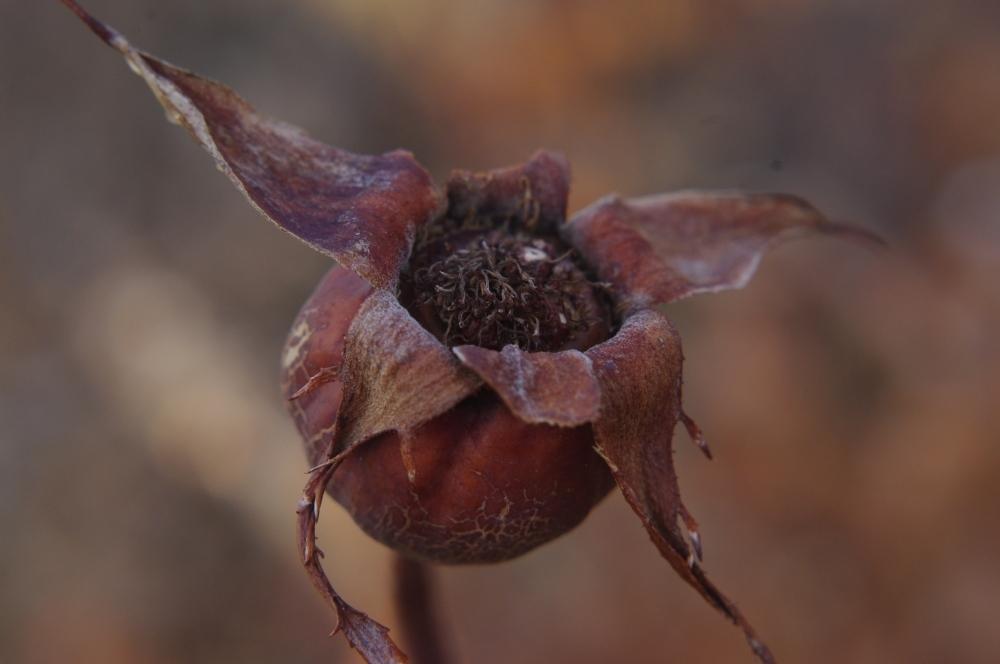
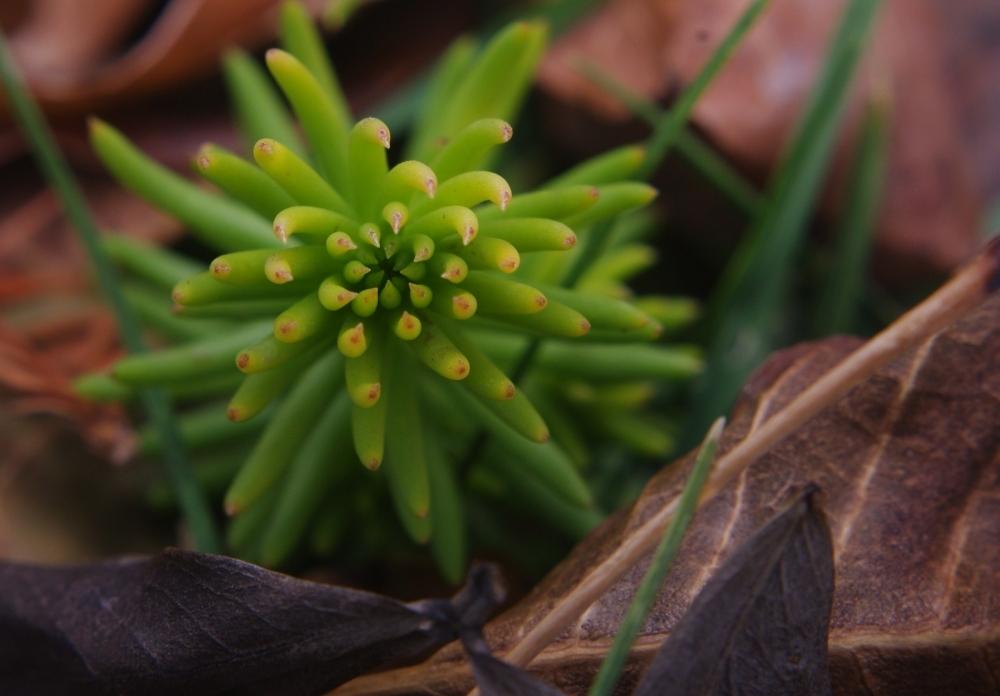
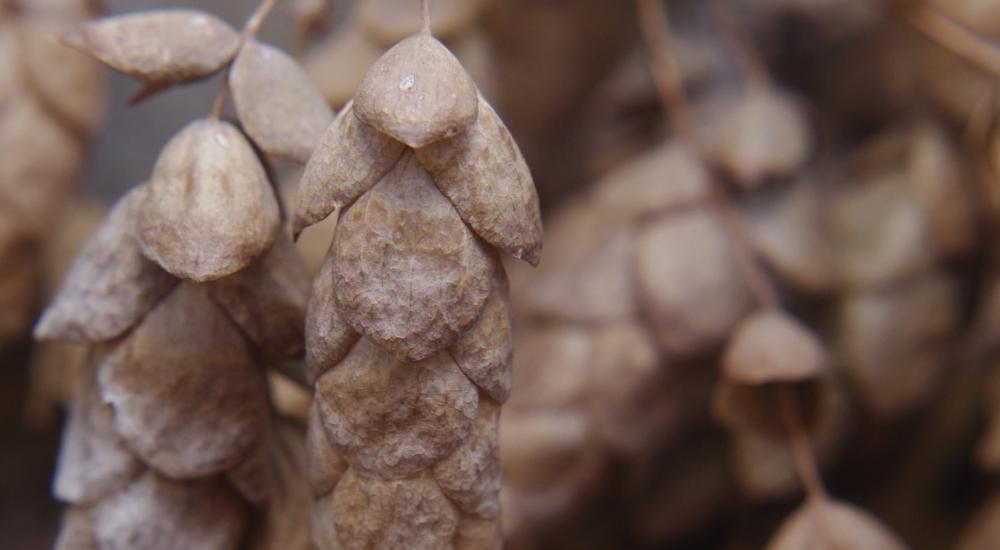
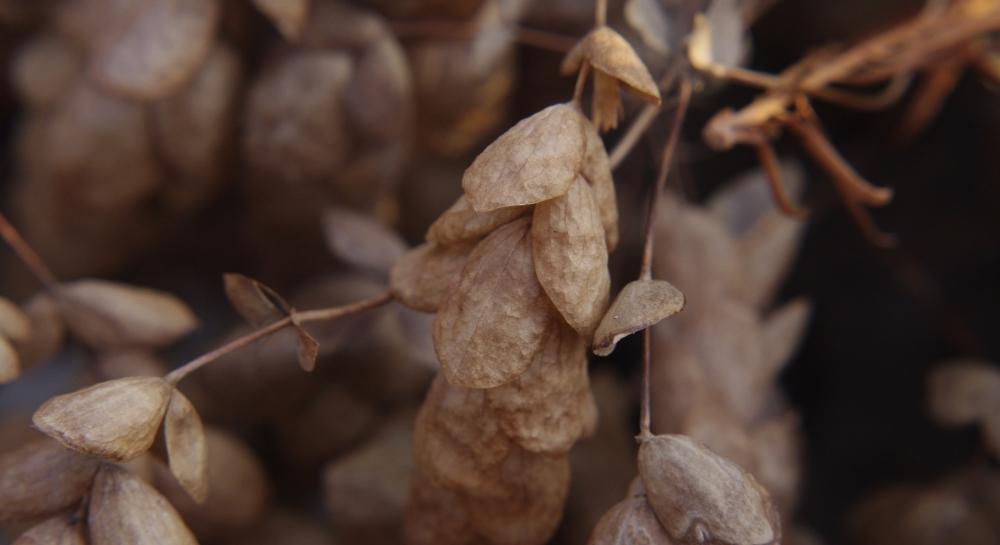
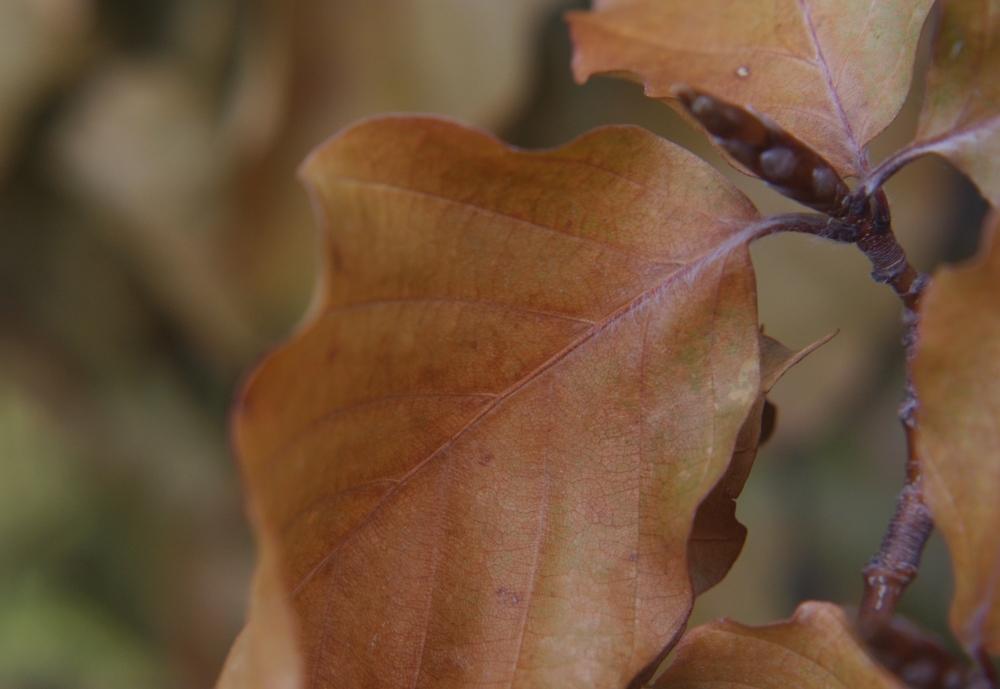
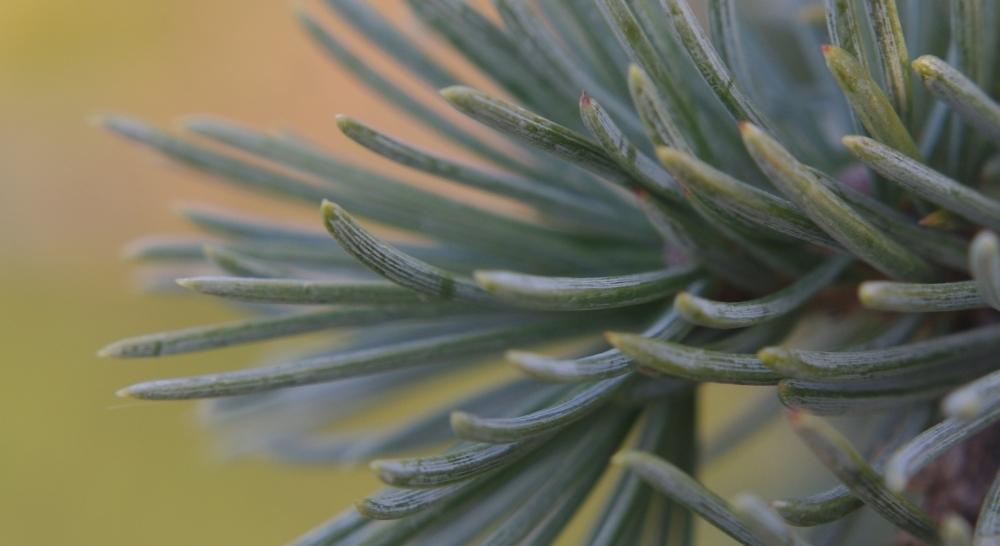
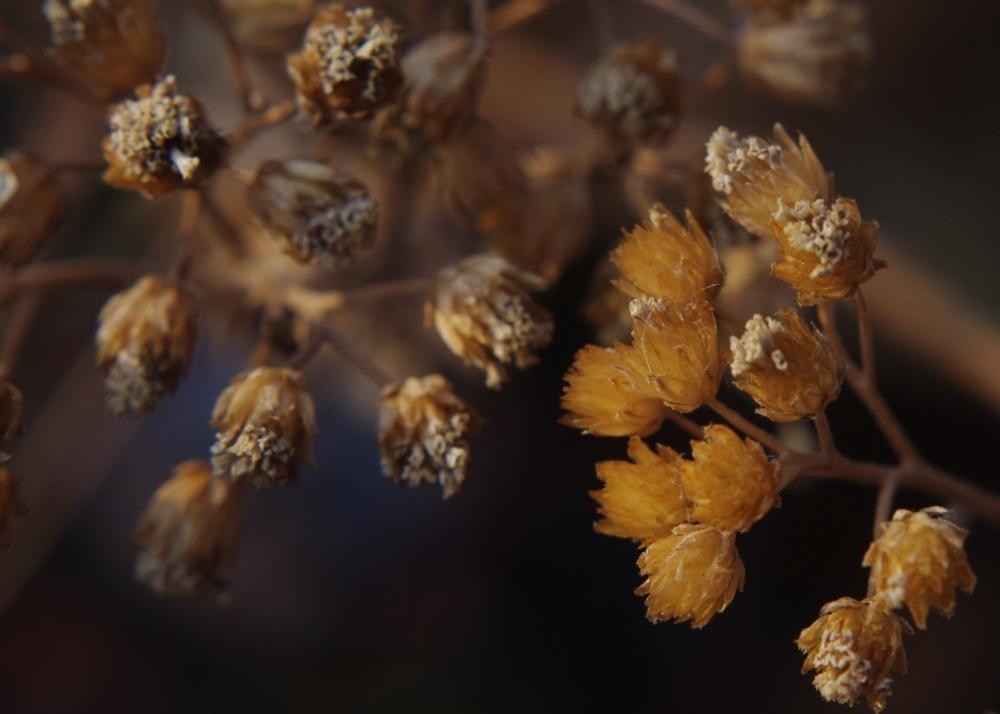
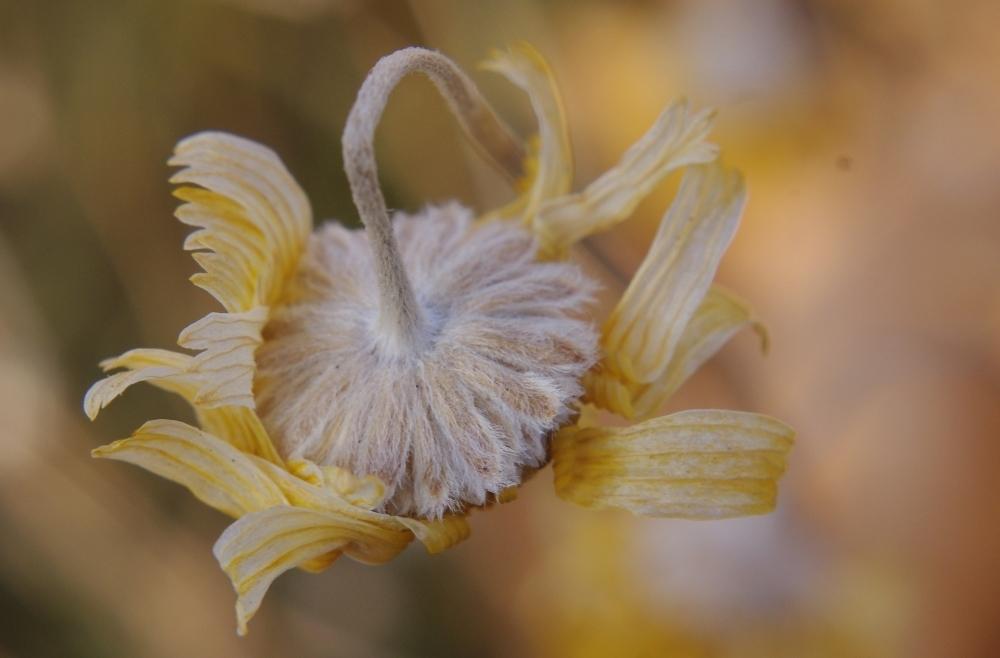
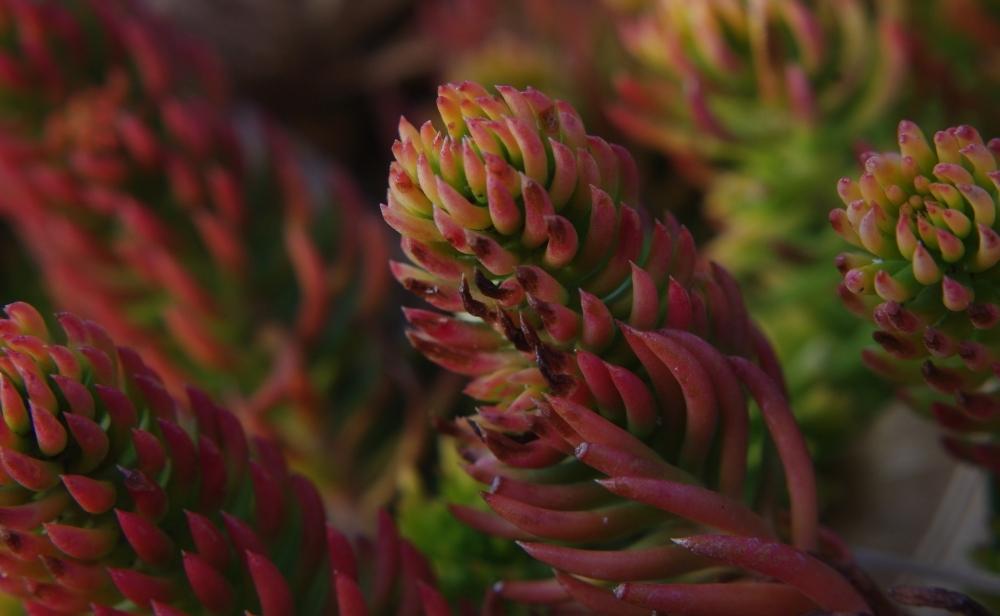
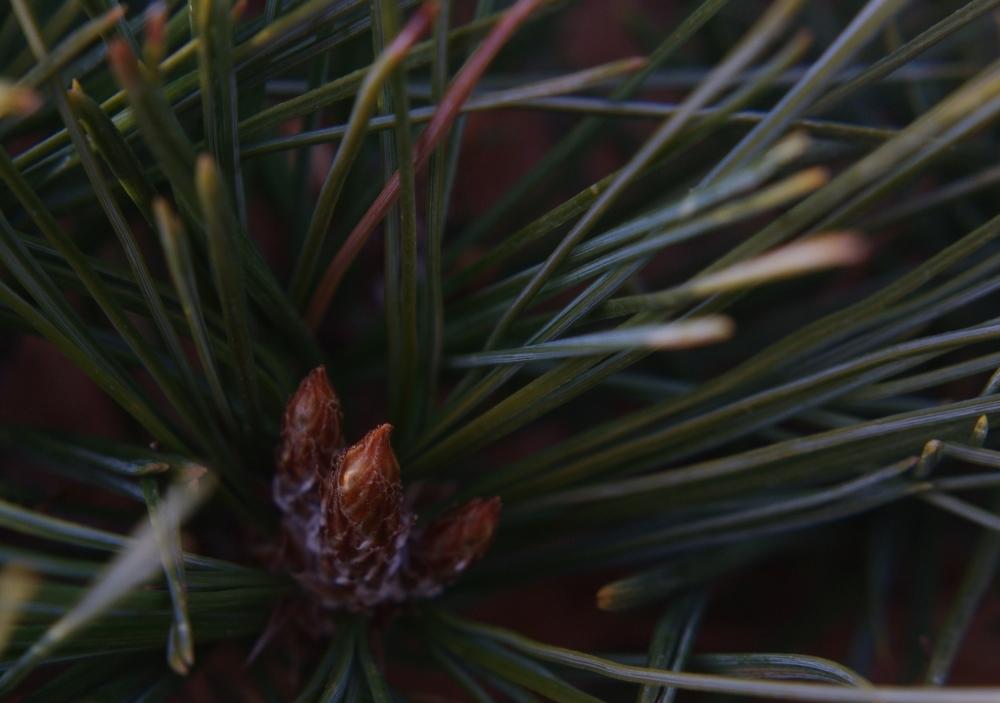
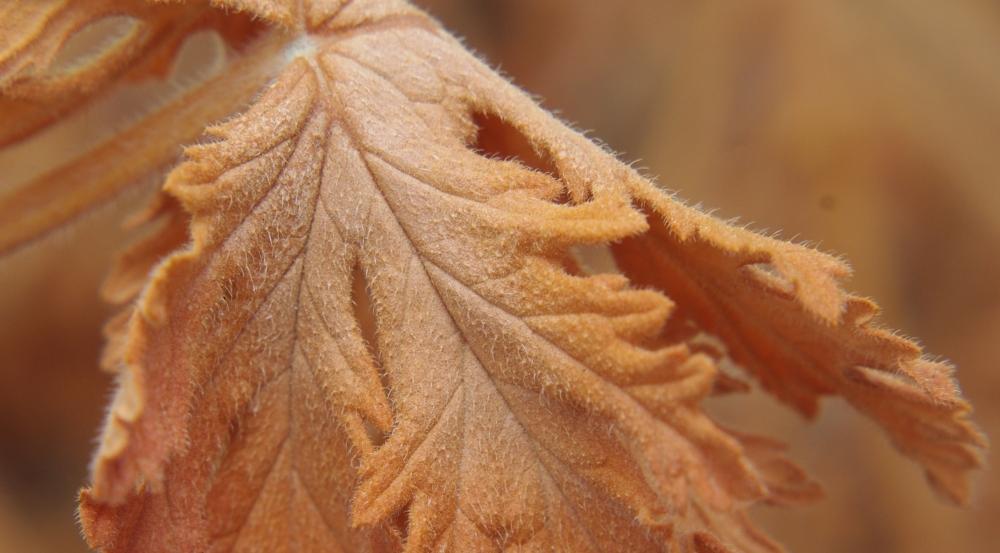
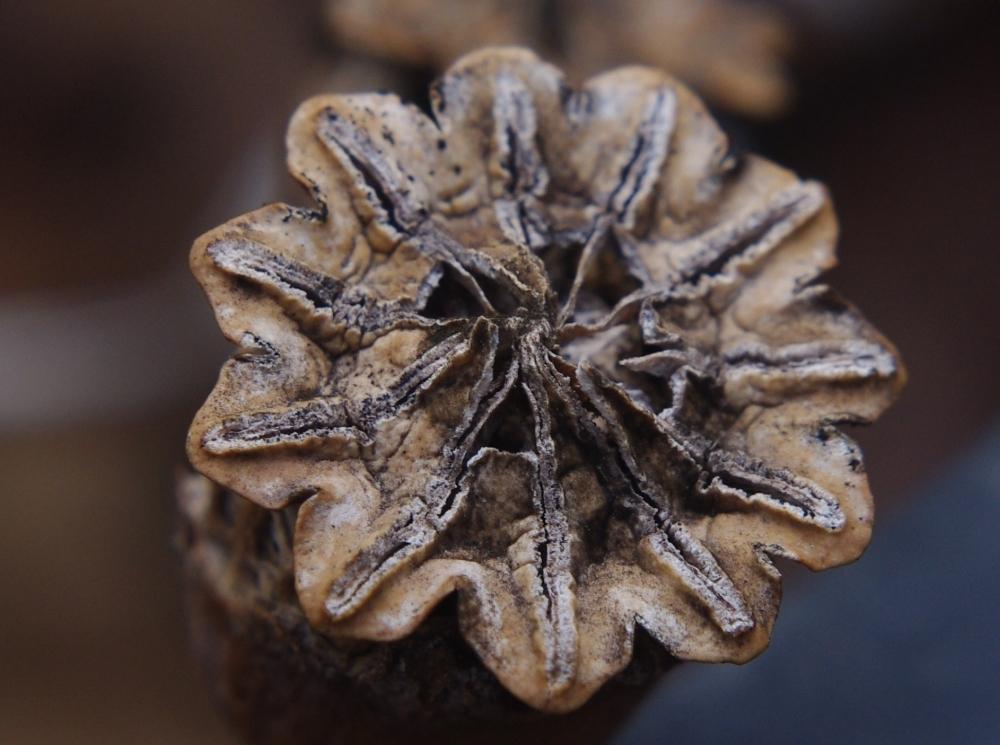
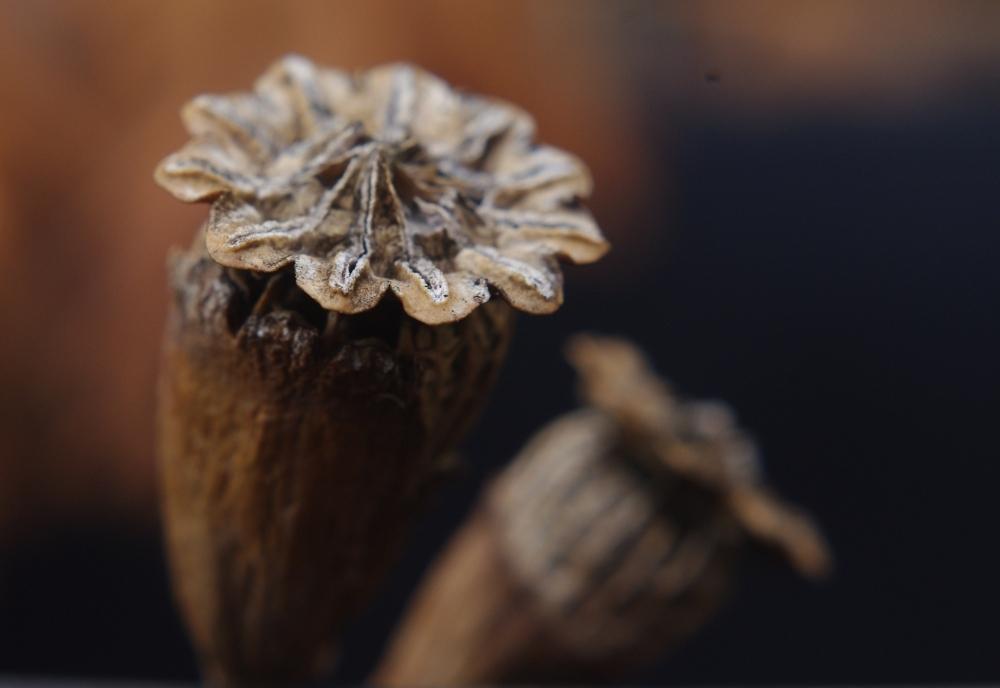
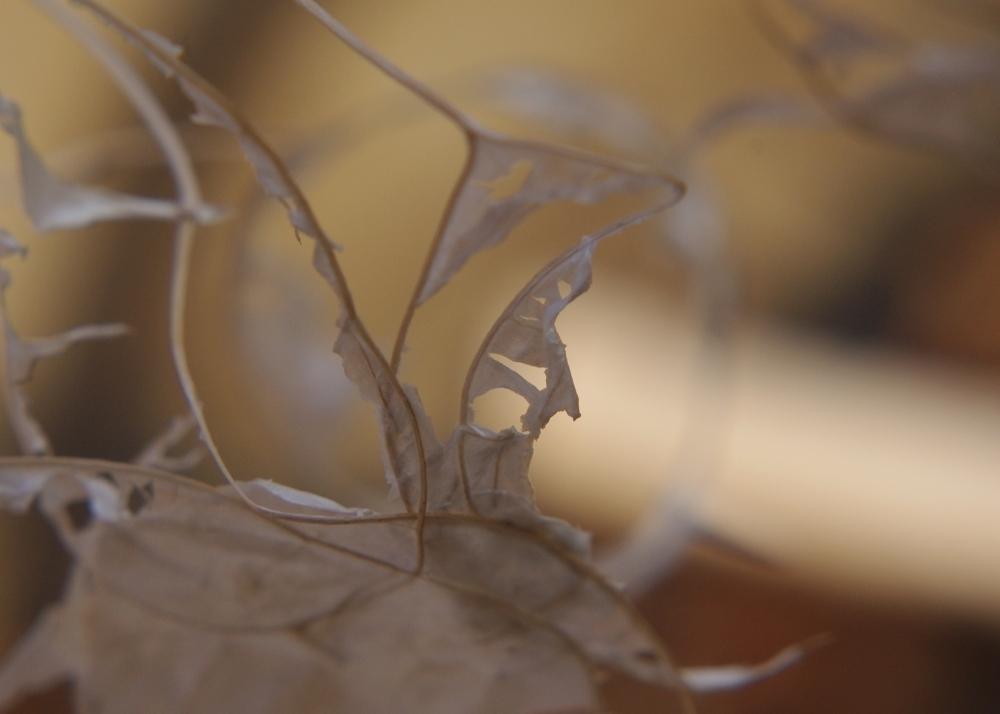
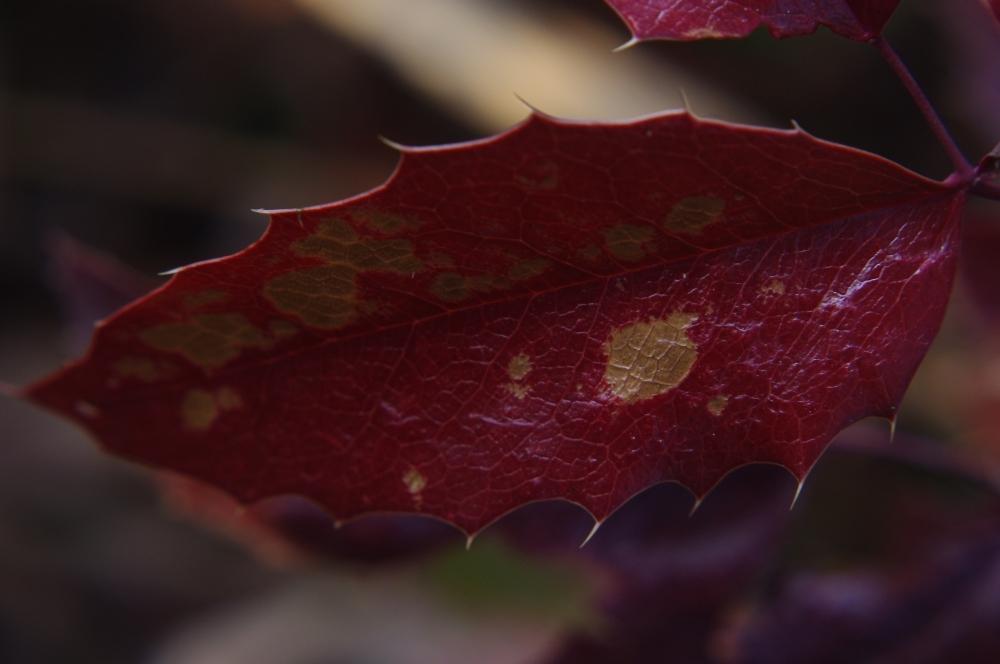
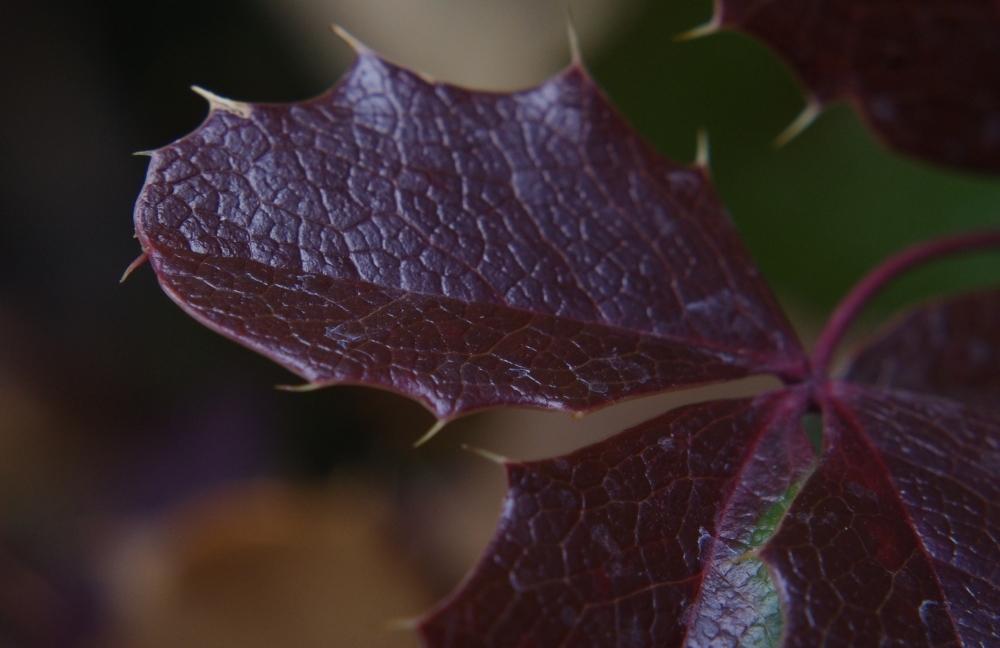
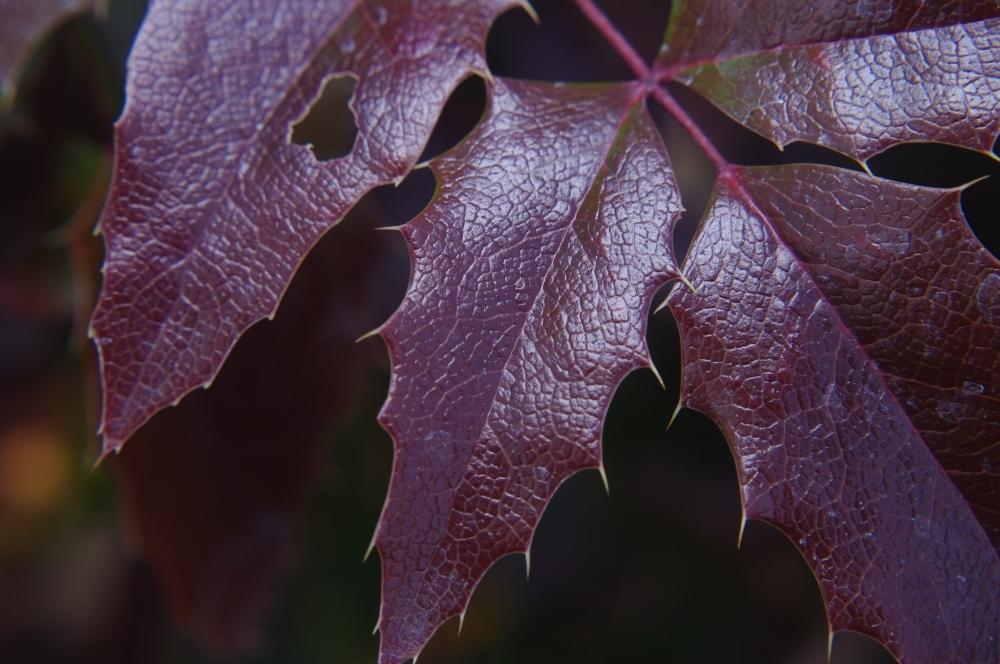
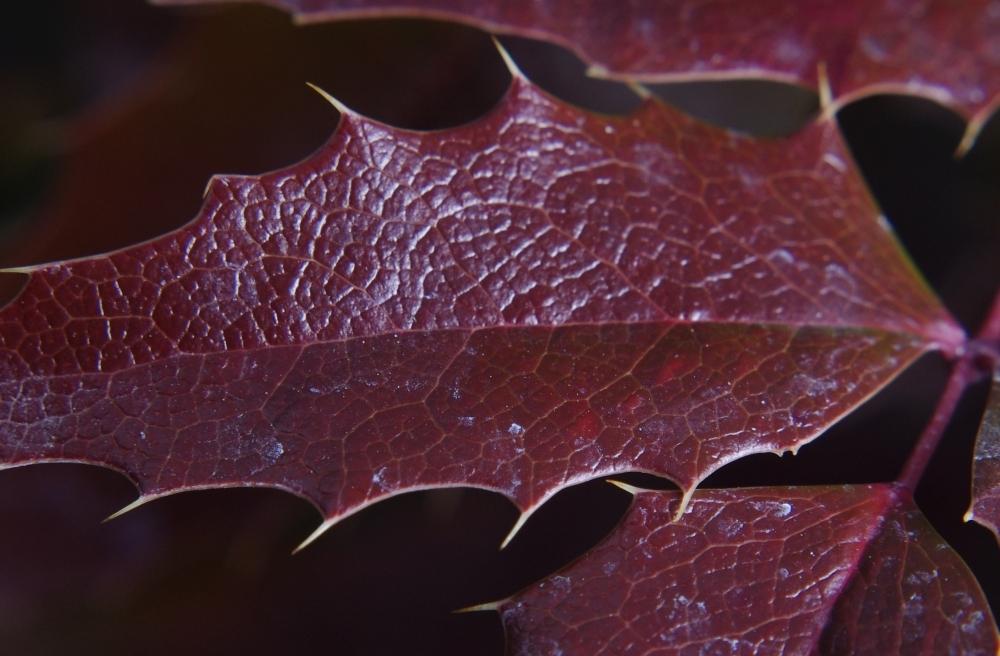
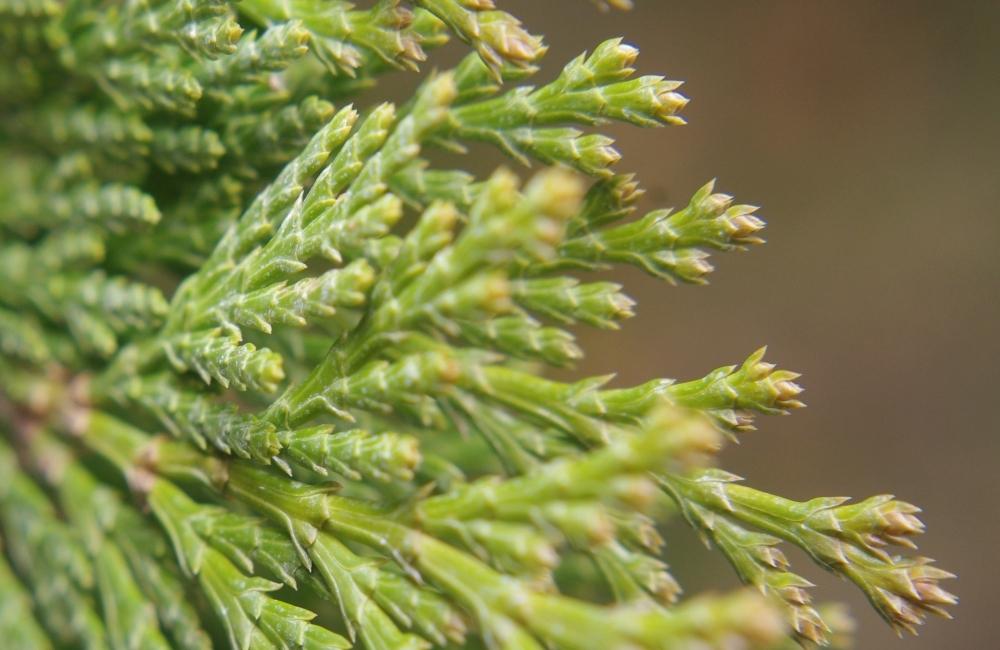
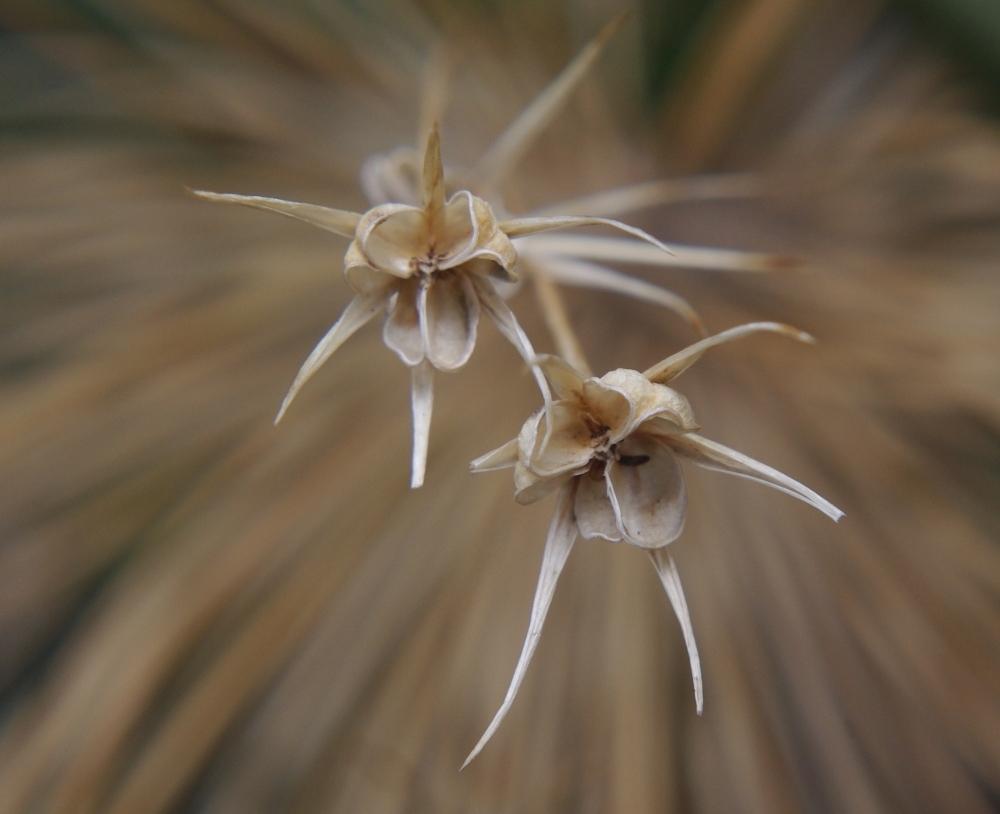
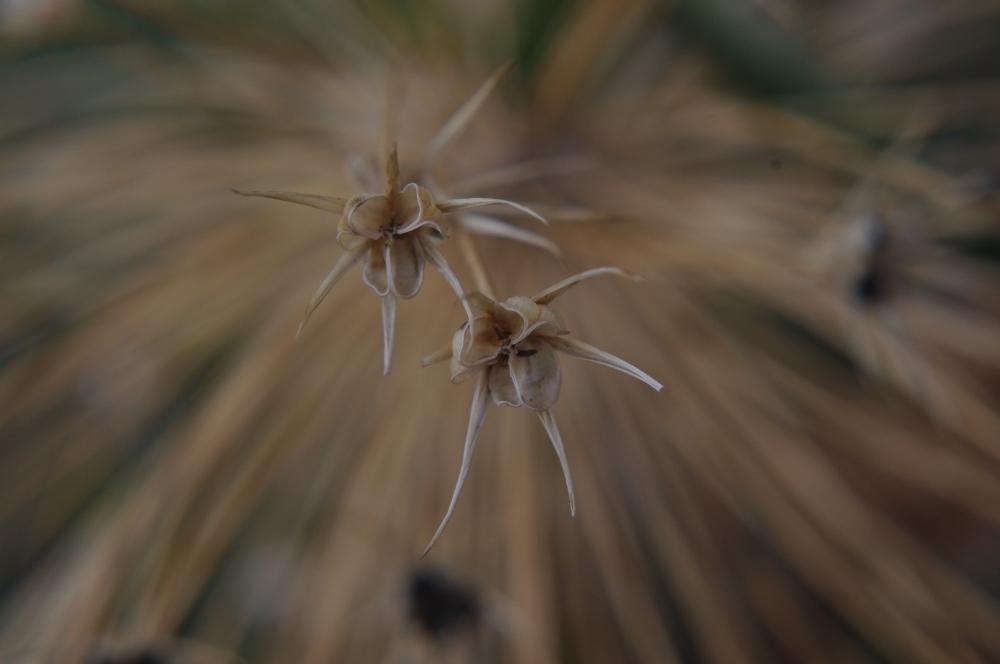
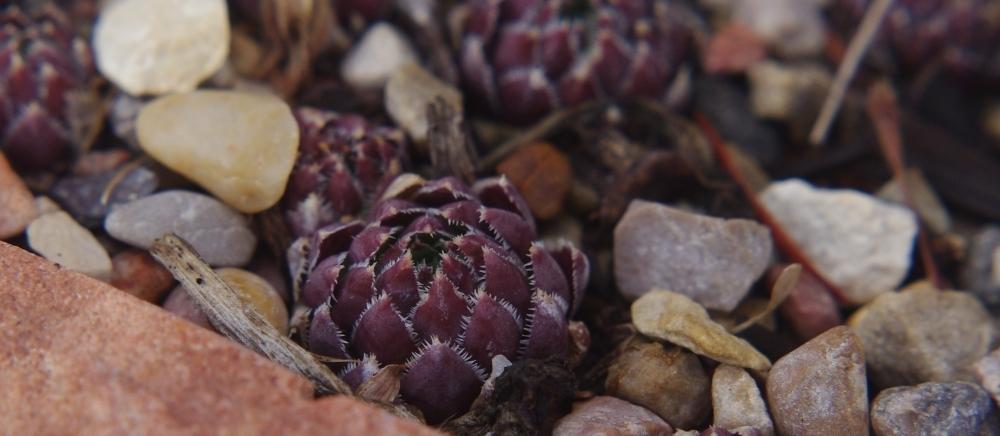
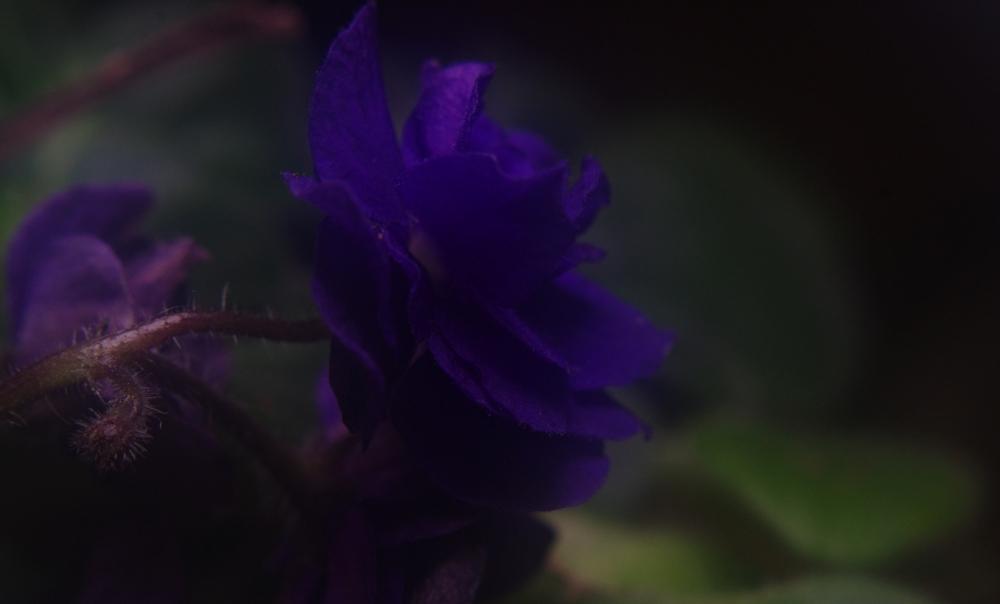
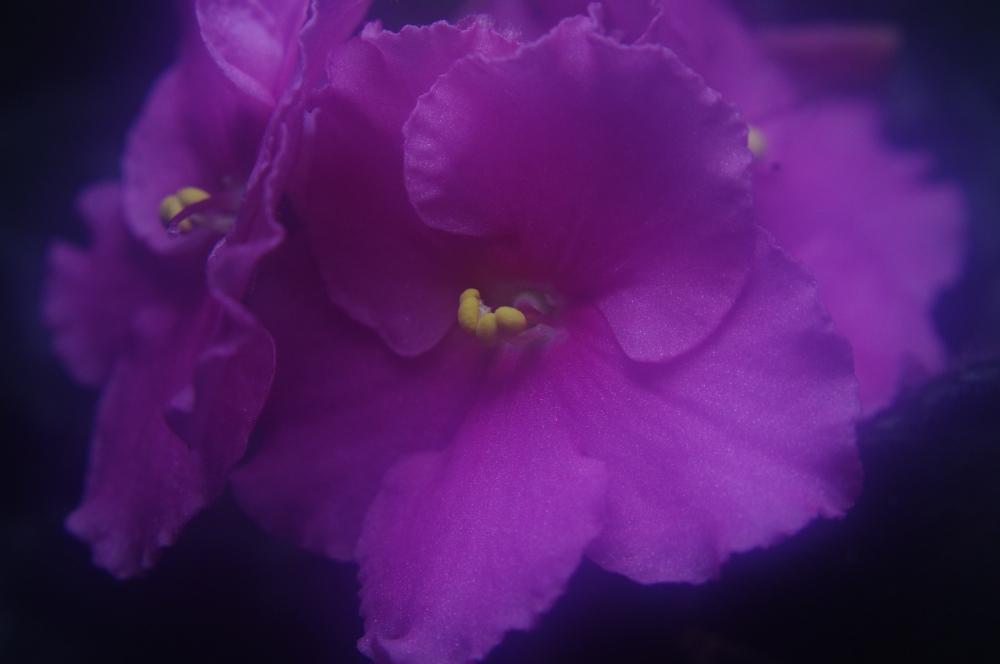
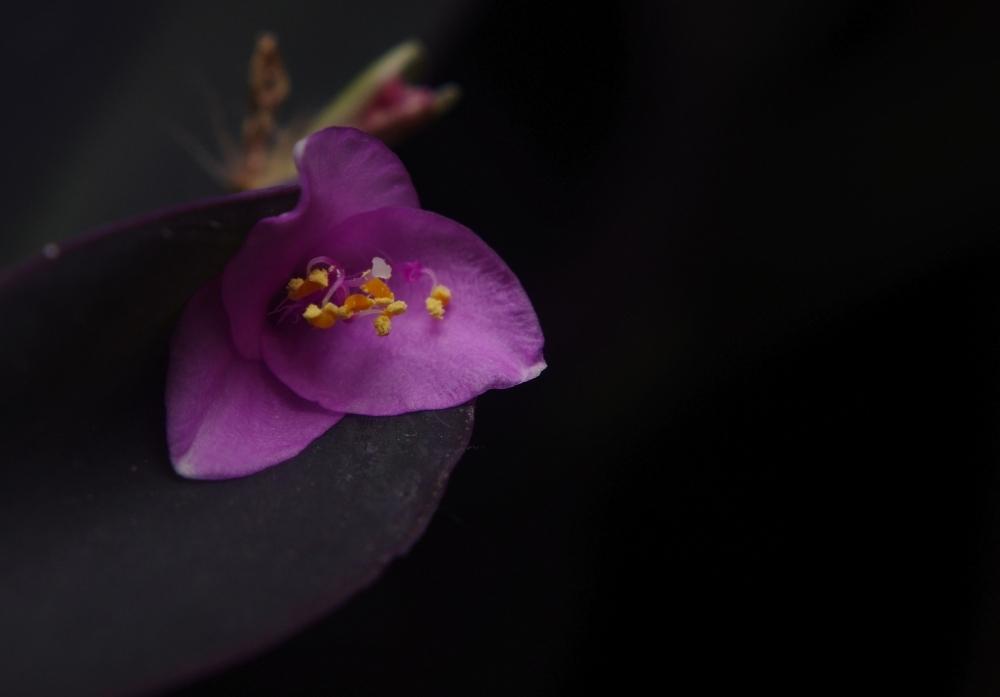
Yesterday afternoon (17th Dec, 2014), I wandered around house, then the the yard and then back around the house shooting things that looked interesting. The outside shots were taken from about on a cloudy day in the late afternoon. Sorry for the volume, but part of the purpose of the thread is to show how quick and dirty this technique is. All of these shots were taken within the same hour and I'm only posting about 1/4 of what I took. Also note that none of them has been retouched (no photoshop or other manipulation) but many have been cropped.
Also note the neat foggy effect on the violets. My lens was cold and when I brought it in the house...well... Here goes: