
A complex, 3-4 day build yet so satisfying! Original post spring 2022. Updated two years later, winter 2023 to spring 2024.
In 2022 we moved out a spa / hot - tub we were no longer using. This left us, intentionally, with a cement pad the right size for a mail-ordered greenhouse by Canopia - Palram. We ordered the Oasis model. The hexagonal 8' x 7' design was also beautiful. So the first photo shows the idea of the greenhouse, and the time of year, March 2022, when we ordered it from Costco. It arrived in a flat box placed in front of our garage door, then built it. In 2024, I've added updates below on how much we are enjoying this little greenhouse in our backyard in town.

Day 1: The instructions and checking all the parts took one day to plan. So the actual first day of the build was putting together the galvanized steel base and upward wall powder-coated aluminum frame or struts, which my husband did on Day 1. He's the detail-oriented one, so necessary to begin well.

Day 2: From then on it was a two person job, which is where I came in, to help organize the parts -- small plastic containers and flan dishes for 70 - 90+ screws and bolts, clips to secure the side walls and many more unique parts. The walls and doors were made of a clear polycarbonate plastic. The roof and louver vents were made of a corrugated plastic material.
I did marvel at the many bolts that we would count out and slide into channels for attaching braces, the roof system and the door assembly and door handle. The ready to assemble pre-drilled metal pieces, pre-cut panels, and extensive hardware was an engineering marvel -- so much in a small package. Quite the feat! There are many steps that required two people such as sliding in the bendy, tall pieces of polycarbonate for each side of the hexagon walls and teamwork in putting in the top cap screws and bolts.
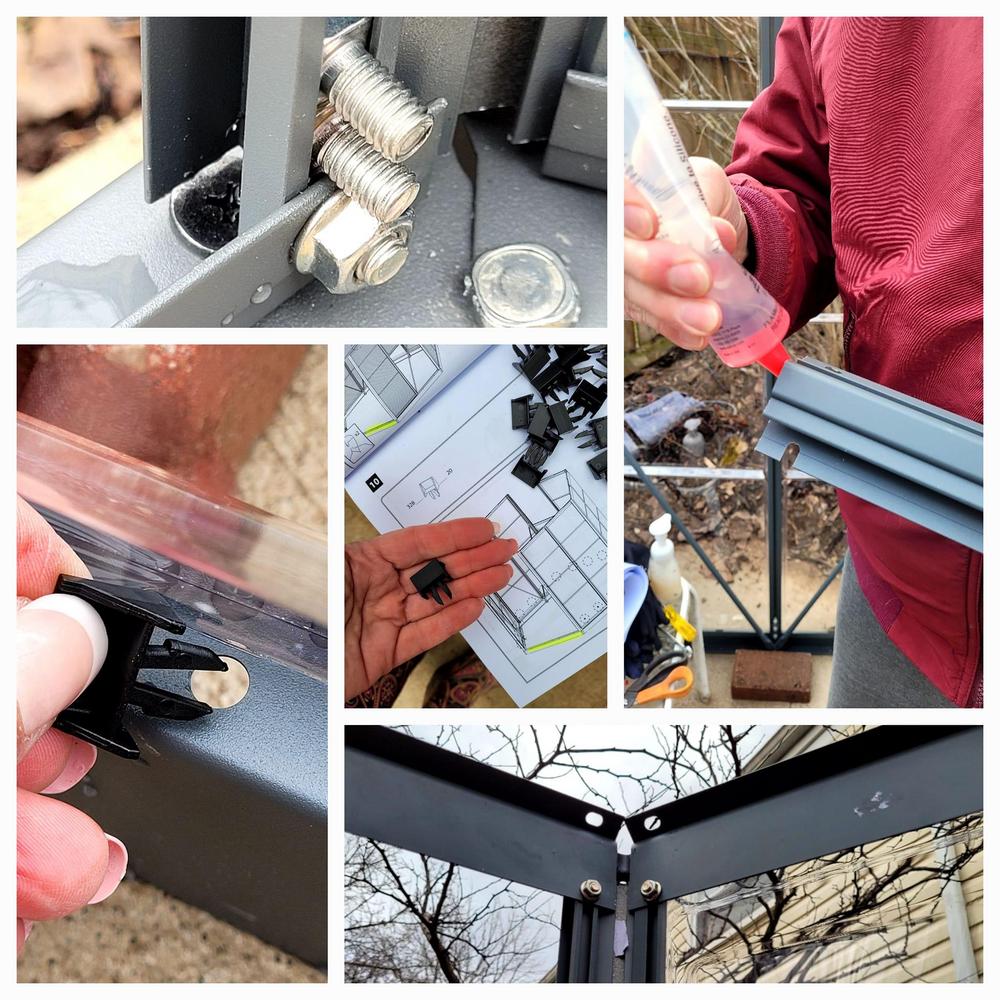
By 10 p.m. in the dark on Day 2, as we wore head lamps to guide sliding roof panels into the aluminum frame channels, in freezing weather, I would not be inclined to agree this is an "easy installation." Panels needed some jostling to get a good fit, and several of the aluminum frame pieces had interlocked in shipping (not the best wrapping) so we had to use a rubber mallet to pound several of the frame struts apart, including those for one of the greenhouse doors. They were locked tight together. One of the framing pieces was bent, fortunately corrected with channel-lock pliers. Building this greenhouse is, however, doable with patience and two people with some mechanical ability. Being nearsighted helps with lining up and installing all those screws and bolts. Using foaming soap helped attach some of the super snug plastic piece to the polycarbonate walls.
Day 3: Adding interior braces, roof end caps and assembling and installing the doors, which thankfully could be put together indoors. The visual instructions mostly avoid the need for translation into multiple languages. The visuals favor those who do well with drawings. With two of us verifying our interpretation of the diagrams, we made only a few "wrong way" moves that were easy to correct.

Photo above shows the boxed greenhouse after it was delivered by UPS. Final photo below, shows the doors added at the end of Day 3. What was left on Day 4 was installing the anchoring screws to the cement inside. My husband soon found that this was a challenging final step, even with cement drill bits and the special blue screws meant for stone. However, he finished drilling in the anchors before evening. Secure anchoring is absolutely necessary for helping any greenhouse survive big winds.

In summary: Definitely a 2 person, complex job best completed with some advanced competencies in reading diagrams. It was also so satisfying to complete, and it looks good, compared to the more utilitarian 6 x 8 style greenhouses. It is already in use, as of Day 4, to help protect sedums and other succulents from too much rain in April and over the summer. I am now moving in artichokes that were overwintered in the garage and pots of newly sprouting potted irises, daffodils and tulips to protect them from marauding squirrels until they get a bit larger. The final touch, solar lights:

Now the 2024 update:
What FUN and how useful this little greenhouse has been. We are looking to get it electrified this year. Two electricians have given us quotes and we now have solar in our house, so that is helpful for keeping it running either year round or for most of the year.
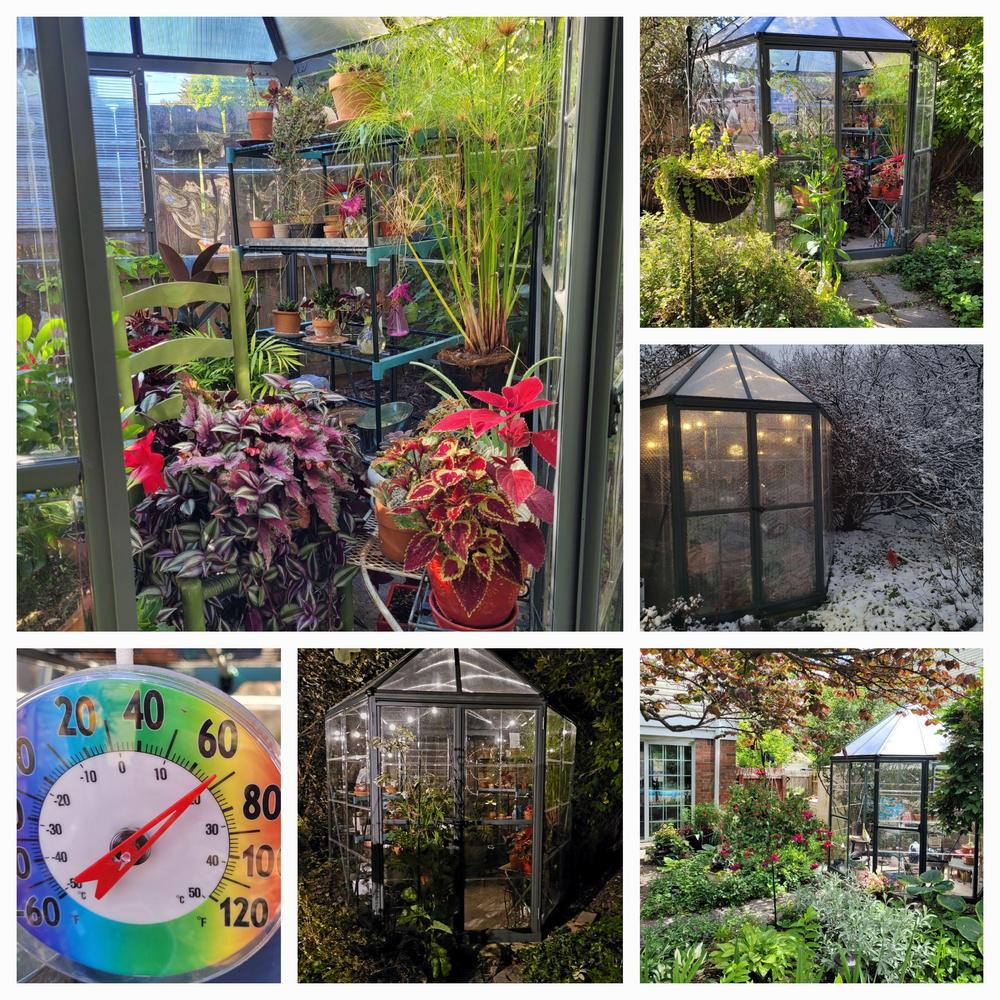
First of all, I'm glad to say in Michigan, this little greenhouse is a great season extender. It allows me to protect my extensive sedum, succulent (cactus) collection from excessive rain, and extends the time I need to slowly prep all my plants, including tender sedums and a Plumeria for overwintering indoors. This deliberate process, and the periodic use of BT (a natural microbial insecticide, Bacillus thuringiensis) has kept the fungus gnats as bay during the winter, without the use of icky, gooey yellow fly traps. I have another blog post listed here about that process. That said, there's always something. In 2024, mealy bugs showed up on my Echeveria, and white flies on my klanchoes.
ANYWAY, back to the good stuff, best shown in a few 2023-2024 photos below:
Fall 2023, season extender:

Use of bubble wrap to help insulate it. Definitely worth it!
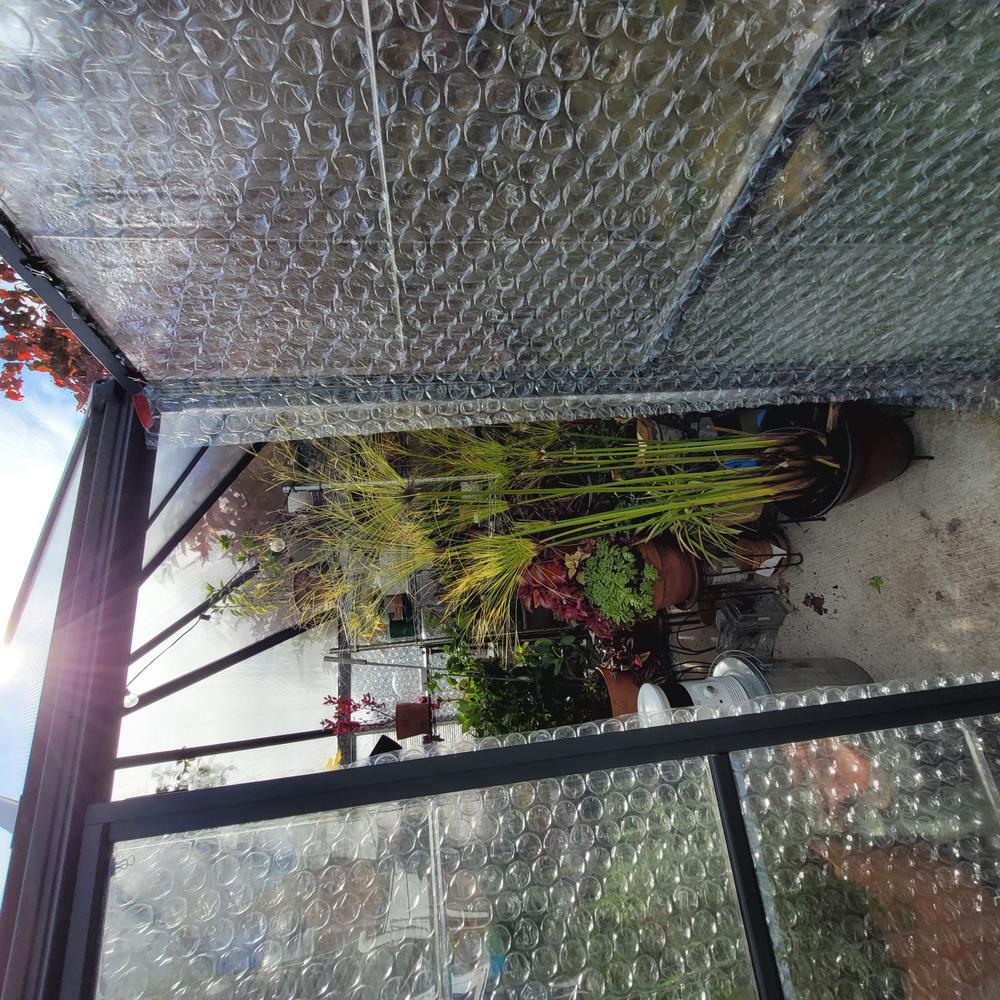
I ordered it through Amazon and the measurements were just the right size of the octagonal shape of this greenhouse. What a find!
I do use an inexpensive heater with a thermostadt during the winter and monitor it closely with a Govee temperature sensor. I find even during February, I need to monitor it closely, as I had one sunshiny day in February when we were both out of down and the greenhouse got to 104 degrees during the day ![]() , as the heater did not turn off soon enough! (Next time, we'll use a timer on it when we leave.) Fortunately the herbs in there toughed it out.
, as the heater did not turn off soon enough! (Next time, we'll use a timer on it when we leave.) Fortunately the herbs in there toughed it out.
Here's the latest for 2024:
Growing lisianthus in mini-soil blocks. Sprouts!

I hope this has been helpful for those researching greenhouses.
What I'm using the greenhouse for as of this 2024 update:

Let us know what ideas you have for putting a greenhouse like this to good use.
~ Deb
Discussions:
| Thread Title | Last Reply | Replies |
|---|---|---|
| Update on the new greenhouse by dnrevel | Apr 28, 2022 8:34 AM | 0 |
| Shelf kit for Oasis by dnrevel | Apr 6, 2022 12:19 PM | 0 |
Post a new thread about this blog entry: