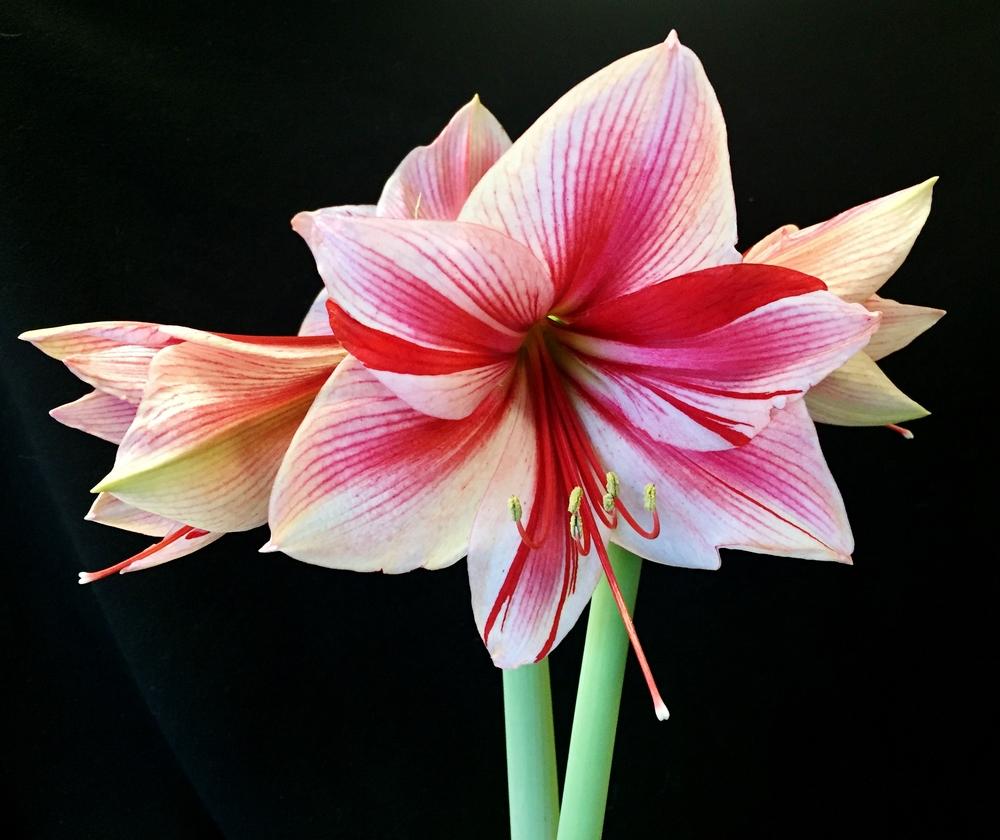
Amaryllis (Hippeastrum) seeds are not readily available on the market. At best, it is a 3-4 year (often more) commitment to bring an amaryllis seed to full bloom. Therefore, most people acquire this bold and beautiful plant mature and ready to bloom. Blossoms can be as big as 7 inches or more across, and come in a range of gorgeous pastel to brilliant colors. Propagation using cuttage and offsets from an existing mature bulb will result in offspring that look exactly like the parent. Some amaryllis bulbs are rare, hard to find, must be imported, or are prohibitively expensive. Although an exercise in patience, in these instances growing bulbs from seed can be advantageous. Additionally, growing amaryllis from seed offers the opportunity to hybridize something new, exciting and different in the world of amaryllis. Seeds most often are obtained from other amaryllis growers/breeders, gardening groups,social media groups, eBay, or by pollinating and hybridizing your own seeds.
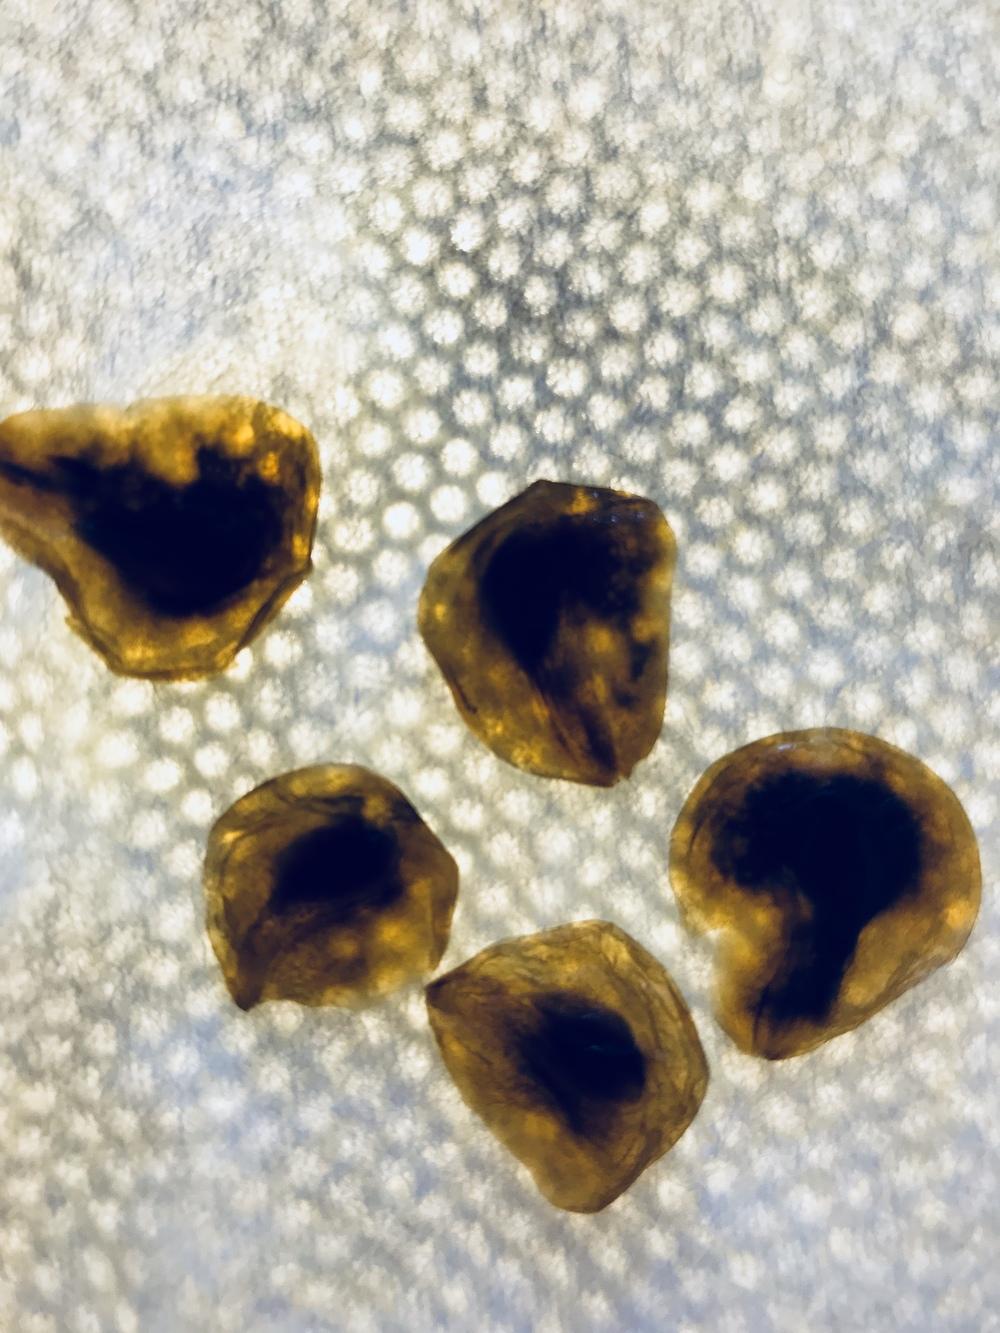
Not all amaryllis can produce seeds. And some may produce seeds that will abort or be sterile. Some seeds are "blanks" -- they have the papery black seed coat but no actual seed inside. If you rub the seed between your fingers and feel a small bump, it is likely a "good" seed, with an embryo seed inside. You can also hold the seed up to a bright light to see through the seed coat and check for blanks. Discard any seeds that are blanks.
Some amaryllis, such as Hippeastrum Papilio, are difficult and will rarely breed at all. If you can get Papilio to produce a seed that will actually grow, you are lucky -- such seeds are often in demand and can be sold to others.
Seeds form in a 3-sectioned pod.
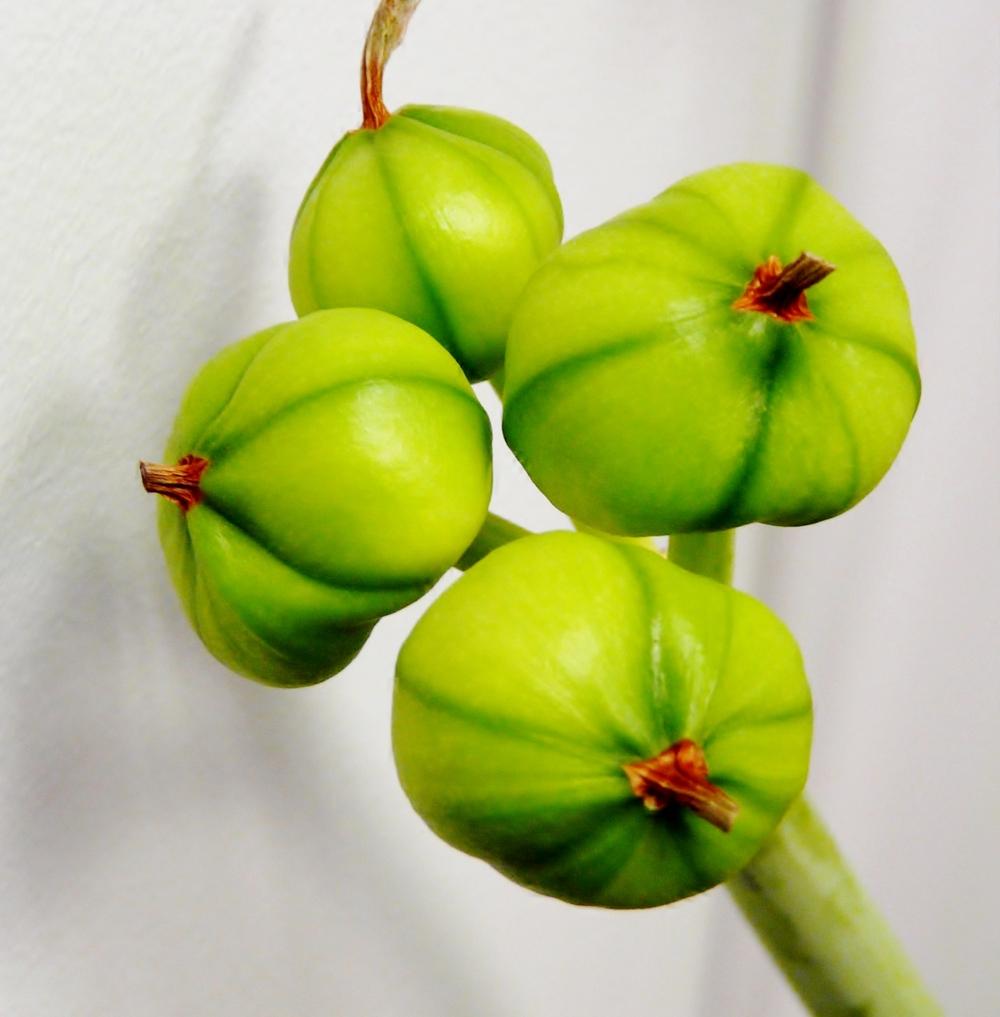
Sandwiched inside each pod section are black papery-thin seeds. The papery-thin seed coat serves to protect the seed, allows the wind to carry and distribute it to other locations, and nourishes the embryo seed as it germinates and starts to grow. The pod will start out lime green in color, and will plump up larger as the seeds continue to mature. Once the seeds are mature, the pod will turn yellow/brown and start to split open at the seams.
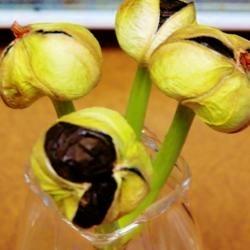
At this point, you can cut the pod off of the stem and dry it out for a few days. Then gently scoop or shake out the seeds and let them air-dry for an additional few days. Amaryllis seeds do not have a very long shelf life, so germinate them as soon as possible. If you need to store them, put them somewhere cool and dry, out of direct light in a sealed container, keeping in mind that the longer you wait, the less viable they will be.
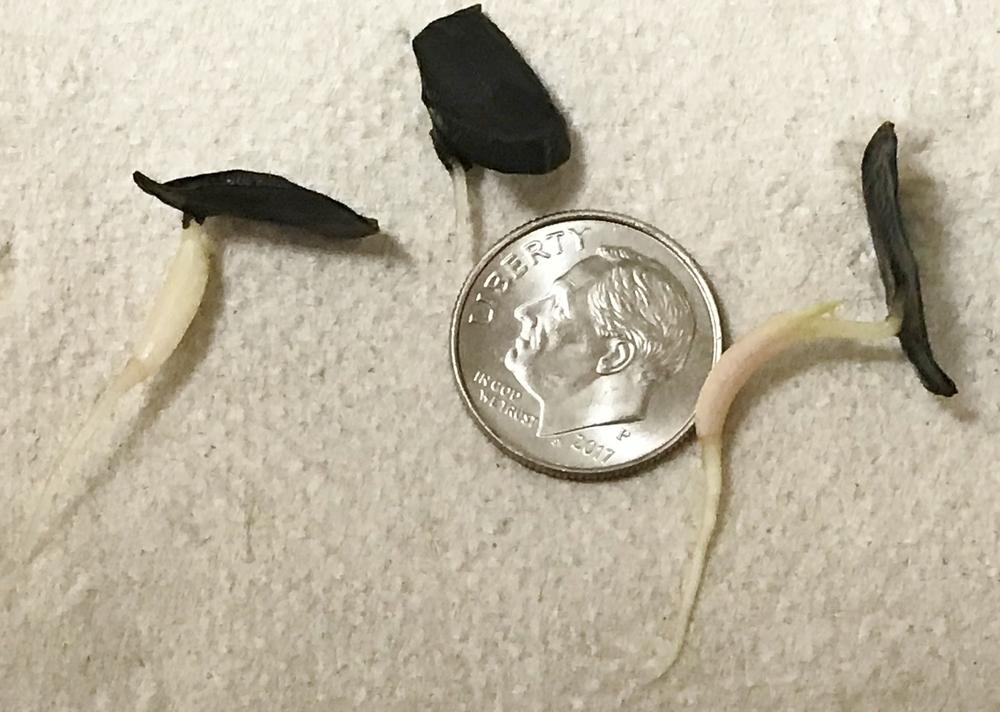
Although seeds can be shallowly planted outdoors directly into soil, they can also be subject to rotting or can be carried away by the wind or animals. "Floating" them in water can often bring better results. To float your seeds, select a clear glass container with a wide opening and fill it with at least an inch of warm water - try to age tap water a day first so the chlorine can dissipate. A clear glass (or plastic) container is best as it allows you to look through the glass so see if the seed has rooted. A drinking glass works well for a few seeds, a pie plate great for larger amounts of seeds,
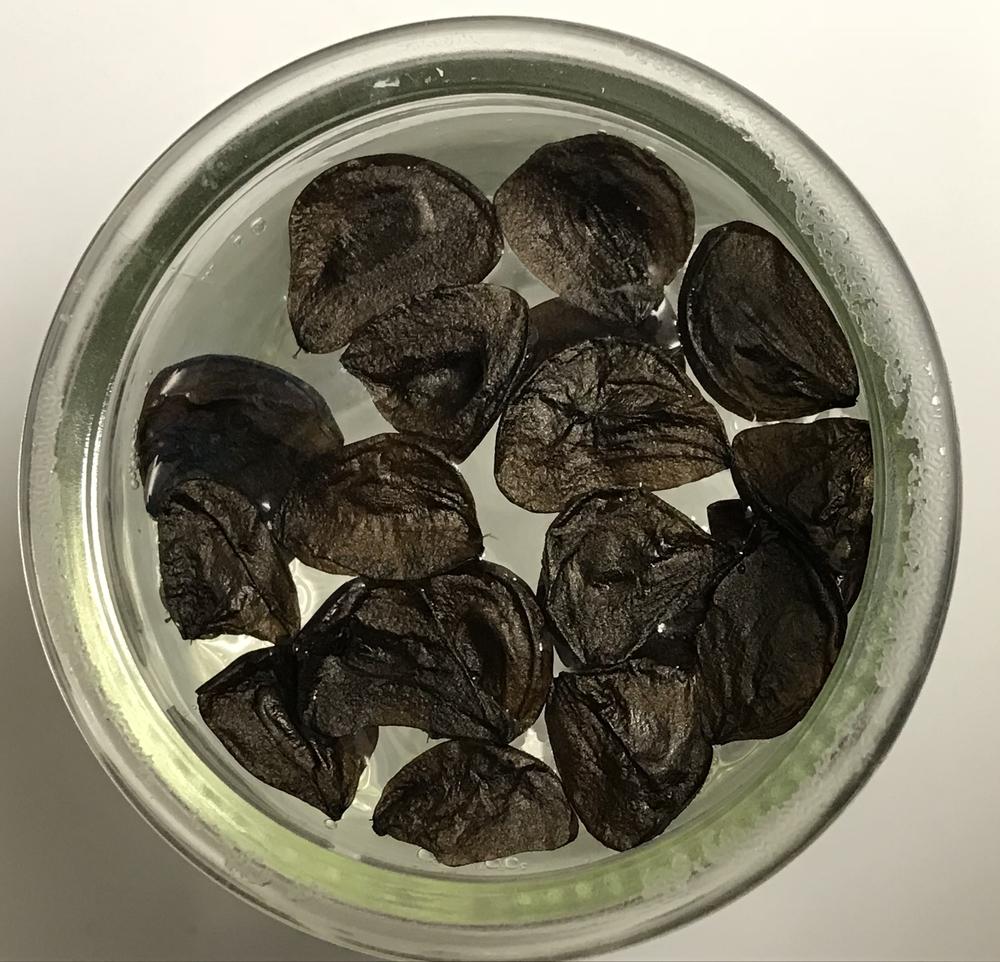
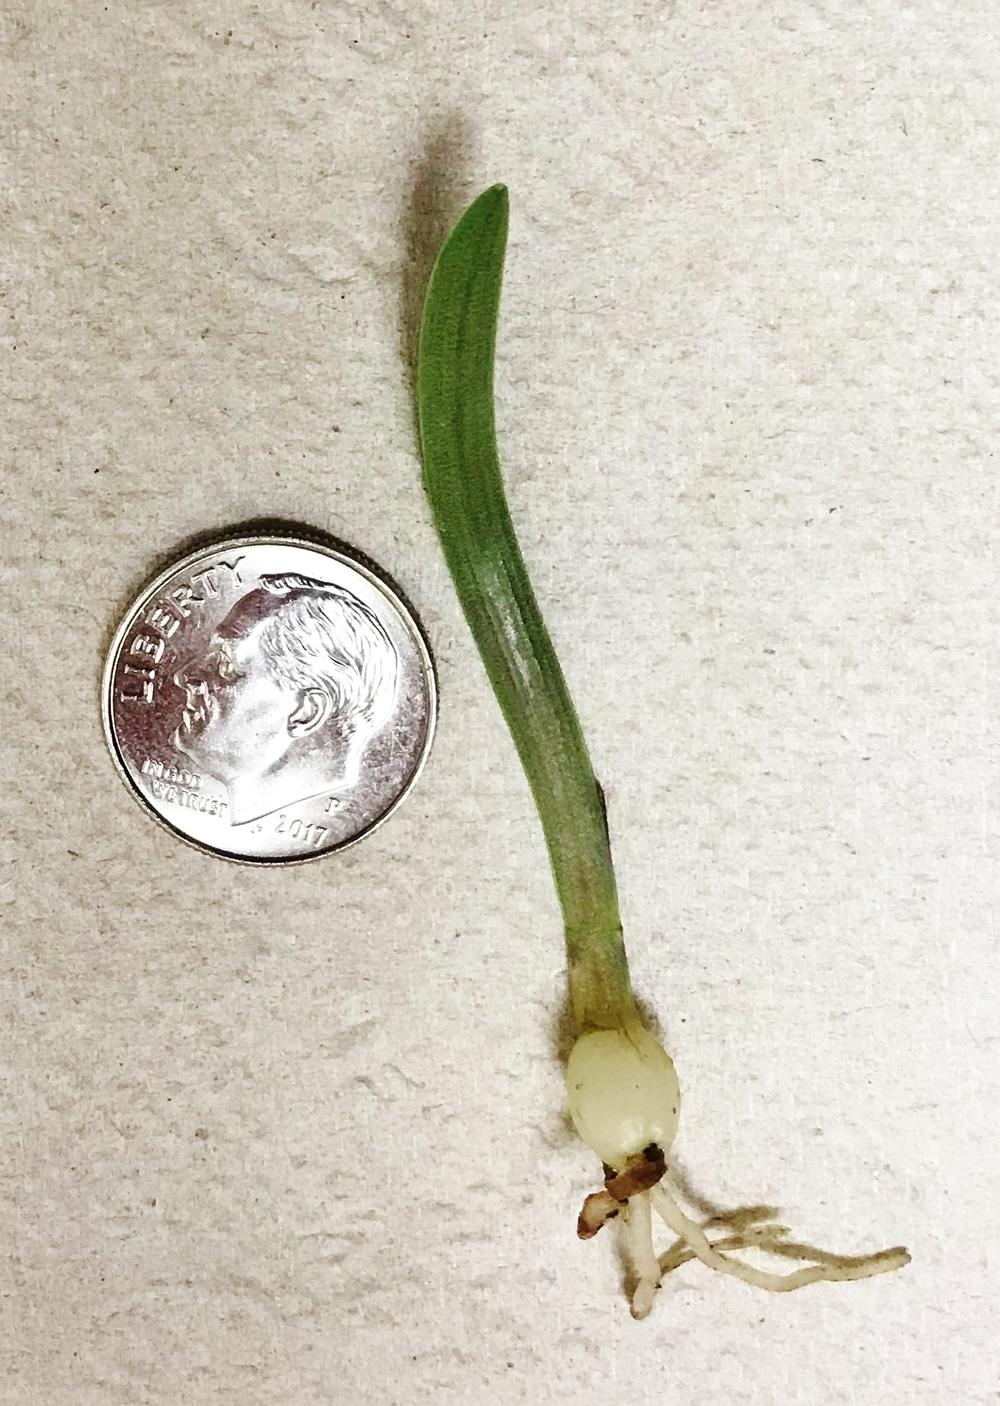
Spread the seeds out on top of the water - they will float - if a seed sinks, discard it. Set your container somewhere safe, out of direct light, checking them from time to time to make sure the water does not evaporate. After 1-4 weeks (or even longer sometimes for stubborn seeds), viable seeds will produce a single root. Roots are impossible to see from the top of the container as they grow in a straight downward direction, so look through the side or bottom of the glass container to see them. This single root will later swell up into a tiny bulb (bulblet). After the root is about 1/2 inch or longer, you can safely plant it. Or, you can also leave it in the water until it actually produces a green blade-like leaf. Make sure your water level remains high enough to accommodate the growing root.
Seed starting mix is good for planting your new amaryllis offspring, however they do also love some organic matter, so mixing a little compost or other organic matter in can further enhance growth. Mold and mildew can be an issue, so using a sterile soil mix is very beneficial. I either use potting mix straight out of the bag, or heat my planting medium in the oven or microwave to sterilize it first. You can plant your new "flower child" in a pot all by itself, or along with some of its siblings - they actually seem to prefer being a little crowded. Label and date the pot, and make sure it has drainage holes in the bottom - drainage is paramount. Dampen the planting medium, then use a toothpick to make a small hole in the soil for the root to fit into. Settle the root into the hole, and then let the actual seed rest on top of the soil (if you prefer, you can add a very thin layer of potting mix over the top of the seed). Gently water to allow the soil to settle around the root. Planting medium should be kept lightly moist, but never soggy. Watch carefully for damping off. Containers can be placed outdoors during spring and summer but should be brought indoors when the weather cools and frost or freeze is a threat. If you cannot find a brightly lit area indoors during winter months, grow lights work very well. Young amaryllis are slowpokes - they put a lot of energy into converting that first little root into an actual bulb, so be patient.
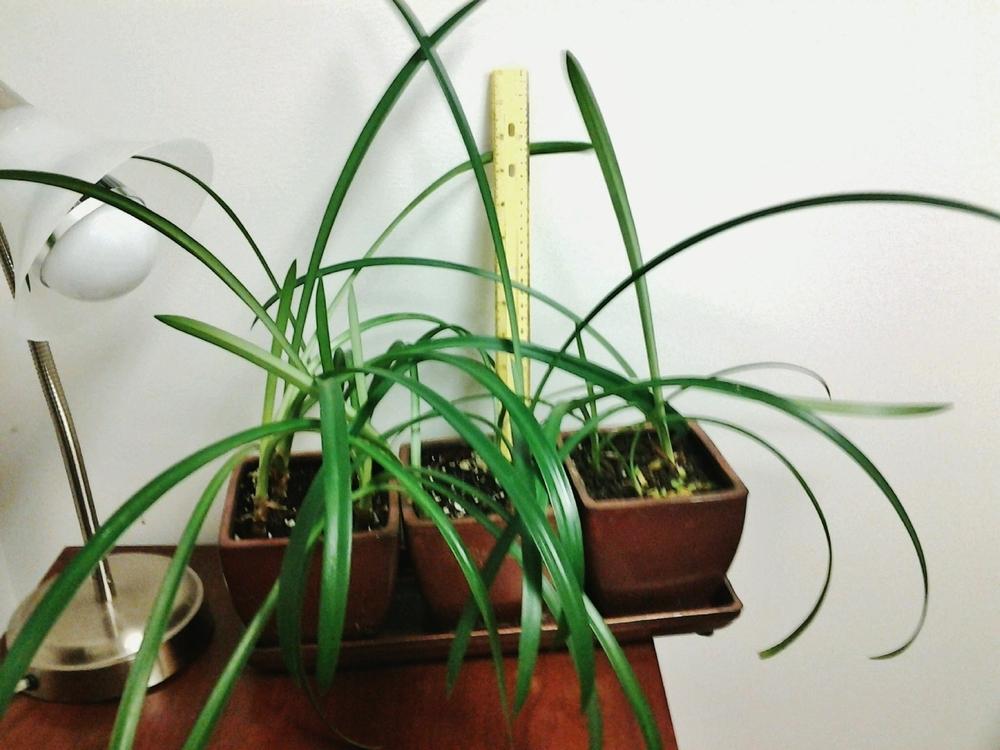
You may not see that first green sprout for another week or more. And when it finally sprouts, don't be surprised if your friends ask why you are growing a single blade of grass, because that is exactly what it will look like
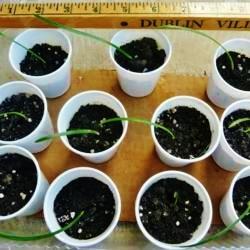
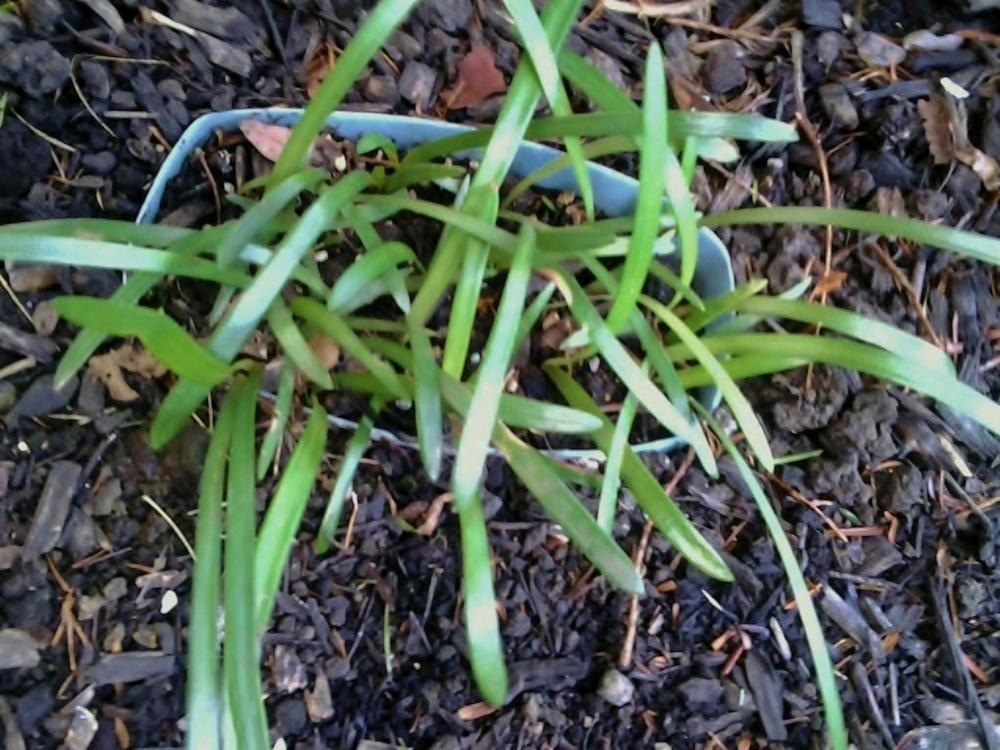
Keep your sprout lightly moist, warm and in medium to bright light, if possible for best growing - I never put them in direct sun, as they may get too hot, sunburned, and dry up and die. After a month or two, you can add a bit of fertilizer to the water, or a little granular bulb fertilizer to the soil - keep the fertilizer weak and don't overdo it though. As it grows, you can start to let the soil dry out a bit between waterings. Again, remain patient. Over the next couple of years you may notice growth spurts - don't panic if one of the leaves suddenly turns brown and dies - energy is going into forming a bigger leaf, which will soon take its place. During this time, a lot of the action occurs UNDER the soil, as your tiny root grows into a bulblet, and then a full sized bulb. Transplant into a larger container when the bulb gets too large, always keeping in mind that amaryllis likes to be cozy, so not too big of a pot - about 1-2" of space around the bulb is perfect.
After growing 3 or more years, you may notice ALL the leaves turn brown and die - don't panic, your amaryllis is going dormant - that is a good sign. It is during dormancy that your bulb creates a flower inside the center of the bulb. It will stay dormant 8-12 weeks, or more. Do not water during dormancy, and place container in a cool, dark spot, such as the basement or cool garage. After 8-12 weeks, you can try to wake it back up with a single, soaking watering. Now is the time to move it to a warmer, brighter location (transitioning to full sun is OK at this point, but try to avoid extremely strong, hot sun) and start watching for either a bud or a leaf to poke up from the middle or side of the bulb. Resume regular watering once you see signs of growth, but save the fertilizer until AFTER flowering. If leaves but no bud and flower appear, go ahead and resume fertilizing - you may need to wait another year or two for your amaryllis to bloom (it will go dormant yearly once cool/dry weather arrives - never allow your amaryllis to remain in a hard frost or freezing weather). If properly cared for, your amaryllis will usually bloom about once a year. Once it does flower, be sure to take lots of pictures to show your friends and be proud of yourself. No matter what it looks like, your firstborn amaryllis "flower child" will be BEAUTIFUL!
| Thread Title | Last Reply | Replies |
|---|---|---|
| this article on Amaryllis by donnacattewe | May 10, 2022 6:08 PM | 1 |
| Planting seed to germinate by CatherineSearle | Jan 18, 2021 11:19 AM | 1 |
| Thank you! by Lalambchop1 | Oct 2, 2018 2:39 PM | 4 |
| Amaryllis by gardenhugs | Sep 26, 2018 4:47 PM | 0 |