Dedicated macro lenses can be expensive, but there are a variety of other methods to shoot close-up photos using the lens(es) you already have, paired with inexpensive accessories. This article examines and illustrates some of these methods.
Contents
This article consists of three broad sections:
1) The preamble, which contains an introduction to the article and some general, high-level background information.
2) A discussion of the equipment that I used when shooting the example photographs.
3) Examples of photos taken using 18 different combinations of lenses and accessories. There's some narrative/exposition in that section, too.
You can skip the introductory stuff and go straight to the examples and photos by scrolling about halfway down this page. But read the disclaimer first.
Disclaimer
I really don’t know what I’m doing. I read a lot and experiment a lot and what follows are my experiences, analysis, and results. I’m by NO means an expert at this stuff, but I sure have a ton of fun with it. But the point here is that this article was not written by a professional…and surely is not the last word on anything.
Preamble
Before I get into the practical stuff and examples, there are a few conceptual things that are important to get out of the way:
First, purists describe macro photography as subject that’s shot at least at a 1:1 ratio (subject:sensor). For example, let’s say that you have a 20mm photosensor (think of it as the digital camera’s film) and you were to fill the entire frame with a 60cm wide dragonfly, you’d have shot that dragonfly at a 1:3 ratio (20:60 reduced). However, if you shot a 10cm wide fly and filled half the frame with it, you’d be shooting at a 1:1 ratio (10:10 reduced). For the sake of this article, though, let’s agree to define macro photography as shooting closeups.
Second, unless the lens is a dedicated macro lens, it probably won’t shoot 1:1 natively (even if it says “macro” on it). For example, the kit lenses that came with my camera shoot at a 1:3 ratio (18-55mm) and 1:3.6 (55-300mm) – not even close to 1:1.
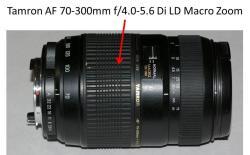
Third, lenses have a minimum focus distance. For example, the Tamron 70-300mm lens (with 1:2 macro mode) that I sometimes use has a minimum focus distance of 3.1 feet. That means that if I’m shooting a closeup of a flower I’m sometimes on my tiptoes to get the thing focused. On the other hand, a true 1:1 macro lens such as the Tamron 90mm (with 1:1 macro capability) will focus as close as 11 inches. That’s a big disparity. In the examples below, I include the approximate focus distance (in this case the distance from the lens to the subject). The closest is 3/4"...and that would be good to know before you embark on a funnel-web spider shooting expedition.
Fourth, I shoot a Pentax camera and that doesn’t matter a bit, apart from the type of mount that it has (and that it doesn't use proprietary batteries - I can buy backups at the 7-11 or a tienda or even that mud hut in Ethiopia...seriously ). If you buy any of the equipment that I mention later in the thread, just be sure to get something that is going to fit your lens/camera type. Everything I discuss in this thread is either not camera-specific or is available for any DSLR brand.
Fifth, dedicated,1:1 macro lenses start at about $500 and go up from there. That’s a lot of cash for a specialty lens that may not get used much.
So the point of this thread is to describe some techniques to get close-up shots (even legitimate 1:1 or better) inexpensively and in creative ways, using the lenses that you already have.
Note: A critical (and frustrating) concept in close-up photography is focus depth. That is to say, how much of the subject can you get in focus clearly. A complete discussion of focus depth is beyond the scope of this article, but a
thread in the photography forum outlines the basics of focus depth. For this discussion, keep in mind that the closer your lens is to the subject, the thinner the slice/focus depth will be. And in some of the examples below, that's really pretty close.
The stuff I describe here is pretty inexpensive compared to a macro lens…and some if it you may have in your kit already. You also don’t need to buy all of it (by any means) to take good close-up shots. I got most of this stuff from Amazon (and will include links so I can justify using their images), but a good photography store will have it, too. I’m not flogging any particular brand or solution or vendor, but this is the stuff that I have collected over the past few years and used in the shots in this thread (and I buy a lot of gear from Amazon because we don't have a local photography shop here).
Note: While looking at this stuff be aware that the more space between the lens and the sensor, the more light is required to get proper exposure. Also, adding glass decrements light, too, so you’ll need to account for that as well.
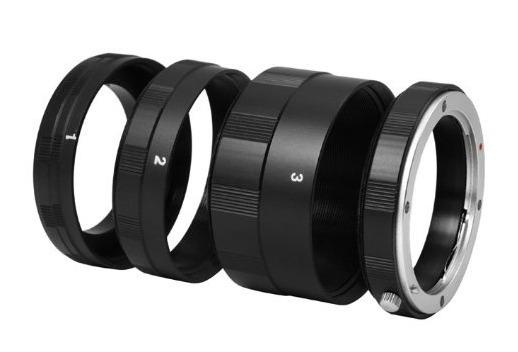
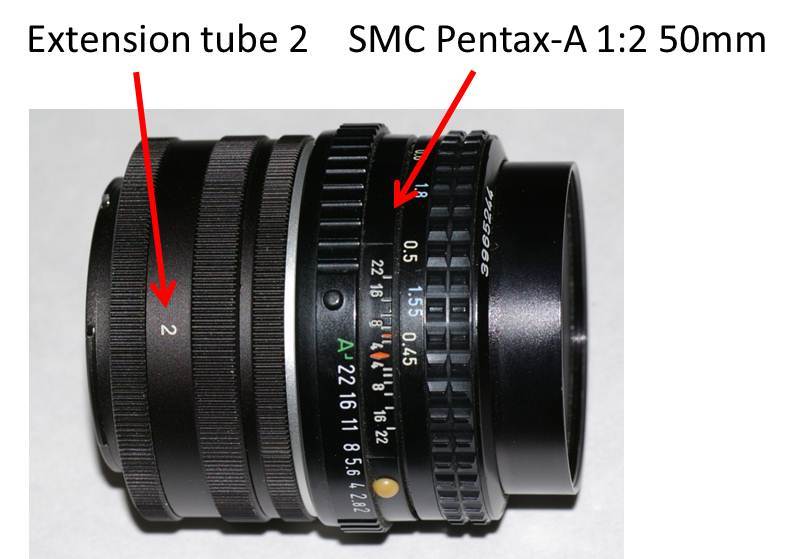
Extension tubes
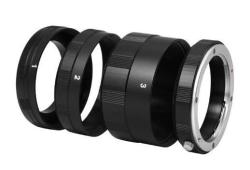
These usually come in a set of three (labeled 1, 2, 3) and can be used in combination. On both ends (lens-side and camera-side) are adapters to make it work for the lens/mount. These tubes put the lens farther from the sensor, magnifying the image that hits the sensor (lens math and physics belong in another thread written by someone far brighter than I). They sure soak up the light, so all things equal, start with a fast lens when you use these. These are mount-specific, so if you buy a set, get the right ones. I got some for my Pentax from
Amazon for $10.70.
Note: Extension tubes separate the camera body from the lens and contain no electronics or contacts. Therefore the auto-focus and auto-aperture features of the lens/camera will not work. You must shoot in manual mode. Some companies do offer versions with built-in electronics, but they've received poor reviews and it's hard to maintain the contacts from what I understand.
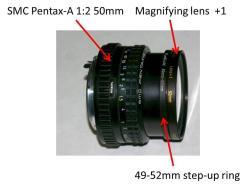
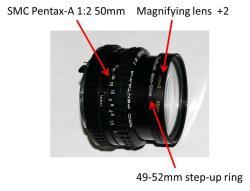
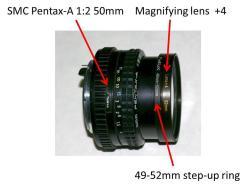
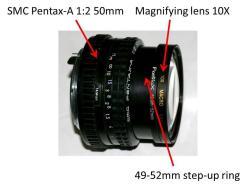
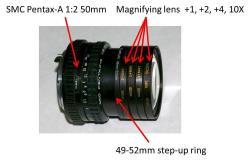
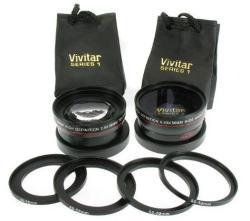
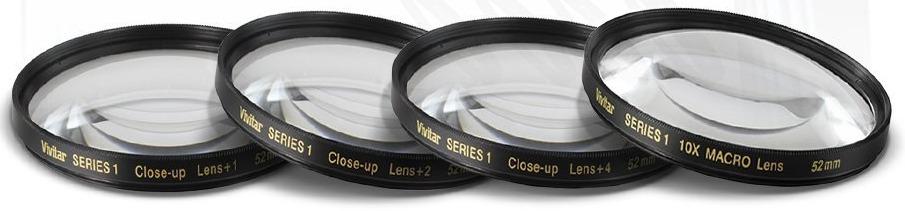
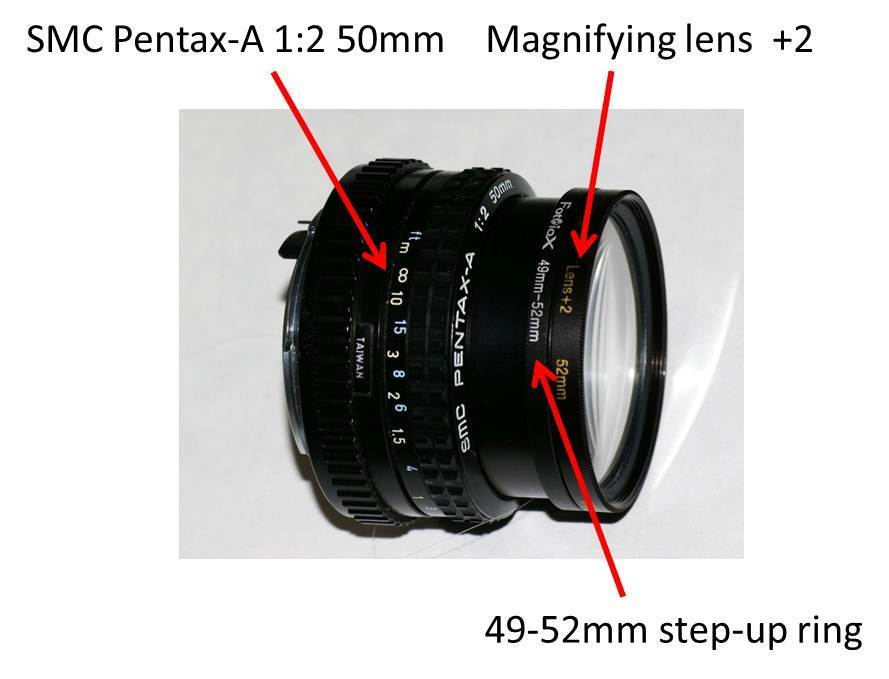
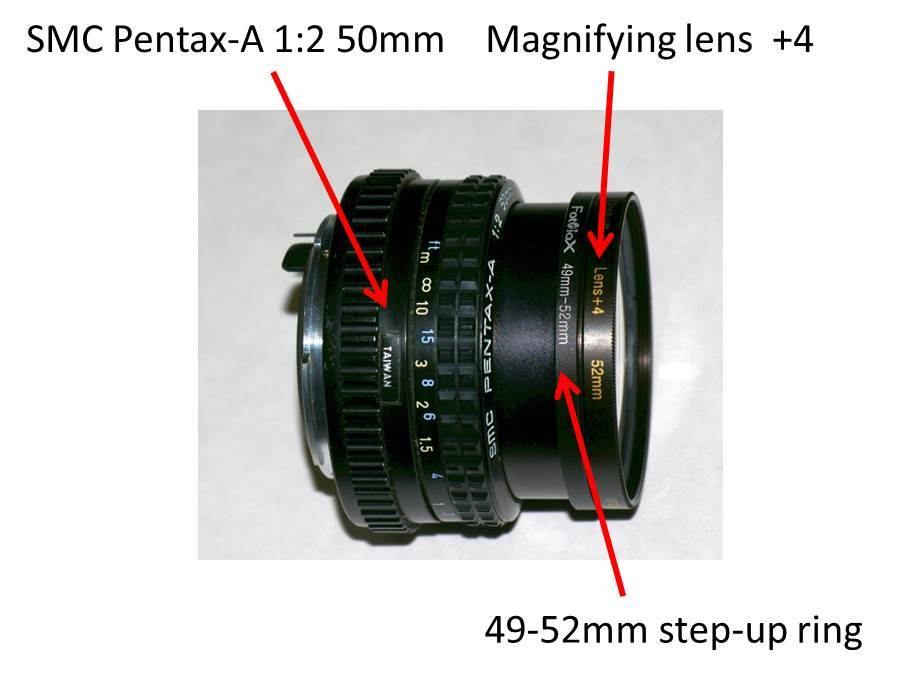
Magnifying lenses
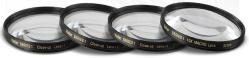
These are just extra lenses that screw onto the front of the lens (exactly like filters do). They come in different strengths (most kits include 1x, 2x, 4x, and 10x) and can be screwed together to create different combinations. I’m not entirely sure what the 1x, 2x, etc., mean – but it’s not a 1:1 doubling of magnification (as you’ll see below). These are not mount-specific, but come in a variety of sizes. Make sure you get the right ones for your lens (or get some adapters described below). I got a 52mm set from
Amazon for $21.99. That set also came with three filters, a lens cap, a hood, and some other junk. Less expensive sets are available.
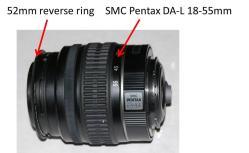
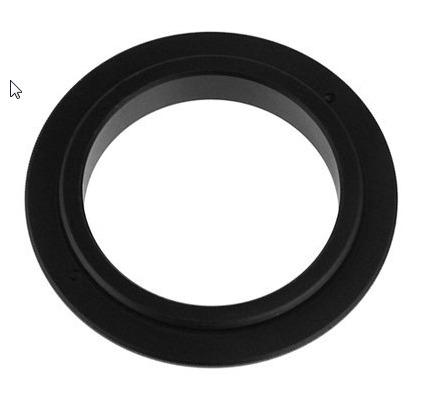
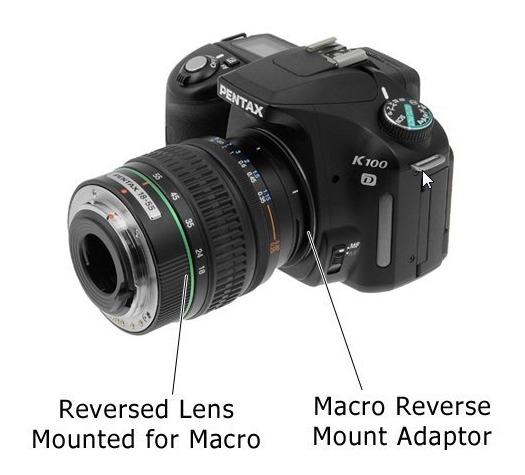
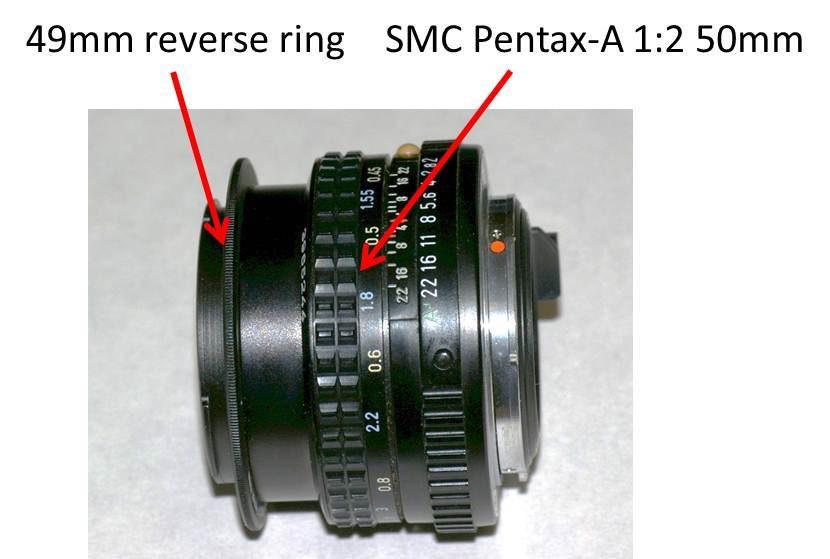
Reverse rings - camera mount


An old, tried technique for taking close-ups is to invert any lens (swap camera-side/subject side). You don’t need any special equipment to do that…just flip the lens around, hold it right up on the camera (carefully), and shoot. Or don’t..but get an inverter ring instead that does the job, prevents light leak, and actually centers the lens. These are mount-specific, but inexpensive. I got a 49mm ring from
Amazon for $10.76. Other sizes are available.
Note: Some people report trouble getting these on and off the camera without damage. I've never had any problems with it, but keep that in mind and take care when using these. Being slow and methodical and mindful when dealing with photographic equipment seems to account for a lot of potential hiccups, though (at least in my experience).
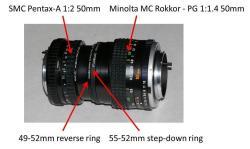
Reverse rings - couplers
Another neat technique is to screw two lenses together, face-to-face. There are various male-male adapters that allow this and they come in a variety of sizes. You can use step-up/step-down rings (described below) to account for different lens diameters. I got a 49mm-52mm from
Amazon for $9.93.Other sizes are available on that link.
Combinations
You can use these techniques and this equipment in combination, too. For example, you could use an extension tube, your lens, and a magnifier on the lens. Or an extension tube with two coupled lenses.
Et cetera.
Other nice things to have
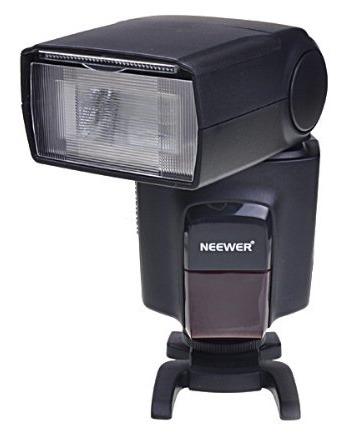
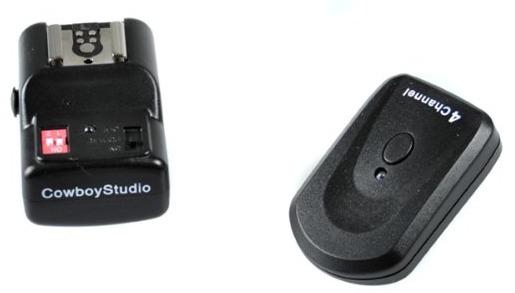
Off-camera flash setup
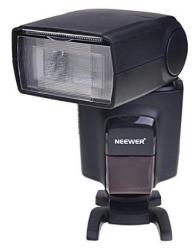
Your on-camera flash won’t work well for some close-up shots (think an inch or so away from the subject). Having a flash that you can mount on a tripod, set on a table, or hold in your hand when shooting can make a big difference. The flash I have (Neewer TT560) was really inexpensive (comparatively) at $38.41 from
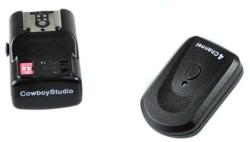
Amazon , but it’s really neat because you can adjust the intensity on the flash itself. (Other, more expensive models can do that automatically.) I use a $20.28 wireless flash trigger (transmitter on the camera hotshoe and receiver attached to the flash) that I got from
Amazon for handheld or on-tripod flashery. Both of these items will work with any camera with a hotshoe -- they're not brand-specific.
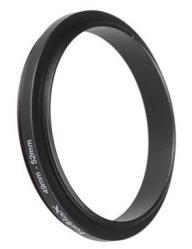
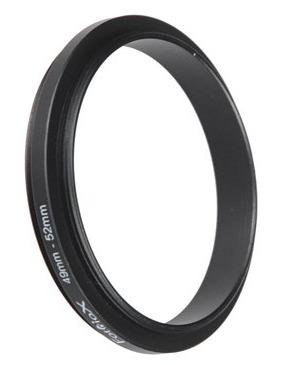
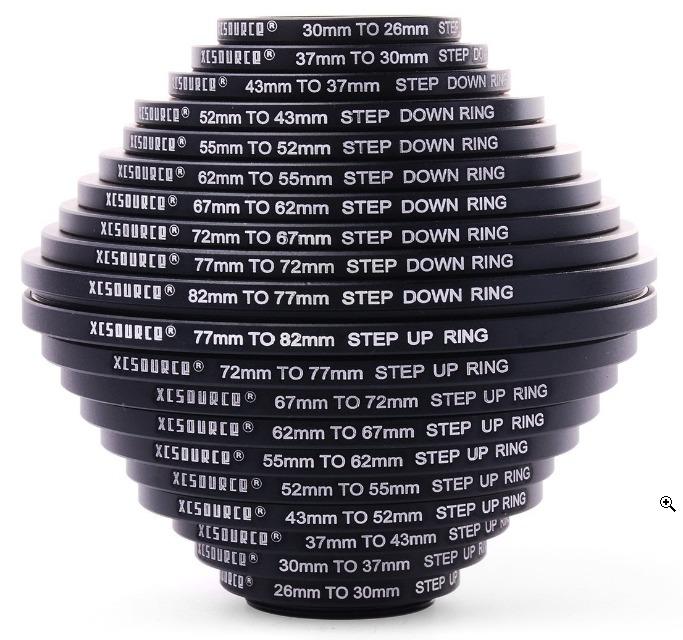
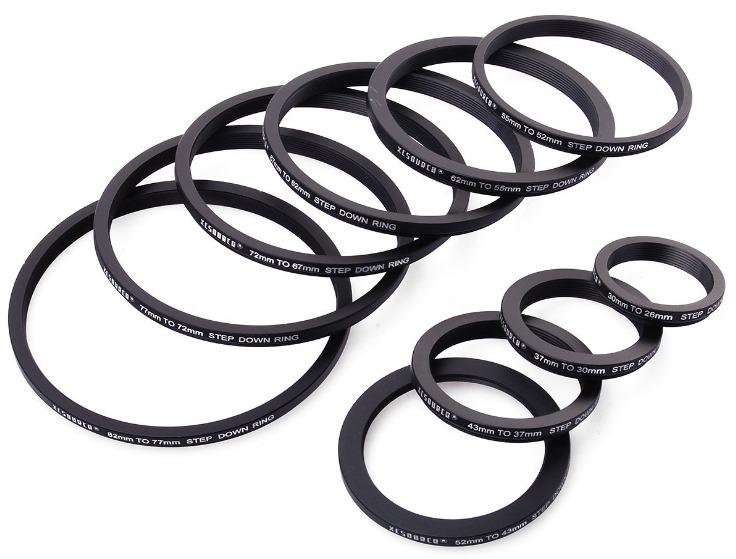
Step-up/step-down rings
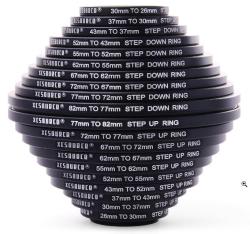
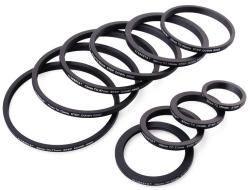
Step-up/step-down rings can be used to adapt the size of the threads on lenses / couplers / filters / etc., so that you can use the same filter/reversal ring with a variety of lenses. You can buy individual rings, sets of step-up or step-down rings, or a combo-pack with everything in it. I got a kit from
Amazon for $14.99. These are not camera- or mount-specific. It's just about the lens size.
When using these, watch for vignetting. Also remember that each adapter increases the distance of the lens from the sensor (increasing magnification) and also decrements the amount of light hitting the sensor.
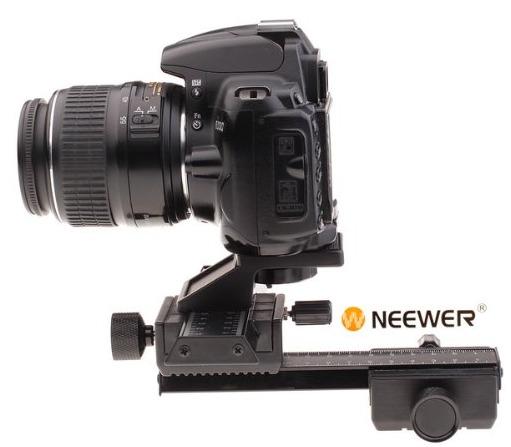
Focus rail
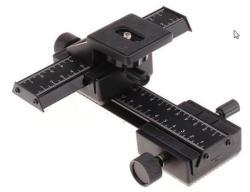
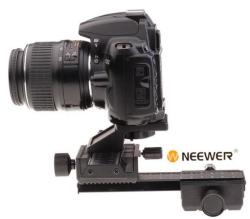
This device mounts on a tripod and moves the lens (entire camera) from side-to-side and front-to-back to allow for finer focus than you get with the focus ring. When the focus depth is measured in fractions of a millimeter (I’m not kidding), this can be critical. It’s only useful, of course, when your subject is absolutely static. I bought the one I use from
Amazon for $22.71. It’s a little squirrely and quirky, and if photography were my career, I’d get a higher-quality model. But for ~$20.00, it performs admirably.
Remote shutter release
Most DSLRs can be triggered remotely. This is important for close-up photography because once you set the focus, the less you touch the camera, the better. Even pushing the shutter-release button can wreck the focus. My camera has a setting that will take the shot three seconds after the signal from the remote. Depending on the manufacturer and the camera, other features may be available by remote control, too. I bought an off-brand remote shutter release for my Pentax from Amazon for $6.99. Remotes for other brands are available, too.
A Few General Tips
I don’t know whether any of the following are Canon-ized (heh) or even considered poor technique…but I do know that I get good results from them. As you’ve realized by now, I’m a seat-of-the-pants kind of hobbyist.
Use continuous or burst mode
If you’re shooting at an absurd magnification (like I do sometimes) or shooting insects or other moving critters, shoot in burst mode and control (or not) the focus by moving the camera (your face) rather than moving the focus ring. Recall that focus depth is so incredibly thin when shooting close-ups that your auto-focus probably won’t be that reliable - or quick. If you shoot a number of shots of the same thing, you’ll likely get lucky and find that a few end up in good focus. You’ll surely end up less frustrated than if you took a single shot of each subject.
Shoot RAW
Simply put, the RAW format contains lots more data than the .jpg format (think of RAW as the negative and .jpg as the processed print). It’s lots easier to salvage a poorly exposed RAW shot than it is a .jpg. And when you’re in 100pct manual mode (with the ISO, aperture, and shutter speed fixed) not everything comes out 100pct perfectly. The downside to this, though, is that burst mode is a good deal slower when you use RAW rather than .jpg (think writing time for larger files).
Use the live view
My camera can display a live view of the photo and allows for 10x magnification. Others will even let you send the live view to a monitor or laptop. It’s tons easier for me to get an accurate focus on a bigger screen than it is through the viewfinder. Of course, this only works with a static subject and a static camera. I use this technique only when the camera is on the focus rail.
Use a tripod (or monopod, at least)
It’s a pain in the neck to lug a tripod around, but I get lots better shots when I do -- even in burst mode when I’m swinging the camera around chasing bees.
Note: If you buy a cheap, flimsy tripod, you'll regret it. Although the theme of this thread is budget, don't skimp on the tripod.
Focus manually
As noted, so much of close-up photography is about focus. Believe it or not, you can focus more precisely than your camera can for macro shots. A lot of people claim success shooting macros using automatic focus, but I think that given enough time and experience, you’ll be focusing manually eventually.
Experiment
Just try stuff. Just do. Digital “film” is free. Wish I had more words here to give the idea more weight…but it’s just simple.
Shoot lots
Combined with burst mode and experimenting, this is key. If you’re prepared properly (with memory cards, batteries, thought, planning, etc.), there’s no reason to be economical with your shots.
Cautions
This thread could also be called:
Quick ways to get your mirror, lenses, and sensor filthy. Or,
how to strip the threads in your lenses in one easy step. Or any one of a number of other things. As you experiment with this equipment and some of these techniques, be mindful. There’s a lot that can go wrong -- but it doesn’t need to.
The Setup
I took 18 series of shots using different combinations of lenses and equipment. Well, 36 I guess because I shot both indoors and out to illustrate each combination. It's one thing to shoot close-ups in a controlled environment, but it's entirely another to wander outside and make it practical. So I thought it was important to include examples of both.
I’ll go through each series (by category) and give examples of how stuff turned out. I’m not going to draw any conclusions, but will let the photos speak for themselves – and let you decide whether there are any worth pursuing. Look at how they handle the light and color, how the edges (especially corners) look, vignetting, artifacting, etc. The quality truly varies.
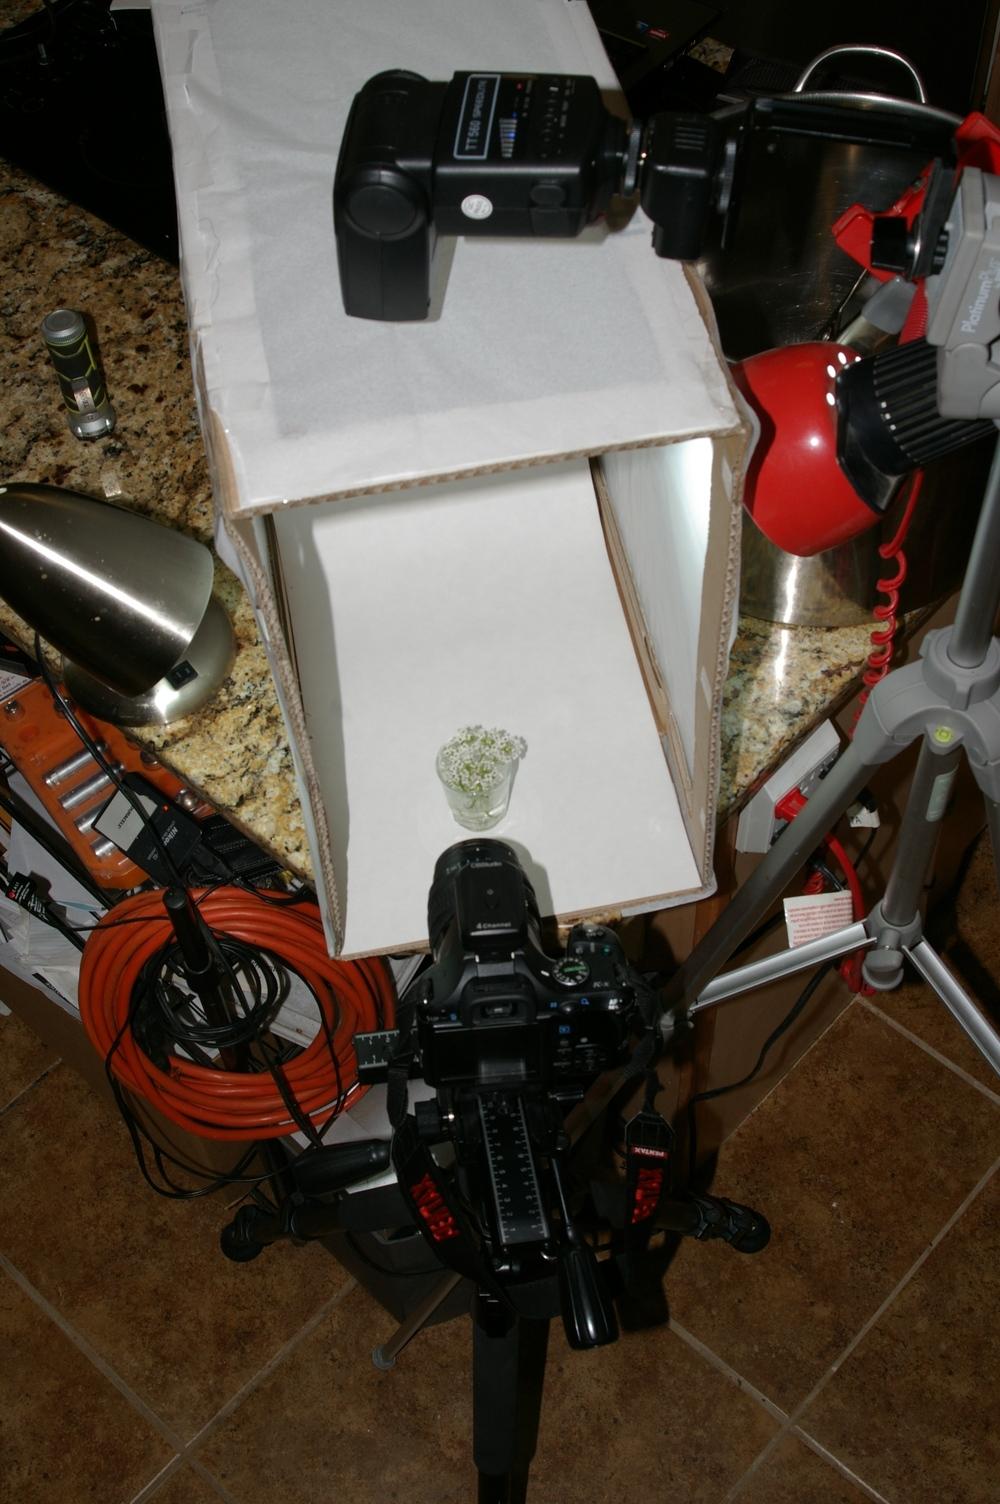
This is what the indoor setup looked like:
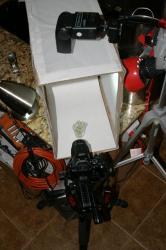
I built a sloppy lightbox (plans all over the ‘net) out of a cardboard box and tissue paper. It worked okay, but was a little rough because most shots required the subject to be nearly on top of the lens (thus allowing less light to hit the front of the subject). But it helped tons, and the shots wouldn’t have been the same without the box. Amazon also has some lightboxes for around $20 and I have to think that they’re more versatile/consistent. The two lights have 75W daylight bulbs in them (instead of soft white). I used the flashlight to illuminate the subject as needed while focusing. Note the focus rail on the black tripod, too. (Ignore the extension cord and other junk.) Also note the flash transmitter on the camera hotshoe and the receiver at the base of the flash (between the flash and the gray tripod).
On the indoor photos: I didn’t crop or retouch or manipulate these in any way for a few reasons. First, for scale. Cropping would make comparisons between or among the examples impossible.
Second, each combination deals with light a little differently. If I changed the light/brightness/color/etc., in post-production we’d lose data and the comparison would be lots weaker. (Oh, and I’m aware of the artifacts on the sensor. It's really time to get it cleaned…again. But with the volume of photos here, I just didn’t take the time to shop them out.)
I shot each set at a variety of apertures, but most of the better shots come at f/8 or higher. Exceptions to that will be apparent. I also tend to shoot and select photos that are a little underexposed. It's a quirk of mine. Maybe being a little colorblind doesn't help, but anything that's a little dark isn't the fault of the camera or the lenses or the setup -- it's all mine in the section. And it looks as if all of the indoor shots could use some attention to white balance.
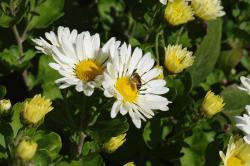
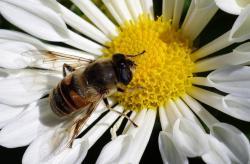
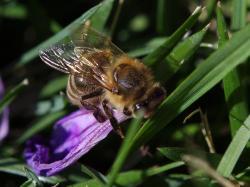
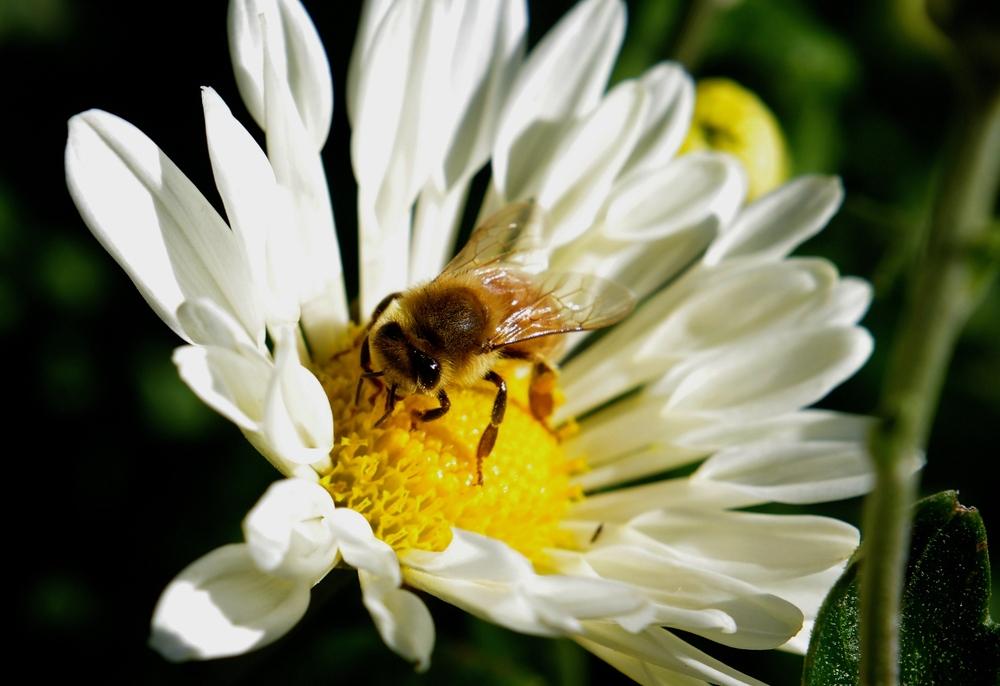
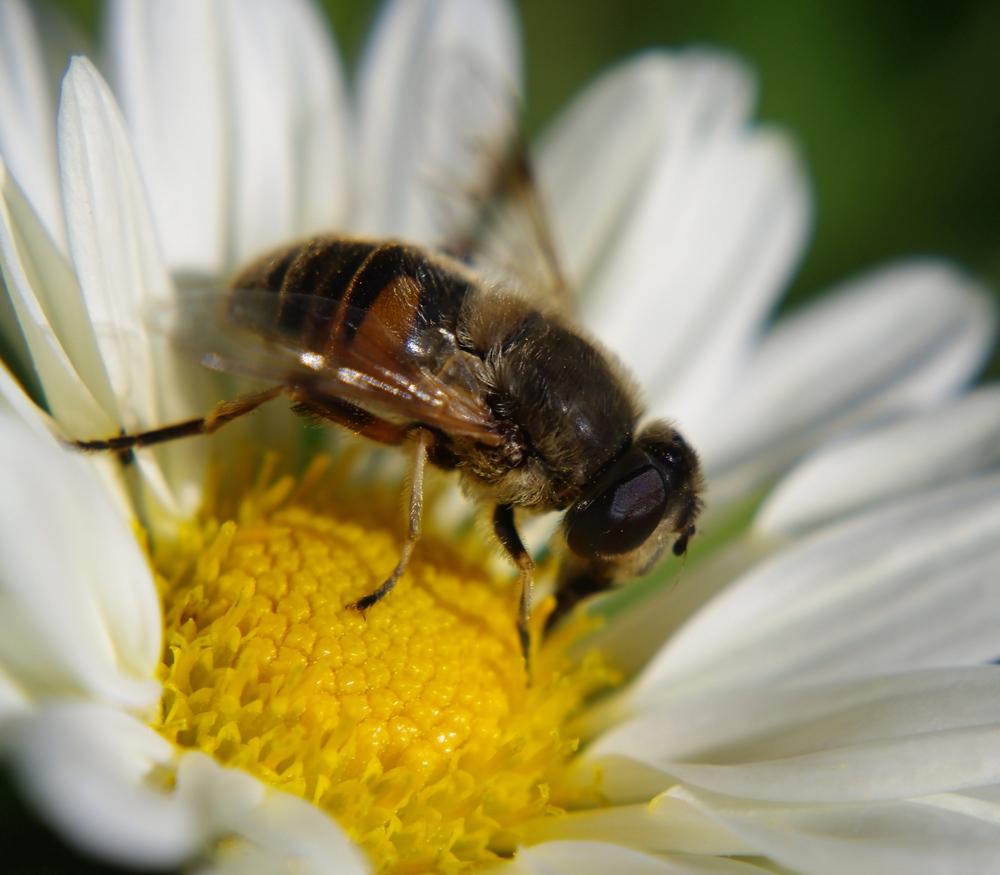
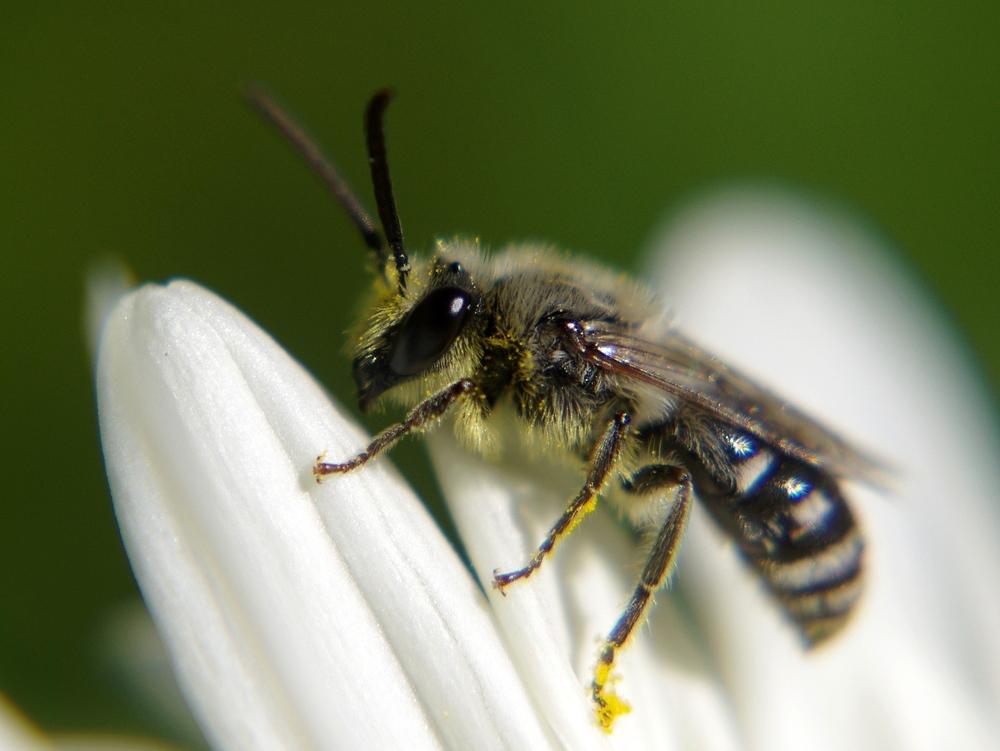
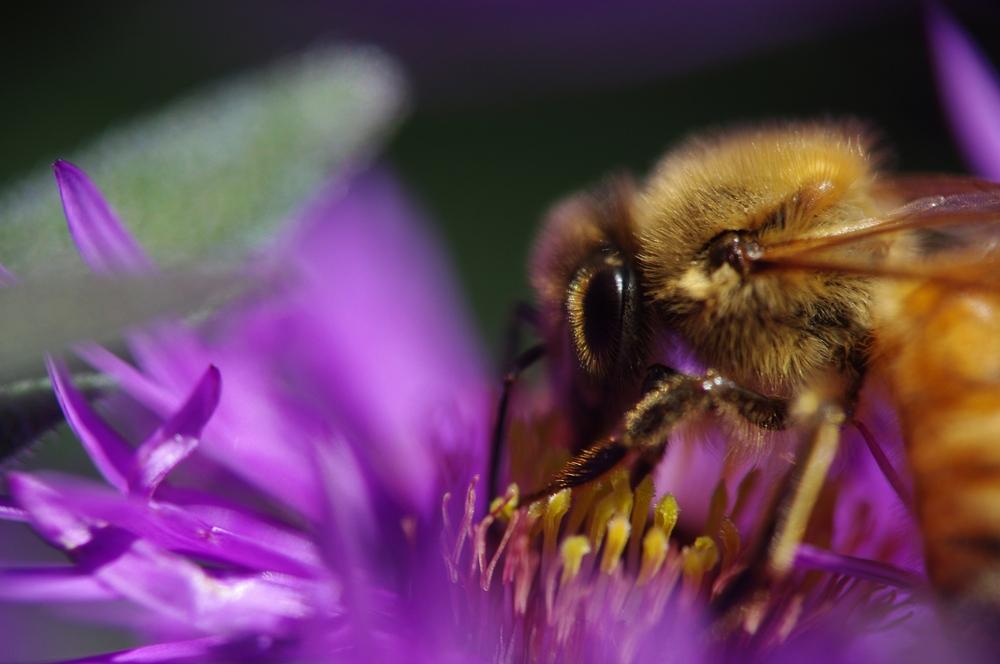
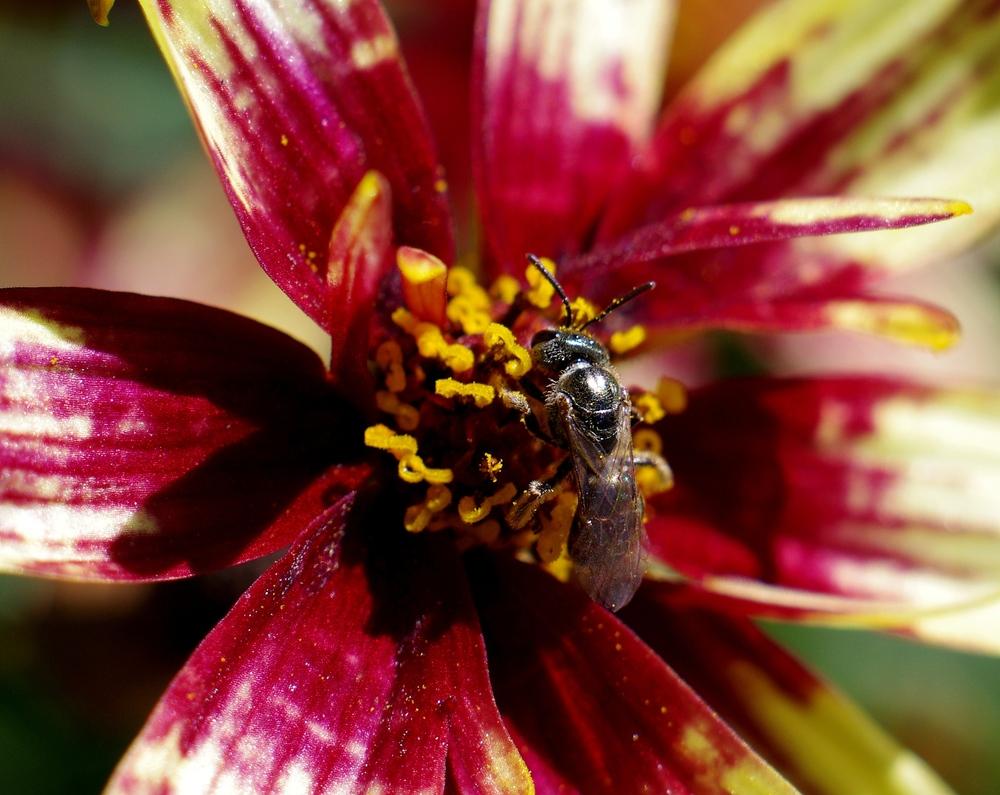
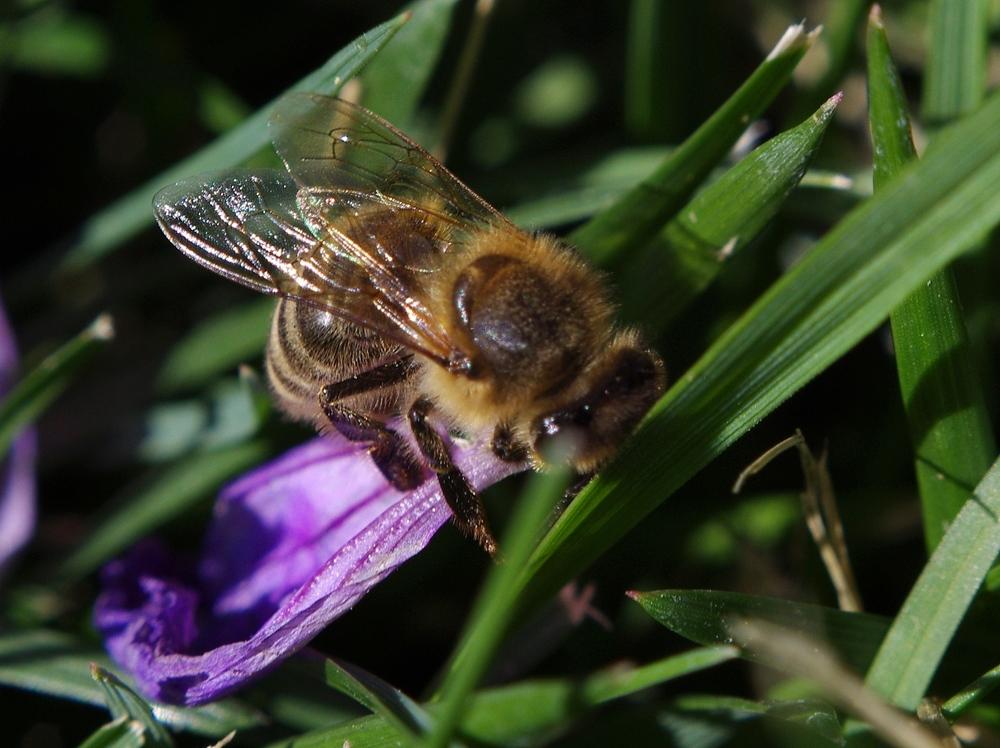
Also, I shot lots of bees. It's an affliction of mine. They come from miles around to enjoy our buffet. I think our yard's bee-dance is the most popular of the summer. All the bees are shakin' to it.
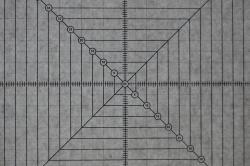
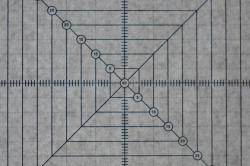
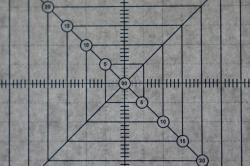
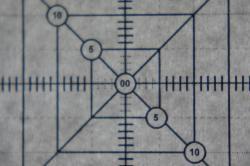
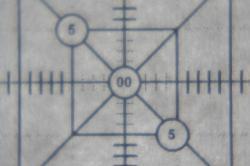
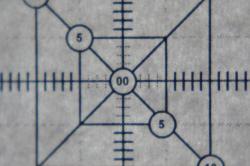
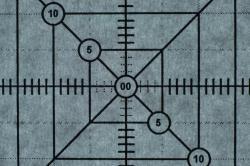
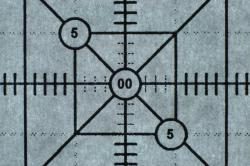
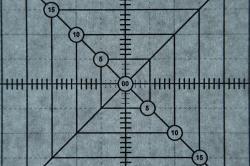
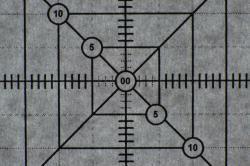
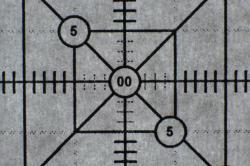
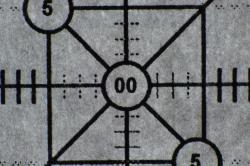
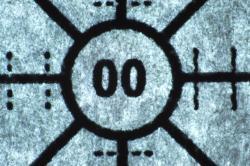
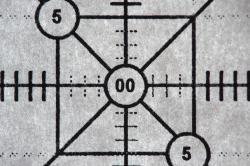
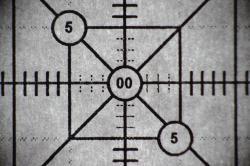
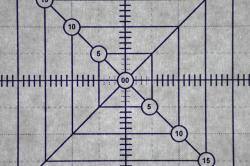
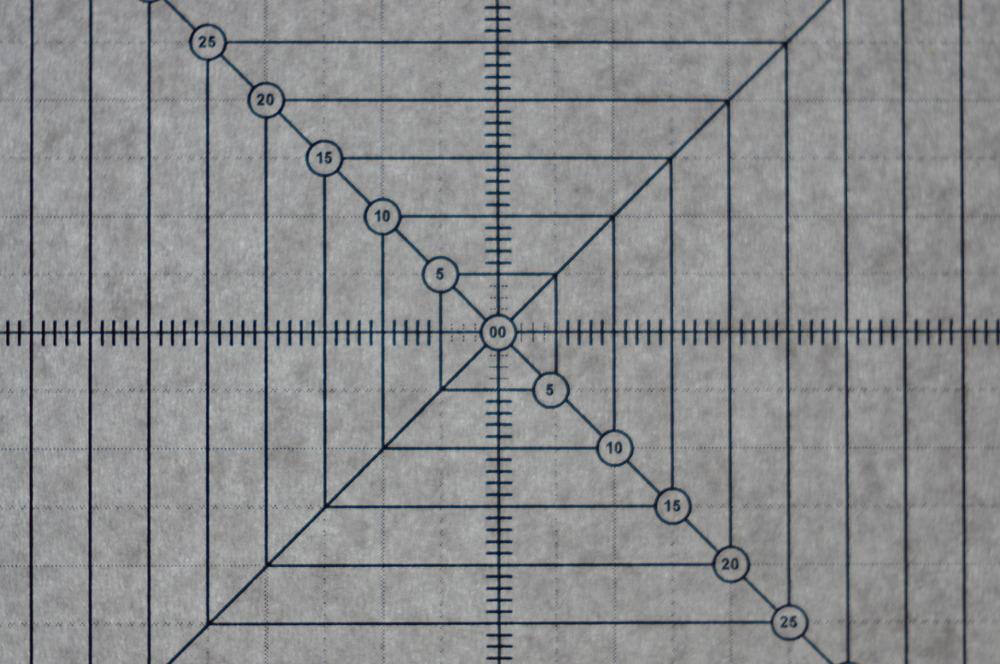
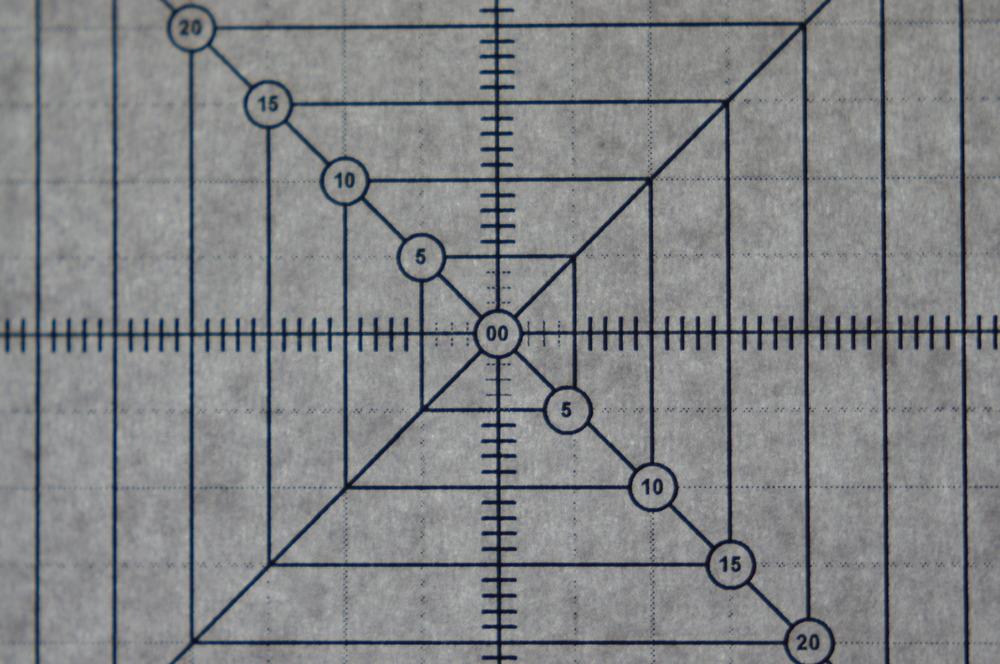
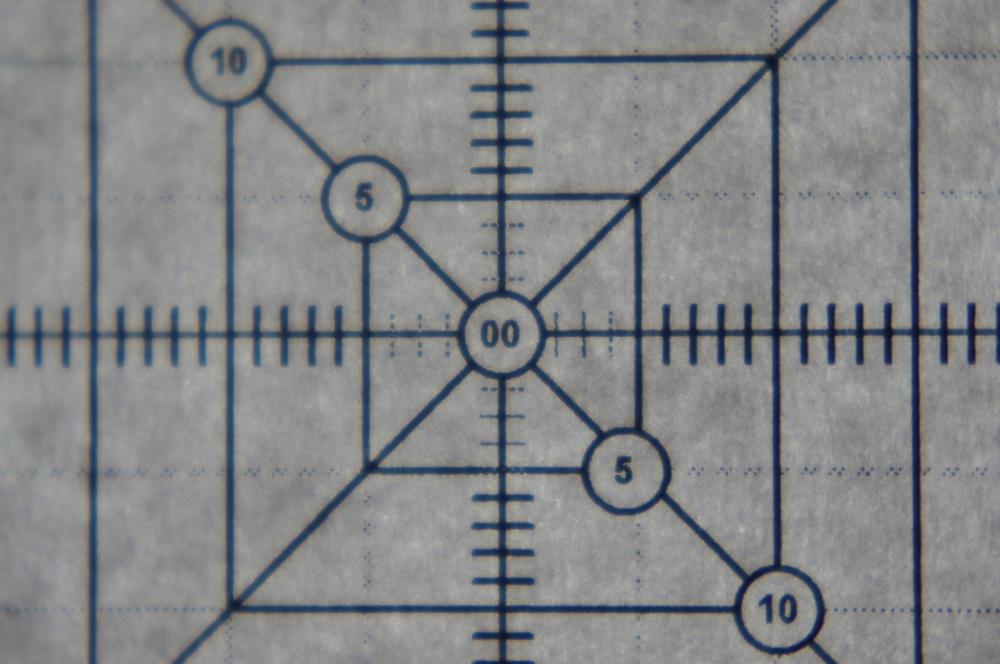
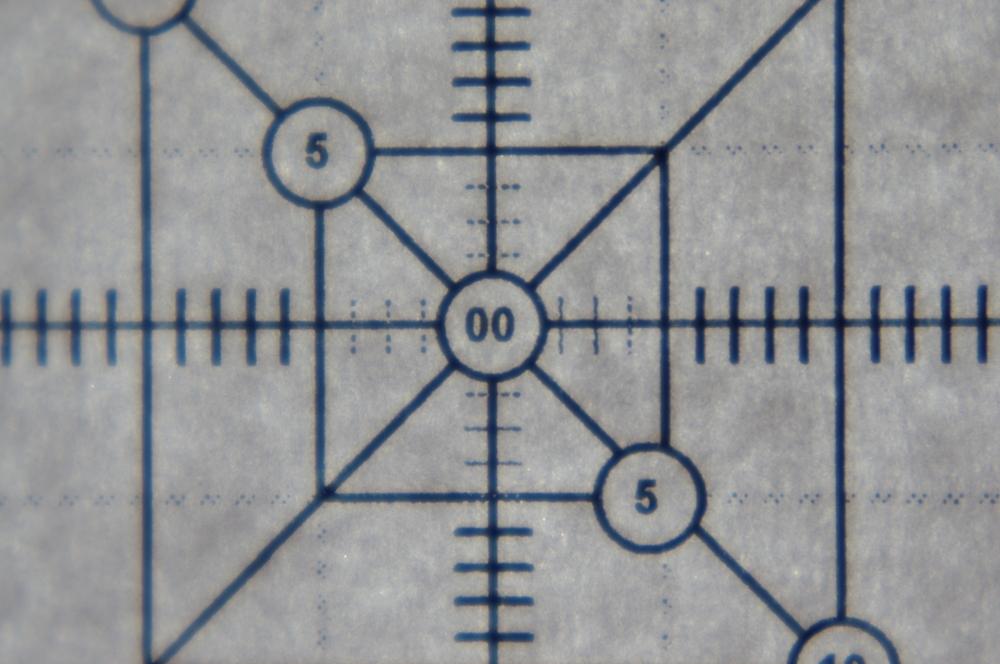
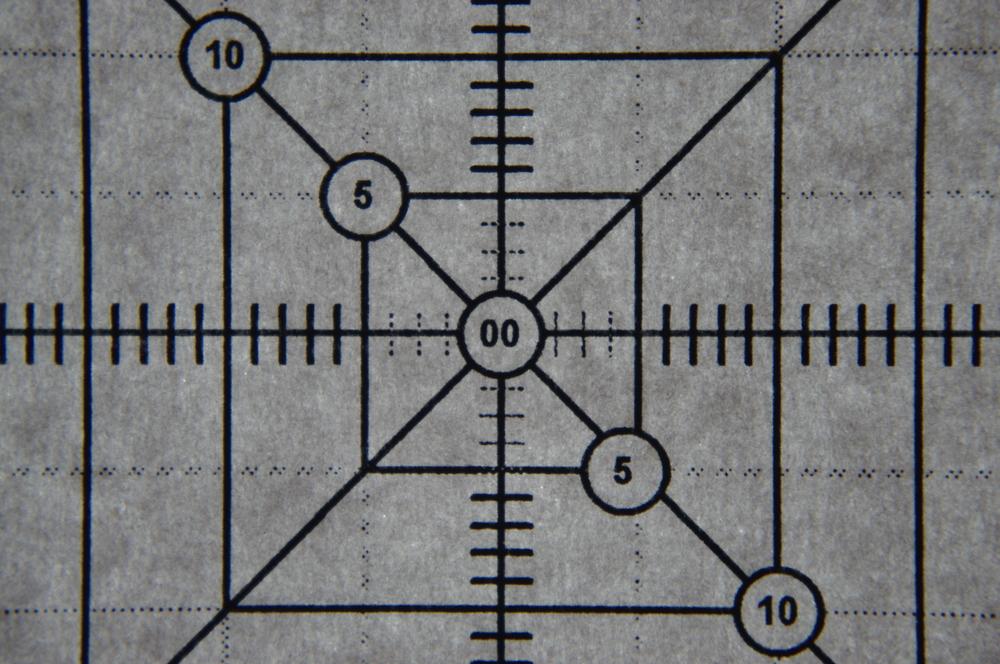
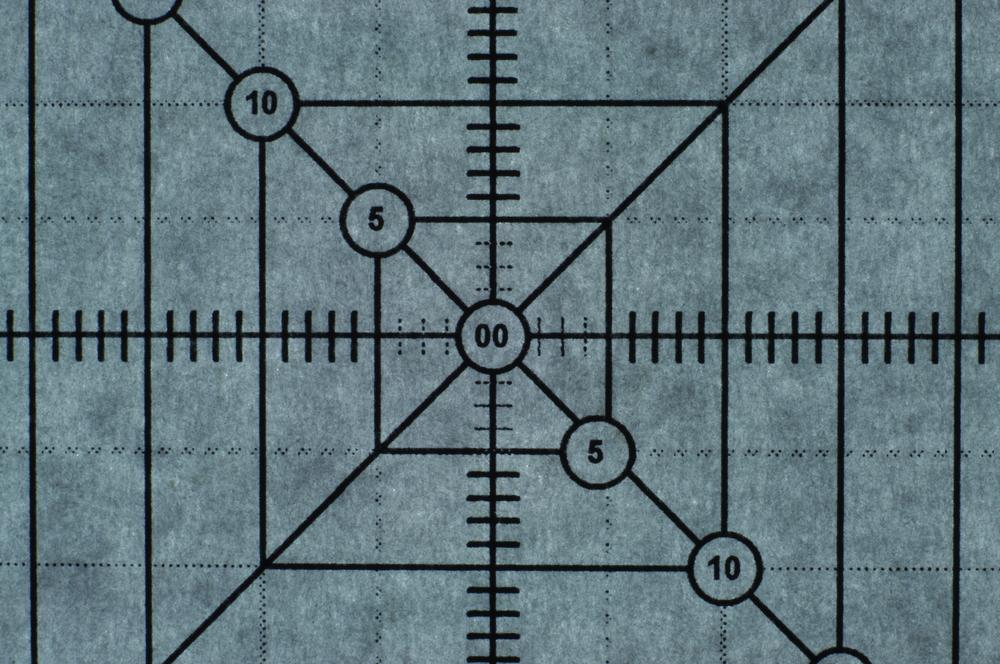
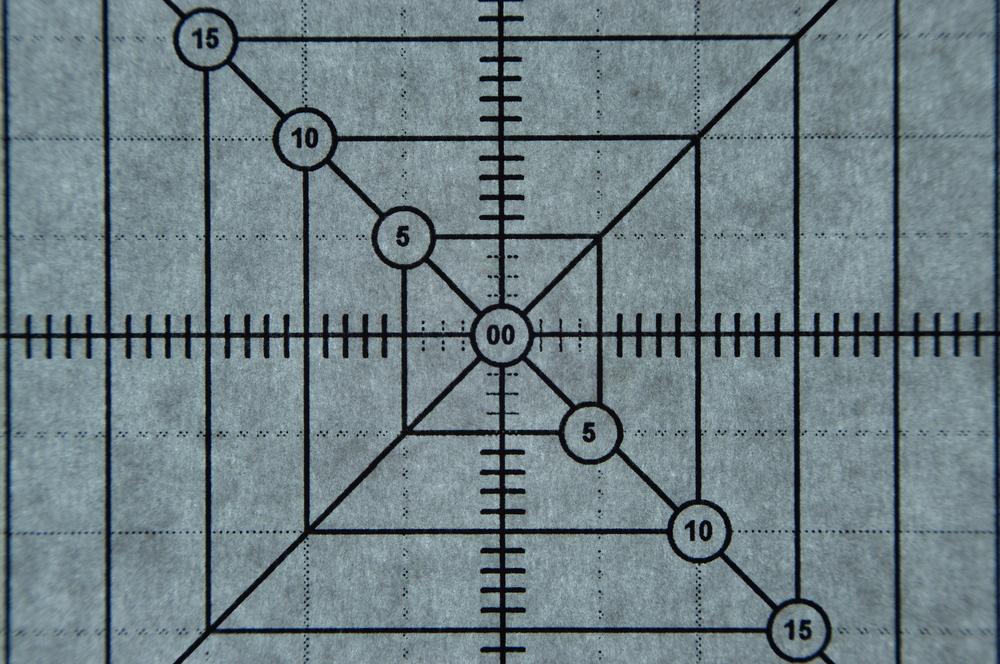
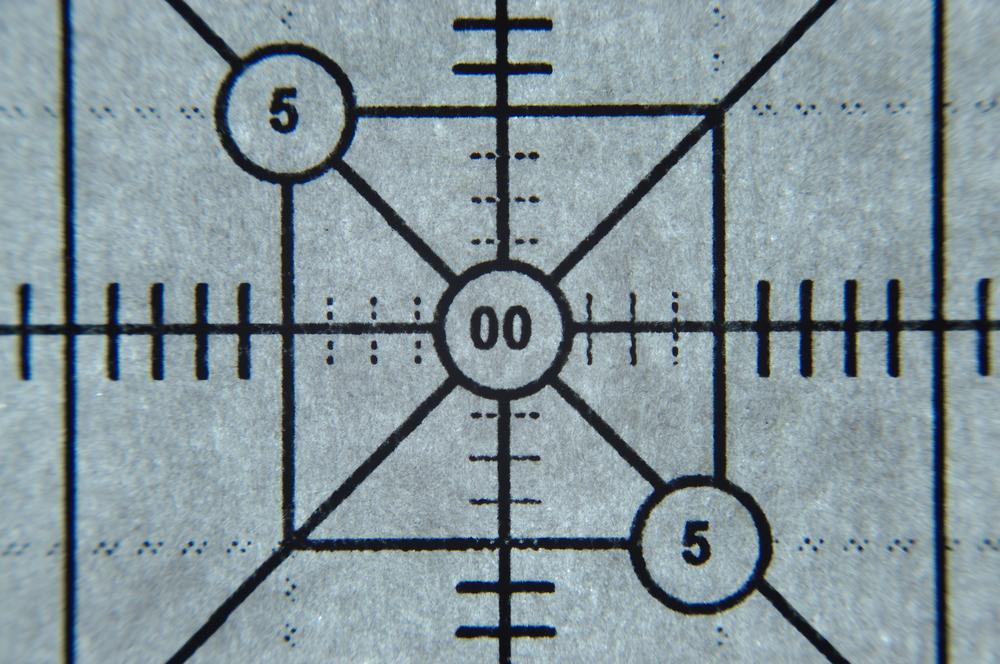
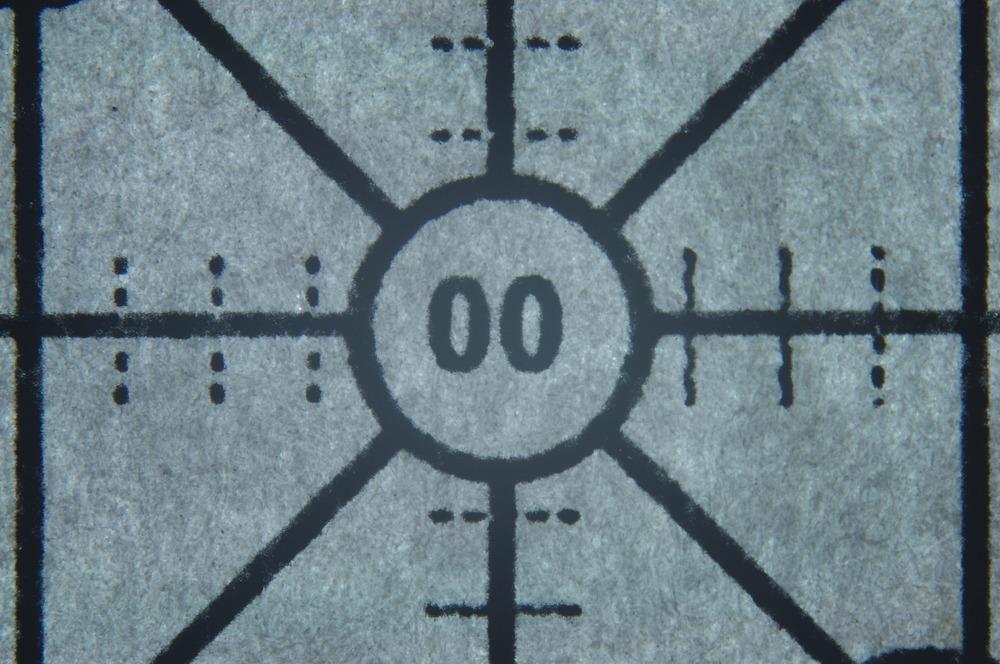
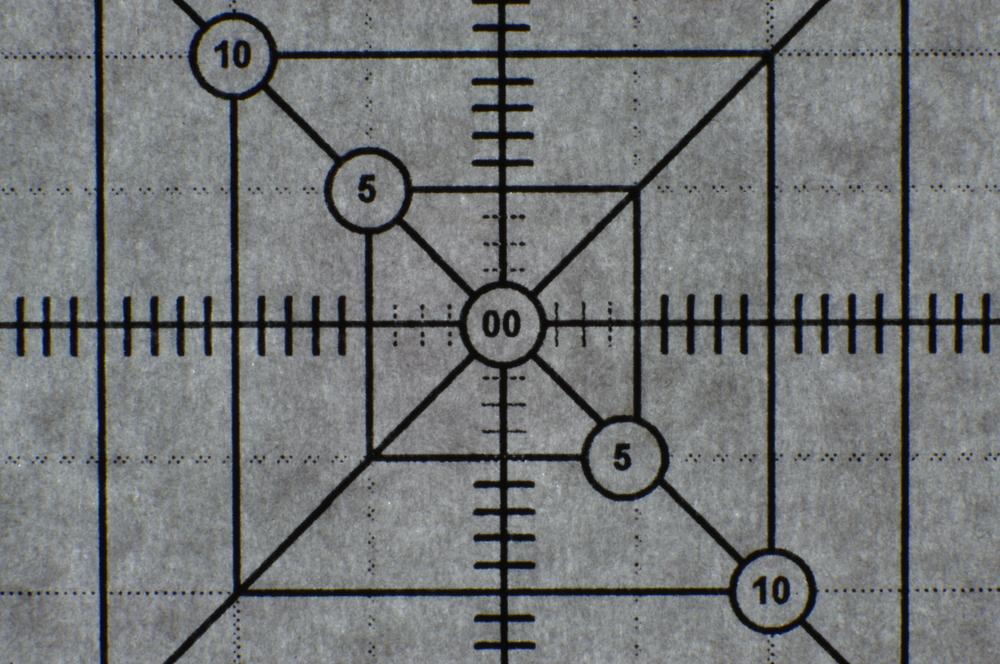
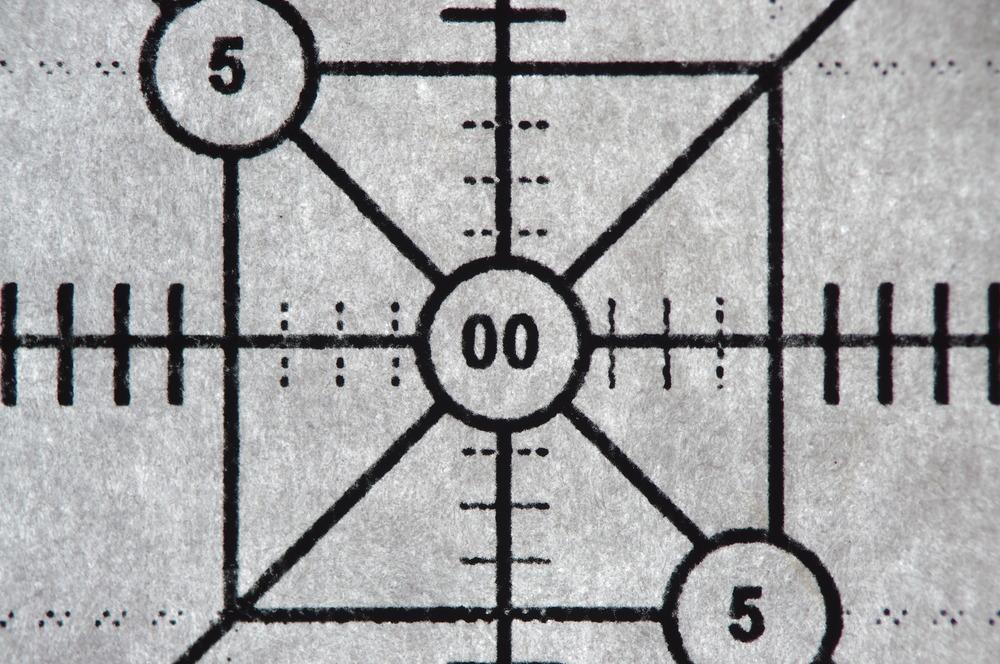
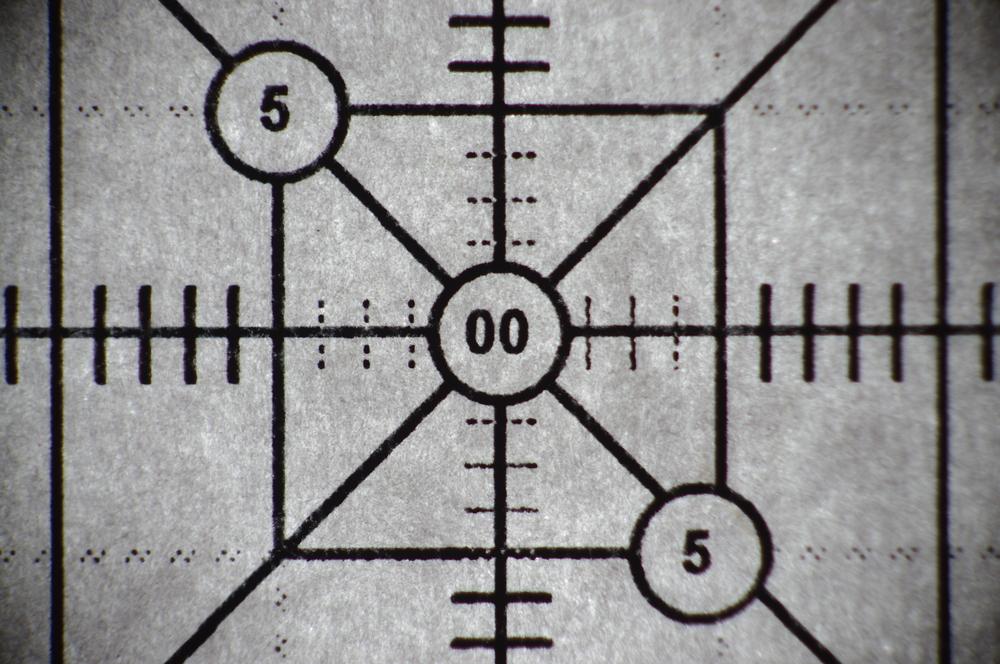
A couple of notes on scale
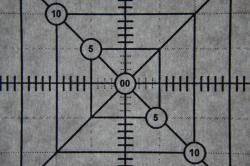
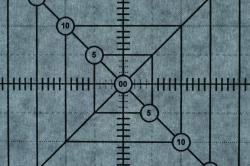
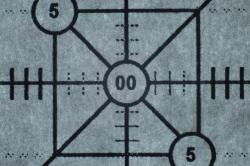
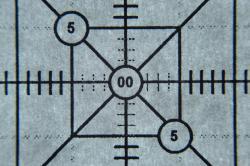
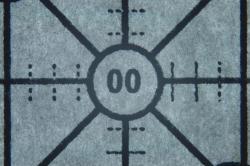
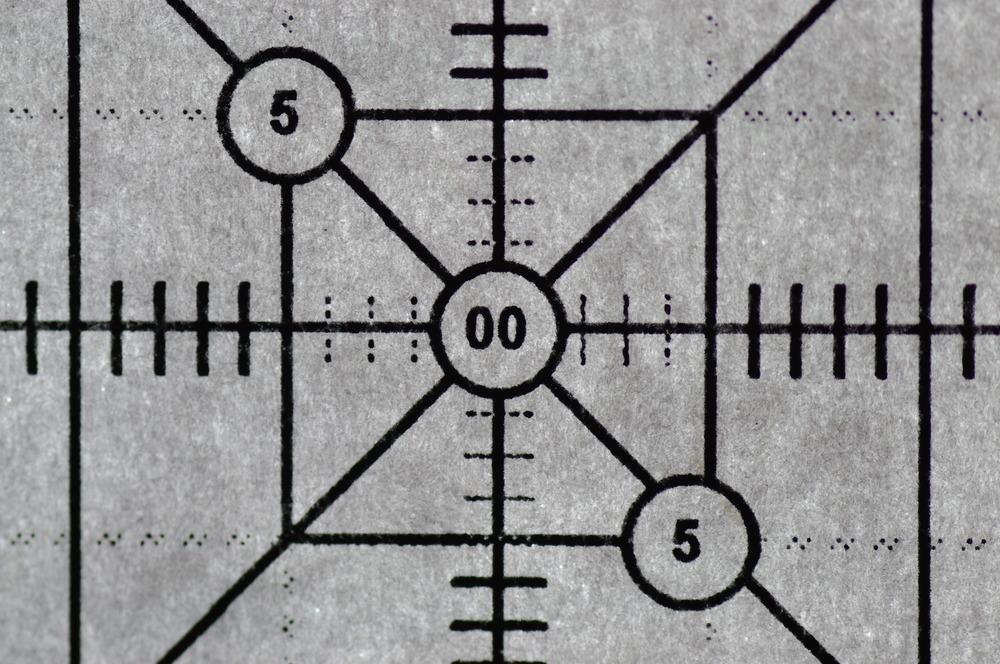
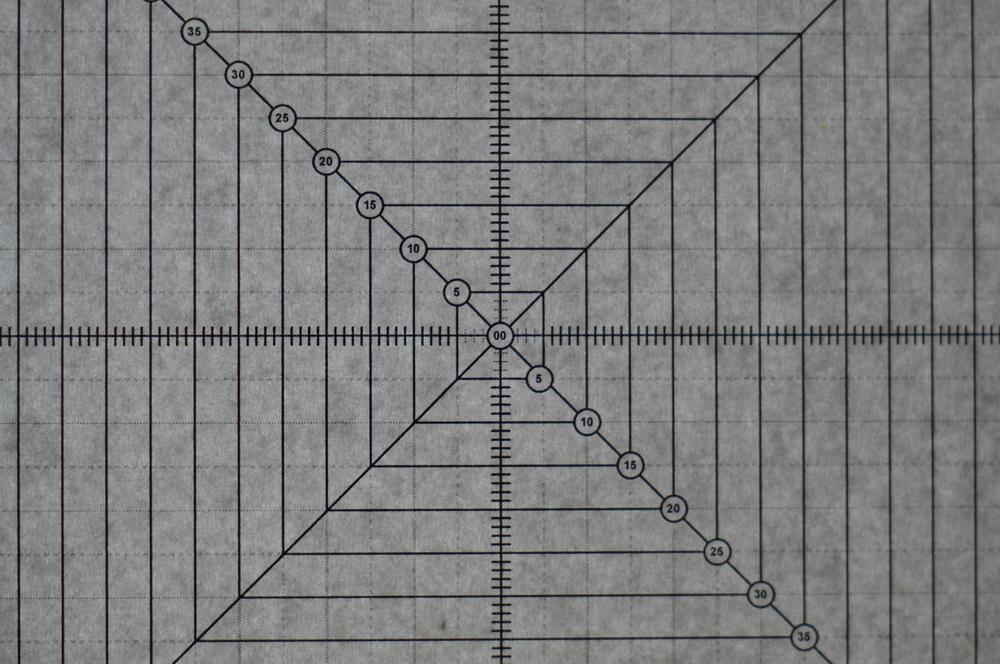
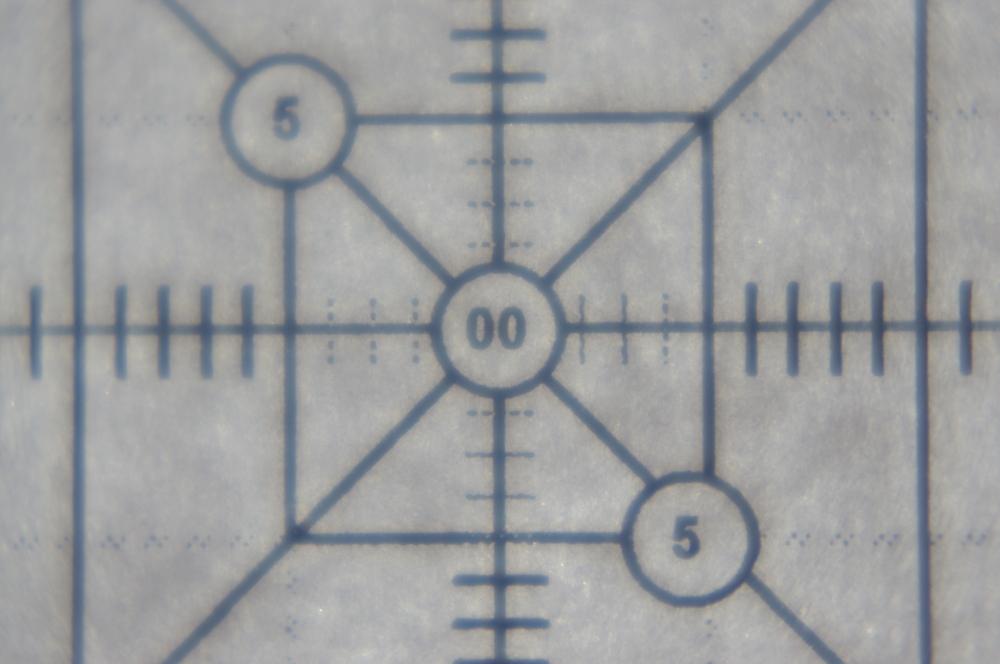
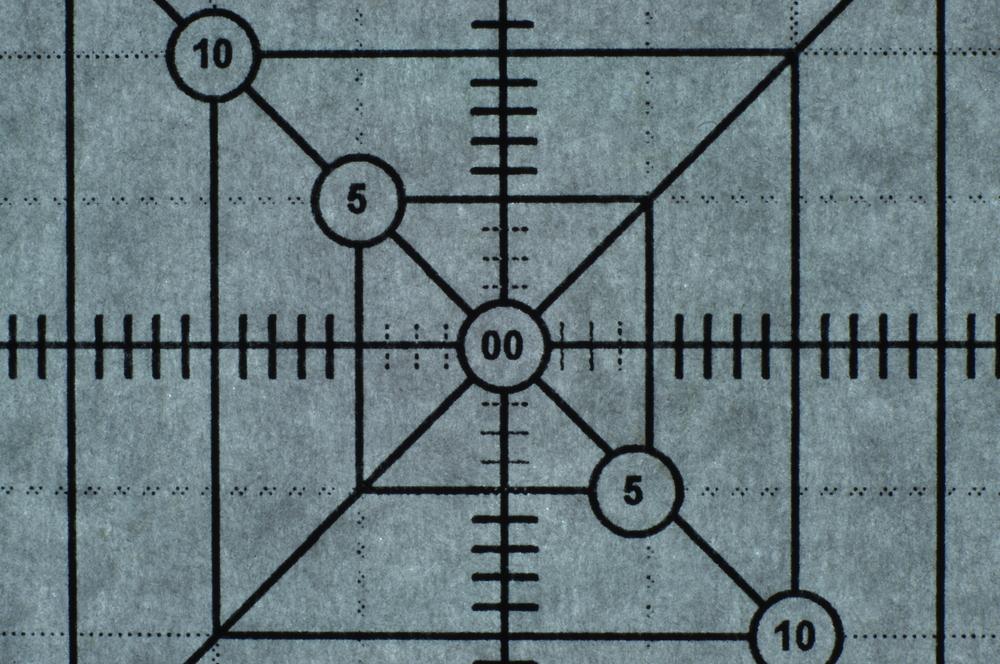
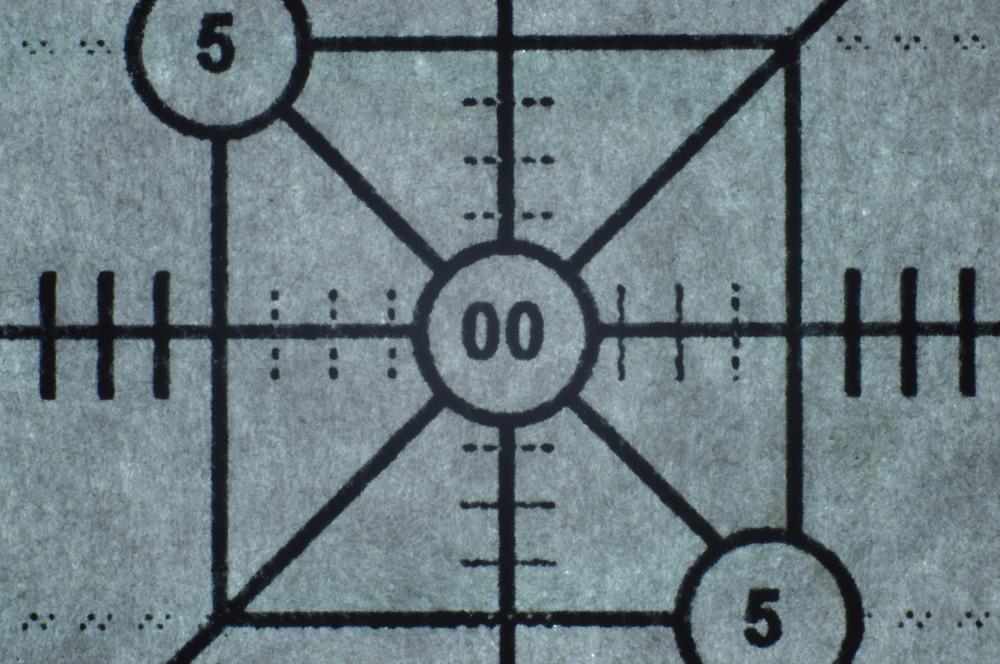
I’d initially thought I’d shoot a ruler (millimeters for scale) with each combination in order to show its scale. That didn't work very well, so I created a more detailed scale in Visio, back-lit it, and took a shot with each combination. The scale is in millimeters. Here's a shot using a true 1:1 lens for reference (it's a 24mm sensor on the camera):

Note: I've included the measurement from the front of the lens to the subject with each shot of the scale chart. That's a real practical consideration.
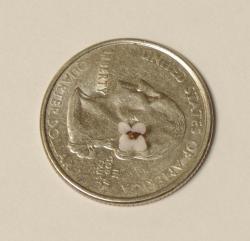
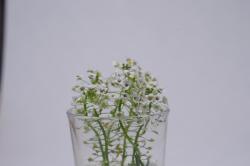
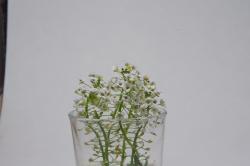
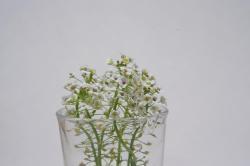
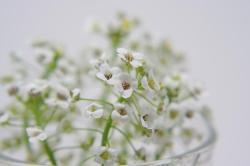
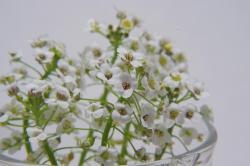
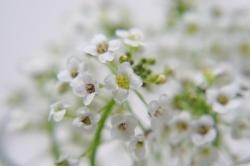
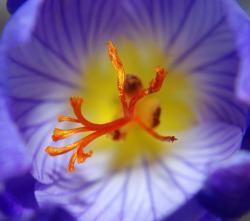
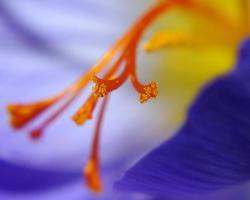
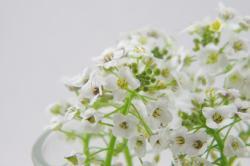
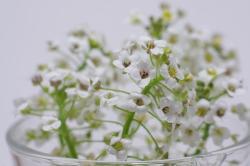
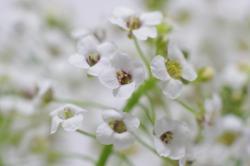
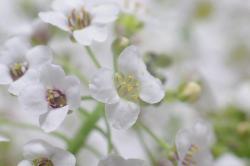
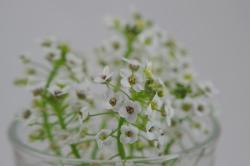
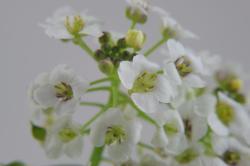
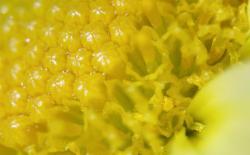
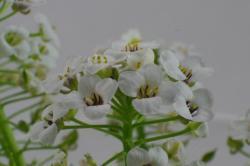
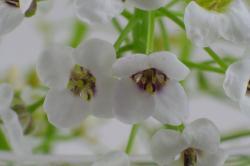
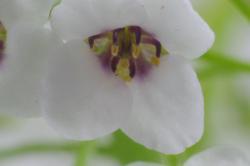
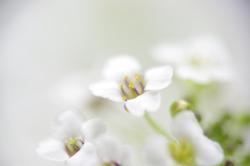
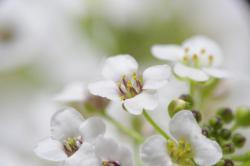
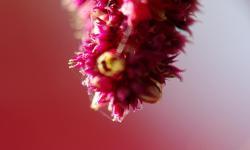
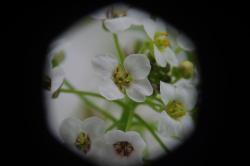
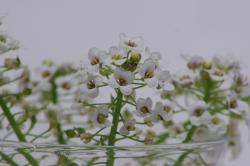
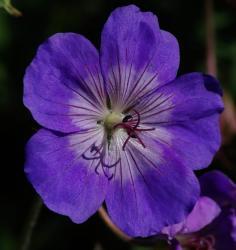
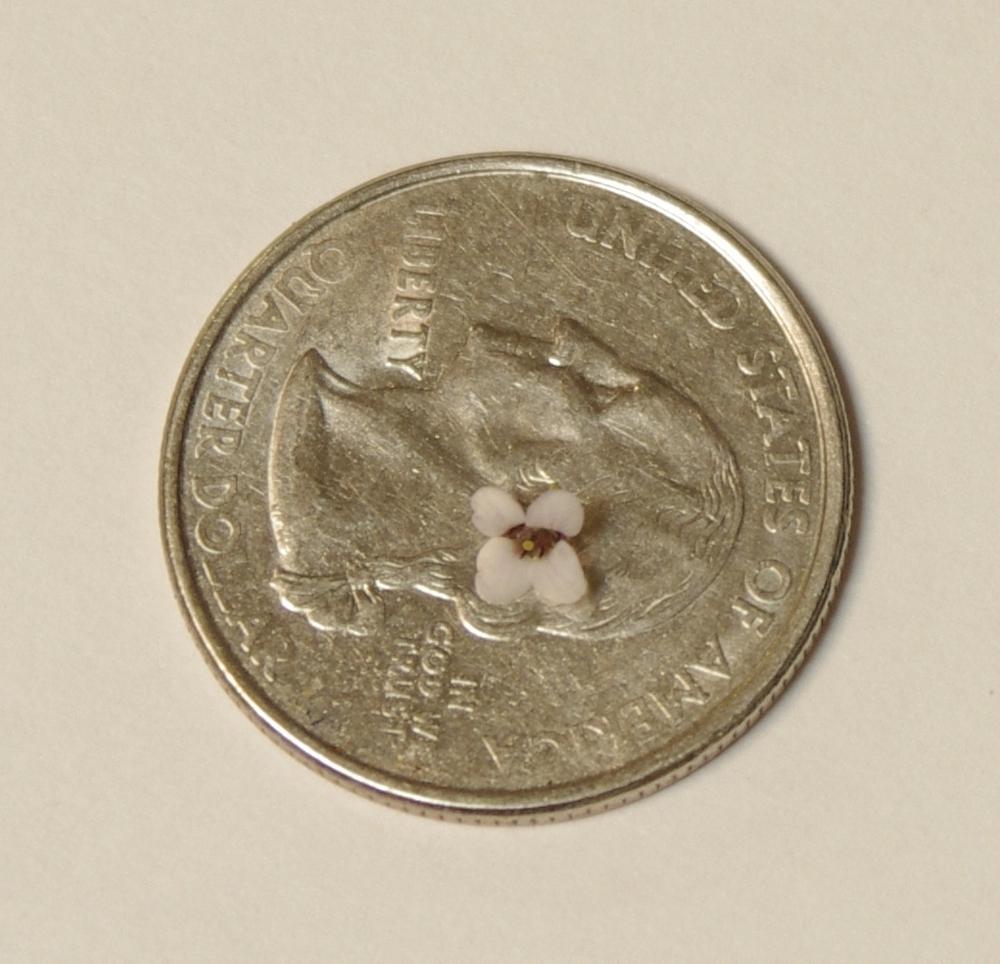
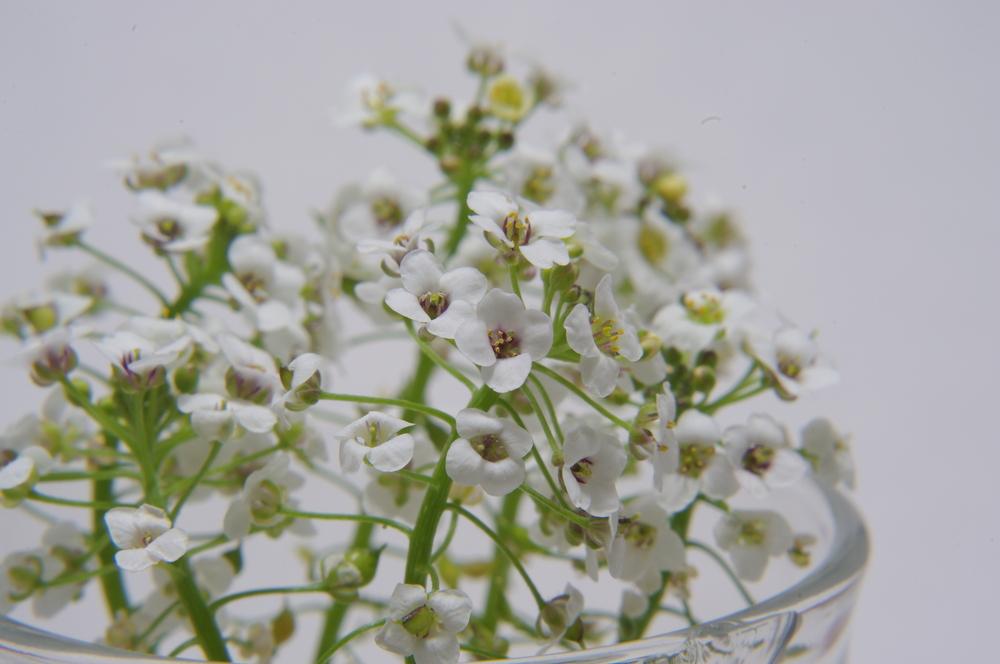
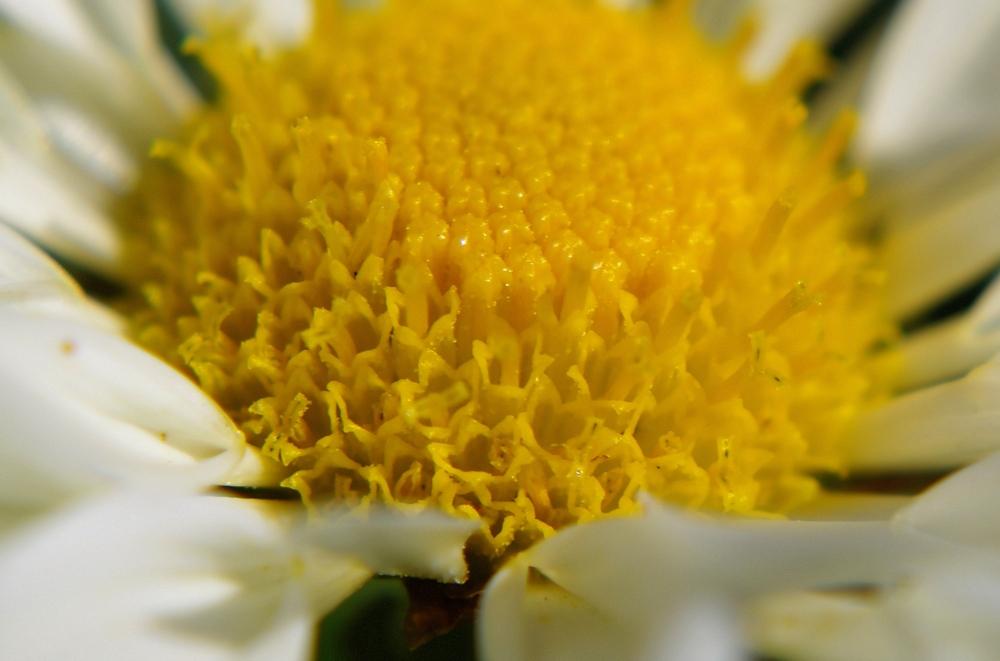
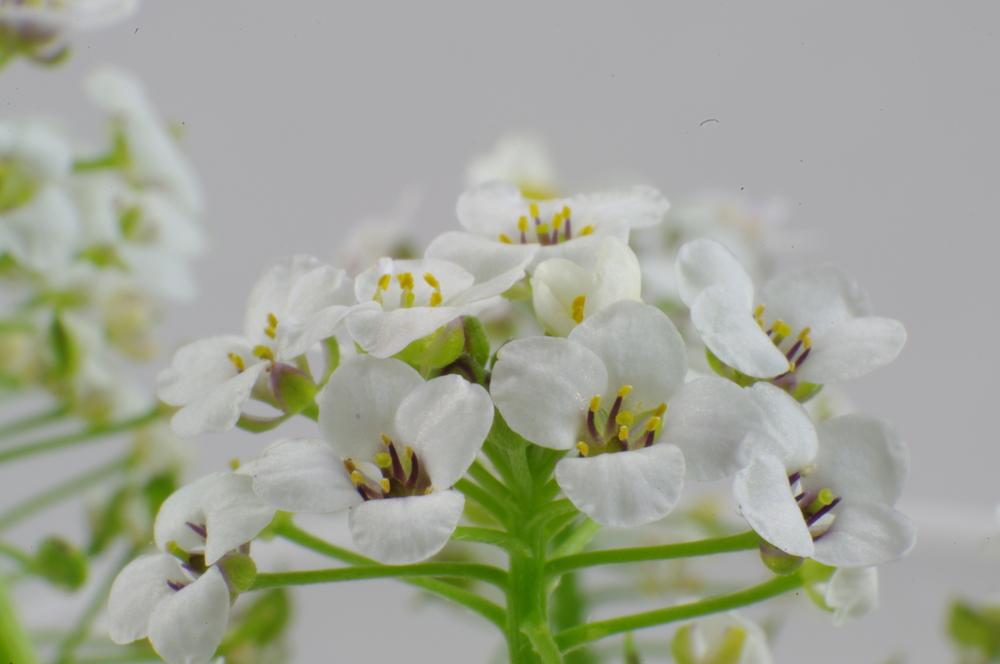
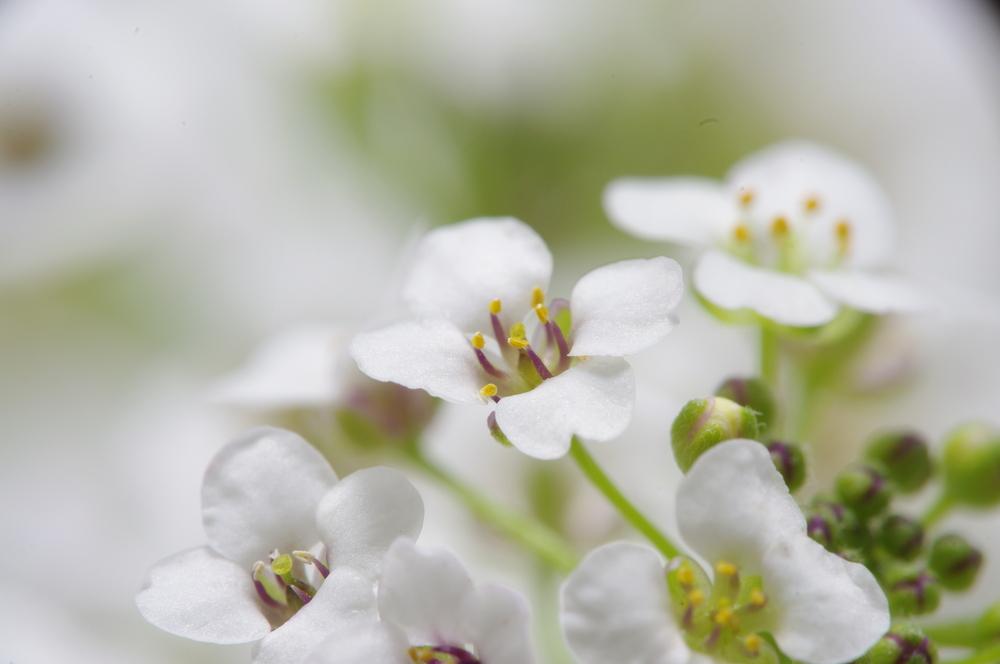
When you look at the alyssum that serves as the subject for the indoor shots, keep reminding yourself how tiny it is. The blossoms are only 3-4mm wide. It's so small that at 1:1, you could put six (or more?) blossoms side by side across the sensor. Or, in terms that I can understand better, six side-by-side along the diameter of a U.S. Quarter. The second shot directly below is a close-up on the same quarter. If you look down and to the left, you can see the first part of the "G" from In God We Trust...in addition to the waves of Washington's hair. These are TINY blossoms.
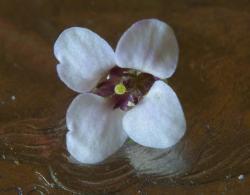
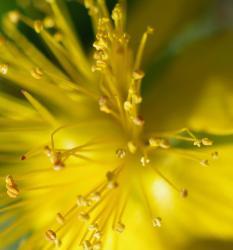
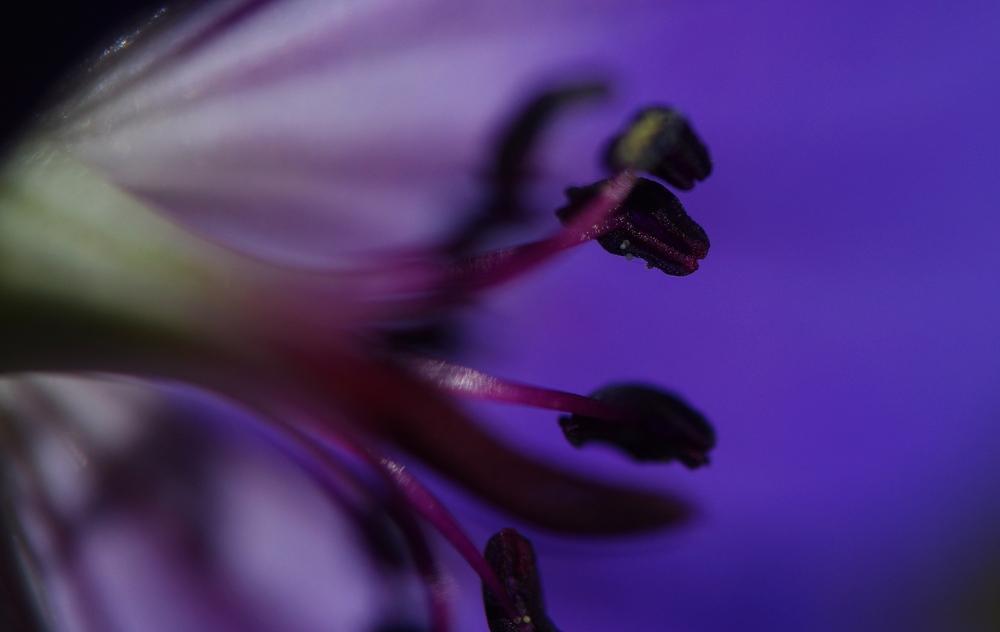
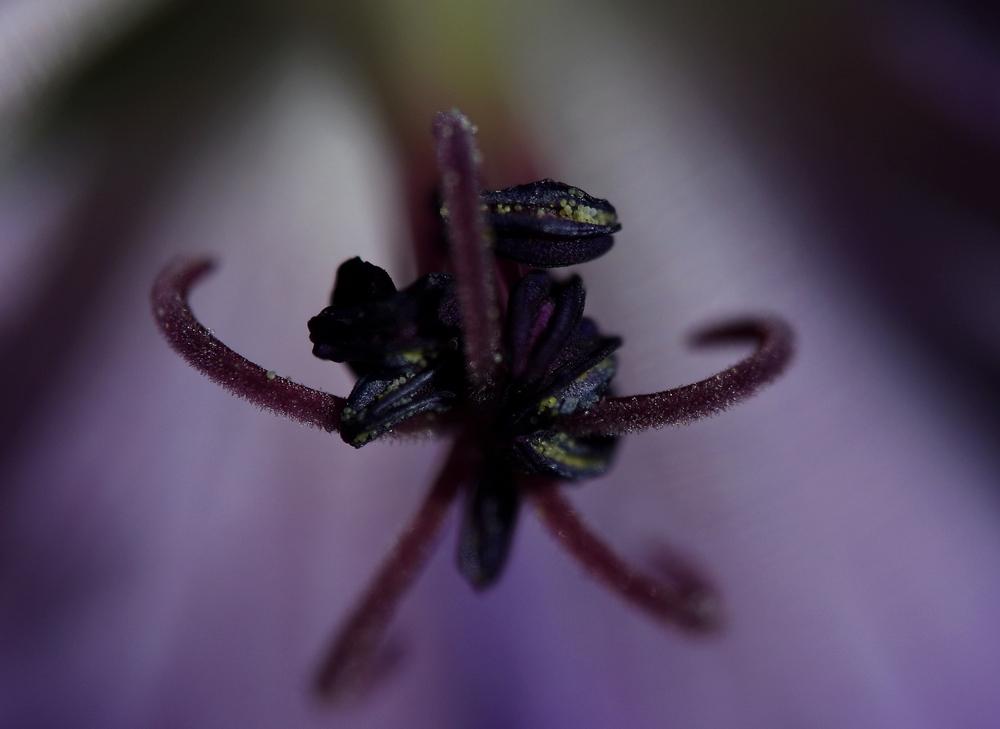
Finally, the alyssum itself. Wow. I’d always seen those in bunches as bunches. The blossoms are neat in their own right!
The Combinations and Pictures
The series are broken into categories (and subcategories) with equipment, scale, and examples illustrated.
1. Magnifying lenses
These are magnifying lenses that screw on to any lens -- just as a filter does.
1a. Magnifying lens: labeled +1
Apparently 1x isn't much magnification.
~10.25"
indoor
SMC Pentax-A 1:2 50mm (f/8, 1/125, ISO-200)
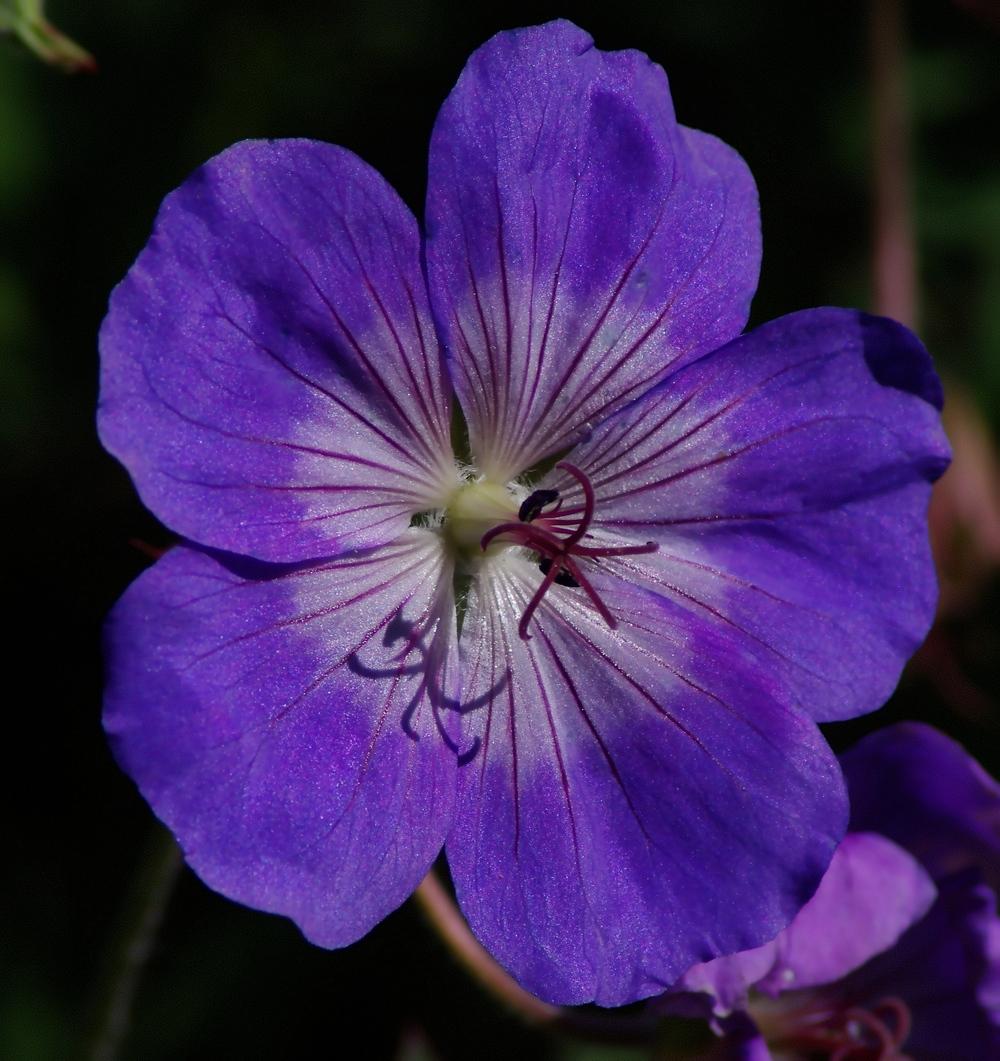
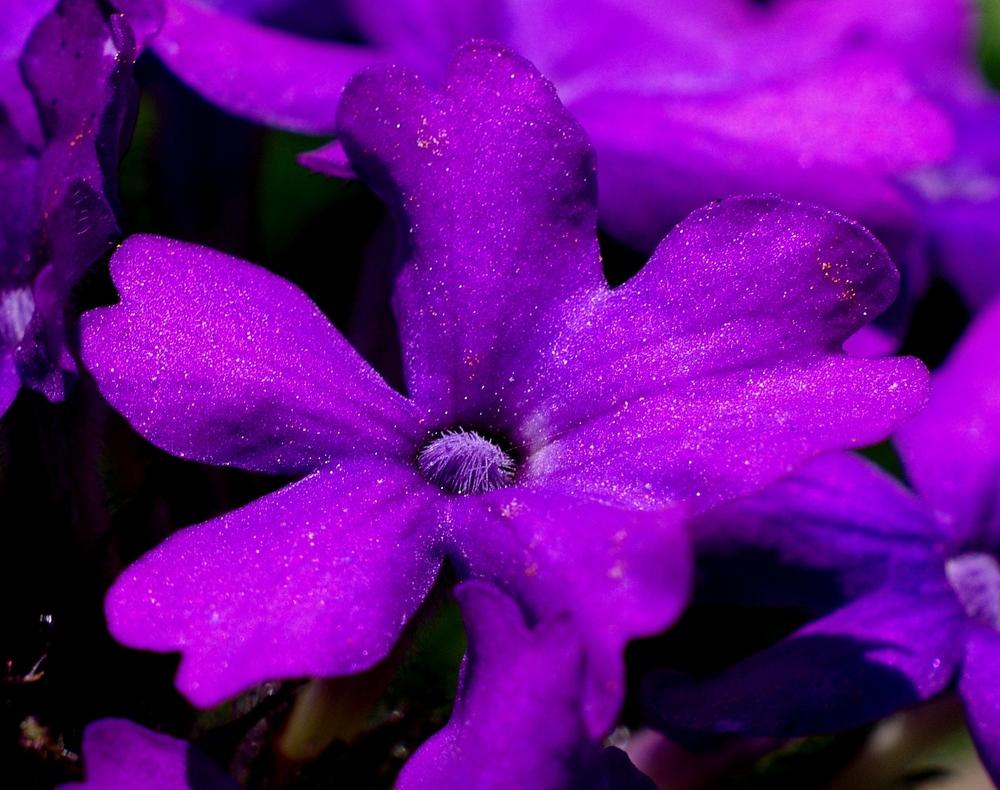
 outdoor
SMC Pentax-A 1:2 50mm (f/13, 1/250, ISO-200) for both
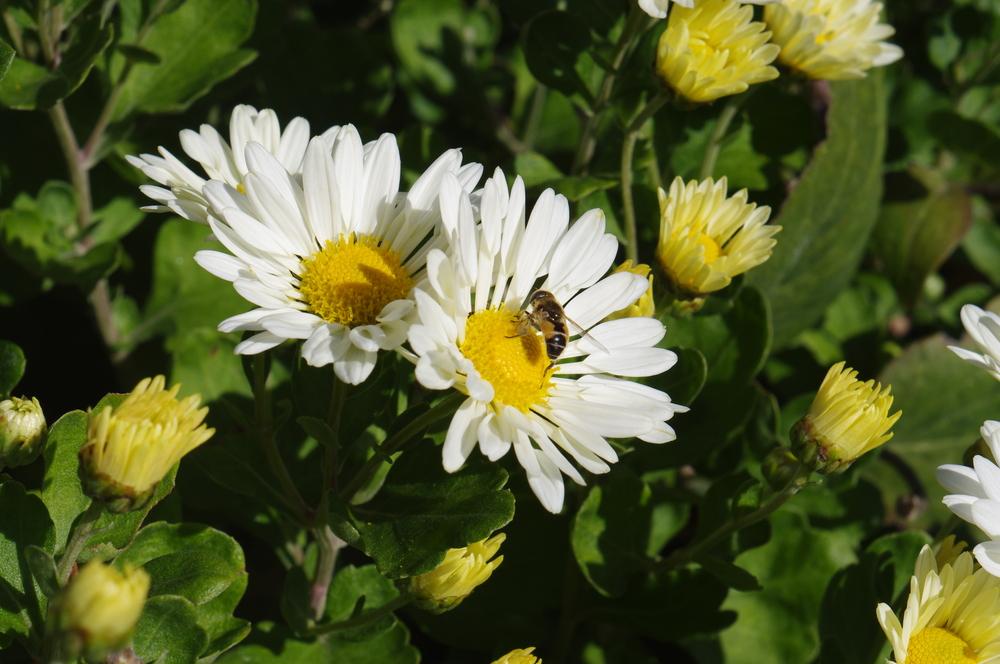
 1b. Magnifying lens: labeled +2
~7.5"
indoor
SMC Pentax-A 1:2 50mm (f/22, 1/40, ISO-200)
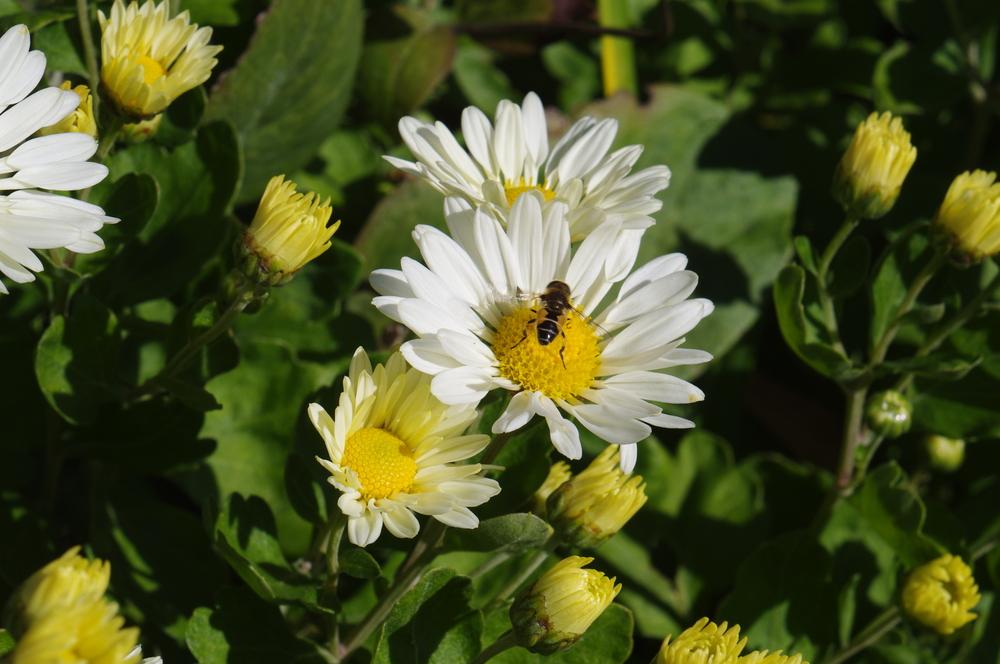
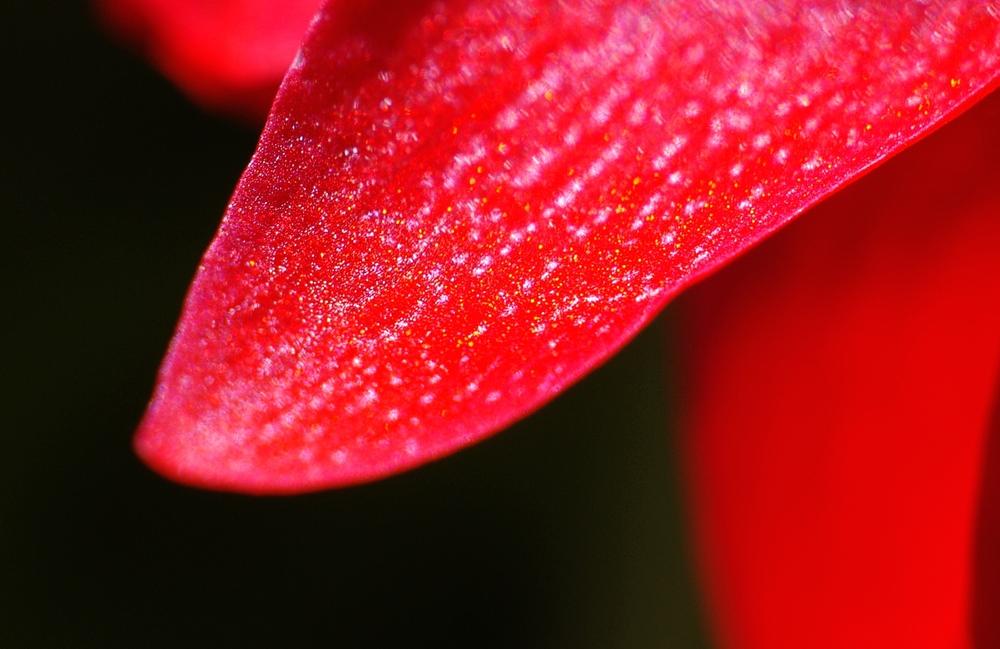
 outdoor
I thought that these were all a little overexposed, so I darkened them some -- probably too much.
SMC Pentax-A 1:2 50mm (f/11, 1/160, ISO-200)
SMC Pentax-A 1:2 50mm (f/11, 1/125, ISO-200)
SMC Pentax-A 1:2 50mm (f/11, 1/200, ISO-200)
Note: To save space (the irony's not lost on me), the values above correspond with the pictures below...in order. In other words, the first value-set in the list goes with the first photo that appears, and so on.
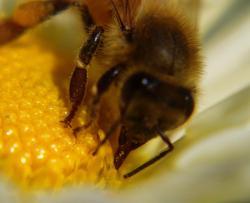
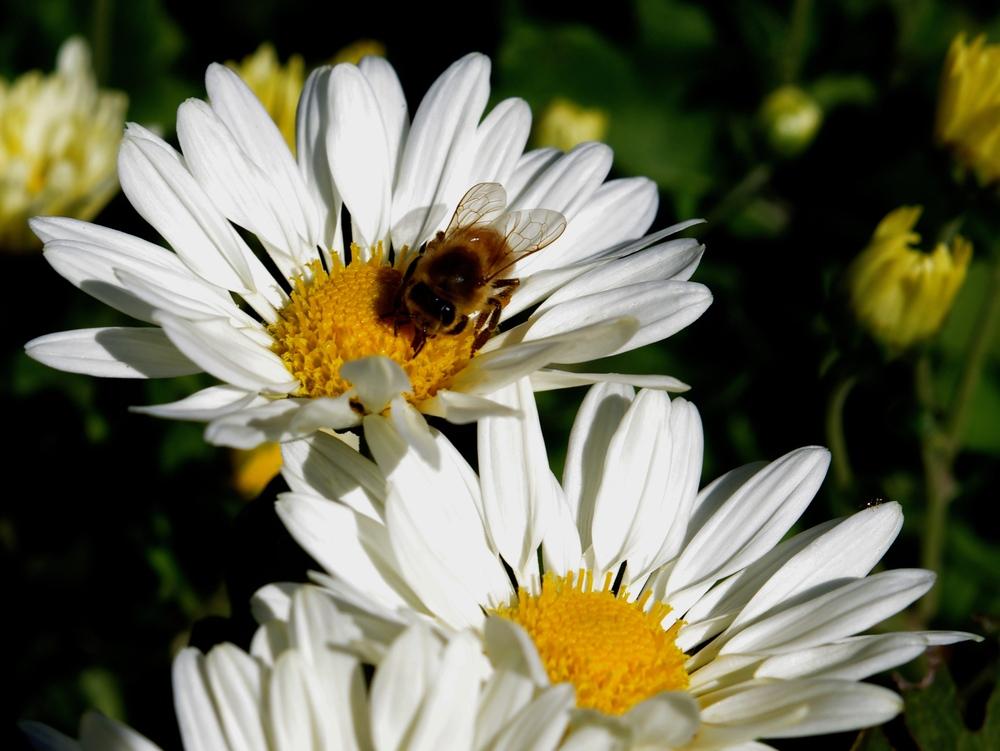
 1c. Magnifying lens: labeled +4
~5.75"
indoor
SMC Pentax-A 1:2 50mm (f/22, 1/160, ISO-200)
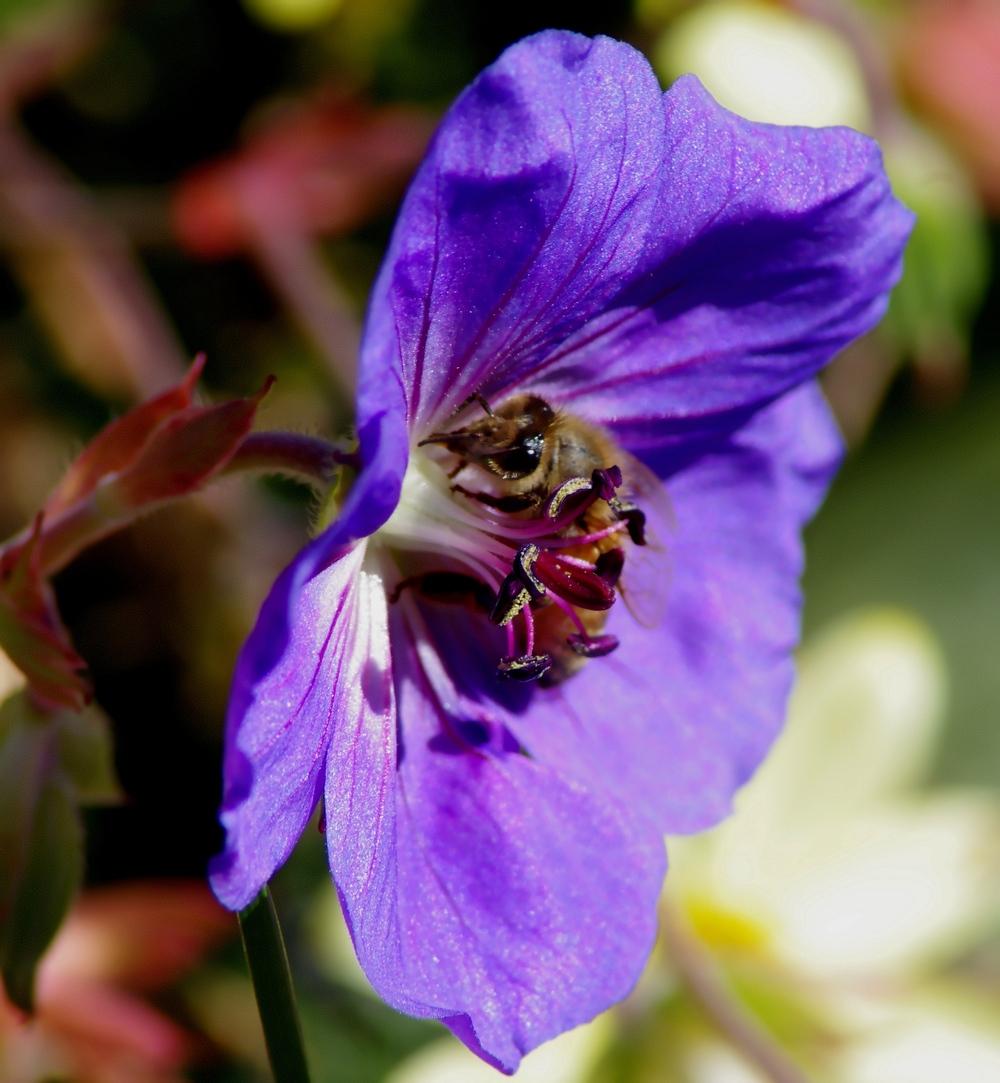
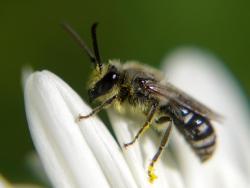
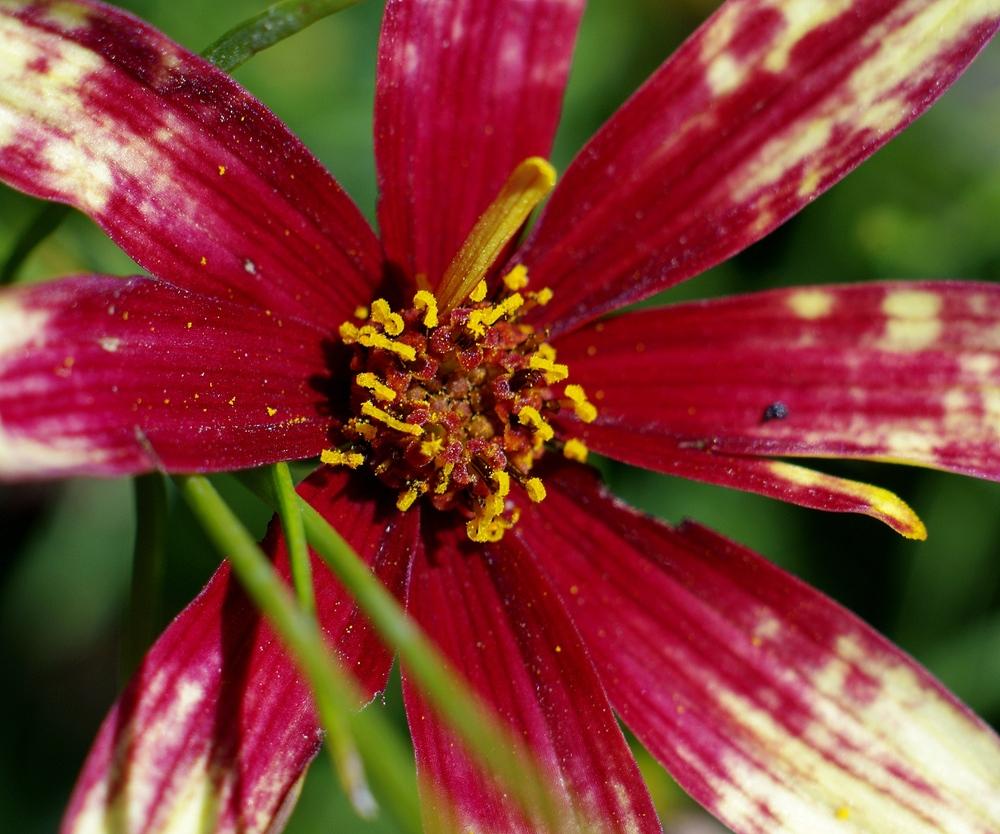
 outdoor
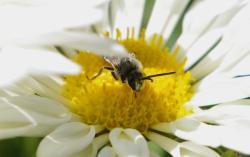
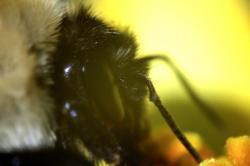
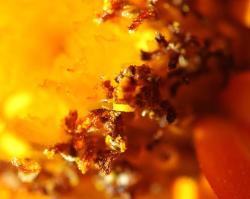
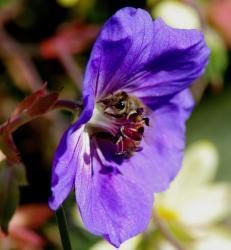
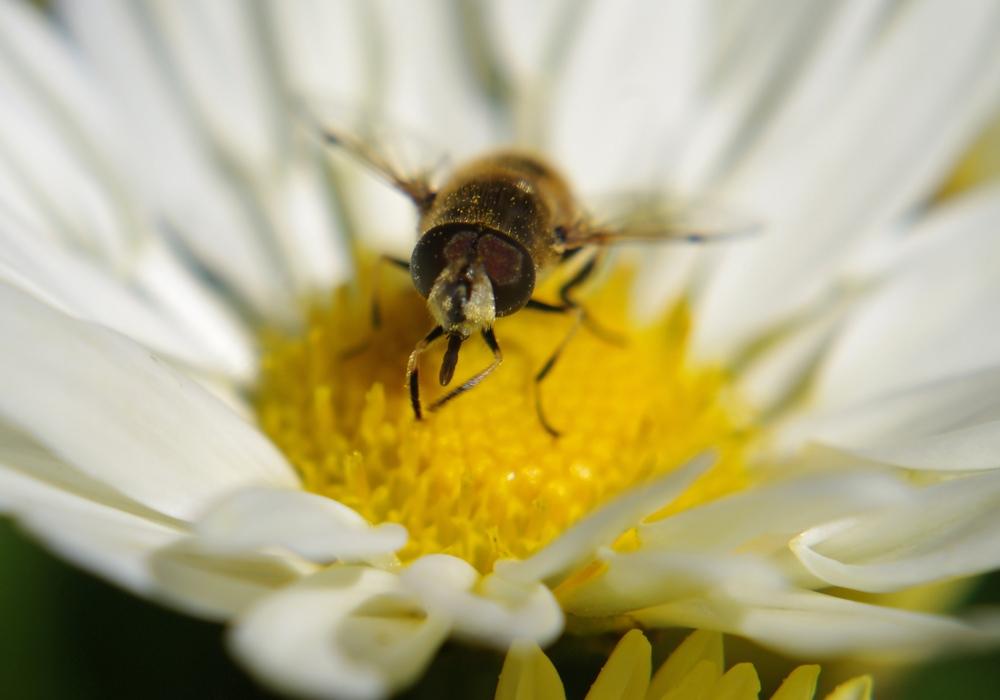
I'm a huge fan of the beeface - or fakey beeface.
SMC Pentax-A 1:2 50mm (f/9, 1/200, ISO-200) for first two
SMC Pentax-A 1:2 50mm (f/9, 1/500, ISO-200) for last

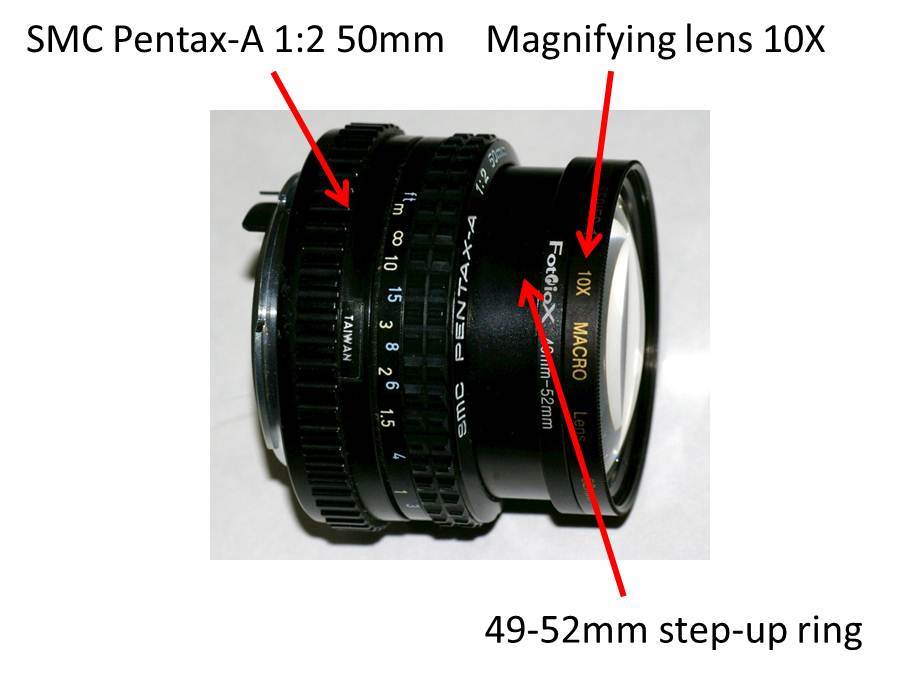
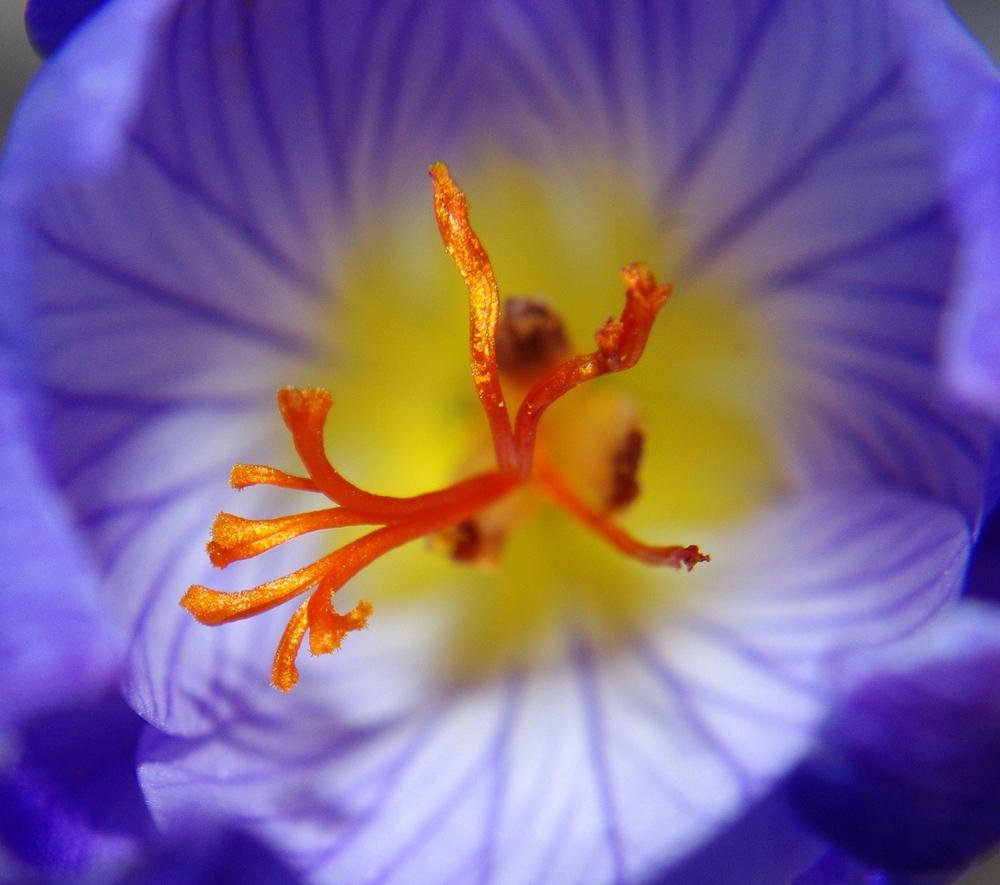
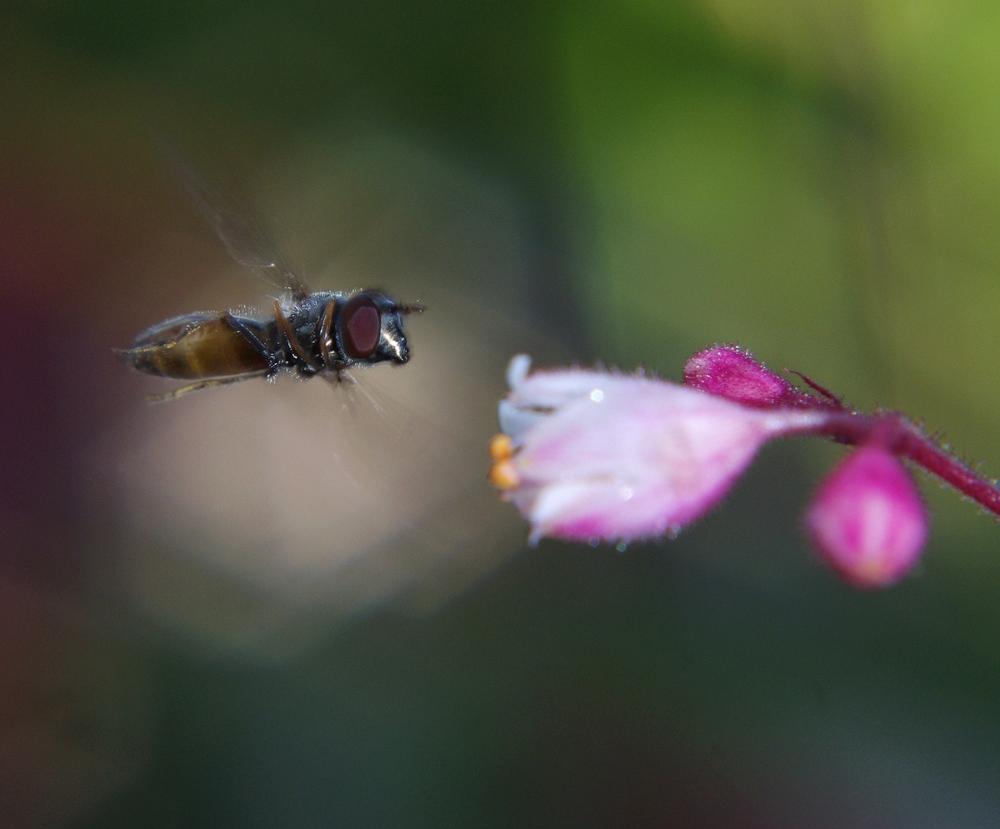
 1d. Magnifying lens: labeled 10X
~3.25"
indoor - an exercise in f-stoppery (and we're finally getting reasonably close)
SMC Pentax-A 1:2 50mm (f/8, 1/80, ISO-200)
SMC Pentax-A 1:2 50mm (f/22, 1/60, ISO-200)
 outdoor
Yes, more...(fakey bees)
SMC Pentax-A 1:2 50mm (f/7.1, 1/500, ISO-100) for all


 1e. Magnifying lenses: all four magnifiers together
This setup is just milky...
~1.75"
indoor
SMC Pentax-A 1:2 50mm (f/8, 1/30, ISO-200)
 outdoor
SMC Pentax-A 1:2 50mm (f/6.3, 1/500, ISO-200) for both
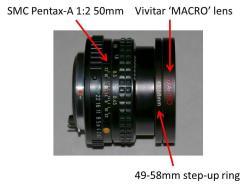
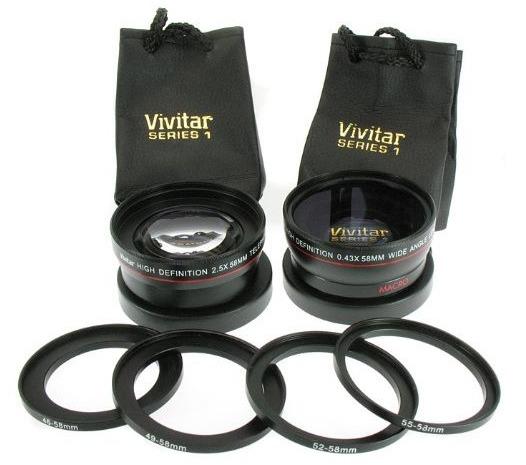
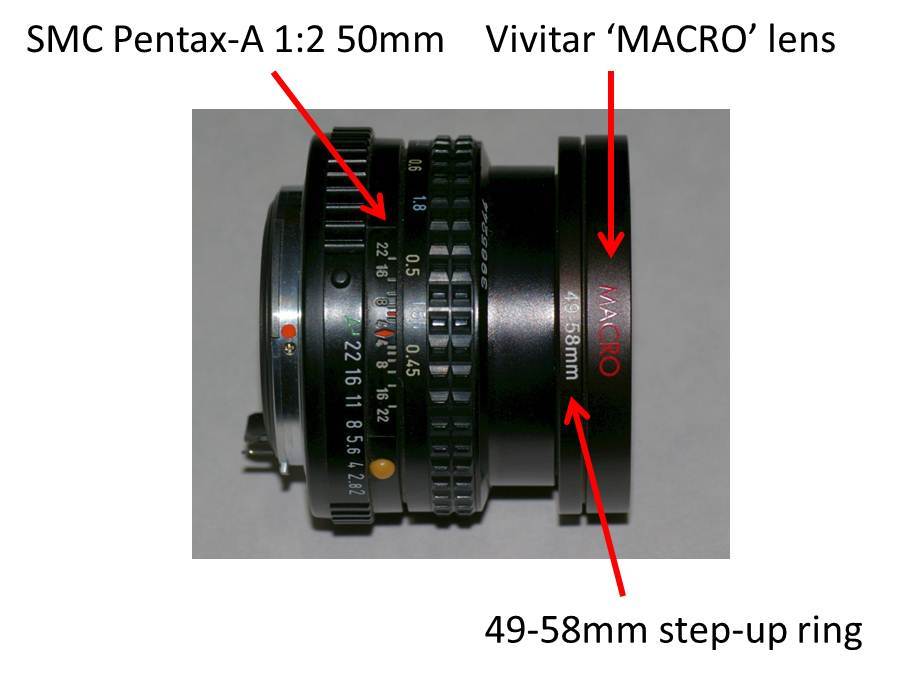
 1f. Vivitar “MACRO” screw-on magnifier
This came as part of this kit:
I don't recommend the tele/wide screw-ons for much, but the macro portion of the wide one has something to it (it screws off).
~2.25"
indoor
SMC Pentax-A 1:2 50mm (f/8, 1/100, ISO-200)
 outdoor
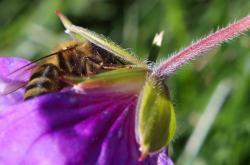
In the last one of this set, I was trying doggedly to take one of my trademarked, out-of-focus shots of a bud...when I got surprised. Terrible thing when that happens so perfectly...
SMC Pentax-A 1:2 50mm (f/11, 1/80, ISO-400)
SMC Pentax-A 1:2 50mm (f/11, 1/160, ISO-400) for the last two
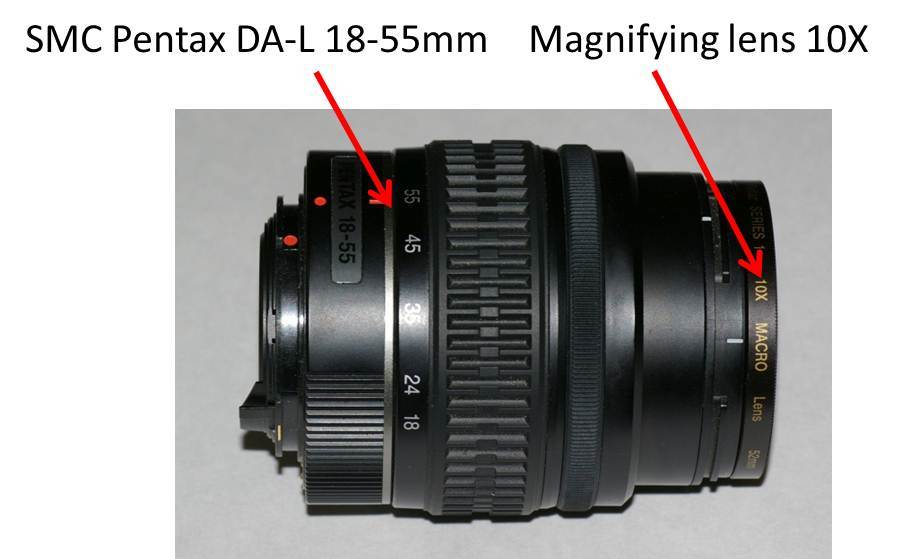
 1g. Pentax DAL 18-55mm kit lens with 10X magnifying lens
I included this one because not everyone has a prime lens to use with their camera. Normally, modern cameras are sold with a zoom lens or two in the kit. This lens is probably similar to what nearly everyone has on the camera or in the bag.

~3"
indoor
Pentax DAL 18-55mm (f/22, 1/2, ISO-200) shot at 55mm
 outdoor
Pentax DAL 18-55mm (f/8, 1/800, ISO-100) shot at 55mm
Pentax DAL 18-55mm (f/8, 1/1000, ISO-100) shot at 55mm
Pentax DAL 18-55mm (f/8, 1/800, ISO-100) shot at 55mm

 2. Extension Tubes
Recall that the lens cannot talk to the camera when you use these extension tubes. Your EXIF data for f-stop will read f/0. So if you want to keep track of what you've shot, you'll need to write that much down at least.
2a. Extension tube: labeled 1

~4.5"
indoor
SMC Pentax-A 1:2 50mm (f/8, 1/60, ISO-400)
 outdoor
SMC Pentax-A 1:2 50mm (f/11, 1/125, ISO-200)
SMC Pentax-A 1:2 50mm (f/11, 1/160, ISO-200)
SMC Pentax-A 1:2 50mm (f/11, 1/250, ISO-200)
 2b. Extension tube: labeled 2
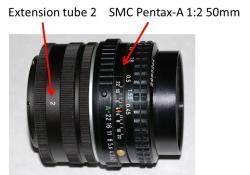
~3.75"
indoor
SMC Pentax-A 1:2 50mm (f/8, 1/100, ISO-200)
 outdoor
SMC Pentax-A 1:2 50mm (f/8, 1/160, ISO-200)
Only one outdoor shot. Everything was horrifyingly overexposed when I shot with this setup. I only meant to include one sample of each, anyway.
 2c. Extension tube: labeled 3
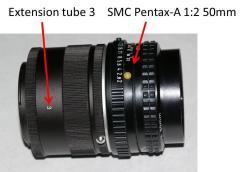
~2.75"
indoor
SMC Pentax-A 1:2 50mm (f/8, 1/80, ISO-200)
 outdoor
SMC Pentax-A 1:2 50mm (f/5.6, 1/250, ISO-200)
 2d. Extension tube: all three
Getting hazy...

~2.25"
indoor
SMC Pentax-A 1:2 50mm (f/8, 1/160, ISO-200)
 outdoor
SMC Pentax-A 1:2 50mm (f/5.6, 1/250, ISO-200)
SMC Pentax-A 1:2 50mm (f/5.6, 1/200, ISO-200) last two
 3. Inverted or reversed lenses
With this method, the camera-side of the lens faces out, exposed to everything. Take care to keep it clean.
3a. 50mm Pentax SMC 2.0 reversed
Because the lens is on backward, it's not talking to the camera again.

~5.5"
indoor
SMC Pentax-A 1:2 50mm (f/8, 1/30, ISO-200)
 outdoor
SMC Pentax-A 1:2 50mm (f/8, 1/250, ISO-200) for all three
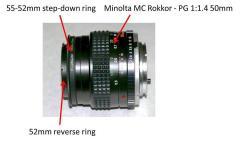
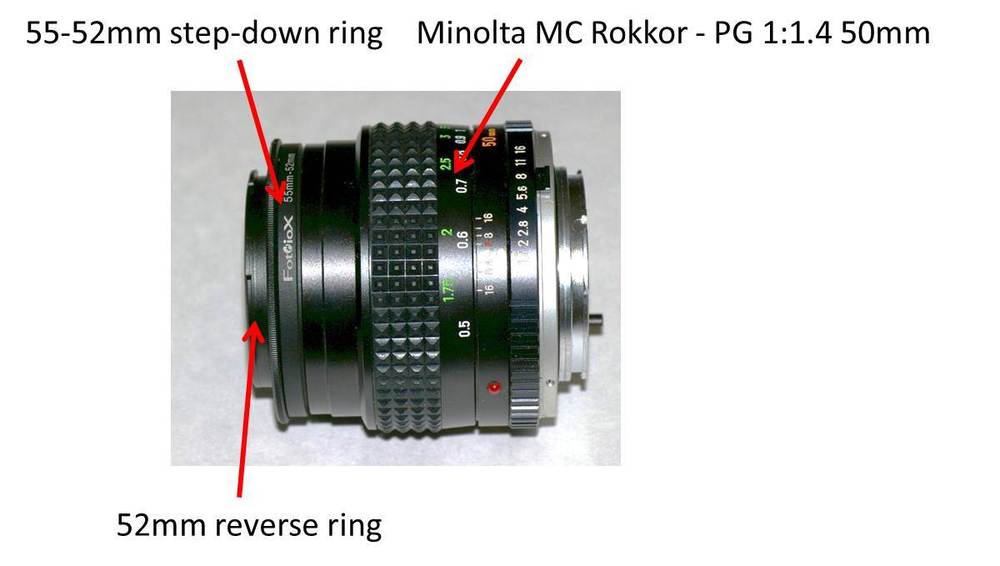
 3b. Minolta MC Rokkor - PG 1:1.4 50mm reversed
I found this lens on a good body in a thrift store for $10.00 a few years ago. It's a great lens and I'm glad I was able to put it to work.
~3"
indoor
Minolta Rokkor 1.4 50mm (f/16 1/5, ISO-200)
 outdoor
Minolta Rokkor 1.4 50mm (f/11 1/125, ISO-200) for both
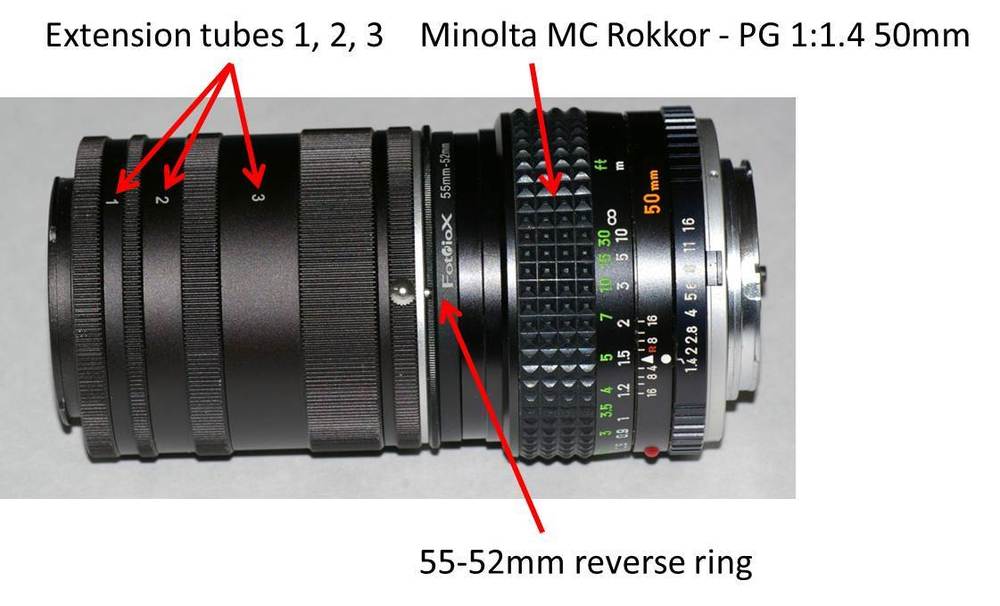
 3c. 50mm Minolta Rokkor 1.4 reversed with all extension tubes
I really thought that this would be the best faux macro iteration of the bunch. It wasn't. Not by a mile. Those extension tubes (combined) do a LOT of damage even to a very fast lens.

~2"
indoor
Minolta Rokkor 1.4 50mm (f/22, 1/13, ISO-200)
 outdoor
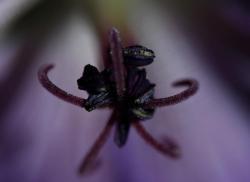
The last of these three does not belong (quality)...but I included it to show just how small the scale is. That's a bee head filling a third of the sensor (uncropped). Some serious close-up-ness.
Minolta Rokkor 1.4 50mm (f/7, 1/160, ISO-200)
Minolta Rokkor 1.4 50mm (f/7, 1/80, ISO-200)
Minolta Rokkor 1.4 50mm (f/7, 1/160, ISO-200)

 3d. Pentax DAL 18-55mm kit lens reversed
This turned out to be a terrible lens to use for this purpose. It doesn't have a manual aperture ring, so it's therefore stuck as closed as it can possibly be - f/40. Makes it nearly impossible to take handheld shots. But...I guess that's part of the purpose of this post, too. Making mistakes and learning from them.
One thing I learned is that when you put a zoom lens on backward, it behaves backwardly. That is to say that with this lens, 18mm is the macro-est setting while 55mm is the least macro-ey. It's only counterintuitive if you don't think about it for a minute. I'm kind of embarrassed admitting it.
The indoor shots are (or would have been) fine if you can find the focus. But at 18mm (and a constant f/40) there's so little light getting in, I couldn't see the blossom very well at all to establish clear focus -- even with a flashlight pointed straight at it. The shots that are in focus look nice, though.
The following are shot at 55, 45, 35, and 18, respectively. Look at the texture of the paper in the last one. It looks like carpet to me.
~3"
~3"
~2.5"
~2"
indoor
Pentax DAL 18-55mm (f/
40, 0.6 sec, ISO-200) shot at 55mm
Pentax DAL 18-55mm (f/
40, 1.3 sec, ISO-200) shot at 45mm
Pentax DAL 18-55mm (f/
40, 1.6 sec, ISO-200) shot at 35mm
Pentax DAL 18-55mm (f/
40, 5.0 sec, ISO-200) shot at 18mm

 outdoor
The outdoor shots were abysmal. Maybe if I'd used a tripod and the live view...but that's tough in the sunlight. They say a good carpenter doesn't blame his tools. I'd imagine that even a mediocre one can pick the right tool for the job, though...
Pentax DAL 18-55mm (f/
40, 1/60 sec, ISO-800) shot at 55mm
 4. Paired lenses
This is the technique that I had the most fun with. It strikes me as so perversely funny to stick two lenses together face-to-face. That just ain't right. But it's pretty effective.
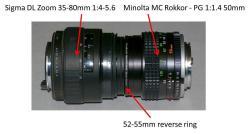
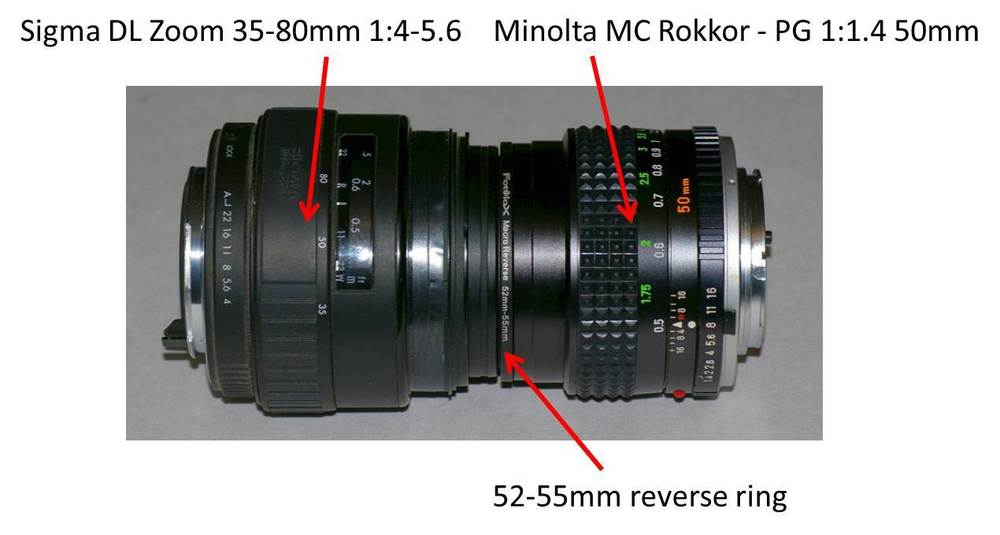
4a. Sigma DL Zoom 35-80mm 1:4-5.6 (mounted on camera) paired with Minolta MC Rokkor - PG 1:1.4 50mm (mount facing sujbect)
Found this Sigma AF lens on a film camera from the late '90s. It has turned out to be a pleasant surprise. Shot at 80mm zoom (on the dial) on the Sigma with the Minolta wide open (f/1.4).
~0.75"
indoor
Two shots this time - one at f/5.6 and the other at f/22.
Sigma DL Zoom 35-80mm at 80mm (f/5.6, 1/60, ISO-200) - Minolta MC Rokkor - PG 1:1.4 50mm (f/1.4)
Sigma DL Zoom 35-80mm at 80mm (f/22, 1/80, ISO-200) - Minolta MC Rokkor - PG 1:1.4 50mm (f/1.4)
 outdoor
Sigma DL Zoom 35-80mm at 80mm (f/8, 1/320, ISO-400) - Minolta MC Rokkor - PG 1:1.4 50mm (f/1.4)
Sigma DL Zoom 35-80mm at 80mm (f/8, 1/320, ISO-400) - Minolta MC Rokkor - PG 1:1.4 50mm (f/1.4)
Sigma DL Zoom 35-80mm at 80mm (f/8, 1/640, ISO-400) - Minolta MC Rokkor - PG 1:1.4 50mm (f/1.4)
Sigma DL Zoom 35-80mm at 80mm (f/8, 1/320, ISO-400) - Minolta MC Rokkor - PG 1:1.4 50mm (f/1.4)
 4b. SMC Pentax-A 1:2 50mm (mounted on camera) paired with Minolta MC Rokkor - PG 1:1.4 50mm (mount facing sujbect)
~0.75"
indoor
That's some brutal vignetting. I think that I left the Minolta at f/8 instead of opening it up to f/1.4. It was a wearying process. I decided to shoot another the day after (ensuring that the Minolta was set to f/1.4). I didn't use the lightbox, but instead took a handheld shot with a flash. The vignetting decreased.
SMC Pentax-A 1:2 50mm (f/22, 1/13, ISO-200) - Minolta MC Rokkor - PG 1:1.4 50mm (f/8??)
SMC Pentax-A 1:2 50mm (f/8, 1/180, ISO-200 - with on-camera flash) - Minolta MC Rokkor - PG 1:1.4 50mm (f/1.4)
 outdoor
SMC Pentax-A 1:2 50mm (f/13, 1/400, ISO-400) - Minolta MC Rokkor - PG 1:1.4 50mm (f/1.4)
SMC Pentax-A 1:2 50mm (f/13, 1/250, ISO-400) - Minolta MC Rokkor - PG 1:1.4 50mm (f/1.4)
SMC Pentax-A 1:2 50mm (f/13, 1/250, ISO-400) - Minolta MC Rokkor - PG 1:1.4 50mm (f/1.4)

 Conclusion
I have no conclusions except that with a little ingenuity and a few dollars, you can shoot fairly high-quality close-ups with any old lens (or combination of lenses). Mess around with this stuff, have fun, and draw conclusions of your own. I'm interested in seeing your results.
Post-amble
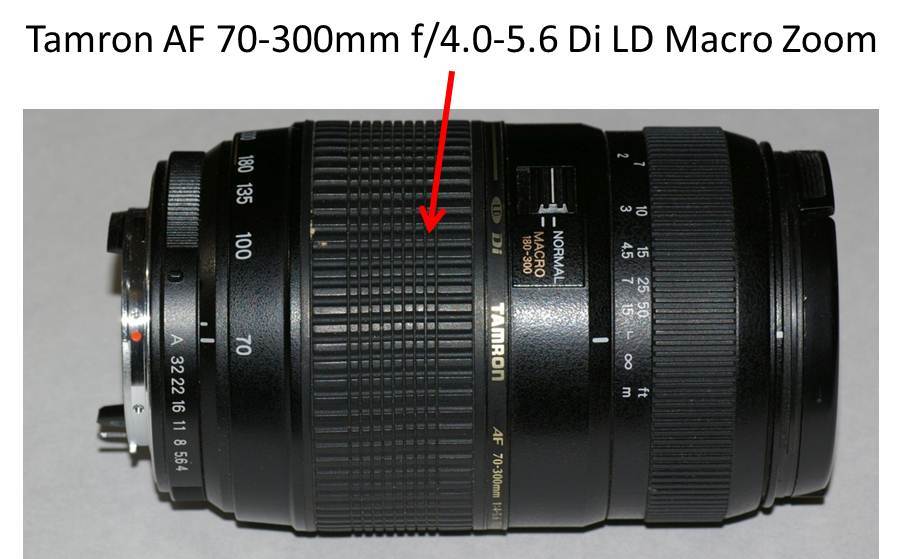
After all of that, the lens that spends the most time attached to my camera is:
My old standby: Tamron AF 70-300mm f/4.0-5.6 Di LD Macro Zoom
It probably doesn’t belong in this thread, but it’s my mainstay for closeup shots in the garden. It’s fairly inexpensive for what it is (less than $200) and it's a pretty versatile lens. It has a “macro” mode, but only shoots at 1:2. Yet it has provided me with some great shots – both indoors and out. I include it here just because it’s the thing I use most in the garden.
~28"
indoor
Tamron AF 70-300mm f/4.0-5.6 Di LD Macro Zoom (f/25, 1/80, ISO-100, 300mm) shot at 300mm
 outdoor
I'm not particularly happy with any of these shots. I only took a few because the lens is just that reliable...but yesterday the photographer wasn't. And I don't want to dig through old stuff to find better shots for the sake of consistency -- everything in this thread was shot yesterday and really on the fly.
Tamron AF 70-300mm f/4.0-5.6 Di LD Macro Zoom (f/13, 1/160, ISO-200, 300mm) shot at 300mm
Tamron AF 70-300mm f/4.0-5.6 Di LD Macro Zoom (f/13, 1/500, ISO-200, 300mm) shot at 300mm
Tamron AF 70-300mm f/4.0-5.6 Di LD Macro Zoom (f/13, 1/125, ISO-200, 300mm) shot at 300mm


 ~10.25"
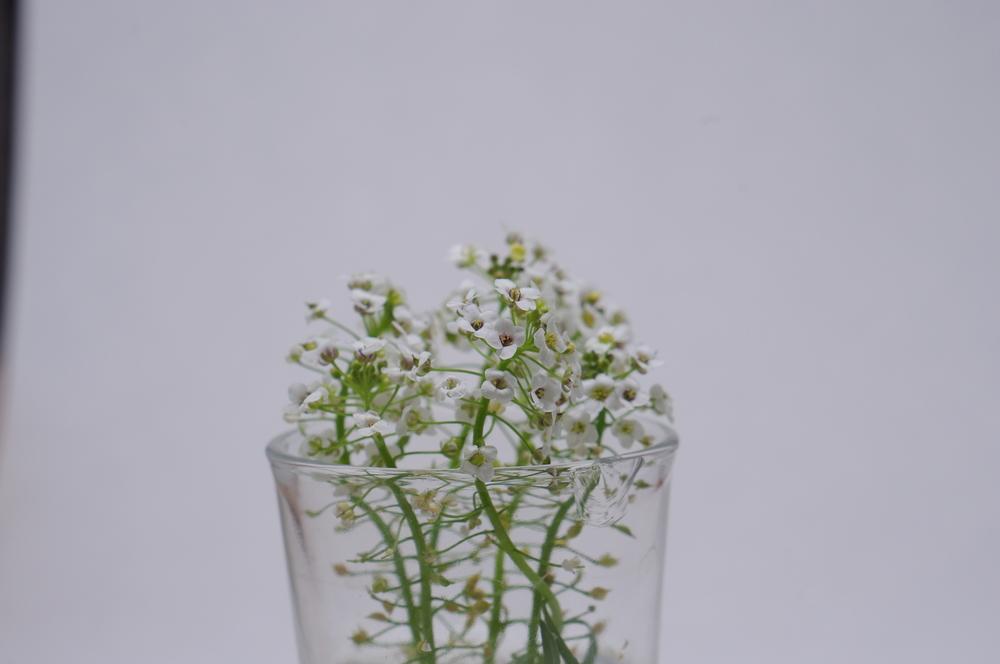
 ~7.5"
~7.5"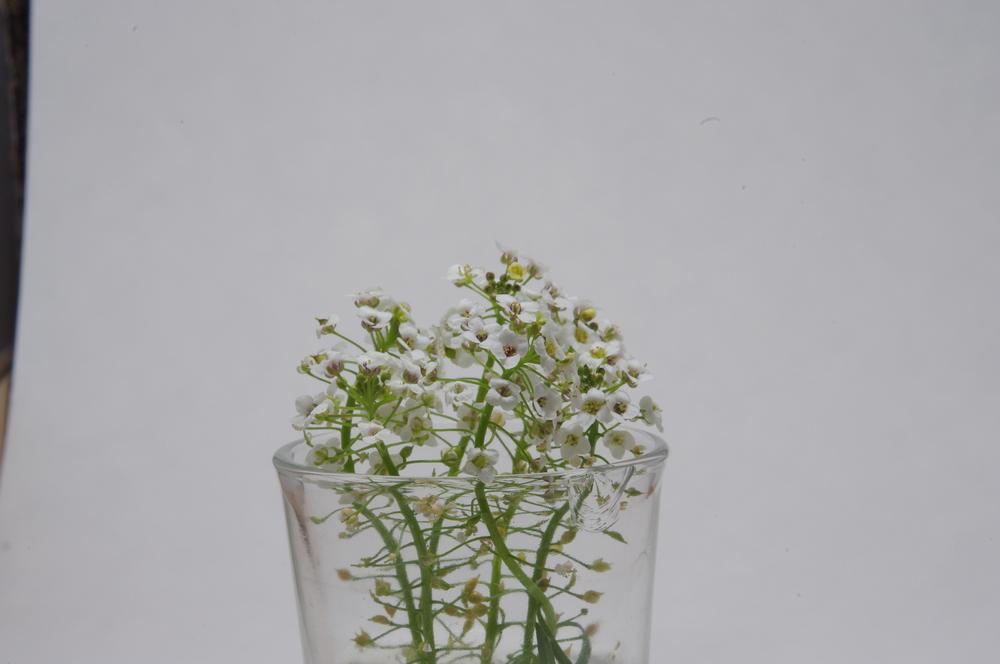


 ~5.75"
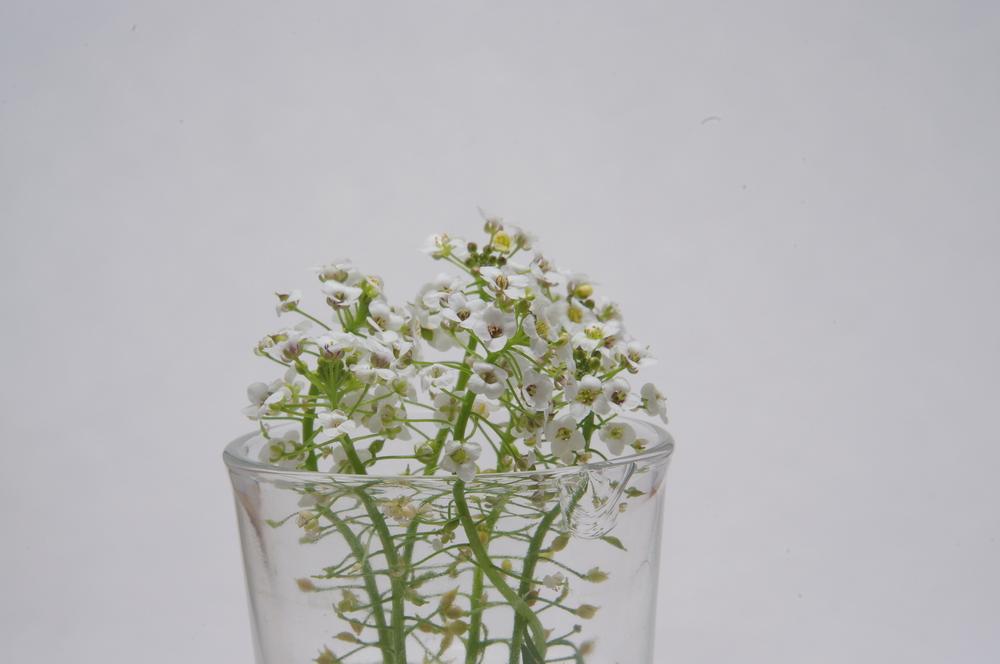

 ~3.25"
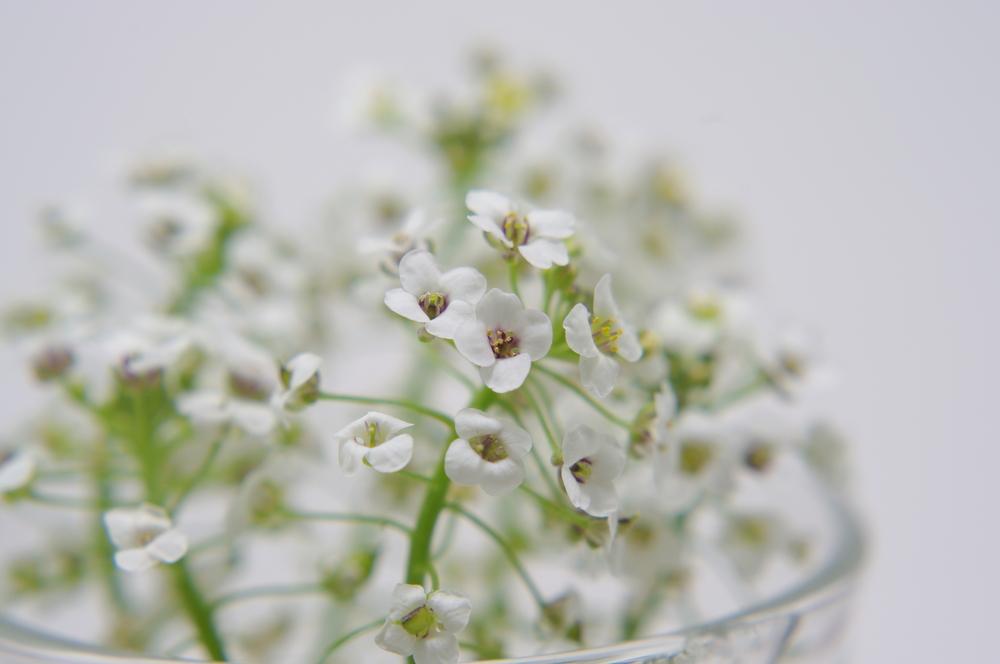


 ~1.75"
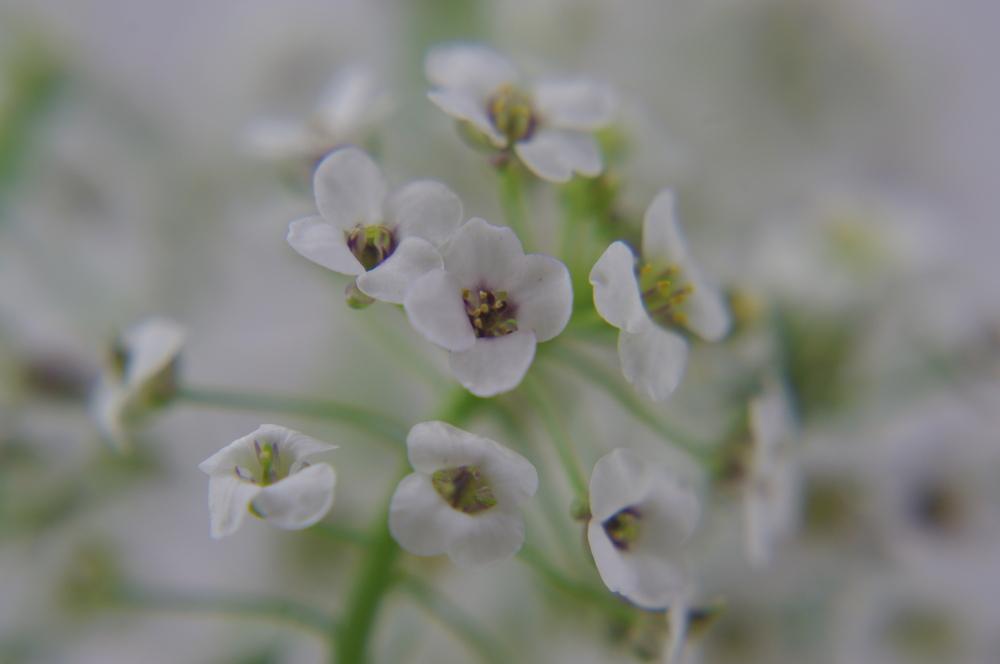

 ~2.25"

 ~3"
~3"

 ~4.5"
~4.5"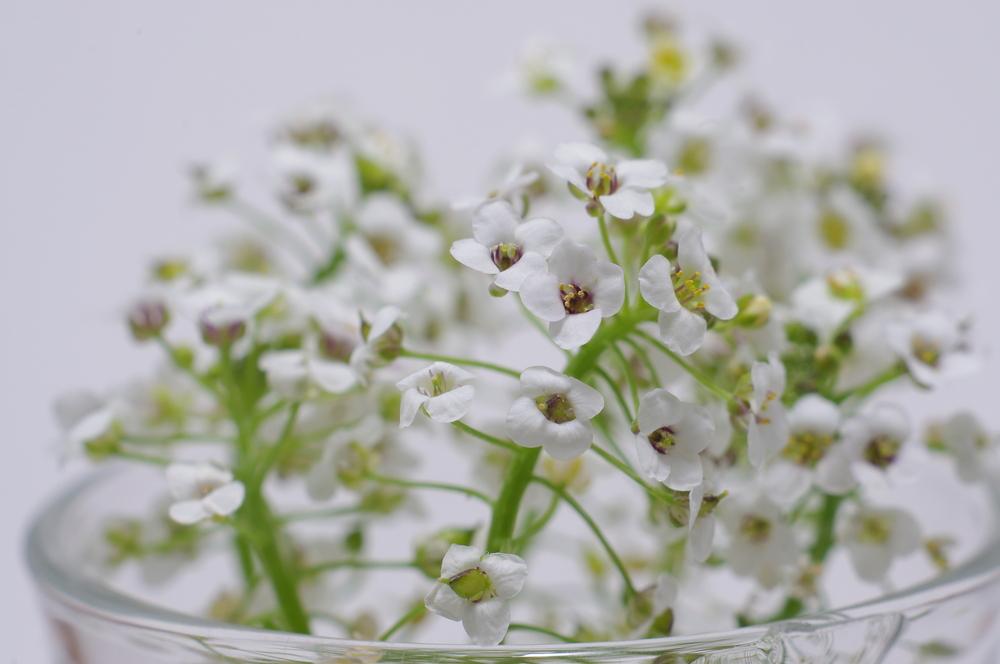


 ~3.75"
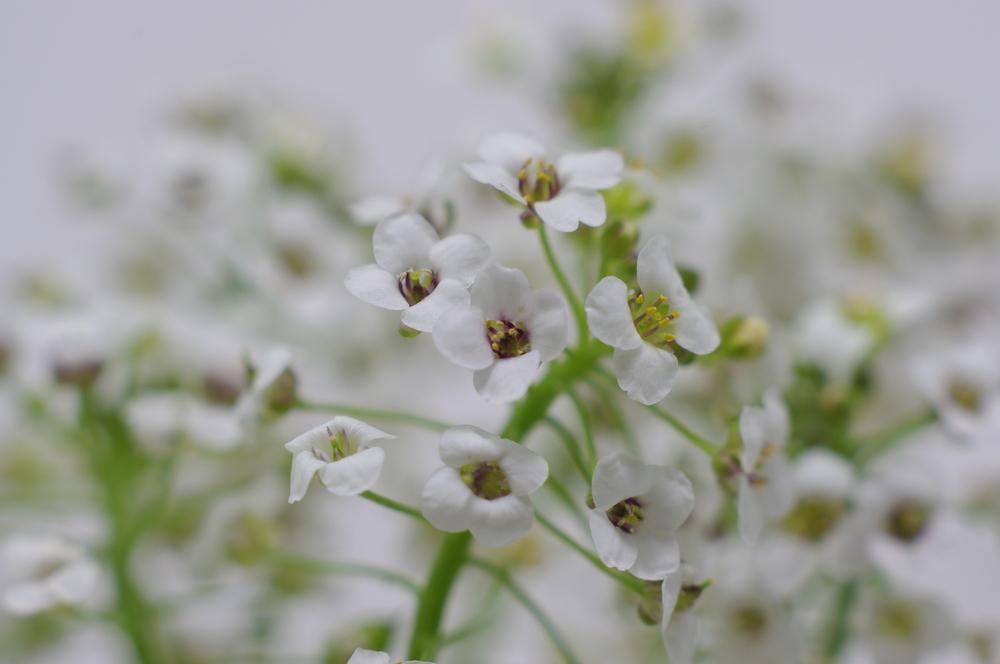

 ~2.75"
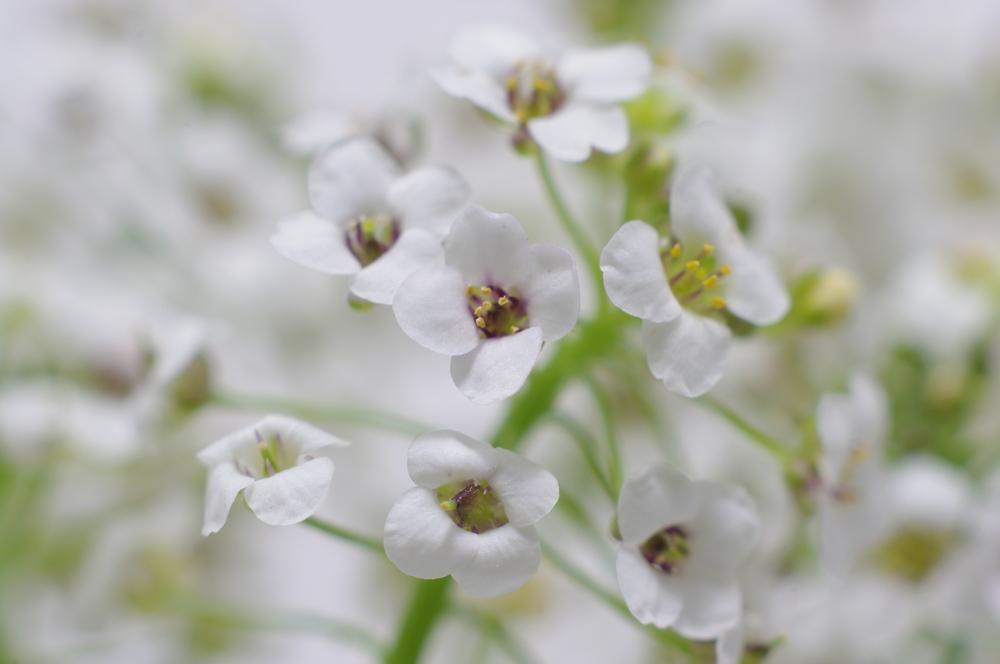

 ~2.25"
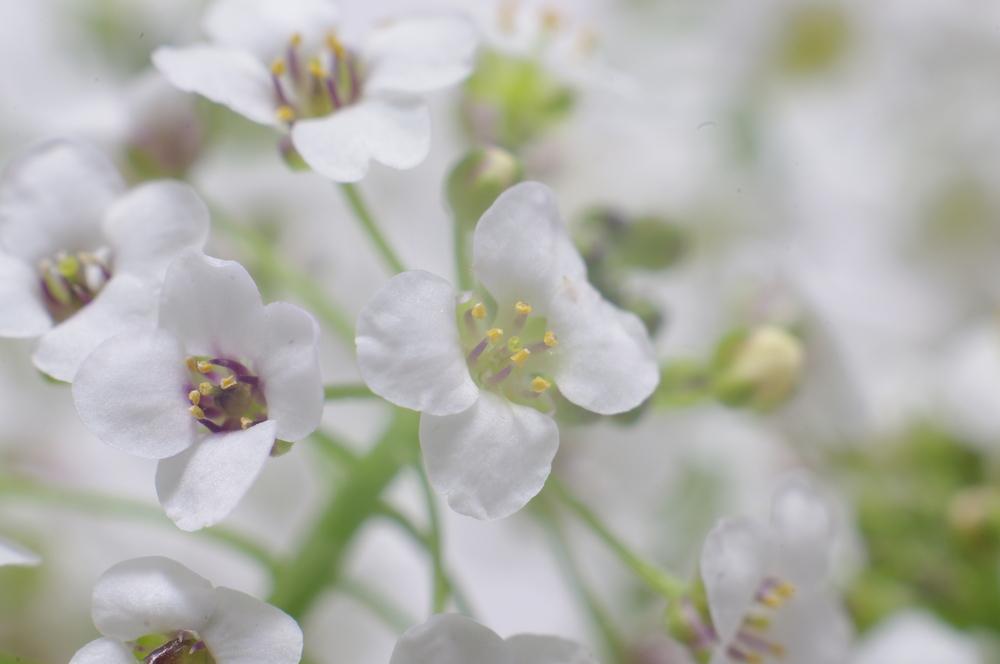


 ~5.5"
~5.5"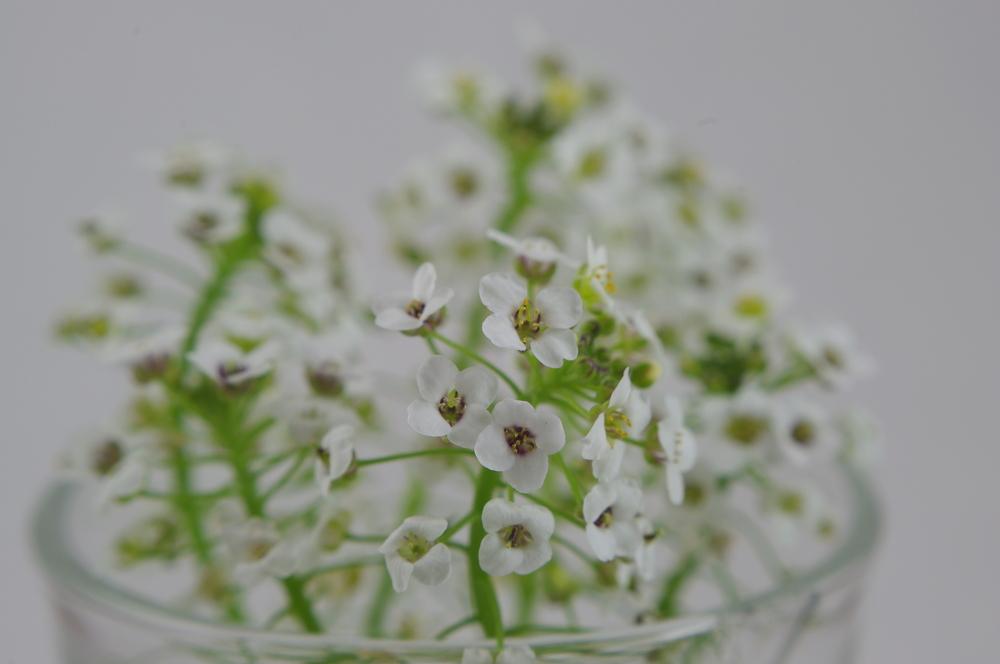


 ~3"
~3"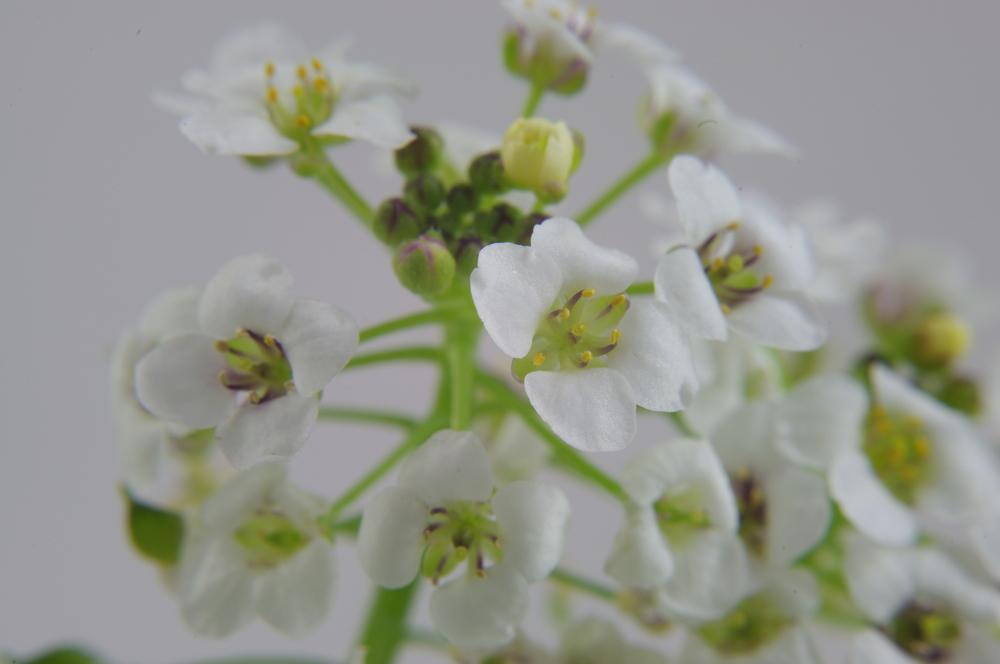


 ~2"
~2"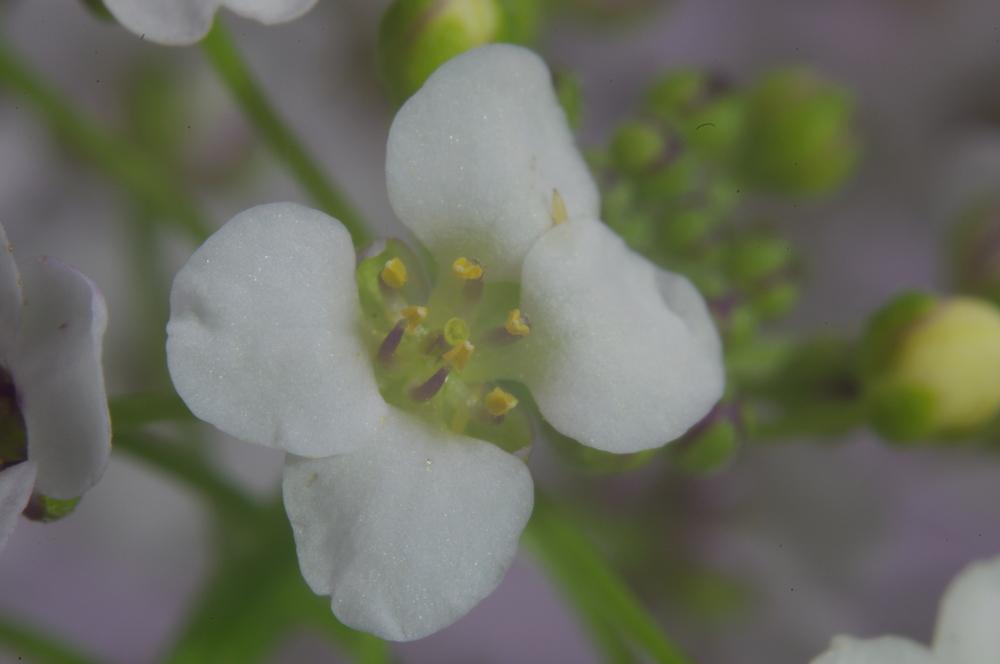


 ~3"
~3" 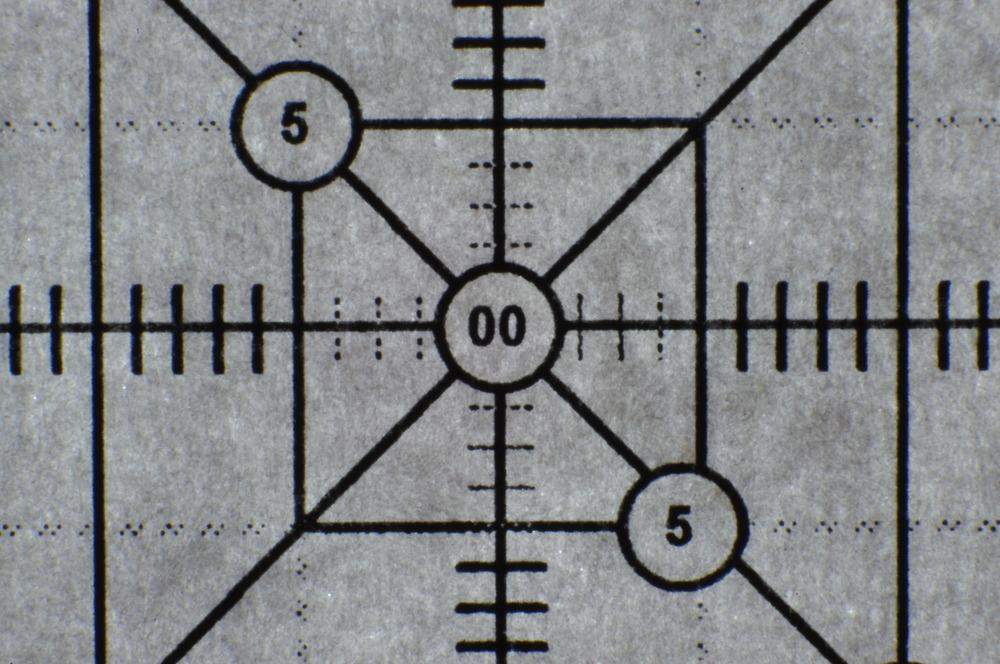 ~3"
~3" 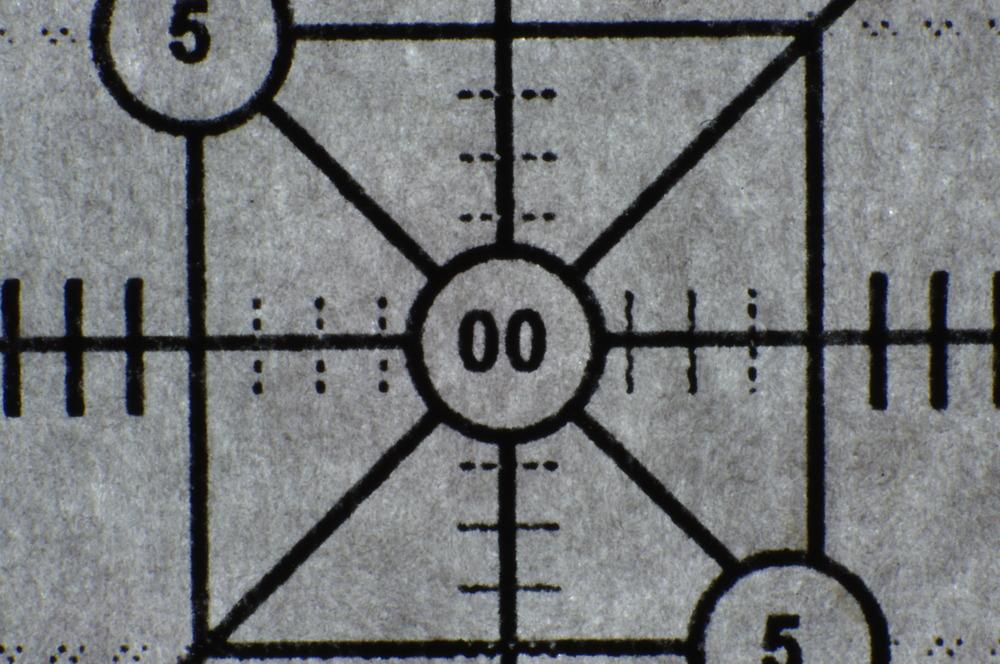 ~2.5"
~2.5"  ~2"
~2"


 ~0.75"
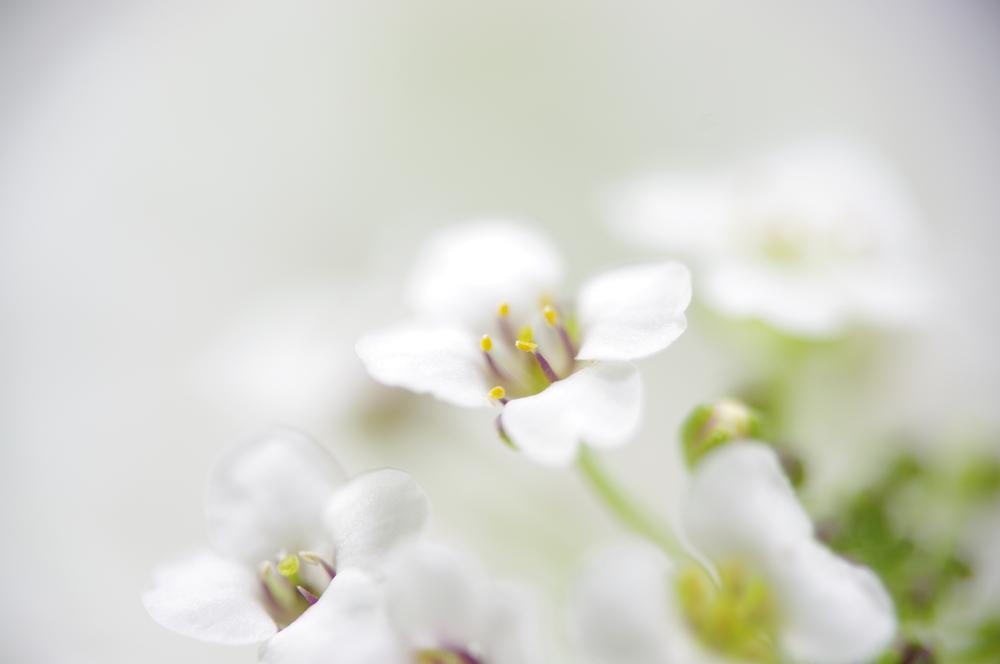


 ~0.75"


 ~28"
~28"