Post a reply

Avatar for COamateur
Feb 22, 2019 11:32 PM CST
Thread OP

I'm new to seed germination and just sowed my first batch! I'm using 1020 trays with individual 2-3" pots ...but I'm not sure the best techniques for bottom watering. I've heard someone say they add approx ¾" - 1" of water...let it sit for about 30 minutes...and then drain the tray completely. Draining seems quite tedious with all the pots in there though.

Do you drain your trays after each watering? Or do you just add less water each time? Any detailed advice would be wonderful! (As well as the # of times you typically bottom water per week).

Thanks!
Avatar for ZenMan
Feb 23, 2019 12:29 PM CST
Name: ZenMan
Kansas (Zone 5b)
Kansas 5b
Annuals Enjoys or suffers cold winters Region: United States of America Seed Starter Keeper of Poultry Hybridizer
Hummingbirder Dragonflies Garden Photography Butterflies Zinnias Garden Ideas: Level 2
Hi COamateur,

Welcome to the National Gardening Association and to this Seeds Forum. Are you in Colorado? If so, we are in neighboring states.

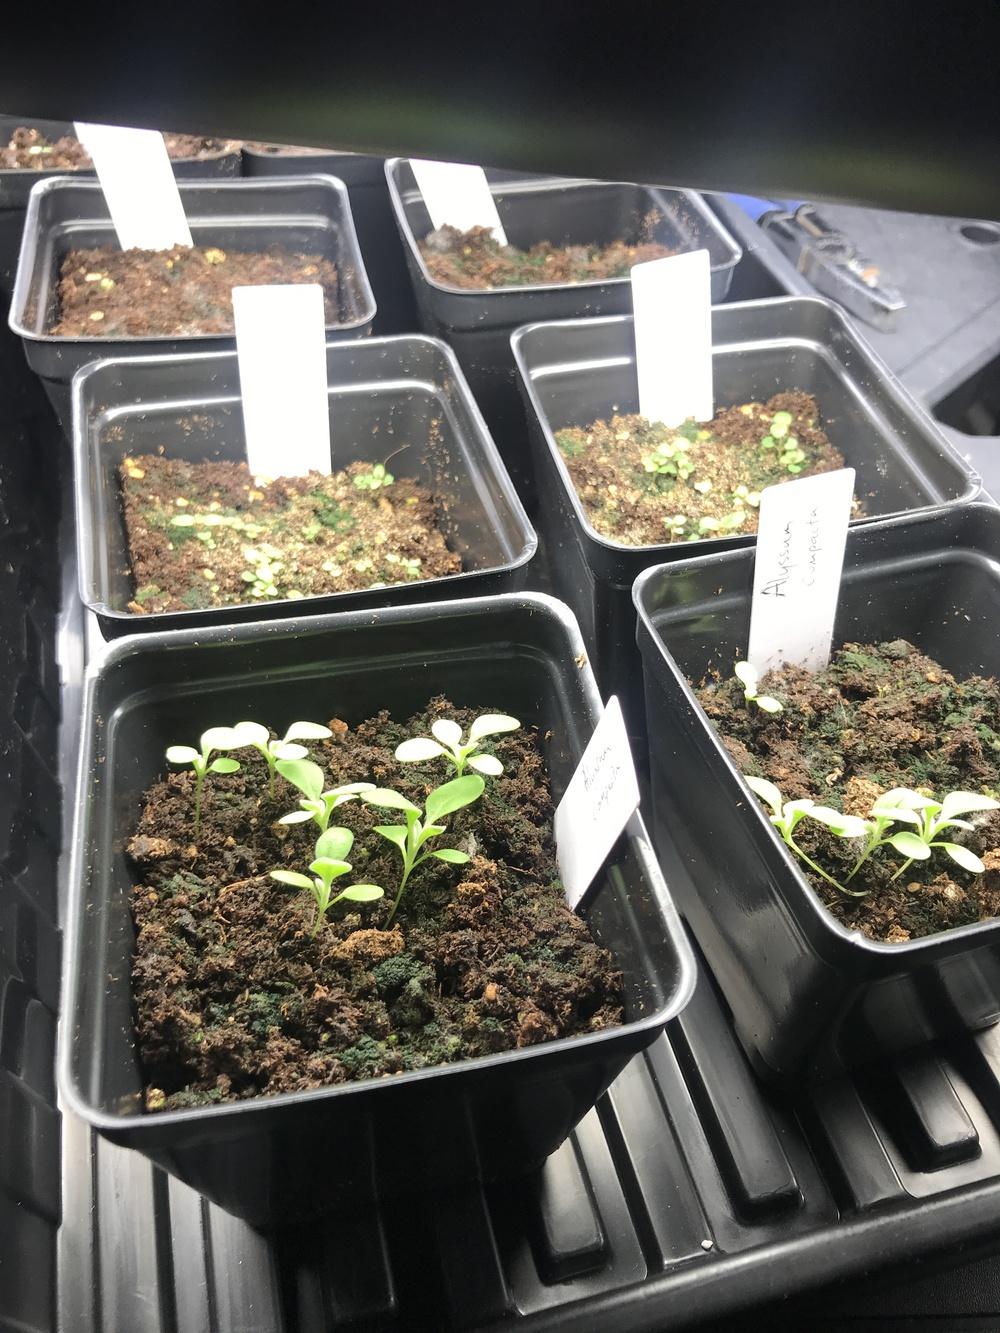
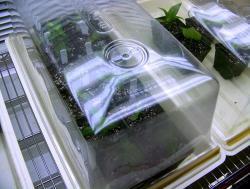
I use PermaNest trays, which are basically the same size as 1020 trays, but much more substantial. I get 18 3.25-inch pots per tray, and I pour about a quarter inch of water in the tray and let the pots soak that up by capillary action. I keep transparent covers over the trays to hold the moisture in, because the relative humidity indoors during our cold weather is very low. While the seedlings are germinating, they are on a heating mat.

When the seedlings get a little size on them, they come out from under the humidity domes. I add more water to the Permanest trays every few days, and I add some soluble nutrients to that water.
Thumb of 2019-02-23/ZenMan/c1d46b Thumb of 2019-02-23/ZenMan/4af22b
I use Reverse Osmosis water, which is essentially as pure as distilled water, (and purer than rain water), because we are in a rural area and the well here provides water of questionable content.

ZM
I tip my hat to you.
Last edited by ZenMan Feb 23, 2019 12:32 PM Icon for preview
Avatar for Shadegardener
Feb 23, 2019 12:39 PM CST
Name: Cindy
Hobart, IN zone 5
aka CindyMzone5
Celebrating Gardening: 2015 Plant Identifier
CO - maybe use a turkey baster to suction up all of the remaining water? Have tried it and it works pretty well.
Only when the last tree has died and the last river has been poisoned and the last fish has been caught will we realize that we can't eat money. Cree proverb
Image
Feb 23, 2019 1:16 PM CST
Name: Bruce (Vancouver Isl
BC (Zone 8a)
Region: Canadian Lilies Bulbs Annuals Cat Lover Lover of wildlife (Black bear badge)
Critters Allowed Beavers Birds Bee Lover Butterflies Plant Lover: Loves 'em all!
Welcome! @COamateur

I use an extra tray when I am watering. I put about 1" of water into the empty tray and then move my pots or seeds trays into the water for 30 minutes. I then move them back to their own tray and return them under the lights. I know this sounds tedious but it gives me something to do as well as allows me to inspect all my seedlings. I do this every 4 days. Some of my pots (small yogurt containers actually) are bigger than my seed trays and so take longer to dry out so I may do them every 5 days or the seed trays more often (every 3 days). It is important to watch the colour of the soil on the top of the trays and only water once it has become dry (usually shows as a lighter brown). When you place the trays in the water you can watch to see when the soil becomes dark again indicating they have enough water. Don't leave any water in their trays as this may lead to root rot. I hope this all helps.
Avatar for COamateur
Feb 23, 2019 3:33 PM CST
Thread OP

Wow, thanks so much all!

@ZenMan - I SO appreciate the detailed explanation of how you're doing this. Makes all the difference and really is a true help. Yes, I'm in CO! I've got the heat pads and dome covers both on :)

@shadegardener - great idea!

@Lily_Lover - I like the transplant idea. That's really creative. I'll keep an eye on the soil tops. Thanks for the advice!


Really grateful for all the help so far! Really means a lot, everyone!
Avatar for Shadegardener
Feb 23, 2019 4:04 PM CST
Name: Cindy
Hobart, IN zone 5
aka CindyMzone5
Celebrating Gardening: 2015 Plant Identifier
CO - You're welcome. Good luck!
Only when the last tree has died and the last river has been poisoned and the last fish has been caught will we realize that we can't eat money. Cree proverb
Image
Feb 25, 2019 5:47 PM CST
Name: Karen
Valencia, Pa (Zone 6a)
I was one of the first 300 contributors to the plant database! Cut Flowers Winter Sowing Charter ATP Member Seed Starter Echinacea
Plant and/or Seed Trader Region: Ohio Region: United States of America Butterflies Hummingbirder Celebrating Gardening: 2015
I use daisy trays inside my regular 1020s.

Daisy tray
https://www.amazon.com/dp/B004JVGTBA/

That way I can just pick up the daisy tray and place in an extra tray. When finished soaking up water, I move back into the normal tray under lights.

Karen
Image
Feb 25, 2019 5:55 PM CST
Moderator
Name: Linda
Carmel, IN (Zone 5b)
Forum moderator I was one of the first 300 contributors to the plant database! Charter ATP Member Region: Indiana Dog Lover Container Gardener
Seed Starter Herbs Vegetable Grower Cut Flowers Butterflies Birds
Welcome @Coamateur Welcome!

I use capillary mats in the bottom of my trays. Start with making sure the matting material is completely wet (but not soaked). Just add enough water to make sure it stays consistently most. Your cell packs or pots will soak up enough water through the bottoms to keep things evenly watered.
Avatar for COamateur
Mar 13, 2019 5:32 PM CST
Thread OP

Ok friends...I could use some more feedback!!! My first round of seeds have been going for a few weeks. I'm seeing lots of germination, but also a lot of algae / mold. I was watering every 3 days or so...but I took off the clear plastic lid (humidity dome), turned off the heat pad, and have not watered in about 4-5 days.

Do I need to do anything else? And when should I consider thinning out the seedlings? Would love any help here! Thanks so much all!

Thumb of 2019-03-13/COamateur/b59481
Thumb of 2019-03-13/COamateur/cd25d9
Thumb of 2019-03-13/COamateur/6cc369
Thumb of 2019-03-13/COamateur/5f62dc
Avatar for ZenMan
Mar 13, 2019 11:08 PM CST
Name: ZenMan
Kansas (Zone 5b)
Kansas 5b
Annuals Enjoys or suffers cold winters Region: United States of America Seed Starter Keeper of Poultry Hybridizer
Hummingbirder Dragonflies Garden Photography Butterflies Zinnias Garden Ideas: Level 2
Hello COamateur,

" I'm seeing lots of germination, but also a lot of algae / mold. "

Both algae and mold can be harmful to seedlings. Surprisingly, algae have proved quite deadly in my indoor zinnia project. You wouldn't expect that, because algae are one-celled plants, but they grow rapidly if they get light, moisture, and nutrients, and they quickly use up all of the available nutrients in the pot. The plant literally dies of starvation.

I use a product called Physan 20 to control algae and mold. Physan 20 is a disinfectant, sanitizer, deodorizer, fungicide, algaecide, and virucide. It has many uses. Some hospitals use it in their mop water, and many commercial greenhouses use it to maintain a clean environment. I buy the stuff in gallon jugs, because I use a lot of it. I applied some today to some emerging seedlings. Depending on the use, I dilute it one teaspoon per gallon of water, up to one tablespoon per gallon. I follow the instructions on the label.

http://www.physan.com/

https://www.amazon.com/s?k=phy...

ZM (not associated with any product or vendor mentioned or linked)
I tip my hat to you.
Avatar for SkipNJ
Jun 5, 2019 4:32 AM CST
Name: Skip
NJ (Zone 7a)
So many weeds
Has anyone personally compared capillary mats vs. periodic bottom watering by hand? I am considering making a large capillary bed, which is similar to a capillary mat, to place in a large cold frame (4ftx10ft) but dont want to waste a lot of time and effort if constant bottom moisture isn't likely to work well. In its simplest form a capillary bed would be something like a cheap kitty litter pan with an overflow hole in the side 2" from the bottom, then filled with 3-4" of washed sand. You would fill the pan with water until water drains out of the hole, creating a water table 1" below the surface of the sand, then you would place your flats, pots, or plug trays on top of the sand, and the idea is water will wick up into them. The better designs have inverted water bottles all the way up to automatic valves or float valves to keep the water level constant. The capillary beds can be scaled up to large nursery beds, and the height of the water table can be adjusted to be further from the surface of the sand for plants that like it dryer.
http://depts.washington.edu/pr...

https://agsci.oregonstate.edu/...

Should I try this for the twenty 1020 deep plug trays I have, or would I be better off trying to make a large pan or pans to bottom water and then drain by hand? I am attracted to the capillary bed design because I can connect it to a rain barrel and not have to worry about it drying out while I'm at work or away on vacation.

I don't have any space for seed starting other than an unheated somewhat wet cellar, and I'd rather not use electricity for lights, heating mats and climate controls if nature can do some of the work for me in cold frames at different times of the year.
Last edited by Invaded Jun 5, 2019 4:38 AM Icon for preview
Image
Jun 5, 2019 12:39 PM CST
Name: Karen
Valencia, Pa (Zone 6a)
I was one of the first 300 contributors to the plant database! Cut Flowers Winter Sowing Charter ATP Member Seed Starter Echinacea
Plant and/or Seed Trader Region: Ohio Region: United States of America Butterflies Hummingbirder Celebrating Gardening: 2015
I don't know. I have no experience with anything like that. Hopefully someone with experience will come along.

Karen
Avatar for ZenMan
Jun 6, 2019 9:42 AM CST
Name: ZenMan
Kansas (Zone 5b)
Kansas 5b
Annuals Enjoys or suffers cold winters Region: United States of America Seed Starter Keeper of Poultry Hybridizer
Hummingbirder Dragonflies Garden Photography Butterflies Zinnias Garden Ideas: Level 2
Hi Skip,

" I'd rather not use electricity for lights, heating mats and climate controls if nature can do some of the work for me in cold frames at different times of the year. "

This time of the year is very near to the beginning of Summer. Most people are starting their seeds now by simply planting them in-ground, or they planted their seeds in-ground after the danger of frost was over at the beginning of Spring and they are now caring for their garden(s).

For whatever reasons, capillary beds, and even cold frames, are not used much by gardeners nowadays. This might be a good time to do some experiments with capillary beds for next year. The idea of a system that would care for your plants in your absence on a vacation has its attraction.

ZM
I tip my hat to you.
Avatar for SkipNJ
Jun 6, 2019 7:10 PM CST
Name: Skip
NJ (Zone 7a)
So many weeds
" Most people are starting their seeds now by simply planting them in-ground, or they planted their seeds in-ground after the danger of frost was over at the beginning of Spring and they are now caring for their garden(s). "
Indeed, I did a massive wintersowing of perennials, and many things are still in seedling stage. Some relief from watering would be welcome. The cold frame is to protect the containers and seedlings from insects, downpours and weed seeds.
I'll try the cap bed on a small scale with something easy, and provide an update on how it worked.
Last edited by Invaded Jun 6, 2019 7:11 PM Icon for preview
Only the members of the Members group may reply to this thread.
  • Started by: COamateur
  • Replies: 13, views: 19,079
Member Login:

( No account? Join now! )

Today's site banner is by fiwit and is called "Gazing at More Stars"

This site is protected by reCAPTCHA and the Google Privacy Policy and Terms of Service apply.