Post a reply

Image
May 17, 2023 2:07 AM CST
Thread OP
Name: Alicia
Ennis, TX (Zone 8a)
Region: Texas Dog Lover
Hello fellow gardeners,
I am very new to growing vegetable plants. This is my first year, actually, and I started some tomato and pepper plants from seed. They germinated very well and quickly grew……until I put them outside in my raised bed. My raised bed has a mix of top soil (on the very bottom…..just to fill up), a raised bed garden mix, and compost (all bought from a big box store). They seemed to stall (and actually looking kinda scrawny) once I put them in the bed. I did harden them off before planting. I just don't know what I did wrong. I fertilized them a couple times when they were seedlings with a weakened kelp fertilizer. After putting in the bed I've only fertilized once. Any help/suggestions/criticism you guys can offer would be greatly appreciated. (Also, the healthiest looking tomato plant that is a lighter green and in the tomato cage is a store grown one).
Also……any idea what this mold or fungus could be???
Thank you so much for reading this! I appreciate any help.
Thumb of 2023-05-17/haushinka/4ee160

Thumb of 2023-05-17/haushinka/26d493

Thumb of 2023-05-17/haushinka/d38a6f

Thumb of 2023-05-17/haushinka/dfc8bc

Thumb of 2023-05-17/haushinka/57e6be

Thumb of 2023-05-17/haushinka/70d597
Last edited by haushinka May 17, 2023 2:45 AM Icon for preview
Image
May 17, 2023 3:55 AM CST
Central Florida (Zone 9a)
I recycle, reuse, repurpose!
Composter Region: Florida Enjoys or suffers hot summers Birds Annuals Cactus and Succulents
Zinnias Organic Gardener Cottage Gardener Frugal Gardener Dragonflies Butterflies
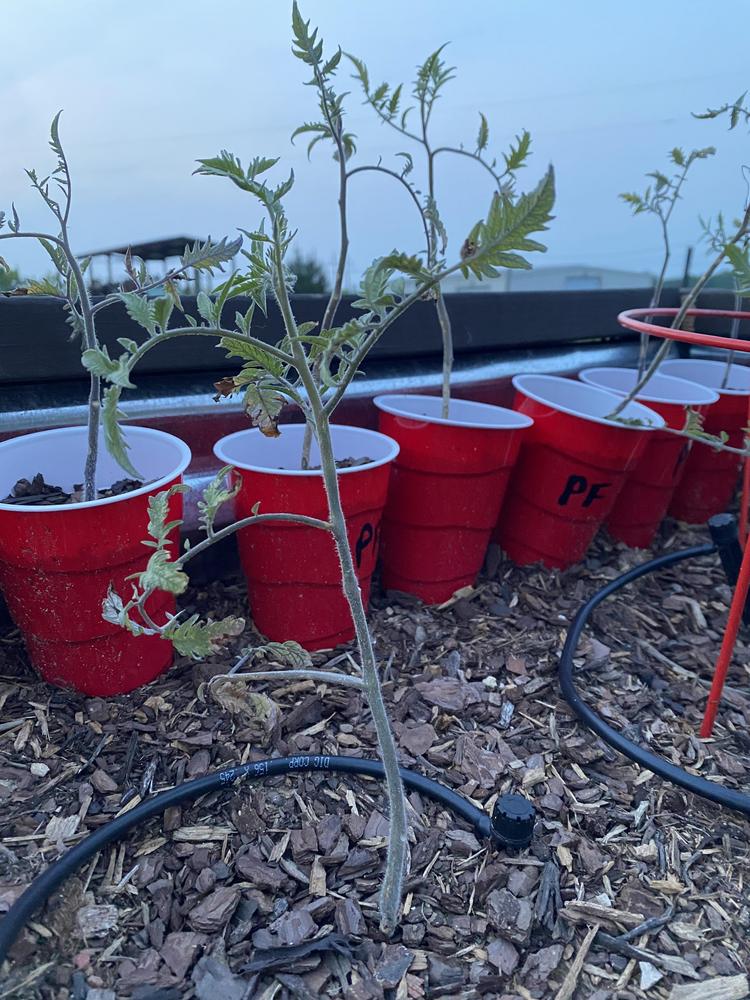
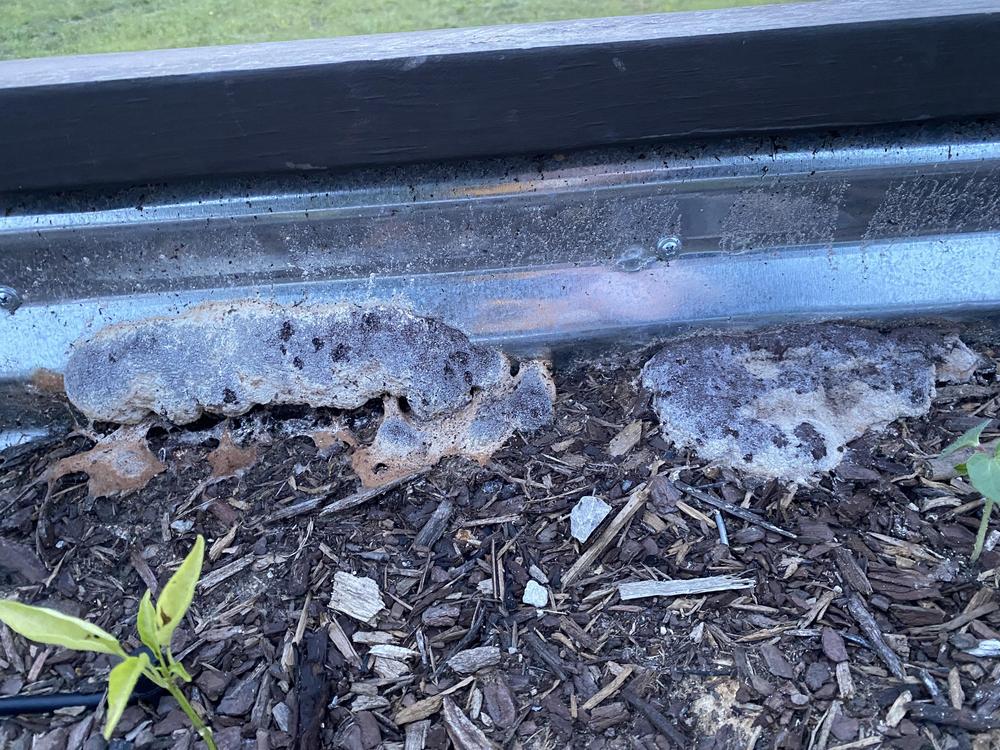
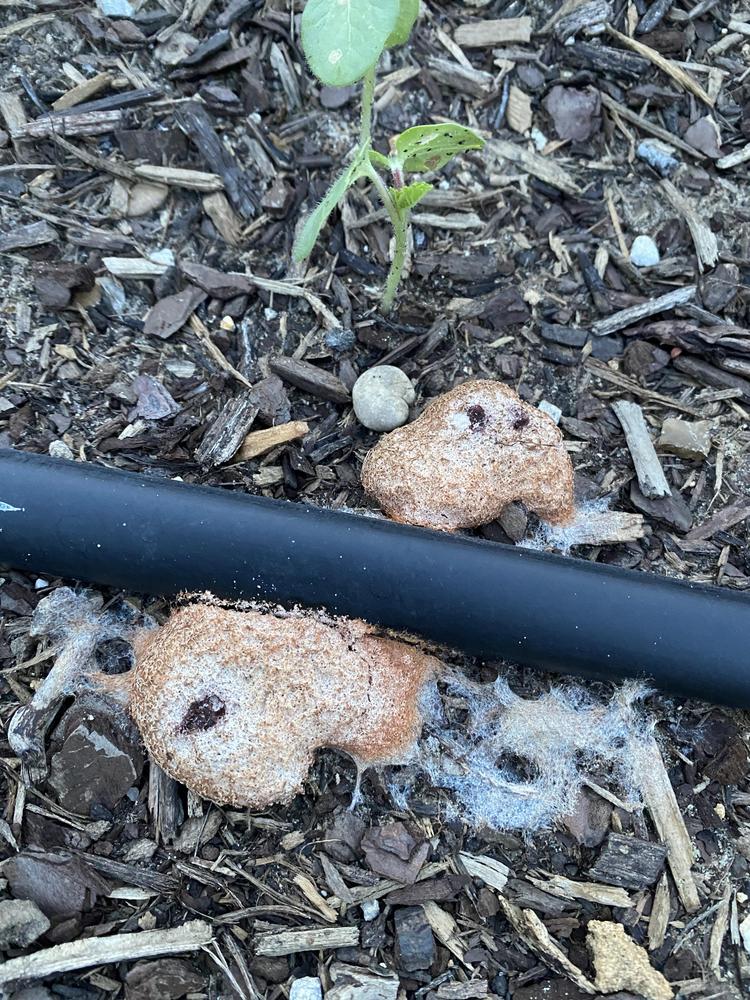
The lighter green, yellowish ones could be overwatered. Also, the plants look long and leggy which could mean that they were reaching for the sun. Did you have drainage holes in the bottom of the cups? I do not know what the mold or fungus is, but I have seen it before. Sorry.

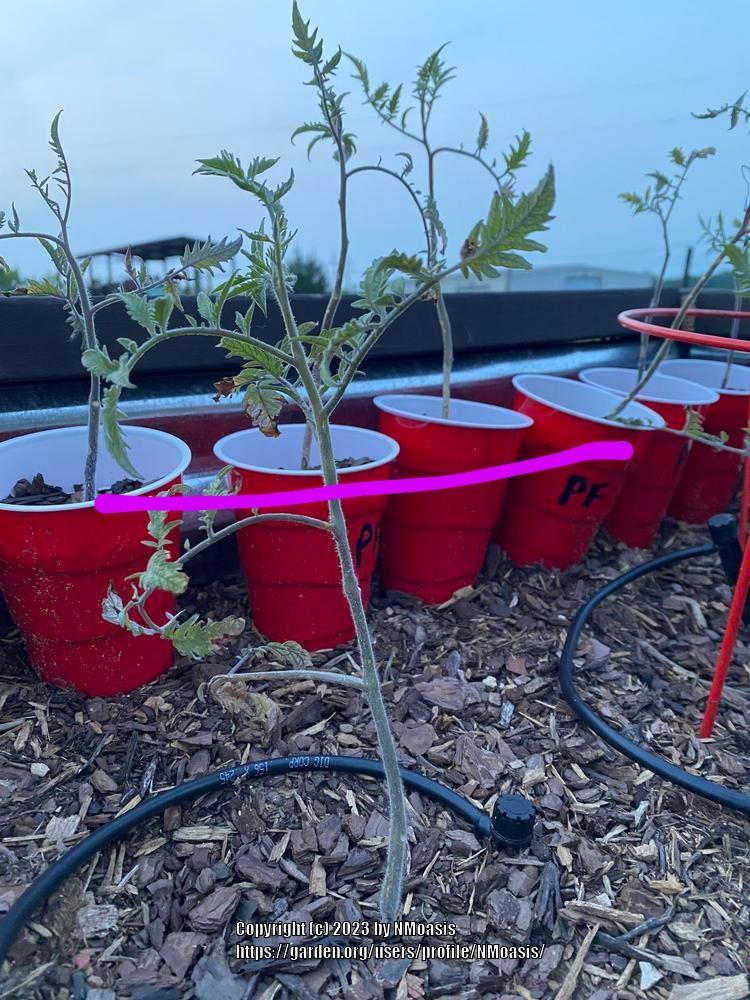
This is what I know about tomatoes: They like to be planted deep, and the pic of the one with the cups lined up behind it needs to go way deeper.
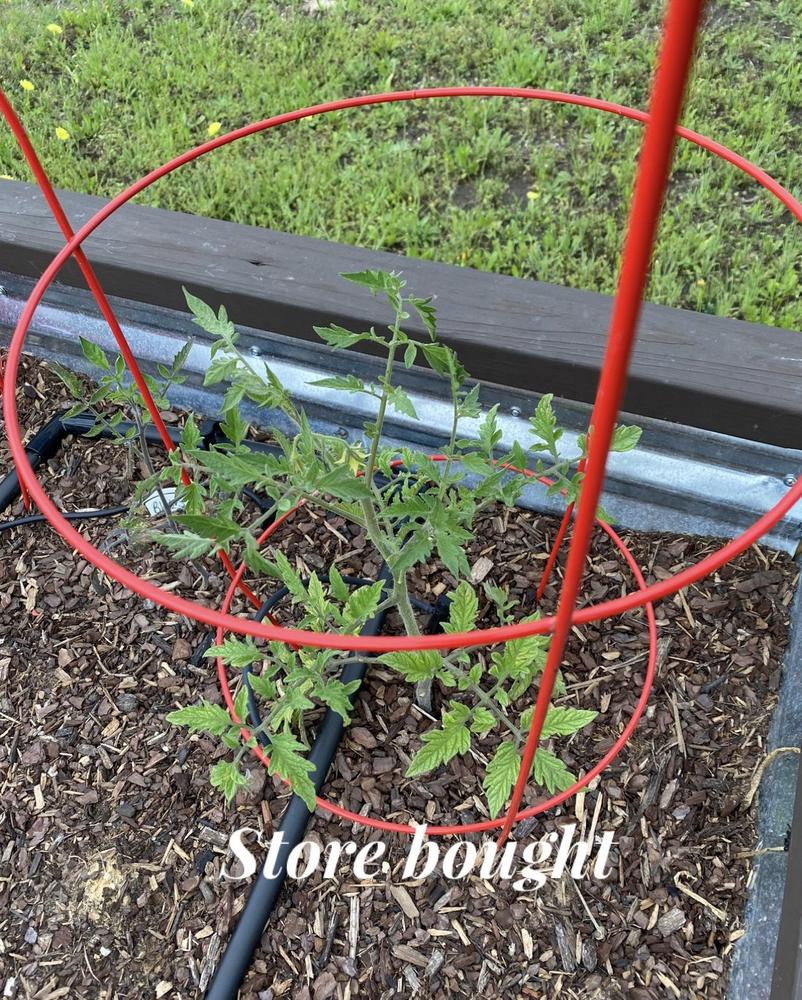
They need watered early am and I see that you have drip irrigation so that is good. No water on the leaves that way. I use coffee grinds for the first planting as a good nitrogen aid, but I wouldn't fertilize any more right now. I have rain barrels and I try to water with the rainwater because it has nitrogen in it and is a good boost to quick growth, but as I stated before they are good for quite a while on fertilizer. The store bought one has blooms! Wonderful, because that is hope. Good luck to you and plant those others deep. You will see a difference. Lovey dubby
Image
May 17, 2023 11:24 AM CST
Name: Zoë
Albuquerque NM, Elev 5310 ft (Zone 7b)
Bee Lover Salvias Region: New Mexico Herbs Container Gardener Composter
Cat Lover Butterflies Bookworm Birds Enjoys or suffers hot summers
Agree, those seedlings need to be buried up to their "armpits." Pink line, below. But disagree about fertilizer —I think they look puny and chlorotic because they need a good feeding with a balanced fertilizer - kelp or coffee grounds aren't adequate. That raised bed mix might be devoid of nutrients (does it have added fertilizer?) How long since you added real fertilizer, and what was the npk? Tomatoes are needy but they have basic simple needs: regular food, water and lots of sun.
Thumb of 2023-05-17/NMoasis/0cdd73
Image
May 27, 2023 1:06 PM CST
Name: BetNC
Henderson County, NC (Zone 7a)
Container Gardener Seed Starter Plant and/or Seed Trader Tomato Heads Annuals Vegetable Grower
yes, plant ASAP and fertilize with a good tomato fertilizer!

First, prepare the planting hole/trench by working in:
dolomite, an organic rock calcium source (Espoma Garden Lime)
a balanced fertilizer specifically formulated for tomatoes (TomatoTne is an organic fertilizer that has ALL the macro- and micronutrients tomatoes require)

Have you noticed that the stems are hairy?? That'ss actually baby roots: burying the stem leads these tiny hairs to grow into roots - increasing nutrient uptake and helping anchor the plant. The advice I was given and still follow years later, is:
nip/pinch/cut off the lowest set of leaves
bury the transplant up to the new lowest leaves

And if the transplants are leggy (like yours):
dig a trench
remove the lowest set of leaves
lay the transplant in horizontally, with some of its upper stem and its "head"/top out of/beyond the end of the trench
fill in the trench, burying the plant roots and lower stem - but not the top of the stem and the "head"/top
gently bend the exposed stem an inch or two (be careful not to force or the stem will break!)
the plant will right itself naturally, reaching upward to the sun

water the newly planted plants in well, to settle the soil snugly and eliminate air pockets

Most importantly, come on over to the thread 2023 Tomato Gardening (in the Vegetables and Fruit forum). There you'll find us tomato heads, willing to help beginners and experienced grower alike with growing problems/challenges. . . and especially some Texas tomato growers! One of them might even be able to id that curious mold/fungus!
Only the members of the Members group may reply to this thread.
Member Login:

( No account? Join now! )

Today's site banner is by Zoia and is called "White Wedding"

This site is protected by reCAPTCHA and the Google Privacy Policy and Terms of Service apply.