Image
Aug 21, 2011 5:39 PM CST
Thread OP
Name: Karen
Valencia, Pa (Zone 6a)
I was one of the first 300 contributors to the plant database! Cut Flowers Winter Sowing Charter ATP Member Seed Starter Echinacea
Plant and/or Seed Trader Region: Ohio Region: United States of America Butterflies Hummingbirder Celebrating Gardening: 2015
Best bet on compost is always making your own. I've been pretty lazy in that department this year; I haven't made nearly as much compost as I usually do. But when I clear my beds in fall, I do tend to fill my bins. I ignore it all winter, and by late spring it's usually "done enough" for me to use. I'm not as picky as some people on that maturing compost thing.

Karen
Image
Aug 21, 2011 6:41 PM CST
Plants Admin Emeritus
Name: Evan
Pioneer Valley south, MA, USA (Zone 6a)
Charter ATP Member Aroids Irises I was one of the first 300 contributors to the plant database! Tropicals Vermiculture
Foliage Fan Bulbs Hummingbirder Lover of wildlife (Black bear badge) Composter Plant Identifier
I'm with you Karen. I use not quite done compost every spring, the problem is there's never enough. I also use fallen pine needles and shredded leaves. Too much space in the beds I guess. I usually only clean up the tall phlox (powdery mildew), Iris and hosta. I might try doing a more thorough clean up this year which would give me more time to prune and shear in the spring.
Image
Aug 21, 2011 7:26 PM CST
Name: Juli
Ohio (Zone 6a)
Region: United States of America Charter ATP Member Cottage Gardener Daylilies Garden Photography Enjoys or suffers cold winters
Birds Hummingbirder Butterflies Dog Lover Cat Lover Garden Ideas: Master Level
I used to use a lot of compost when I could still use a shovel! Big Grin

But now that I don't make new beds, or plant many things, I don't use much. I have four big bins made over the old Victory Garden plans. They worked well when I had huge beds, and was adding lots of stuff. Now, I add to it, but have not used much of it. Two years ago, when we made that new bed in front that I showed photos of, we emptied it all out. Probably had six years worth of stuff! It was great!
Image
Aug 21, 2011 8:55 PM CST
Plants Admin Emeritus
Name: Evan
Pioneer Valley south, MA, USA (Zone 6a)
Charter ATP Member Aroids Irises I was one of the first 300 contributors to the plant database! Tropicals Vermiculture
Foliage Fan Bulbs Hummingbirder Lover of wildlife (Black bear badge) Composter Plant Identifier
daylily said:I have four big bins made over the old Victory Garden plans.


Any more info. would be appreciated?
Avatar for ohladybug
Aug 21, 2011 10:39 PM CST
Name: Betty
Columbus,, OH (Zone 5b)
Always share a smile
Birds Butterflies Bulbs Daylilies Dog Lover Hummingbirder
Region: Ohio Region: United States of America
This was a great thread for me. I was going to ask what everyone does to prepare their perennial beds for winter. I'm new to the midwest and new to gardening so all this information has been great! Thanks everyone Thumbs up Thumbs up Thumbs up
Image
Aug 22, 2011 2:34 AM CST
Name: Jo Ann Gentle
Pittsford NY (Zone 6a)
Charter ATP Member I was one of the first 300 contributors to the plant database! Cat Lover Heucheras Hellebores Container Gardener
Birds Region: New York Avid Green Pages Reviewer Irises Garden Ideas: Master Level Lilies
I will clean the iris and cut back any coneflowers that spread too easily. This is the fall I will have a helper spread compost.
We have very poor soil here. It has taken 4 years to get any vedgtables to bear any amount . Clay and rocks just arent condusive . Eggplants and tomatoes bare OK but not great.
Image
Aug 22, 2011 5:06 AM CST
Name: Juli
Ohio (Zone 6a)
Region: United States of America Charter ATP Member Cottage Gardener Daylilies Garden Photography Enjoys or suffers cold winters
Birds Hummingbirder Butterflies Dog Lover Cat Lover Garden Ideas: Master Level
Evan, I would take photos of them, but there is a hornet nest in a tree by them right now! I will look later today, I think I have a photo somewhere of one of my cats sitting on top of them.

Anyone know if it would be wrong of me to take photos of the book drawings? I assume it would be....

The bins are about 4x4x4 made from 2x4 with what I know as dog wire fencing. They are two sections wide, and I have two of them side by side.

The plans are in the old Crocket's Victory Garden book.... Not sure of the actual title. I have it around here somewhere... Whistling
Image
Aug 22, 2011 6:49 AM CST
Name: Juli
Ohio (Zone 6a)
Region: United States of America Charter ATP Member Cottage Gardener Daylilies Garden Photography Enjoys or suffers cold winters
Birds Hummingbirder Butterflies Dog Lover Cat Lover Garden Ideas: Master Level
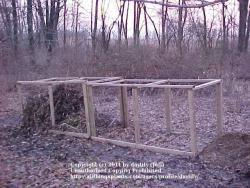
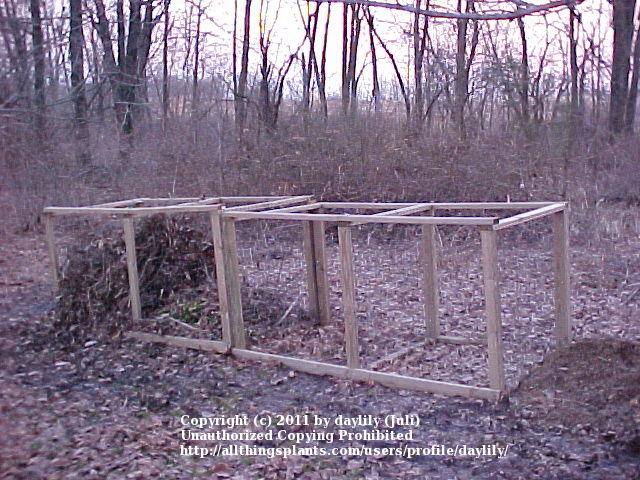
I did find this really old photo taken a year or so after they were made. Sorry, it was taken a long time ago with an old digital camera when they didn't take high megapixel images.

These are two bins set together. Each one has two squares that are built together, sharing a common "wall" in the center. I had two made, and they are sitting side by side, so it looks like four bins, but by the plans, it is actually two. I know that is confusing! The cross bar at the top in front is fastened with a wing nut on one side, so you can open it for easy access. Keeping it closed keeps the individual bin square and from bowing.

The idea is that you put stuff in the bin on one side, then turn it into the next bin. My elderly Mom lives with me, and she can't get the idea of that. She just dumps stuff into what ever bin she is standing in front of. So all of them had some amount of stuff in them at one point. Crying I can see where the system would have worked great. I could have started on the left, then by the time the compost would have been in the right side, it would have been usable. Smiling Instead, I had four bins of half usable stuff with new material on top all the time. I gave up on turning it. When I needed some, I just tried to dig some from around the bottom.

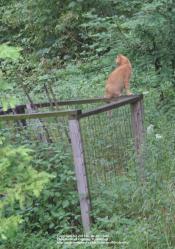
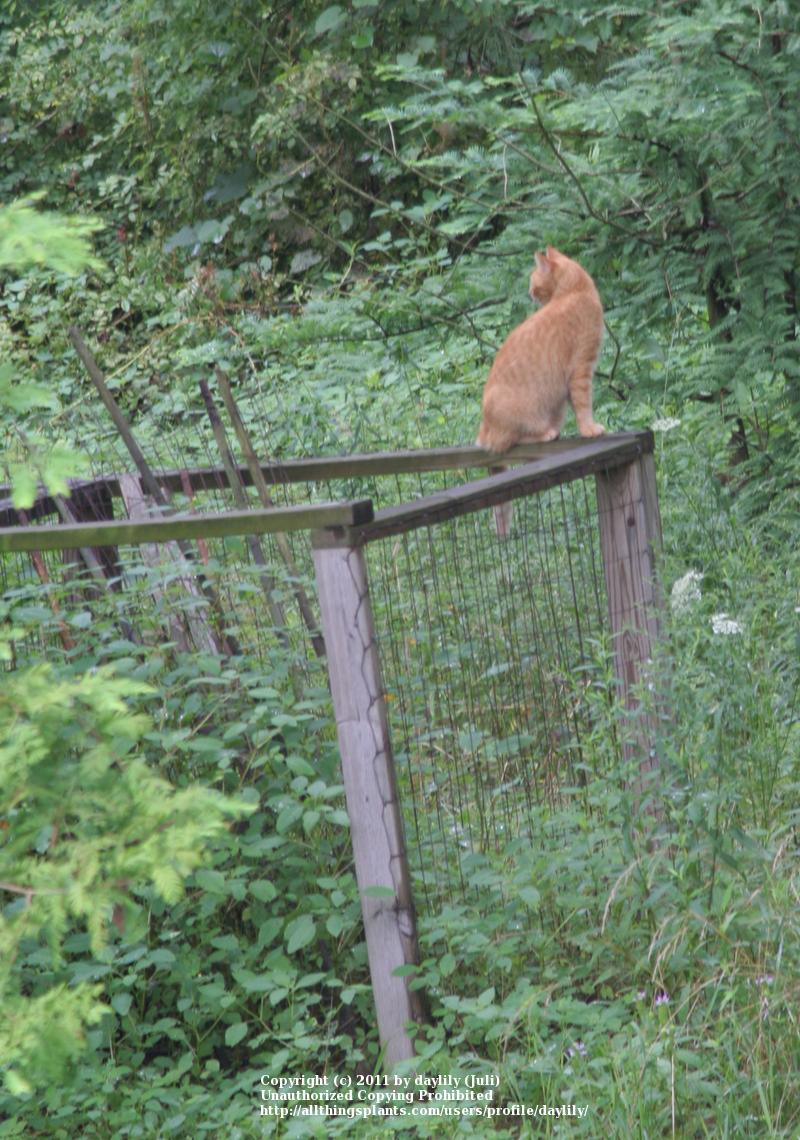
I live out where a big system like this is not a problem. Now, all these years later, weeds have grown up around it, and since I don't use it as much as I did, weeds are growing in it too. But, no one sees it. The second photo is the one with one of my garden cats sitting on it. It was a few years later. You can see what it looks like after it has weathered. It is a little blurry because I was using a telephoto at full range.

I did locate the book. It is called The New Victory Garden, by Bob Thomson. I could have sworn it was by Crockett!
https://www.amazon.com/dp/0316843369/

Thumb of 2011-08-22/daylily/82c477

Thumb of 2011-08-22/daylily/97468a
Image
Aug 22, 2011 7:50 AM CST
Name: Carole
Clarksville, TN (Zone 6b)
Charter ATP Member Garden Sages Plant Identifier I was one of the first 300 contributors to the plant database! I helped plan and beta test the plant database. Avid Green Pages Reviewer
I helped beta test the Garden Planting Calendar Garden Ideas: Master Level Cat Lover Birds Region: Tennessee Echinacea
Very nice. Thumbs up
I garden for the pollinators.
Image
Aug 22, 2011 4:02 PM CST
Name: Rick Corey
Everett WA 98204 (Zone 8a)
Sunset Zone 5. Koppen Csb. Eco 2f
Frugal Gardener Garden Procrastinator I helped beta test the first seed swap Plant and/or Seed Trader Seed Starter Region: Pacific Northwest
Photo Contest Winner: 2014 Avid Green Pages Reviewer Garden Ideas: Master Level Garden Sages I was one of the first 300 contributors to the plant database! I helped plan and beta test the plant database.
>> She just dumps stuff into what ever bin she is standing in front of.

I helped a neighbor who had two bins like that. I did a very coarse screening to separate out rocks and big chunks and trash. I used industrial steel shelivng with about 1" openings.

A second screening with 1/2" hardware cloth gave stuff that might not have been great, but was OK to turn under. Then I picked out most of the rock and plastic and junk from the big pieces, chopped or stomped what looked compostable, and put them back in the first bin to compost.

Then someone else moved in and hired a fast-talking numbscull who ripped out a lot of things including good plants, and exposed a lot of black plastic film some prior owner had put down. He tore down one of the compost heap walls, spread the unfinished compost around a few feet, and left it that way. Then he quit, leaving dug-up areas and tools lying around. He couldn't tell a Rhododendron from an Azealea - literally - and thought he should dig one or the other up "since he was getting rid of weeds".

Sheeze!
Image
Aug 22, 2011 5:07 PM CST
Plants Admin Emeritus
Name: Evan
Pioneer Valley south, MA, USA (Zone 6a)
Charter ATP Member Aroids Irises I was one of the first 300 contributors to the plant database! Tropicals Vermiculture
Foliage Fan Bulbs Hummingbirder Lover of wildlife (Black bear badge) Composter Plant Identifier
Thanks Juli, I get the general idea from the photos. It looks like your cat has a nice perch from which to scan for tender morsels.

Rick, I watched a documentary about an archaeological dig where they used screening trays w/long handles and one pair of braced legs loosely bolted onto the tray. With the tray flat on the ground they would fill it with dirt, pivot it up on the legs and shake it back and forth to remove smalls. I've been thinking this, on a larger scale, might not be a bad approach to screening compost. What do you think? Any more practical ideas?
Image
Aug 22, 2011 5:40 PM CST
Name: Juli
Ohio (Zone 6a)
Region: United States of America Charter ATP Member Cottage Gardener Daylilies Garden Photography Enjoys or suffers cold winters
Birds Hummingbirder Butterflies Dog Lover Cat Lover Garden Ideas: Master Level
Ha! Look what a simple Google search will do! Big Grin

Either I had an updated book or the handyman that built mine made the improvements himself - but I remember him mentioning "carriage bolts" and I know my swing out pieces have wing nuts. I know mine are not nailed together....

http://www.vegetablegardener.c...
Image
Aug 22, 2011 6:58 PM CST
Name: Rick Corey
Everett WA 98204 (Zone 8a)
Sunset Zone 5. Koppen Csb. Eco 2f
Frugal Gardener Garden Procrastinator I helped beta test the first seed swap Plant and/or Seed Trader Seed Starter Region: Pacific Northwest
Photo Contest Winner: 2014 Avid Green Pages Reviewer Garden Ideas: Master Level Garden Sages I was one of the first 300 contributors to the plant database! I helped plan and beta test the plant database.
The pivoting swingy-screen sounds like a great idea, but it would take some assembly, and also possibly some strength. (Perhaps better for compost and archeologists than the relatively large volumes of clay and rocks I try to screen.)

I just prop big steel wire shelving up on cinder blocks or bricks and a stump, with adjustments to change the angle.

The closest I come to that slick pivoting-rocking action is my very final clay-screening step - when I'm working with a fine 1/4" screen almost horizontal, and I'm trying to get every grain of fine stuff possible to pass through it. I tie 1/4" hardware cloth over some steel wire shelving, so the shelving wires take the weight and support the hardware cloth.

I throw 2-3 shovelsfull of partly-screened, partly-rubbed clay onto the 1/4" screen. I'll break it up as much as I can with the back of a steel rake, and rub as much of the clay through it as I can. This is tedious. Sometimes I'll do this while sitting, since my legs are weaker than my upper body.

The pivoting-rocking comes after I've broken the clay up as much as it's going to be broken by rubbing. I grab the low edge of the screen and bounce it up and down several times, where the springiness helps bounce the clay clumps around and encourage fine stuff to fall through. I think this is faster than pushing it around with the rake, because it unclogs the screen and uses the entire surface area instead of just the spots where the rake os rubbing.

Then I put the low end back down, and lift and bounce the whole screen from the high end to fling gravel and big hard clay balls AWAY from the screening area.

It takes around 10-15 shovelfulls to make the little hill under the screen tall enough to touch the screen. I use a spade somewhat delicately to scoop up the little round clay balls that went through the screen and tend to run right down the sides of the hill and collect at the base.

They seem to me to be "purer clay" or "harder clay" than the stuff that broke up easily, so I scoop that away from the hill and demote it to an "extra-bad-clay" heap to work on some other year.

THEN I push the hill around so it isn't as tall, so I can screen more clay.

Eventually the whole area under the screen is full, and I either shovel it to another part of the work area, or move the screen and start a new hill on another side of the stump.

If I'm only planning to screen a small amount of clay that day, AND have enough compost, pine bark and coarse sand, I sometimes amend as I screen.
4-6 shovelsfull of clay.
2-3 of compost.
1-2 of crushed rock.
1-2 of pine bark.
Repeat.

But usually I do it in stages: screen as much clay as I have room for. Then acquire compost, bark and sometimes sand or crushed rock. THEN mix.

(This isn't enough amendment for GOOD soil, but it is enough for SOMETHING to grow and mellow the mix through adding roots and soil life. I keep adding compost each year.)
Image
Aug 22, 2011 7:14 PM CST
Plants Admin Emeritus
Name: Evan
Pioneer Valley south, MA, USA (Zone 6a)
Charter ATP Member Aroids Irises I was one of the first 300 contributors to the plant database! Tropicals Vermiculture
Foliage Fan Bulbs Hummingbirder Lover of wildlife (Black bear badge) Composter Plant Identifier
Very Nice Juli, Thanks.
Image
Aug 22, 2011 7:20 PM CST
Plants Admin Emeritus
Name: Evan
Pioneer Valley south, MA, USA (Zone 6a)
Charter ATP Member Aroids Irises I was one of the first 300 contributors to the plant database! Tropicals Vermiculture
Foliage Fan Bulbs Hummingbirder Lover of wildlife (Black bear badge) Composter Plant Identifier
Rick, It sounds like you have your methodology down pat. The worst thing I have to deal with is some build-up around the old trap rock driveway from snow plows. I don't envy you your battles with the heavy clay soils.
Image
Aug 22, 2011 7:33 PM CST
Name: Rick Corey
Everett WA 98204 (Zone 8a)
Sunset Zone 5. Koppen Csb. Eco 2f
Frugal Gardener Garden Procrastinator I helped beta test the first seed swap Plant and/or Seed Trader Seed Starter Region: Pacific Northwest
Photo Contest Winner: 2014 Avid Green Pages Reviewer Garden Ideas: Master Level Garden Sages I was one of the first 300 contributors to the plant database! I helped plan and beta test the plant database.
Umm, that was the LAST step.

The first step is to set up the coarsest screen (indiustrial steel wire shelving with 1" gaps) at a shallow angle. I throw 3-4 shovelsfull of clay and rock on top.

Then I whale on it with the flat of the shovel and scrape it around a little with the edge of the shovel. This recovers all the clay, breaks it up, and separates out all the rocks over 1". This goes really fast, which is the goal.

I throw the rocks that don't pass through down a slope for future use in drainge ditches and walkways. The whole area downslope from my "screening stump" is the best-paved part of my yard!

Corey
Image
Aug 22, 2011 7:53 PM CST
Name: Rick Corey
Everett WA 98204 (Zone 8a)
Sunset Zone 5. Koppen Csb. Eco 2f
Frugal Gardener Garden Procrastinator I helped beta test the first seed swap Plant and/or Seed Trader Seed Starter Region: Pacific Northwest
Photo Contest Winner: 2014 Avid Green Pages Reviewer Garden Ideas: Master Level Garden Sages I was one of the first 300 contributors to the plant database! I helped plan and beta test the plant database.
Cross-post!

I think I believe the people who say that heavy clay is better than mostly-sand, because you CAN rescue clay, with enough time and compost.

My middle two steps are mostly designed to make the final 1/4" step go faster, because it is the most time-consuming part of all. I try to pull out everything bigger than 1/2", and some of the smaller stuff. I'm willing to throw aside some of the clay if it saves me a lot of time and effort.

I use 1/2" hardware cloth on top of the steel wire shelving. I set it up at a slight slope, so the pieces don't roll off. I have plenty of time to smack them with the flat of the shovel blade, scrape them with the edge, and rub them hard with the back of a steel rake.

Once I've rubbed them enough that what's left is junky with gravel and roots, the slope is enough that I can push it off the low edge of the screen easily. I lose some clay at this point, but I've got LOTS of clay.

I don't try to save every grain of clay. I'm converting a small hill of excavated clay with lots of rocks and gravel into a smaller hill of mostly gravel with some clay. So I can toss the rejects after a fairly quick whacking and rubbing.

The screened part still has a lot of 1/2"-minus gravel and big clay balls, so I will still have to put it through a 1/4" screen.

That would be very slow and laborious, so I do a second fast-pass with 1/2" screening at a steeper angle, to quickly pull out anything even close to 1/2". It makes the 1/4" step go faster if I reduce the amount to be fine-screened, and make it "cleaner".

For this step, I let the screened mix roll down a moderately steep 1/2" screen with just a little shovel action to slow it down and give it more exposure to the screen before it rolls off. As soon as most of the clay has been recovered, I let the worse part join the rejects from the prior step.

Hey, if it is still a big enough clod to roll over a 1/2" screen after all the beating it has already gotten, it must be pretty hard clay! This is another very fast step, and it makes the final, very slow 1/4" step go faster. I think it saves me time and effort overall.

If I ever run out of raw clay to screen, I can go through this heap of rejected stuff and recover a lot of 1/2" gravel and a little clay. I'll probably do that when I want to finish my system of trenches, and need lots of drainage gravel!

Meanwhile, I've recovered almost all the usable clay, removed anything bigger than 1/2" and a fair amount of the gravel between 1/2" and 1/4", and rubbed the clay pretty thoroughly to break it up for the slow 1/4" screen.

Corey
Image
Aug 22, 2011 9:30 PM CST
Name: Lucy
Tri Cities, WA (Zone 6b)
irises
Charter ATP Member Cottage Gardener Irises Region: Northeast US Region: United Kingdom Region: United States of America
Enjoys or suffers cold winters
It sounds like a tough job to me.
Image
Aug 22, 2011 9:33 PM CST
Plants Admin Emeritus
Name: Evan
Pioneer Valley south, MA, USA (Zone 6a)
Charter ATP Member Aroids Irises I was one of the first 300 contributors to the plant database! Tropicals Vermiculture
Foliage Fan Bulbs Hummingbirder Lover of wildlife (Black bear badge) Composter Plant Identifier
Does doesn't it Lucy. I'm feeling pretty lucky right about now.
Image
Aug 25, 2011 4:15 PM CST
Name: Rick Corey
Everett WA 98204 (Zone 8a)
Sunset Zone 5. Koppen Csb. Eco 2f
Frugal Gardener Garden Procrastinator I helped beta test the first seed swap Plant and/or Seed Trader Seed Starter Region: Pacific Northwest
Photo Contest Winner: 2014 Avid Green Pages Reviewer Garden Ideas: Master Level Garden Sages I was one of the first 300 contributors to the plant database! I helped plan and beta test the plant database.
It gives me a seocnd career!

There may have been some real soil here at some point in the past, but bulldozers probably removed all that when the park was built.

I kept hoping that if I dug deep enough I would find sandy subsoil, but no. The clay is everywhere, and the only thing that chnages with depth is that the rocks get bitgger and more numerous.

I wish I had yards of free compost or manure (and teams of people with wheelbarrows to haul it)!

You must first create a username and login before you can reply to this thread.
  • Started by: kqcrna
  • Replies: 47, views: 2,857
Member Login:

( No account? Join now! )

Today's site banner is by RootedInDirt and is called "Botanical Gardens"

This site is protected by reCAPTCHA and the Google Privacy Policy and Terms of Service apply.