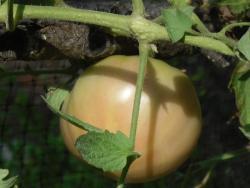
Heirloom tomatoes can be fun to grow; there are so many varieties out there from tiny currants to Goliath sized beefsteaks, from yellow, red, black and everything in between!
So when you find that perfect tomato with the flavor you have been longing for; how nice that you can save the seeds and grow them again next year, and the year after that....
If you are growing more than one variety, there's always that chance of cross-pollinating, so keep them some distance apart! I don't go the recommended 80 to 90 feet apart, but even then, solitary bees could come by and cross pollinate? So I think it's a good idea to plant something else in between my tomatoes, like borage, nasturtiums and marigolds. That way, the bees might stop by the flowers before moving on the the next tomato plant.
Look for the early maturing and attractive plants. Selected plants can then be marked, staked, and regularly inspected during the growing season for resistance to diseases.
Allow tomatoes to completely ripen on the plant before harvesting for seeds.

TO SAVE SEEDS:
There are various methods used to save seeds, I've successfully just scooped them out, rinsed them, and let them lay on a paper towel to dry and then stored them and planted them the following year!
But my favorite method is using fermentation. It's used to save your seeds for many years.
Cut each tomato in half at its equator, opening the cavities that contain the seeds. Into a cup or small container, squeeze the gel and seeds. Add a little bit of water if you only have a small amount of seeds. Set the container with the seeds in a warm place for a few days. I usually just leave them sitting on the sink counter. After a few days, you will notice a layer of fungus appear on the top of your seed mixture. The fungus is eating the gelatinous coat that surrounds each seed and prevents germination; it also produces antibiotics that help control seed borne diseases.
After your seeds have fermented, about a week or so, fill the seed container with water. Let the seeds settle to the bottom, pour out the water along with the tomato pulp and immature seeds that are left floating on top. Your best, viable seeds will be heavier and sink to the bottom. Repeat until the water is clear. Pour your freshly cleaned seeds into a mesh strainer, getting out as much water as possible, then tip your strainer onto a paper towel, paper plate, or newspaper. Spread them out, separating them as much as possible and allow to completely dry. A drying oven can be used to dry your seeds completely, but I've not used this method.
Once the seeds are dried, put in an envelope or zip lock bags, label and store for later use. these days, I buy those small zipper baggies you can get in the craft section, they're perfect sized to save seeds.
