Injured myself earlier this winter, so I will be confined to a wheelchair this spring and possibly summer. That means I won't be able to work the full garden-- no tilling, no raking, no hoeing, nothing.

I decided that I wasn't going to give up growing entirely, though. I'll be planting a few different tomatoes in Earthbox self-watering containers. They'll be placed on my driveway and I'll be able to manage them from the wheelchair.
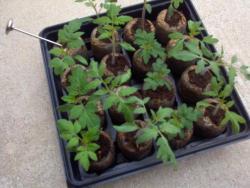
Seedlings have been going since early February. I'm hardening them off now to get ready to plant next week. (I have more surgery scheduled, so I want to have them in containers, so I don't have to worry about the seedlings as much while I'm in the hospital.) The first photo below is the seedlings earlier this week. I have five types planted. Three slicing-sized tomatoes and two cherry tomatoes. They are Momotaro, Husky Red Dwarf, Sweet Ozark Orange, Isis Candy, and Gold Nugget.
I took photos of the process of getting the Earthboxes ready to plant. The drawings provided with the boxes are fairly clear, but sometimes it's easier to understand a real photo.
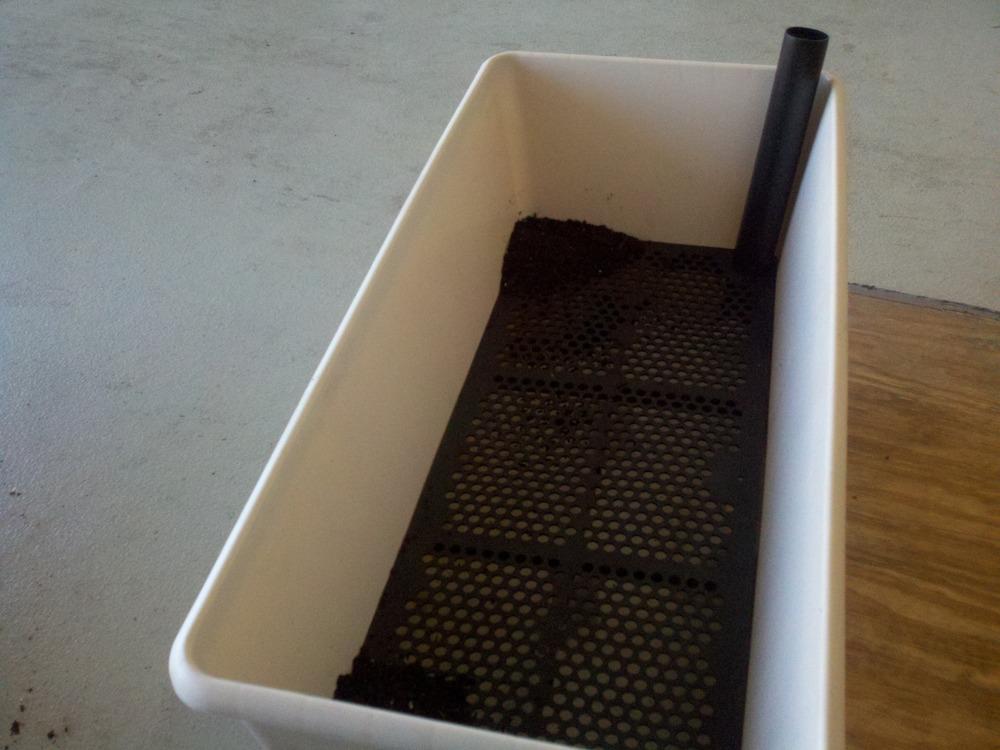
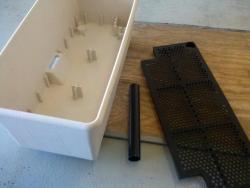
Step 1, Gather the parts. Here I have the box, the reservoir screen and the fill tube. You can't see the casters, which I've already installed. If you want the boxes to roll, buy the factory casters. The hardware store furniture casters won't fit.
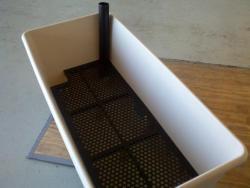
 Step 2, Assemble
. The reservoir screen lays over a variety of support posts in the bottom of the box. There are three holes, two large rectangular holes that allow potting mix to be packed and submerged in the water. That packed soil is a wick that pulls water up by capillary action and supplies the plant with water and dissolved nutrients. The smaller round hole is for the water fill tube. It provides a way to get water to the reservoir, to be used as the plant needs it. You can't see it in the photo below, but there is a hole in the box itself, that keeps the reservoir from overflowing and allows an air gap between the water surface and most of the soil. You can see the overflow hole in the parts photo, above.
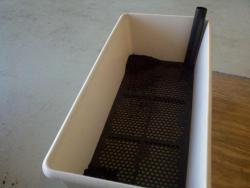
 Step 3, Soil wicks
. Pack potting mix in each of the square corners. The bottom of the box is molded to make a basket to hold the packed soil. Be sure the soil is packed tightly, if not, the water won't wick correctly into the rest of the box. It's hard to see, but the soil is packed into the wicking basket here.
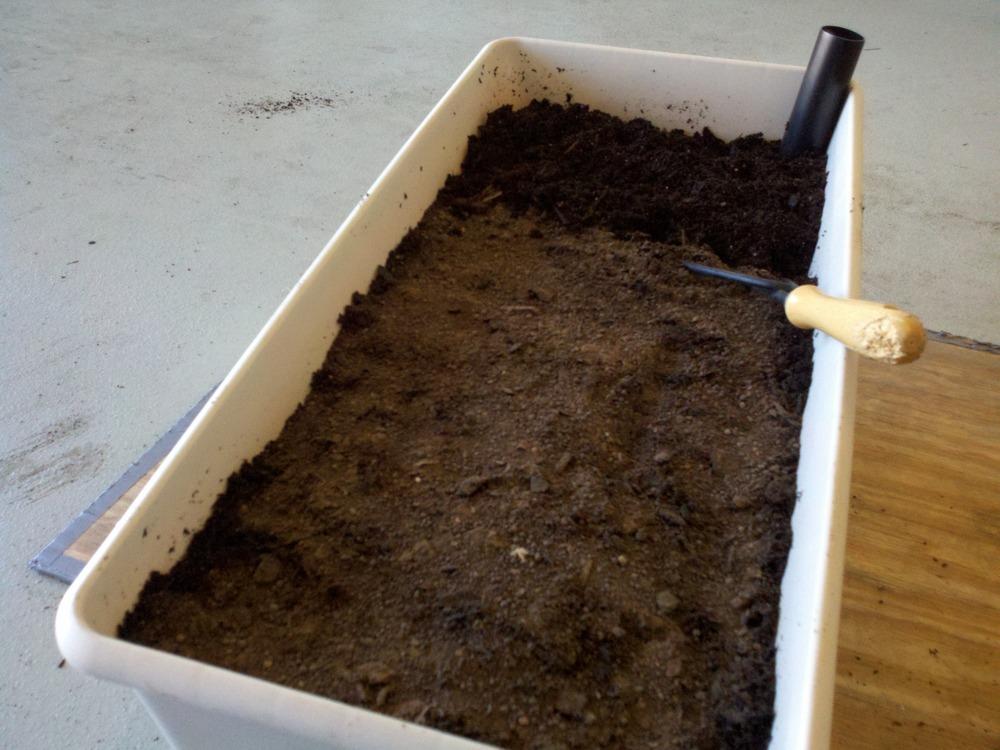
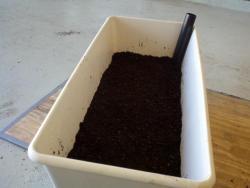
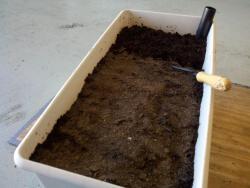
 Step 4, Bottom layer
. Spread an even layer of potting mix over the reservoir screen about two inches deep. Pat the soil into place to make a firm, but not solid layer. This will provide the base for the remainder of the container and ensure the soil doesn't filter down into the water reservoir.
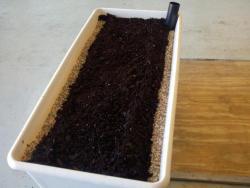
 Step 5, Soil & Dolomite Lime
. Add additional potting mix to fill the Earthbox to within 2-3 inches of the top. Level, but don't compress the soil. Spread one pound (a generous cup) of dolomite lime evenly over the surface. Mix the soil and lime to a depth of 3-4 inches. Once complete, lightly compress the soil.
 Step 6, Fertilize
. This step will vary depending on what you are planting in your Earthbox. The setup instructions show fertilizer placement and seedling locations for a variety of vegetables and plants. Since I wanted to plant my tomatoes in the middle of the box, rather than the edge as Earthbox instructions show, I modified the fertilizer placement. I put two thin strips of fertilizer at each side of the box, in a 2-inch deep trench. I used, as the instructions specify, two cups of chemical fertilizer. Cover the fertilizer with the soil pushed up to make the trench.
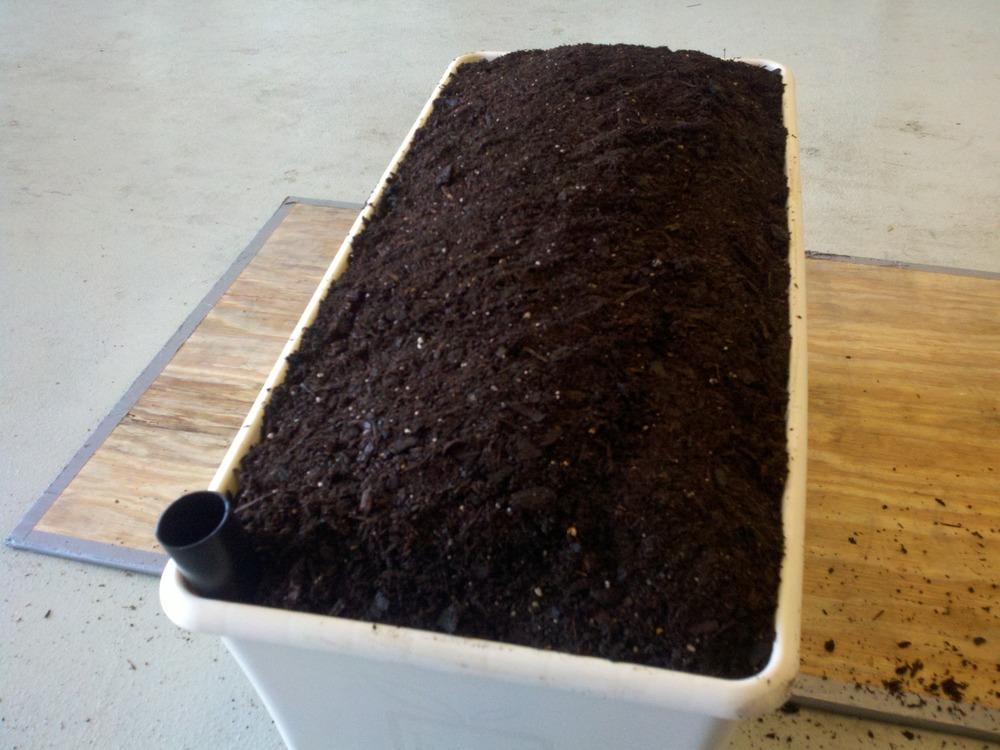
 Step 7, Finish the soil
. Mound soil at least two inches over the edges of the container. Pack lightly as you add to keep the mix from falling out. If you use a two cubic foot bag of mix, you should have just enough to complete a nice loaf-shaped mound.
 Step 8, Cover and plant
. Pull the plastic mulching cover over the fill tube using the pre-cut hole. If you live in a cooler climate, use the black side of the cover out, to help warm the soil. In warmer areas, like here in central Texas, use the white/grey side of the cover to help keep the soil a little cooler. The elastic around all edges of the cover will pull over the upper lip of the box and secure snugly. All that's left is to use a sharp knife to cut slits in the cover at the desired planting locations, dig a small hole to fit your seedling, plant, and water the seedling lightly. Fill the reservoir until water flows from the overflow hole. Add more water every two or three days at first, then every day as your plants grow and need more water.
I'll update with results once I've planted and the plants are growing.
David R