Post a reply

Image
Jun 13, 2014 4:59 PM CST
Name: Greg Colucci
Seattle WA (Zone 8b)
Sempervivums Sedums Plant Lover: Loves 'em all! Cactus and Succulents Container Gardener Garden Ideas: Level 1
Garden Art Birds Dog Lover Cat Lover Region: Pacific Northwest Hummingbirder
ckatNM said:Well, I have to start over. The one planter I thought worked out, didn't.

I am going to give it another try. I thought I'd try it this evening when it cooled off outside. But now all my planters and everything have just gotten dumped on with rain. We haven't had rain in weeks, so I'm not complaining at all. Not one bit.

I'll just keep trying until I get it right.


Hello Kat, what didn't work out about your attempt??? Just curious, so I know pitfalls when I attempt this, which I know I will in some form or another!!! Hurray! I tip my hat to you. Thanks Thumbs up
Image
Jun 13, 2014 5:35 PM CST
Name: cheshirekat
New Mexico, USA Zone 8 (Zone 8a)
Bee Lover Dog Lover Herbs Garden Procrastinator Vegetable Grower
Well, I don't really know what I did wrong. I thought I was figuring it out as I went along.

I started off mixing the cement and water to a very thin consistency. But the cement would drip off and the cloth would be dry, not hardened at all. Just a bit of cement dirtiness left in the cloth. I had several pieces of three different textures to work with. So, after the thin cement failed, I moved on to the same fabric types with slightly thicker cement. That failed also. The last attempt with thicker cement I thought seemed to shape better and appeared that it would not drip/flow out of the fabric.

After drying since Sunday, I checked them this morning after my doc appointment and they had seemed to harden on the outside, but the moment they were touched, they crumbled. I thought the terrycloth one I might try to dip again, but then it rained. On the top, where it was dry, was in contrast to the underneath, where the cloth seemed to be soft, almost like the cement completely wicked out of it. I didn't have to turn it upside down to tell that the cement had not formed. The thinner materials were easily blowing in the gentle breeze, getting rid of all the cement each day, so I only had hope in the one terrycloth material.

It seems to me that the cement was too dry, although the mixture ratios I tried all had more water than cement and well mixed before getting the cloth to soak up the cement. Maybe too dry here? I'm tempted to wait to purchase the peat and other stuff, to give the cement more texture and tension. Or use another type of cement, but I don't know which I'd use instead. I thought this cement settled to the bottom of the bucket too much, although I stirred it frequently. I had to keep constantly stirring because it kept returning to looking like silt that settles in water. I don't have experience working with these types of projects. I've only used cement to do simple things that required them hardening and being able to walk on them. Not be of a different statue-like hardness that this seems to require and I think I am bad at explaining.

It is a very messy project. I have cement dripped all around the area I worked in. I used large lawn trash bags on the ground and rocks to keep the bags in place. All the rocks were dripped on, but the cement just rubbed off of them. Yeah, I am thinking I need a different type of cement. Now what do I do with this huge bag of cement I only used a little bit out of?
"A garden is a friend you can visit any time." - Anonymous
Image
Jun 13, 2014 5:43 PM CST
Name: Greg Colucci
Seattle WA (Zone 8b)
Sempervivums Sedums Plant Lover: Loves 'em all! Cactus and Succulents Container Gardener Garden Ideas: Level 1
Garden Art Birds Dog Lover Cat Lover Region: Pacific Northwest Hummingbirder
Kat that sounds disappointing!! Messy and fun too!! You are making me want to try this...I love the largest one in the photos because of the uneven edges. But I'd do mine much smaller - like maybe even hanky sized and see what that would look like?? I have some old kerchiefs...did you feel that a heavier fabric worked better? (I haven't read the instructions yet - in case I'm asking some obvious questions!!) Good idea on putting down garden bags, now I probably do have a place to make this, and use those garden bags on the ground (and be very very careful! ) Rolling on the floor laughing
Image
Jun 13, 2014 7:53 PM CST
Thread OP
Name: aud/odd
Pennsylvania (Zone 6b)
Garden Ideas: Level 1
I would wet the fabric before dipping it in the cement mixture. Many fabrics have a coating to stop absorption. lf you wet the fabric before dipping in the mixture you will have a better chance of your mixture sticking to the fabric.
Last edited by Cinta Jun 13, 2014 8:12 PM Icon for preview
Image
Jun 13, 2014 8:18 PM CST
Name: cheshirekat
New Mexico, USA Zone 8 (Zone 8a)
Bee Lover Dog Lover Herbs Garden Procrastinator Vegetable Grower
The largest planter is what made me want to do this myself. I just love the look of it.

It is most certainly messy fun, but the mess isn't too bad, if you know ahead of time. I had empty coffee cans I used for extra water to clean up. Even the disposable gloves were able to be reused a few times. But I had extra pairs ready, just in case.

About those uneven edges. I knew that was going to be a challenge if you are one that likes all things to line up perfectly. That was the reason I practiced with dry cloths and wet cloths before I began soaking in the cement water. I like the uneven edges, but also wanted some in neater edges. Neat edges are really a pain to arrange because, well, the neater the hem line, the more lopsided the planters will look if the cloth isn't arranged and draped correctly. The uneven edges of the big pot in the photo looked intentional to me. But I didn't want to keep playing with getting the even edges right, as the cement dripped all over the place.

Some of the fabric I used was about as thin as a kerchief. They were the first I used, and a complete fail, I thought. Couldn't get the thinner material to drape decently, and as I said, the cement seemed to just slip right off with every drop.

I really want someone else to try it so maybe someone brighter can figure out what completely escapes me. I want to blame the type of cement I used. But of course I'm not going to blame myself. Hehehehe. I've been stumped since last Sunday, but I still want to keep trying it until I get a lightbulb moment of some kind. I don't care whether it is my bulb shedding light on this or someone else's. While the texture of cement like "tea" seems reasonable, no way could I make it easy to implement. I don't know how something could harden to a draped shape unless the cement is able to bond or stick to the object. In this case, porous material that would not absorb the cement, or adhere to the cement enough for it to begin to harden to that shape. Thinner cement bonded about as well as water flowing off the Niagara Falls. It just didn't happen.

Don't wear dress shoes. Hehehehehehehe.
"A garden is a friend you can visit any time." - Anonymous
Image
Jun 13, 2014 8:27 PM CST
Name: Greg Colucci
Seattle WA (Zone 8b)
Sempervivums Sedums Plant Lover: Loves 'em all! Cactus and Succulents Container Gardener Garden Ideas: Level 1
Garden Art Birds Dog Lover Cat Lover Region: Pacific Northwest Hummingbirder
Kat - yep, I know it'll be a challenge! I'll let you all know if I ever decide to do this one! I tip my hat to you.
Image
Jun 13, 2014 8:33 PM CST
Name: Sharon
Calvert City, KY (Zone 7a)
Charter ATP Member Houseplants Celebrating Gardening: 2015 Garden Ideas: Master Level I was one of the first 300 contributors to the plant database! Hosted a Not-A-Raffle-Raffle
Native Plants and Wildflowers Dog Lover Ferns Daylilies Irises Cat Lover
I'm thinking of using burlap and soaking it first as Cinta said, then after thoroughly soaked in water, soak it in the cement tea for a while. Then drape. Not sure if that will make much of a difference, but I can try.

It would have been a good day to start one but it was a doctor day for me so that takes up much of the day. I'm afraid to look at the next week of weather.
Visit my cubit Blue Gardens
Check out my Blog
Read my Articles and Ideas
Image
Jun 14, 2014 4:57 PM CST
Name: David Paul
(Zone 9b)
Cat Lover Hibiscus Seed Starter Native Plants and Wildflowers Vegetable Grower Region: Florida
Miniature Gardening Keeper of Poultry Herbs Foliage Fan Farmer Dragonflies
I've got to run away from the house now, but wanted all of you to know I got my ball rolling with this project! Smiling

These are blurry pictures of the first two beginnings from and will fill in the gaps soon.

I covered them with trash bags earlier and before the current storm......

.......,and the in between pictures are needing to be edited...

Get busy along with me as soon as you can!

This is a project that has potential indeed! Thumbs up
Thumb of 2014-06-14/DavidofDeLand/0b95bb


Thumb of 2014-06-14/DavidofDeLand/9e16c8


Thumb of 2014-06-14/DavidofDeLand/f300f7


Thumb of 2014-06-14/DavidofDeLand/5c91b4
Image
Jun 14, 2014 5:01 PM CST
Name: Greg Colucci
Seattle WA (Zone 8b)
Sempervivums Sedums Plant Lover: Loves 'em all! Cactus and Succulents Container Gardener Garden Ideas: Level 1
Garden Art Birds Dog Lover Cat Lover Region: Pacific Northwest Hummingbirder
Alright David! Looks good and very messy Hurray!
Image
Jun 14, 2014 7:11 PM CST
Thread OP
Name: aud/odd
Pennsylvania (Zone 6b)
Garden Ideas: Level 1
David you make me want to run out and play. But;.....I am in the bed with a 102 temp with chills and my entire body hurts. I do not know if this is the flu or allergic reaction to something because it came on sudden.

Have fun and post more pics. David great job.
Image
Jun 14, 2014 8:57 PM CST
Name: Bev
Salem OR (Zone 8a)
Container Gardener Foliage Fan Sempervivums Photo Contest Winner: 2014 Garden Ideas: Master Level
Cinta, get well soon! Smiling
Image
Jun 14, 2014 9:37 PM CST
Name: cheshirekat
New Mexico, USA Zone 8 (Zone 8a)
Bee Lover Dog Lover Herbs Garden Procrastinator Vegetable Grower
Can't wait to see them dry, David. Are you planning to paint them?
"A garden is a friend you can visit any time." - Anonymous
Image
Jun 15, 2014 5:23 AM CST
Name: David Paul
(Zone 9b)
Cat Lover Hibiscus Seed Starter Native Plants and Wildflowers Vegetable Grower Region: Florida
Miniature Gardening Keeper of Poultry Herbs Foliage Fan Farmer Dragonflies
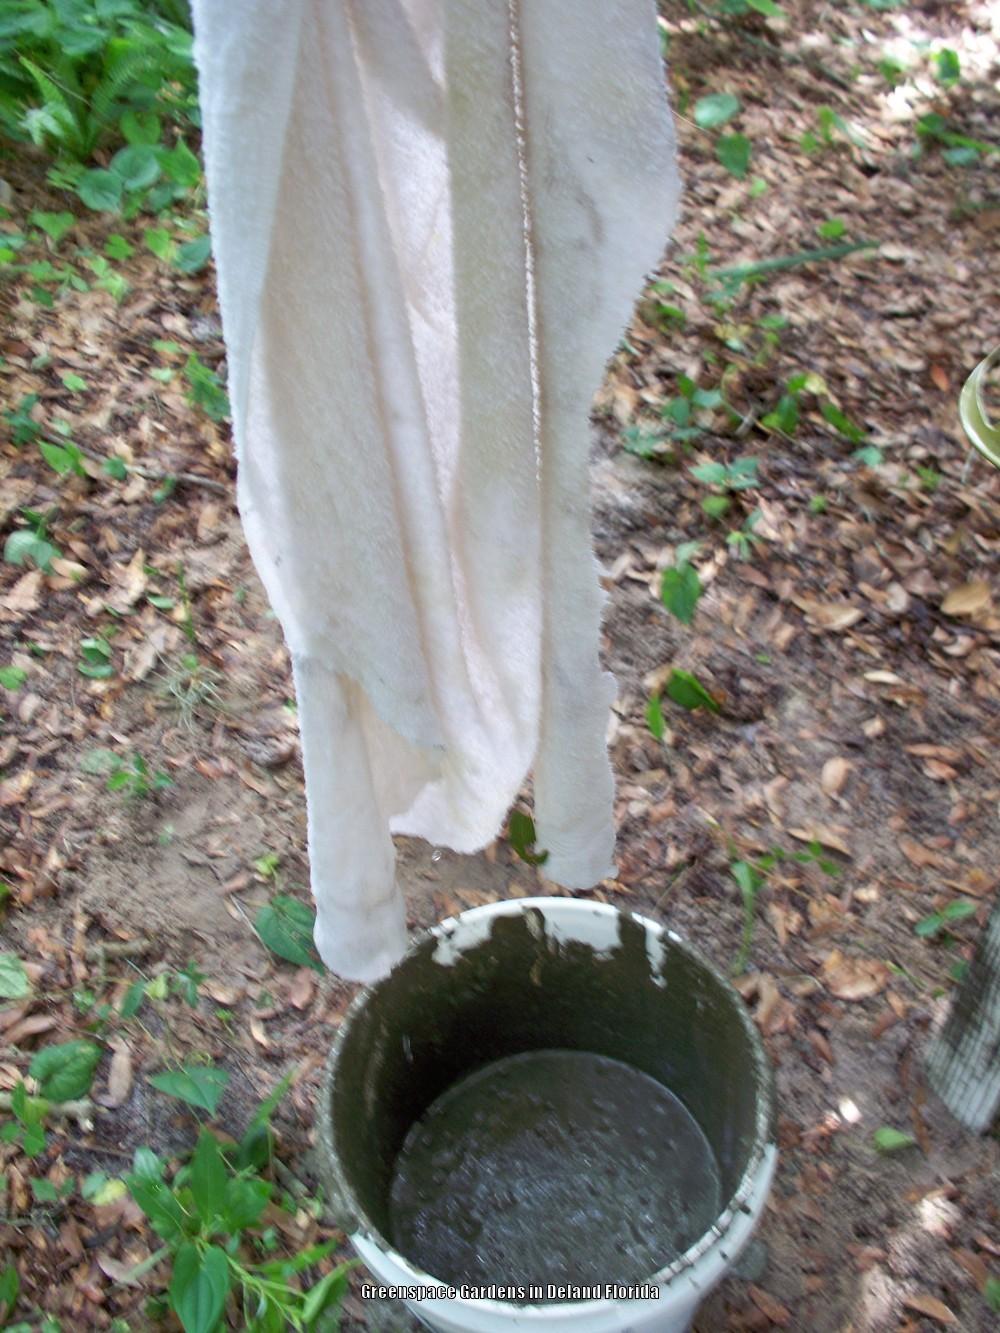
It is a just a tad messy Greg! Hilarious!

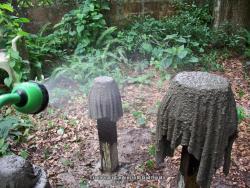
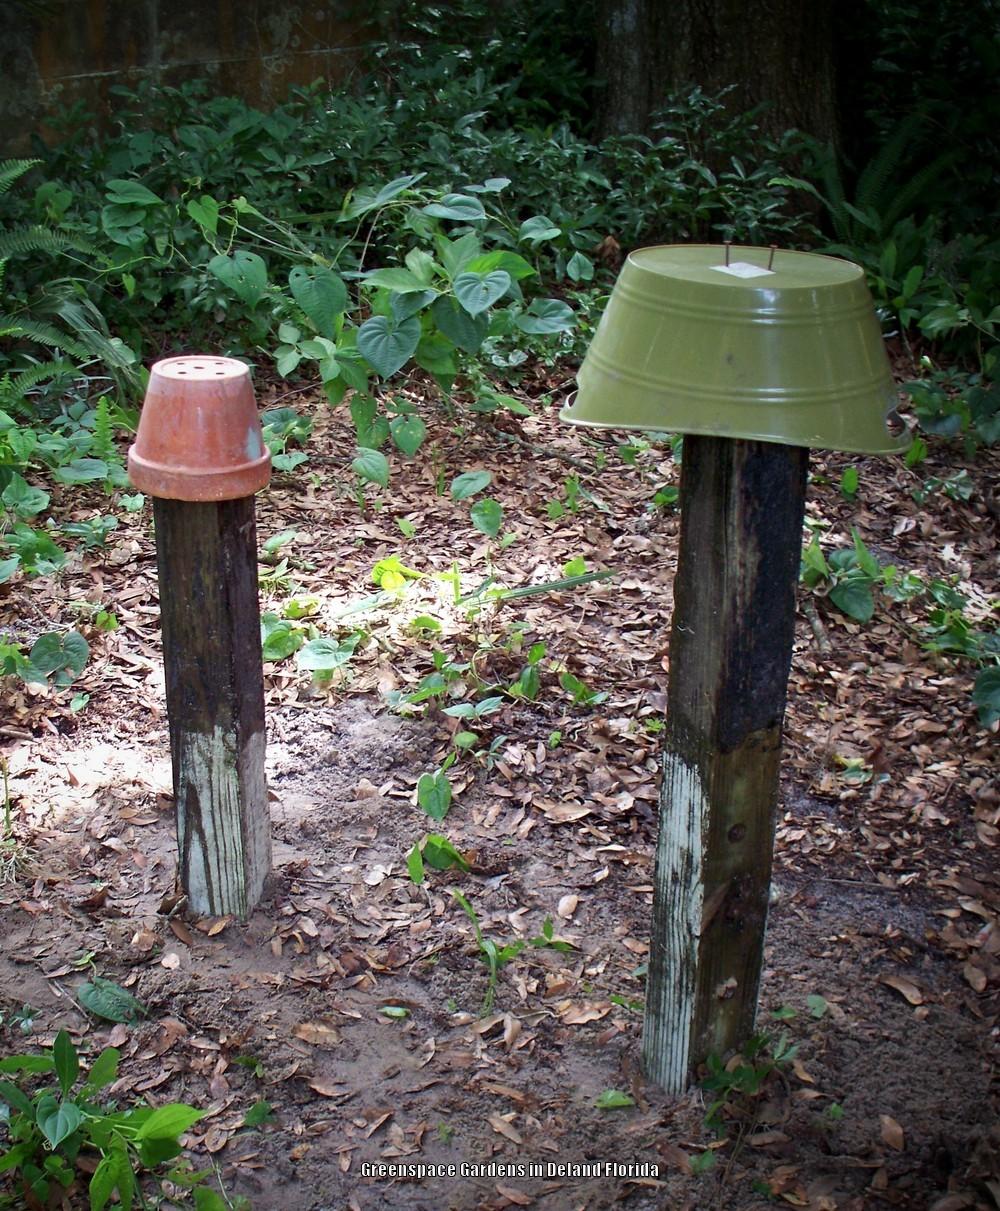
That is why I put the "dripping posts" way out in my far back corner behind my work shed and pot graveyard. I just took two old posts and set them in the ground with my post hole digger. The drips were far less then I expected and can easily be raked off the sand today now and thrown in the trash.

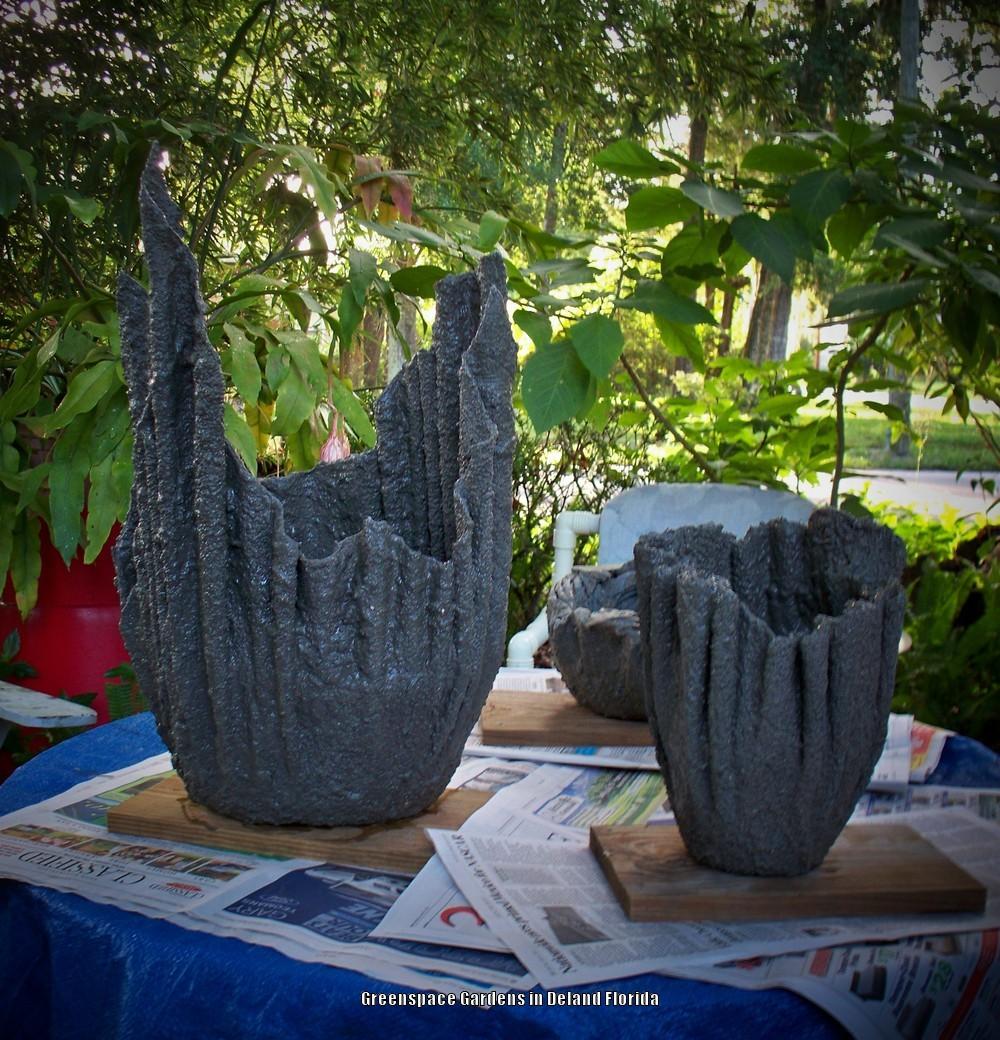
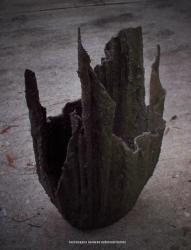
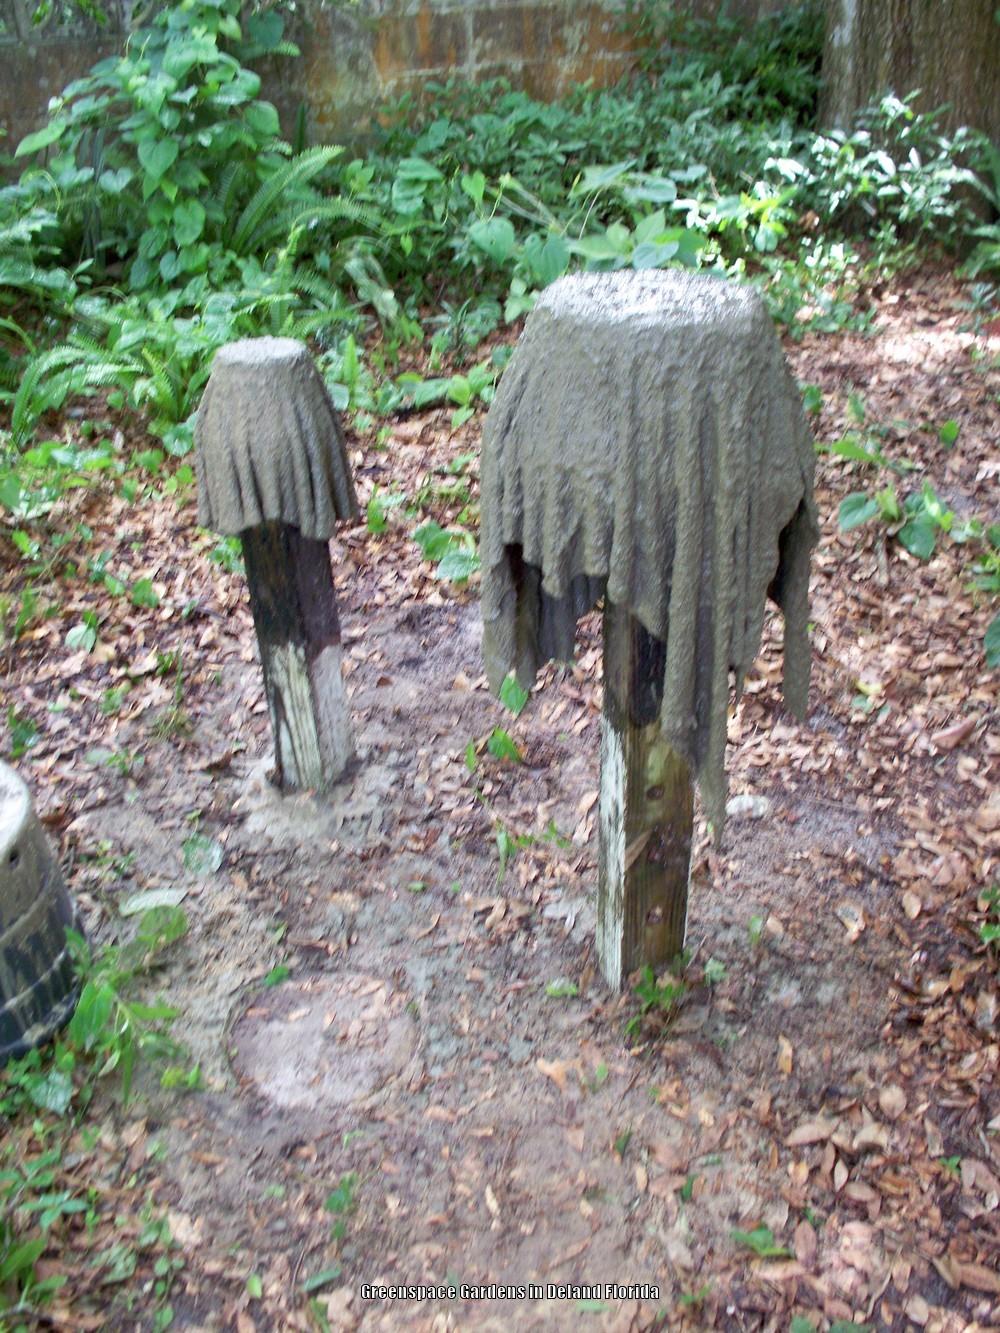
I've been doing hypertufa for several years and altered my recipes for this project. I used 1/3rd vermiculite and 2/3rds Portland cement. The old towels were cut and soaked in water before dipping and redipping and squishing and soaking a few minutes and then another dip, redip, and squish session for another couple of minutes;.................lift and flop over forms.

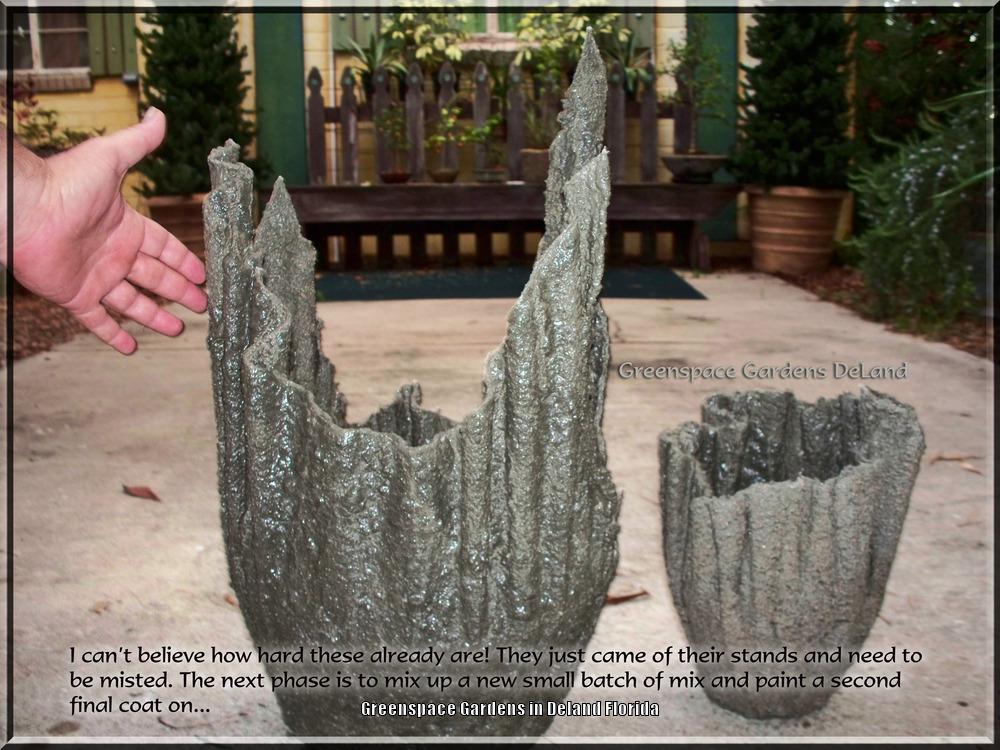
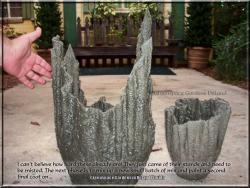
I was so surprised to see how hard they were for as delicate as they seemed when I woke up! I really wasn't expected that in some way.....

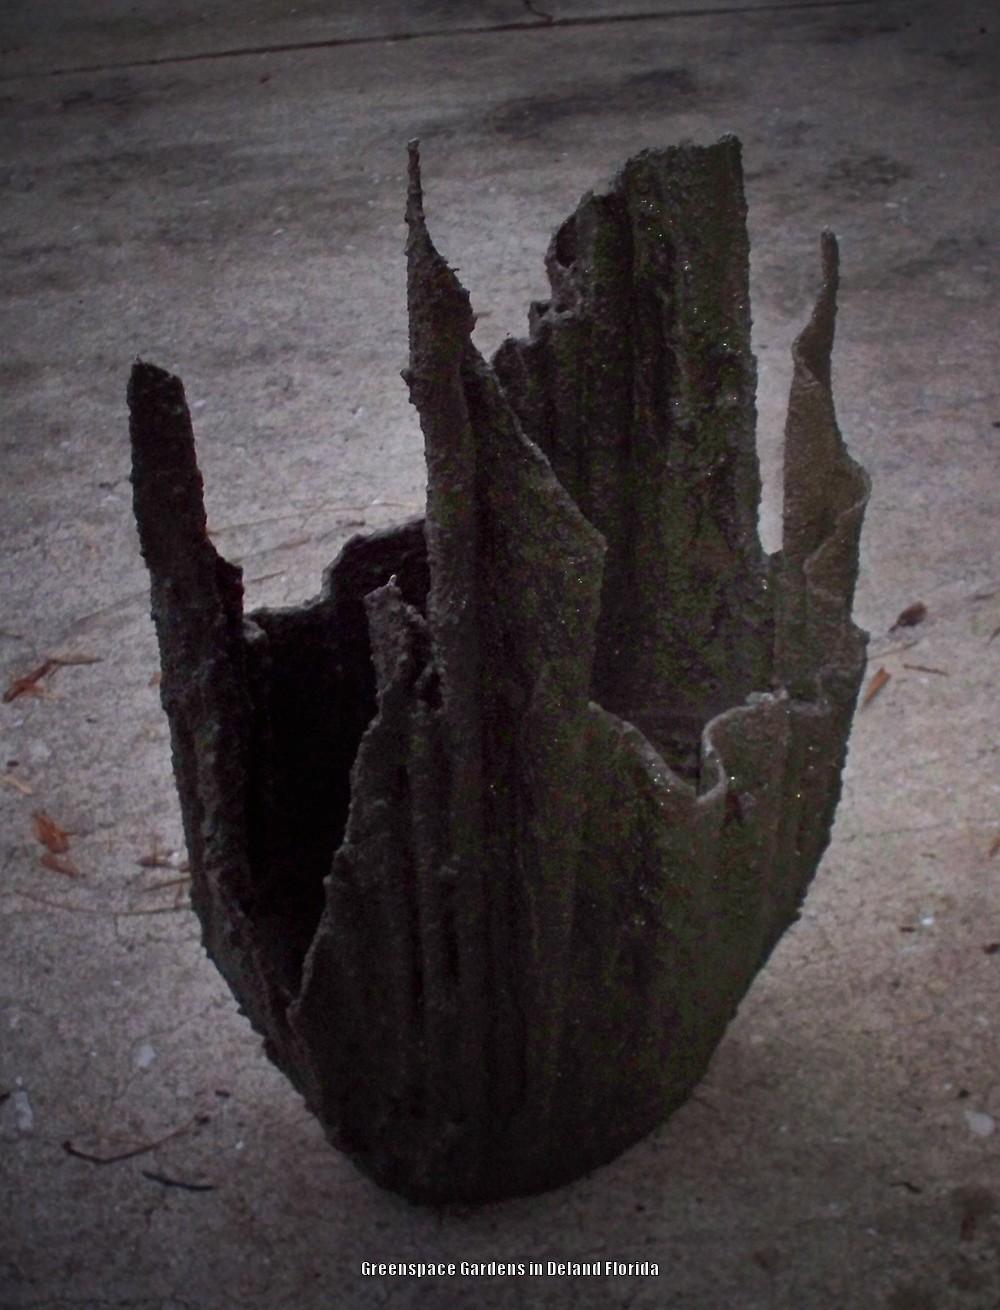
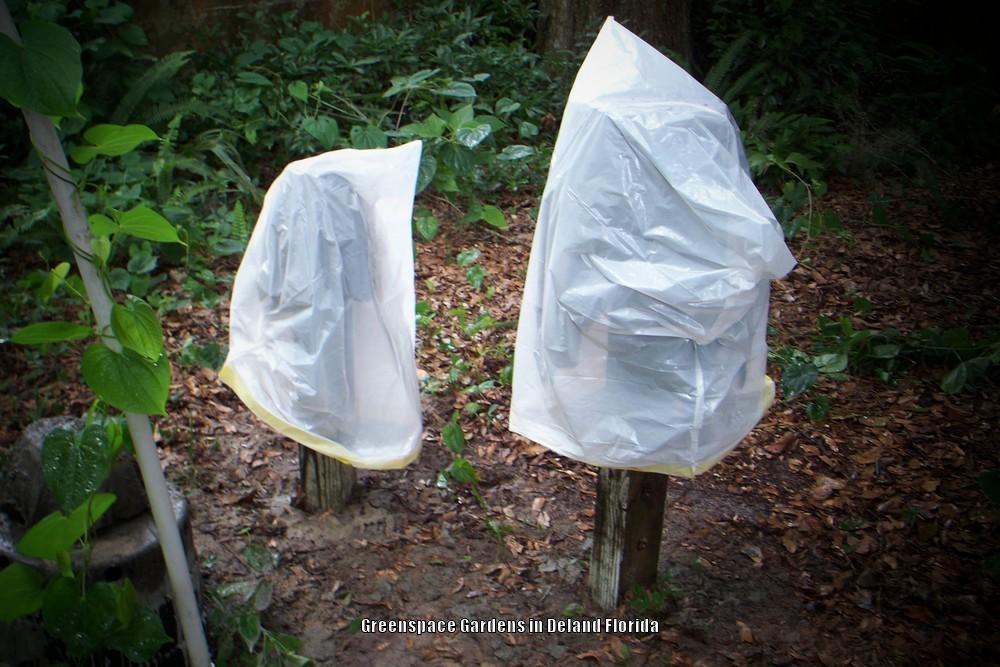
It is important to mist a few times once the concrete has set to the touch and hardening. The plastic bag overnight is a good thing too to prevent overly rapid drying.

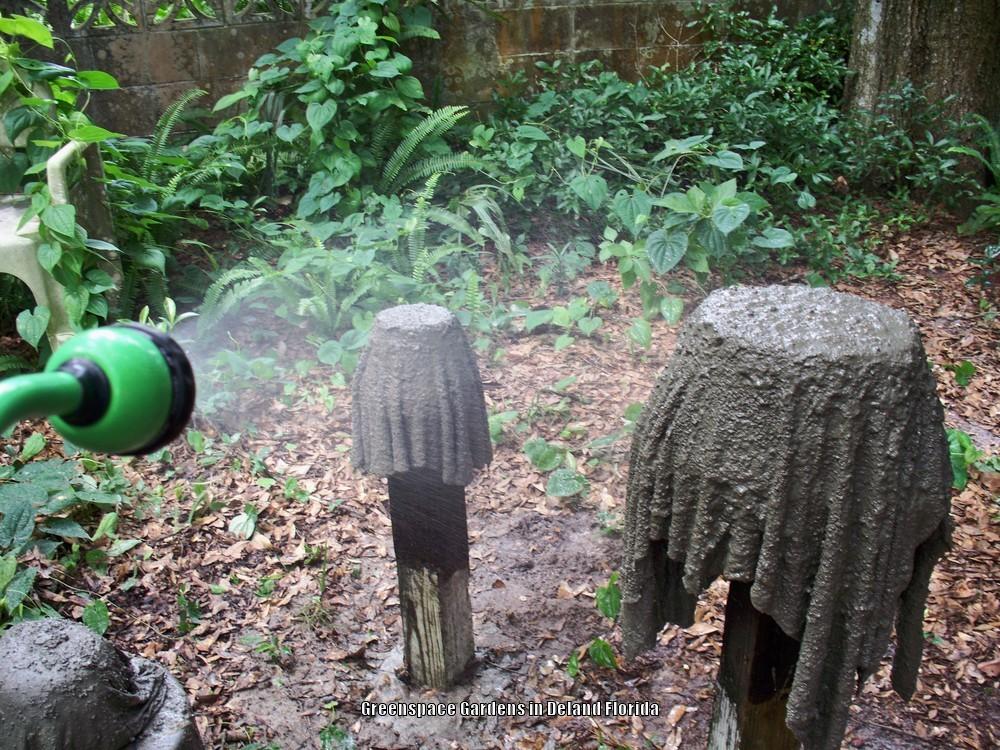
I'm misting them down this morning and going to add a painted on second coat of a slighty thicker mix.

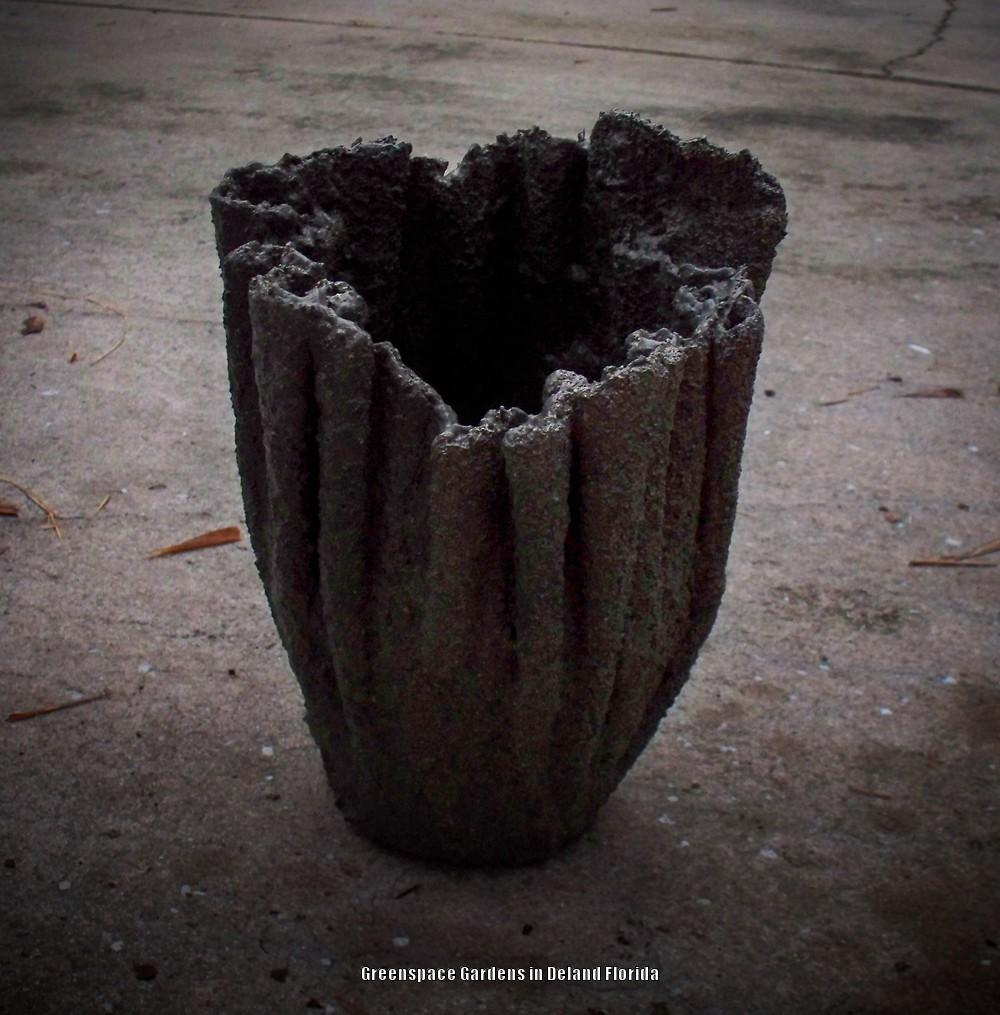
The smaller one was built over an old chipped terracotta pot which is now permanantly in the base. It adds weight and I will re-drill right through the original drainhole for the new look.

This is FUN!!!!

Thumb of 2014-06-15/DavidofDeLand/d2a942 Misting after the concrete has begun getting hard to the touch...


Thumb of 2014-06-15/DavidofDeLand/8ddc59


Thumb of 2014-06-15/DavidofDeLand/5b8b9c


Thumb of 2014-06-15/DavidofDeLand/85a1ae

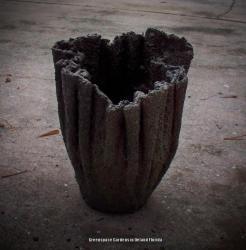
I will be painting them Chesire. An undersea look I'm sure...ha!
Last edited by DavidofDeLand Jun 15, 2014 5:27 AM Icon for preview
Image
Jun 15, 2014 5:32 AM CST
Name: David Paul
(Zone 9b)
Cat Lover Hibiscus Seed Starter Native Plants and Wildflowers Vegetable Grower Region: Florida
Miniature Gardening Keeper of Poultry Herbs Foliage Fan Farmer Dragonflies
Cinta,

Are you feeling better today?

Get well soon!!!!!! I'm looking forward to seeing your first project. Smiling

Thick towels work really well as they can really soak and hold... Thumbs up
Image
Jun 15, 2014 5:55 AM CST
Name: David Paul
(Zone 9b)
Cat Lover Hibiscus Seed Starter Native Plants and Wildflowers Vegetable Grower Region: Florida
Miniature Gardening Keeper of Poultry Herbs Foliage Fan Farmer Dragonflies
Getting ready this morning for their second brush coat. I'll mix a little extra and pour it in the bottom of the large pot to thicken the base to about and inch and a half. The drainhole is easy to drill later...
Thumb of 2014-06-15/DavidofDeLand/02b645
Image
Jun 15, 2014 10:50 AM CST
Name: Jonna
Mérida, Yucatán, México (Zone 13a)
The WITWIT Badge Region: Mexico Garden Procrastinator I was one of the first 300 contributors to the plant database! Ponds Tropicals
Enjoys or suffers hot summers Plumerias Plays in the sandbox Dog Lover Cat Lover
Wow David!! You aced it. They are beautiful.
A day without sunshine is like, you know, night.
Image
Jun 15, 2014 11:33 AM CST
Name: Julia
Washington State (Zone 7a)
Hydrangeas Photo Contest Winner 2018 Garden Photography Region: Pacific Northwest Celebrating Gardening: 2015 Forum moderator
Plant Database Moderator I was one of the first 300 contributors to the plant database! Dog Lover Sempervivums Container Gardener Foliage Fan
I agree Those are nice!!!!! Did you leave the nursery pot inside or is it rigid enough to hold?
Cinta hope you feel better. Group hug
Sempervivum for Sale
Image
Jun 15, 2014 12:02 PM CST
Name: Bev
Salem OR (Zone 8a)
Container Gardener Foliage Fan Sempervivums Photo Contest Winner: 2014 Garden Ideas: Master Level
extranjera said:Wow David!! You aced it. They are beautiful.

I agree

So David, your second "painted" coat will be pigment mixed into another mixture of cement and poured over the first coat that is drying? Or are you saying your 2nd coat will be the paint you will be dabbing onto the first cement coat?
Can you tell I am totally clueless about this kind of process? *Blush*
Image
Jun 15, 2014 12:25 PM CST
Name: Sharon
Calvert City, KY (Zone 7a)
Charter ATP Member Houseplants Celebrating Gardening: 2015 Garden Ideas: Master Level I was one of the first 300 contributors to the plant database! Hosted a Not-A-Raffle-Raffle
Native Plants and Wildflowers Dog Lover Ferns Daylilies Irises Cat Lover
I could be wrong but I read it to mean that he'd mix up another cement/gravy batch and 'paint' it on.
Visit my cubit Blue Gardens
Check out my Blog
Read my Articles and Ideas
Image
Jun 15, 2014 1:10 PM CST
Name: Bev
Salem OR (Zone 8a)
Container Gardener Foliage Fan Sempervivums Photo Contest Winner: 2014 Garden Ideas: Master Level
Thanks Sharon for clarification!

So will paint on 2nd coat to thicken the walls of the planters? ...doing this because you found the first coat to be too thin or not sturdy enough for your liking, David?

You must first create a username and login before you can reply to this thread.
  • Started by: Cinta
  • Replies: 636, views: 243,322
Member Login:

( No account? Join now! )

Today's site banner is by RootedInDirt and is called "Botanical Gardens"

This site is protected by reCAPTCHA and the Google Privacy Policy and Terms of Service apply.