I hope this will help someone and if you have questions I will try to answer them. Please understand that what I know about post processing an image is from years and many hours spent trying to learn to do this and I have a whole lot to learn yet.
There are simple techniques that can allow anyone to post process their photos. You can use free programs such as GIMP and there are others, but GIMP is the closet thing to Photoshop that is free, other than some Mac only software. There is great image processing software like Paint Shop Pro and others that are not free but reasonably cheap also. Just google Photoshop tutorials or GIMP tutorials and you will find all the info you can read or view on the subject. Here's a UK guy that I have learned a whole lot from over the years..https://www.youtube.com/user/GlynDewis/videos
My suggestion is to learn how to use normal layers, layer mask and adjustment layers in programs like Photoshop, GIMP, etc.
With the knowledge of these you can create and process images and have loads of fun creating and adjusting your images.
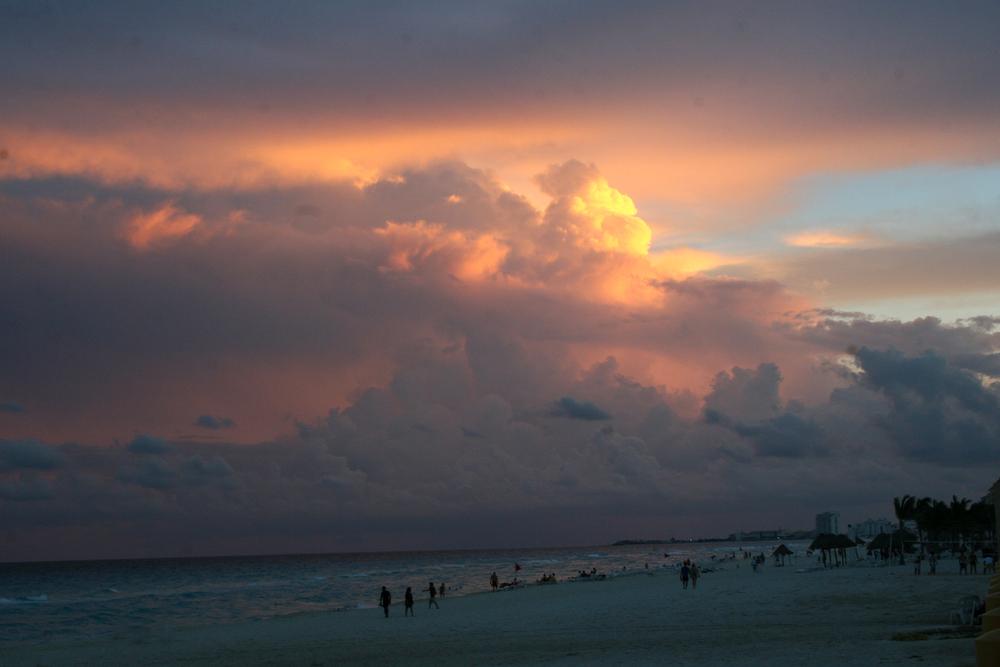
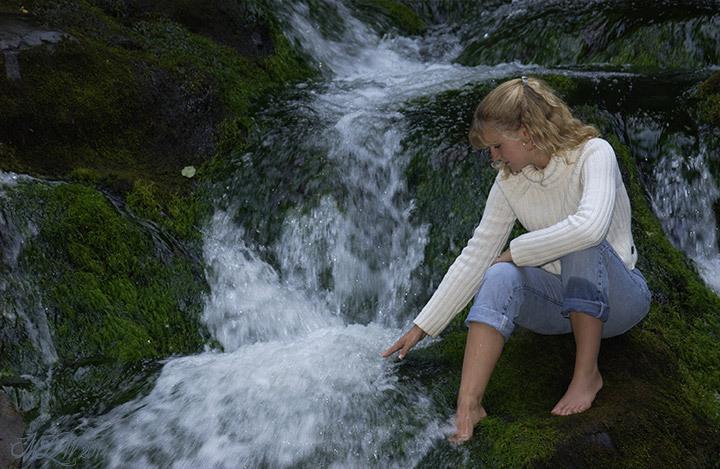
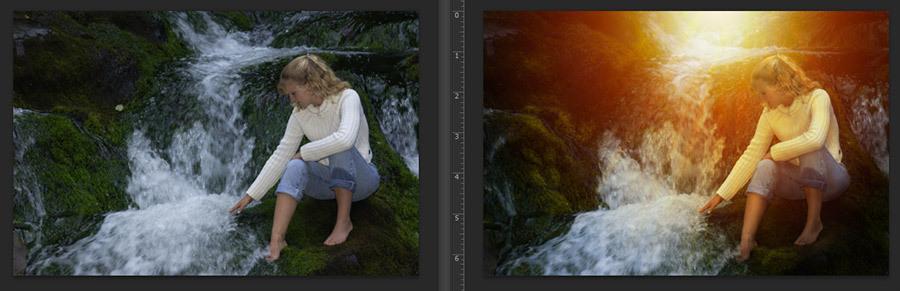
Here's an example of and image that was processed with layers, layer mask and adjustment layers in Photoshop (this can also be done in the other imaging software that I mentioned previously). This is an image that I took of a friend of mines daughter for her Senior graduation.
The original photo

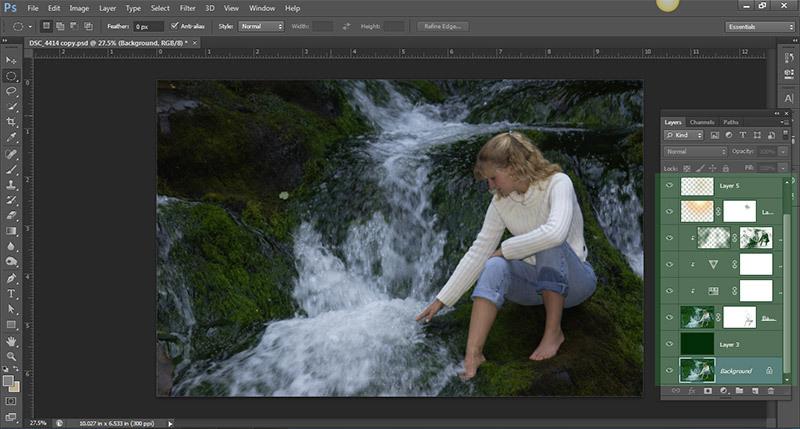
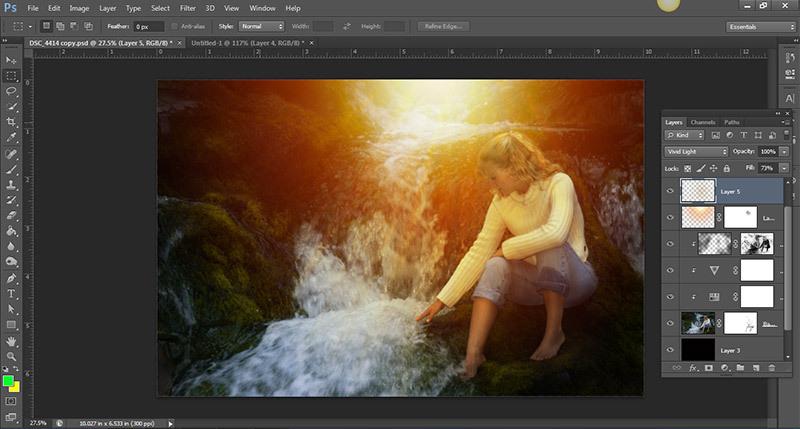
Screenshot of Photoshop and the layers, layer mask and adjustment layers involved in processing the final image. (note the layers panel highlighted in green) This is not as intimidating as it looks.

With the 2 layers highlighted in green I added some subtle shadowing to the girl. (i.e. her legs and under her buttocks) using the layer mask (the white block to the right) in the top layer to "erase" parts to in-destructively add the shadowing by allowing the black layer underneath to show in selected areas.

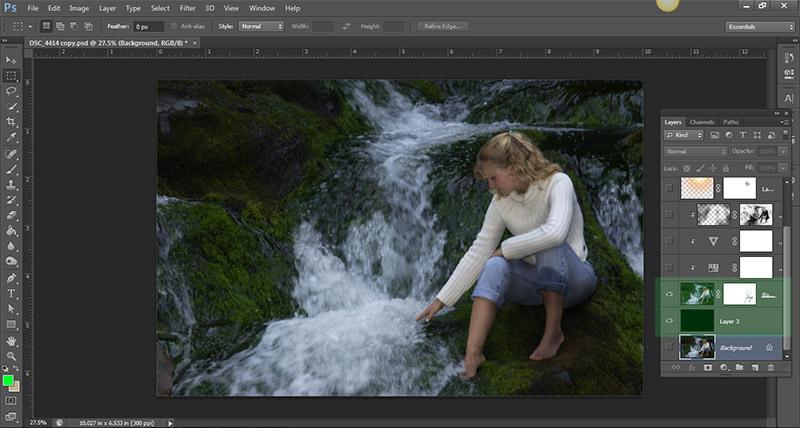
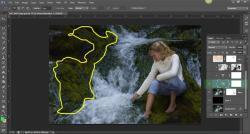
Now we add a Hue/Saturation layer with this layer we can adjust the saturation, lightness and hue of certain colors in the image.
Note the layer highlighted in green and the affected areas like the moss on the rocks outlined in yellow.
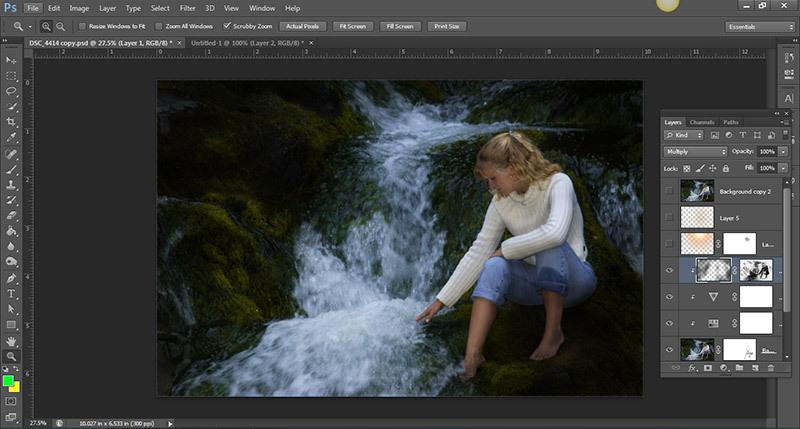
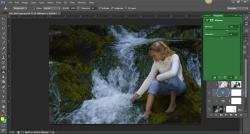
Next, we add a Vibrance adjustment layer, with it we can make subtle adjustments to the vibrance and saturation of the image.
The layer is highlighted in blue and the panel highlighted in green is the Vibrance adjustment panel, this is where you make the adjustments desired. I raised the Vibrance to +35 and the Saturation to +1.
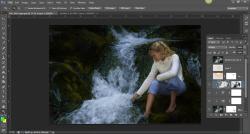
Here we add a regular layer and then add a layer mask to that layer to add some shadowing and highlights to the image, mostly on the rocks, etc. Layer is highlighted in blue.
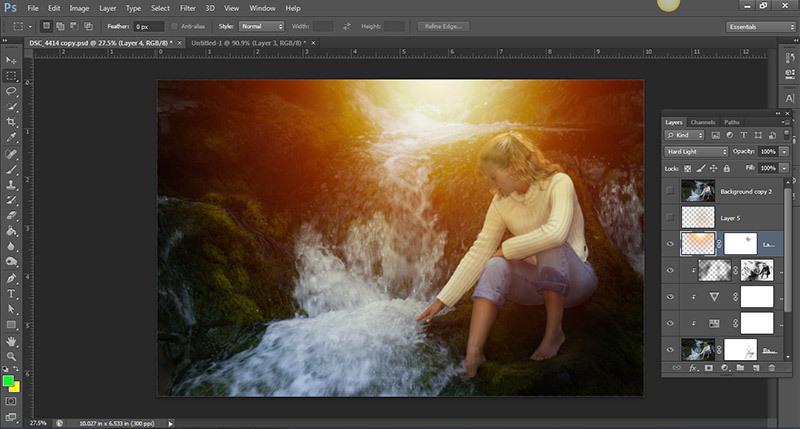
Next we add in a setting sun glow....and use a layer mask (white block to the right) to take a little of the glow from over her face.
Layer highlighted in blue.
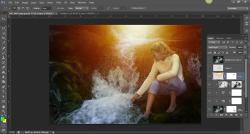
We now add a regular layer to create some sun beams in the image..Layer highlighted in blue.

I hope this will help someone and if you have questions I will try to answer them.
and Now..the Before and After images

Don't let this intimidate you, you won't destroy your image if you always work on a duplicate of your image and not your original.
Just have fun and experiment with the different effects that you can achieve.

Now post your images up and lets just enjoy photography and post processing.


Thanks.