


Building Your Essential Garden Tool Kit
Without the right tool, working in the garden is a struggle. But a small investment in well-chosen tools will pay big dividends in making your gardening easier, faster, and more enjoyable.
Start with the basics: a trowel with a heavy connection where the head meets the handle, a sharp-pointed spade with a long handle for turning soil and digging holes, a garden rake with heavy iron teeth, a hoe with a six-inch-wide head for chopping weeds and mounding earth, hand pruning shears that feel comfortable in your grip, a long-bladed knife (even a kitchen reject works), and a canvas carrying bag with pockets. These tools will handle most everyday gardening tasks.
Beyond the basics, consider adding a two-wheeled garden cart for hauling soil, mulch, and debris. A cart with sturdy plywood, large tubed tires, and a removable back panel is more stable and carries more than a wheelbarrow. Add a lawn or broom rake for leaf cleanup, a sturdy tarp for dragging debris, a hand sickle or Cape Cod weeder for getting into tight spaces, and a pair of lightweight garden snips for light cutting chores like deadheading and harvesting. Five-gallon buckets and a portable potting tray keep your work organized and your space clean.
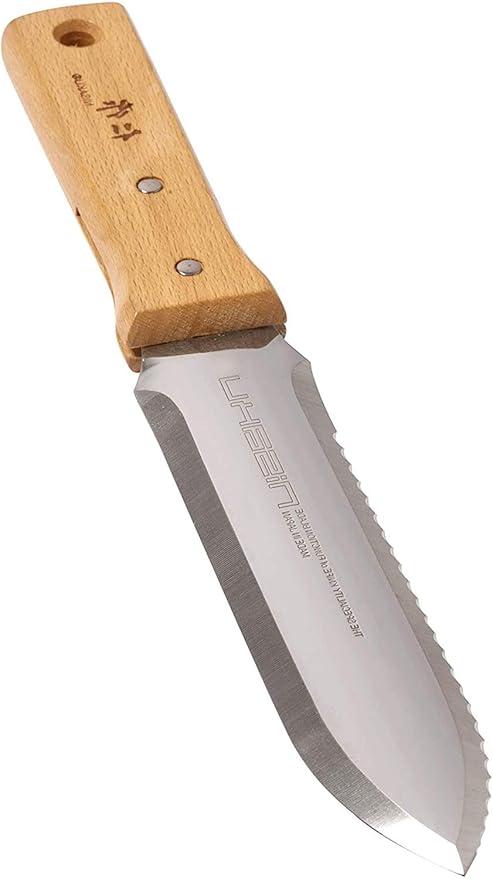
Other frequently used tools include spreaders for lime and fertilizer, spading forks for turning compost piles and harvesting root crops, mattocks for tearing out old plantings, and cultivators for breaking up hard soil. Many gardeners swear by a hori-hori knife (also called a Japanese digging knife) for planting, weeding out perennials with roots intact, and dividing small perennials. A watering wand makes it easy to reach containers, hanging baskets, and new transplants without bending. A sun hat and well-padded garden gloves are essentials too, protecting you from the elements and making long days more comfortable.
Choosing Quality Hand Tools
When buying any tool, make sure it feels like a good fit in your hand. One hand should grasp the handle at the thick point above the shaft; the other should fit in a thinned handhold toward the top. Test the tool before buying if possible.
Shovels and Spades
Americans often use "shovel" to mean either tool, but they're different. A spade has a straight edge for cutting; it's excellent for creating true lines and smooth-sided trenches and works well in confined spaces. A shovel has a cupped, round-point blade designed to lift and toss earth, with a long handle that lets you work standing upright.
For most home gardeners, a shovel with hollow-back construction (lighter and less expensive) is fine for nice, loose loam. If you work heavy soil or pry lots of roots and stones, solid-shank construction (forged from a single bar of metal) is stronger at the points where the greatest forces are exerted. Look for tools with a long handle to reduce bending, a grip to ease hand strain, and rivets where the metal head meets the wooden handle, not just a hole with the head pounded in. Quality construction costs more up front, but a well-made shovel can serve you for decades. Handles made of ash or hickory combine strength with flexibility. For a high-lift angle that reduces back strain, look for approximately 32 degrees; you'll still be able to move the soil effectively while standing straighter.
Rakes
A garden rake with rigid iron teeth levels seedbeds and works amendments into soil, while a flexible lawn or leaf rake gathers debris without gouging turf. Beyond those two basics, specialized designs earn their keep in particular situations. Adjustable rakes change handle length and tine spread, making them useful in tight spaces and adaptable to gardeners of any height, including those working from a seated position. Ergonomic rakes with a bent handle and cushioned grip reduce the bending that makes long raking sessions hard on your back. Narrower heads are easier to control; wider heads cover ground faster.
Pruning Tools
Choosing the right pruning tool makes all the difference for both you and your plants.
Hand pruners work best on branches and twigs under one-half inch in diameter. Bypass pruners cut like scissors, with one blade passing by the other. The stem tissue is neatly severed with as little trauma as possible, leaving it uncrushed. If you plan to purchase only one pair for general use, bypass pruners are most useful, especially for pruning live growth that's one-half to three-quarter inch in diameter. Anvil pruners bring one sharp blade down on a flat surface, cutting the stem like a chopping block. They crush as they cut, which is fine for cutting up dead twigs and branches to throw away but not ideal if you want the plant to keep growing. Anvil pruners generally require less hand strength.
Ratchet pruners are a specialized type that increases the force of your cut with a ratcheting action. Each time you squeeze, the blades cut deeper into the wood without opening up for each cut. Many accommodate branches up to one inch in diameter. They're excellent if you have arthritis or a repetitive stress injury.
Loppers are designed to cut branches from one-half to two inches in diameter, depending on the model. The length of the handles determines your leverage; longer handles make the job easier. Loppers make a bypass type of cut and are useful for cleaning out the interior structure of an overgrown tree or shrub. Ratchet loppers can handle branches up to two to two and one-half inches in diameter and require very little muscle on your part.
Pruning saws fit into spaces where loppers might damage bark. Most cut on the draw, meaning they cut as you pull the blade toward you. A folding pruning saw takes up less room and protects the blade with a locking mechanism. These saws are great for cutting branches from one to three inches in diameter.
Pole saws or pruners are equipped with either a saw blade or pruning blades, or both. They sit atop a long pole, allowing you to cut branches that would otherwise be out of reach. Buy the lightest weight pole you can, since working overhead can be tiring.
Hedge shears resemble giant scissors and make large, wide cuts. They're not suitable for cutting woody branches and should only trim soft, green, new growth. If you have a formal hedge or topiary requiring close shearing, they are indeed necessary.
Key tip: When you've chosen your pruning tool, buy a holster so you can easily carry it without losing it. These tools cover choosing the right cutter for the job; for how and when to make the cuts themselves, see our guide to Pruning.
Gloves
Gloves are an undervalued gardening tool. They offer big returns of improved safety and comfort for a small investment. The right pair depends on how you garden.
For general gardening chores like raking, weeding, and digging, cotton, cotton-polyester, or leather gloves work well. Water- and mud-resistant options like latex-dipped cotton or PVC provide grip in soggy conditions. If you work with oils, acids, herbicides, pesticides, or other caustic chemicals, use neoprene- or nitrile-coated gloves. Leather gloves provide more protection than cotton at a slightly higher cost. Cowhide (smooth or suede) is most common; pigskin tolerates abrasion and rewetting well; goatskin treated with lanolin is luxurious but best for light to medium work.
For heavy pruning of thorny plants, specialized pruning gloves with reinforced cuffs protect forearms almost to the elbow. Cut-resistant Spectra or Kevlar fabrics offer protection against sharp edges. For power tool use, vibration-reducing gloves with gel inserts in the palms ease fatigue.
Glove sizes vary among manufacturers. Many unisex gloves are cut for men's hands. To get the best fit, try gloves on both hands and make a tight fist. You shouldn't feel pinching or tightness. Try picking up small objects and simulating tool motions before buying.
Working Comfortably and Safely
Garden work should feel good, not punishing. Ergonomic tools and proper technique keep your body in neutral positions while working, lessening stress on joints and muscles.
When using hand tools, wrap your thumbs around the handle and don't push the tool with your thumb. Take frequent rests from repetitive motions such as pruning, and stop as soon as you feel pain. When carrying heavy objects, lift by squatting and using your knees, not your back. If lifting off an elevated surface like a truck bed, lean against the bed and pull the bag close to your body. Use a garden cart whenever possible, or use a tarp to drag heavy objects. When gardening all day, rotate tasks every half hour or so to use different muscle groups. Also stretch before and after your garden workout.
Invest in sturdy, lightweight tools and well-padded gloves. Many hand trowels, cultivators, and small tools now come with cushioned handles. Cushions on rakes and shovels reduce strain on hand and arm muscles. Some loppers, hedge shears, and multichange tools have telescoping handles that let you extend into trees and shrubs without climbing ladders or diving headfirst into bushes. These extended-handle tools save back, neck, and leg muscles.
Long-handled spades and lawn rakes are preferable to short-handled ones if you're protecting your back. Ergonomically designed lawn rake shafts have a bend in them that reduces bending when raking. Knee pads help with the constant up and down of planting, weeding, and harvesting. Wheeled garden scooters designed so you can sit while you work and then scoot to the next spot are a lifesaver for gardeners with knee and ankle concerns.
Power Equipment for Today's Gardeners
Modern power equipment for home gardeners has shifted dramatically. Battery-powered and electric tools are now the default for most home gardening tasks. They're quieter, produce zero emissions, require no fuel mixing, and many municipalities restrict or ban gas-powered equipment. Gas still earns its place on large properties or for heavy brush clearing, but battery and electric options have matured into powerful, practical choices.
String Trimmers and Edgers
Well-groomed borders and edges are a landscape's finishing touches, and string trimmers rank second only to lawn mowers in popularity. (For turf care itself, from mowing height to feeding schedules, see Lawn Care.)
Battery-powered and corded electric trimmers are now as powerful as their gas counterparts, lighter to operate, and vastly quieter. Corded models are limited to 100 feet from any outlet, so cord length matters if your property is sprawling. Battery-powered models have come a long way; modern lithium batteries run much longer than older versions. Curved-shaft trimmers are lightest and most economical, perfect for trimming around flower beds, fences, and paths on a typical city lot. Straight-shaft trimmers offer more power, comfort, and flexibility, with longer reach for easier cutting under shrubs and fences.
Leaf Blowers and Blower-Vacs
Blower-vacs (tools that work in reverse to vacuum leaves and debris into a bag) are useful for gathering and shredding leaves. The vacuum function is popular for making mulch and compost; a blower-vac can reduce 16 bags of loosely packed leaves to one mulched bag. They're particularly useful for clearing leaves and debris in tight spaces like basement window wells and around tightly packed plantings. With an extension attachment, they can clean gutters, garages, decks, and even car engines after a wash.
Like string trimmers, battery-powered and electric models are now the first choice. They produce 63 to 70 decibels of sound (much quieter than gas), produce no emissions, and require no fuel mixing. Cubic feet per minute (cfm) indicates how much air the unit moves; a blower capable of 250 cfm or more is powerful. Reduction ratios vary; a reduction ratio of at least 10 to 1 (leaves to mulch) is respectable. For most home gardening tasks, 150 miles per hour air velocity is more than sufficient.
Convertible Trimmer Systems
Multipurpose trimmers that convert to edgers, pruners, hedge trimmers, blowers, and vacuums offer versatility and save storage space. You pay for one engine and purchase attachments as needed. Converting from one tool to another is quick; changing attachments on modern models takes about 30 seconds. If you need a cultivator only three or four times a year for light work, a convertible trimmer with a cultivator attachment makes more sense than owning dedicated tools.
Chipper-Shredders
A chipper-shredder not only makes materials compost faster, it reduces volume by up to 10 times. The modern chipper-vac (looking something like a lawn mower with a chute attached) works in three ways. Pushed around the yard like a lawn mower, it sucks up leaves and chops them into an attached bag. Chopped leaves break down into compost much faster than whole ones. A side chute is an entry point for chipping branches up to three inches in diameter, producing good mulch for landscape plants. An optional hose attachment sucks leaves and waste out from under bushes, along walls and hedges where a mower can't reach.
Chainsaws
Chainsaw selection and safety deserve their own thorough treatment. See our Getting Smart About Chain Saws guide for detailed information on choosing and operating this specialized tool safely.
Cleaning and Maintaining Your Tools
Tool maintenance is one of the best investments you can make. Clean, sharp tools work more efficiently and last for decades. Even casual maintenance extends tool life dramatically.
Regular Cleaning
Try to get in the habit of cleaning your tools after each use, before you put them away. Throughout the gardening season, it's important to clean sap and dirt off your tools to prevent the spread of soil-borne diseases and weeds. Sap and dirt left on tools during winter storage will attract and hold moisture, encouraging rust.
First, scrape off all soil from shovels, spades, and hoes. Remove leaves and debris from rakes. The easiest way to clean is with the garden hose if you take time to dry them off afterwards. Spray with a forceful stream of water, using a stiff brush to remove stubborn dirt. Never put tools away wet. Thoroughly dry them before hanging. Don't leave tools lying on the ground or on the floor of a garage or shed. Hang them away from moisture and keep them off concrete floors.
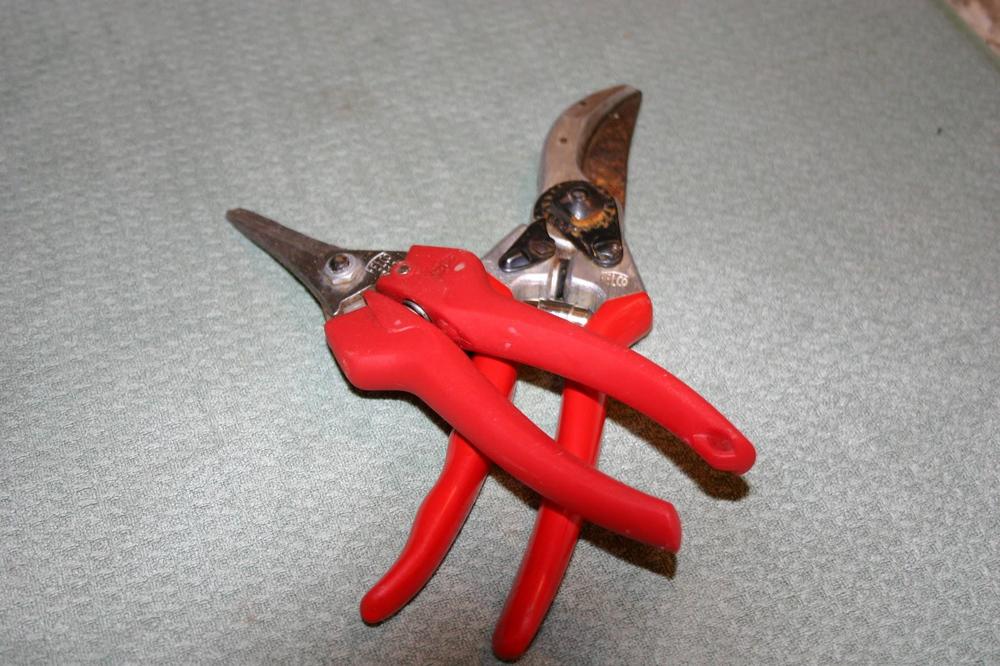
If your tools have moving parts, such as pruners, shears, and loppers, disassemble them first. Remove accumulated rust and dirt from all metal surfaces with a wire brush. Remove stubborn rust from small tools with fine steel wool. Use medium-grit sandpaper to remove rust on larger tools such as shovels, spades, and hoes. For very heavy coats of rust, an electric drill with a wire brush attachment works well; always wear safety glasses.
For pruning tools, regularly remove sap and materials that stick to the blades. Warm water and dish detergent work well. For stubborn residue, turpentine or a solvent like nail polish remover might be needed. A nail brush or scouring pad provides extra power for cleaning. A little vinegar and steel wool can help remove rust and restore shine. Dry pruning tools thoroughly after washing. Add a drop or two of a penetrating lubricant designed for pruning tools to the pivot point after drying.
At the end of the season, give tools a thorough cleaning. Use winter to clean, sharpen, and prep your tools for spring.
Sharpening
Sharp tools help prevent disease. The blades of pruners, shovels, spades, and hoes often cut through plant leaves, twigs, and roots. Dull tools tear or rip plants, leaving ragged wounds that are more susceptible to disease. Sharp tools also save you valuable time and energy.
When sharpening, try to maintain the original factory bevel or angle. If the blade is beveled on only one side, as with bypass pruners, sharpen only that side. File the flat side only to remove burrs (rough metal ridges) caused by sharpening.
Use either a whetstone (also called a honing stone) or a mill bastard file, depending on the tool. For pruning tools, a whetstone produces a very sharp cutting edge. Start by applying a few drops of oil or water to the whetstone. The liquid carries away metal filings and lubricates the surface. With the beveled side of the blade against the stone, rub the sharp edge toward the stone in a curved motion, as if shaving off a thin slice. If the blade has nicks, use an 8-inch fine-grit file to remove them.
To sharpen larger tools like shears, loppers, shovels, spades, and hoes, use fine- and medium-grit mill bastard files instead of a whetstone. Stabilize the blades in a vise or against a solid surface to avoid injury and ensure an even stroke. Always push the file away from your body, moving diagonally. The objective is to have the cutting teeth of the file bite into the metal of the tool. Do not use oil when sharpening with a file; metal filings accumulate and clog the file's teeth.
Sharpening Different Blade Types
Bypass pruners or loppers work like scissors, with slightly curved blades that hold a stem or branch in place. Sharpen only the beveled side of the cutting blade. Do not sharpen the flat side or any part of the opposing blade, or you'll create a space between the blades that will prevent clean, scissorlike cuts.
Anvil pruners and loppers have a cutting blade that comes down on an anvil. The cutting edge is beveled on both sides, like some knife blades. Sharpen both sides of the cutting blade from base to tip. Take care not to remove too much metal; retain the original shape so the blade meets the anvil completely.
Hedge shears work like scissors with the cutting blade beveled on the inside edge. Lock long, unwieldy blades into a vise to ensure a smooth stroke. Sharpen the cutting blade with a medium-grit file from bottom to tip, then put a fine finish on the blade by switching to a fine mill file. File the outside of the cutting blade and opposing blade lightly to remove nicks or burrs.
Shovels, spades, and hoes hold up best with blunt cutting edges since they're used for digging. Use a medium-grit file to work out nicks and chips and make a straight bevel. Brace the tool against a solid surface or clamp it in a vise. Push the file forward along the cutting edge in one diagonal direction so the file grips the steel. For all three tools, smooth sharp edges and remove burrs with a fine-grit file or small whetstone.
For advanced tool recovery, an electric bench grinder is the most efficient way to recover cutting edges on shovels, spades, and hoes. A grinder has a tool-rest platform that enables you to achieve a more exacting edge. However, grinders create intense heat that can compromise steel temper, making it brittle. Periodically immerse the tool in cold water to cool it, and take off small amounts of metal at a time. A small grinding wheel attached to an electric hand drill does the same job. With either tool, always wear gloves and safety glasses.
Handle Care and Final Touches
Clean wood handles with a stiff-bristled brush, and smooth down nicks and splinters with medium-grit sandpaper. Coat wooden handles with boiled linseed oil to help preserve them and prevent splintering and breaking. Sand off the factory varnish and wipe on boiled linseed oil with a cloth; apply several light coats, letting the oil soak in after each application. Wipe off any excess with a dry cloth.
If you use linseed oil, be sure to dispose of linseed oil soaked rags or paper towels safely. Linseed oil and other flammable oils, stains, and solvents produce heat as they dry and may cause rags to spontaneously combust. Immediately after use, spread oil-impregnated rags and towels flat on an outdoor, non-flammable surface like a driveway, or hang on an outdoor clothesline until completely dry. Once dry, dispose of materials at a hazardous waste collection site. Contact your state or local Fire Marshal for advice on safe disposal procedures.
If plastic handles are tearing or wearing thin, remove the coating with a craft knife and replace it with a liquid or spray plastic coating sold as Plastidip at hardware stores. Dip or spray the handles and clamp the metal portion in a vise to let dry.
Once handles are in good shape, reassemble your tools. Oil the pivot bolts and adjust them so the blades are tight enough to provide a strong, clean cut. Lubricate all metal blades and the heads of shovels, hoes, and rakes with a light machine oil or a synthetic penetrating oil.
Clean, sharp, and properly maintained, your tools are ready for storage. Store them in a dry place away from heat and moisture. Hanging tools is an effective way to keep moisture at bay. Small tools such as pruners do fine either hung or stored in canvas gardening bags.
When spring comes around, you will have a host of tools ready to serve you. With regular care, your tools will last for decades and can even be handed down to the next generation.
