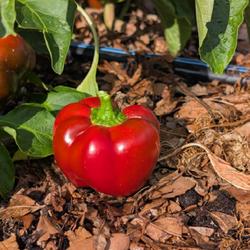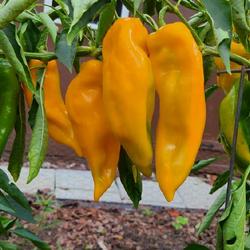

Introduction
The brilliant hues and full-bodied flavors of peppers have assured them a central role in many of the world's cuisines.
The wild ancestor of cultivated peppers is said to have originated in the Mesoamerica region (southern Mexico, Central America, and northern South America). By the time Europeans arrived in the "New World" in the late fifteenth century, cultivation by the indigenous people was widespread and many different types had been developed.
About peppers
The glistening greens of the leaves and the rainbow of colors of the ripening peppers -- red, yellow, orange, green, brown or purple -- make pepper plants an ornamental, as well as delicious, addition to the garden. Sweet bell peppers go well with just about anything and are wonderful eaten right out of the garden, while the hotter varieties spice up many recipes. Stuffed peppers, pickled peppers, fried peppers -- peppers fit in, deliciously, everywhere. Peppers like warmth, so wait to plant until the soil and air temperature has warmed up reliably.
Choosing a site to grow peppers
Select a site with full sun and well-drained soil. Prepare the garden bed by using a garden fork or tiller to loosen the soil to a depth of 12 to 15 inches, then mix in a 2- to 4-inch layer of compost.
Starting peppers from seed
Pepper seedlings need warmth and light to thrive. If you're starting plants from seed, sow seeds indoors 8 to 10 weeks before your last frost date. Fill 2-inch square plastic or peat pots with moistened seed-starting mix and sow 2 seeds per pot. Keep the seed starting mix warm (ideally 70-80 degrees F) to speed germination, which will take 7 to 15 days. The young plants need to be kept continuously moist.
Once seedlings emerge, provide plenty of light. While a sunny south-facing window may work, keeping seedlings under grow lights positioned just a few inches from the tops of plants will produce stronger, stockier transplants. Use lights with one warm-white and one cool-white fluorescent bulb, turned on 14 hours a day.
When seedling height is 3 times the diameter of the pot (for example, 6 inches tall for 2-inch pots), transplant the seedlings into 4-inch pots to prevent them from becoming root-bound.
Harden off seedlings gradually before moving them outdoors. Set transplants outside for only 1 to 2 hours on the first day, ideally during cloudy, calm weather. Each day after that for a week, extend the period of time the seedlings are outdoors until they stay out overnight.
Planting Instructions
Plan to set out home grown or purchased transplants after the last spring frost date. Start plants indoors in flats or pots 8 to 10 weeks before the average last frost date.
Don't rush transplants into the garden when soil and weather are still chilly; planting them when temperatures are below 55 degrees F may permanently set them back. Wait until soil temperature is at least 60-65 degrees F and nighttime temperatures stay reliably above 50 degrees F.
Set hot pepper plants 12 to 15 inches apart, larger bell types 15 to 18 inches apart. Provide windbreaks to minimize transplant shock.
For small-fruited pepper varieties like cayennes, cherries, or long slender fryers, tighter spacing of 6 to 12 inches can yield about one-third more peppers per square foot, though individual fruits will be smaller.
Use cutworm collars to protect young transplants from cutworm damage. Fashion collars from sections of toilet paper or paper towel tubes, old tuna cans, or cut-down yogurt containers. Place the collar so it is 1 inch below the soil surface and 2 inches above it. Alternatively, wrap the base of stems in multiple layers of newspaper.
Ongoing Care
Provide deep watering weekly for pepper plants. Support bushy, heavy-yielding plants with 2-foot-high cages, or stake them. Apply heavy organic mulches when summer heat begins to peak. Temperatures over 90 degrees F can cause buds and blossoms to drop; the condition is more serious if humidity is low also. Temperature management is critical for pepper success. In cool climates, cover seedlings with floating row covers (a cheesecloth-like material) after planting to keep night temperatures warmer. In hot summer areas, consider using shade cloth over the plants on hot afternoons to keep them cooler.
In short-season areas, you can pre-warm the soil with black plastic mulch laid over the beds 2 weeks before planting. In cool regions, infrared-transmitting (IRT) plastic mulch is very effective, as it transmits warm rays while blocking ultraviolet rays and helps retain soil heat throughout the growing season.
Pests are not a serious concern. However, contact your local County Extension office for controls of common pepper pests such as corn borers, flea beetles, and leaf miners.
Another concern is sunscald, which occurs when peppers are exposed to too much direct sun without protective foliage. The affected area becomes soft, wrinkled, and lighter in color, eventually turning dry and sunken. To prevent sunscald, keep plants well-leafed and growing vigorously through proper fertilizing and watering. In hot, sunny climates, position plants where they get some afternoon shade from taller plants. If only small sections of a pepper fruit are damaged and there is no mold present, you can cut away and discard the sunscalded section and still eat the fruit. Discard any pepper where black mold has begun to grow.
How to harvest peppers
Most peppers, except for a few varieties like Sweet Banana, are green when young. Though bell peppers come in many colors, such as red, yellow, and purple, you can eat any of them in the green stage. However, they are sweeter if you let them ripen until the color is fully developed. Harvest by cutting through the stem of each fruit with a knife or with pruners. The stems of peppers are brittle, so cutting is safer than pulling by hand.
Hot peppers will develop more heat as they turn to their mature color, so if you want spicy peppers, let them ripen completely on the plant. Sweet peppers can be harvested green or at their mature color; mature red, orange, yellow or colored peppers have higher vitamin C content than green peppers.
You can have an almost-continuous harvest from your pepper plants by cutting often, as this encourages the plant to keep blossoming, especially in the beginning of the summer.
Pepper varieties
Popular hot pepper types include jalapeno (mildly hot, 3 to 4 inches long), cayenne (spicy, slim and pointed, 2 to 8 inches long), anaheim (medium hot, elongated, 4 to 10 inches long), and serrano (pungent, 2 inches long). For cool climates, recommended varieties include Early Jalapeno, Hero (cayenne-type with excellent flavor), Mulato Isleno (mildly hot Anaheim type, chocolate brown when mature), Paper Dragon (spicy, early, excellent for drying), and Serrano (surprisingly productive even in cool summers). Habaneros are among the hottest peppers but require more heat and longer seasons.
For sweet peppers, consider these reliable varieties: Bell Boy (blocky, productive, TMV tolerant), Big Bertha (very large, 4 to 7 inches long, excellent for stuffing), Red Cherry (1.5 inch diameter, great for pickling), and Blushing Beauty (All-America Selections winner, matures from ivory to red in 72 days, disease resistant).
Preserving your pepper harvest
To preserve hot peppers, freeze them whole in plastic freezer bags. Smaller hot peppers or chilies can be dried individually when mature or strung into ristras (long ropes of dried fruits) for winter use and storage.
For sweet peppers, wash, dry, and seed them; then slice or dice as desired. Spread the cut pieces on a cookie sheet and freeze for an hour or so until solid. Transfer frozen pieces to a freezer storage bag, removing as much air as possible before sealing. This allows you to pour out the amount you need while keeping the remainder frozen.
Frequently Asked Questions about Peppers
What is a pepper plant actually asking for?
Most of the answers below come back to five conditions, so it is worth stating them once. Peppers are warm season perennials from the tropics that we grow as annuals. They want full sun, at least six hours and preferably eight. They want soil that holds moisture but drains, at a pH of about 6.0 to 6.8. They want nights above 60F and days below the low nineties, and they drop their flowers at either extreme. They want moderate, steady feeding, because too much nitrogen buys a magnificent bush and very few fruit. And they want even watering, because the swing from bone dry to soaked is what produces blossom end rot.
Almost every problem on this page is one of those five going wrong somewhere.
Something took my ripening hot peppers overnight. What eats a habanero?
More things than gardeners expect, and the heat of the fruit rules out far less than it seems to. Two beliefs come up every time this is asked and both are wrong. The first is that birds will not touch a hot pepper: in fact birds are the one group that does not register capsaicin at all, which is why hot peppers are attractive to them and why capsaicin is the active ingredient in squirrel-proof birdseed. Most feed by day but they are active from first light, so fruit that was there at bedtime and gone at breakfast may have gone at dawn rather than in the night. The second is that a squirrel could not manage it. Squirrels, rats and mice all take ripening peppers, capsaicin notwithstanding, and rodents work at night. Raccoons, opossums, deer and, in some regions, packrats take fruit off a plant as well.
The damage pattern narrows it down more reliably than the heat of the variety does:
- Whole fruits gone, nothing left behind, no other damage. Something that carries food off: rodents, a squirrel, a packrat. Look for fruit stashed nearby, under a deck or in a shed.
- Fruit gone and stems or branches broken. Something heavy that pulled on the plant, so a raccoon or a deer.
- Fruits pecked or partly hollowed but still attached. Birds.
- Whole plants grazed as well as fruit, cuts clean and angled. Rabbit or deer, depending on the height of the damage.
Settle it rather than guessing. Rake the soil around the plants smooth and damp in the evening and read the tracks in the morning; a few nights of that usually identifies the visitor, and an inexpensive motion-triggered camera gets an answer in one night. Knowing which animal it is matters, because nothing on the list responds to the same measure.
Once you know, exclusion is the control that actually works. Bird netting draped over a hoop or cage and secured at the ground handles birds and, in a heavier mesh, rodents and squirrels; leave it loose enough not to press on the foliage and pin the edges so nothing walks underneath. Fencing is the answer for deer and rabbits. Repellents give patchy results, need renewing after rain, and must be chosen from products labeled for the animal and for food crops and applied strictly as the label directs, since not every repellent may legally be used on something you intend to eat. Clearing brush piles and other cover near the bed reduces rodent pressure more than any product does. One last thing: peppers that have been gnawed or chewed and left on the plant should be discarded rather than salvaged, whatever the animal was.
Why are my pepper leaves yellowing and dropping?
Pepper plants shed older leaves under drought stress, especially in hot weather, and the lowest leaves yellow and drop first. That is a normal response, though it does leave fruit exposed to sunburn. Overwatering produces the opposite pattern: waterlogged soil leads to root rot and yellowing across the whole plant rather than just at the base.
Many gardeners water more when plants look wilted on a hot afternoon, and that is usually the wrong move. Peppers curl their leaves slightly in intense heat to cut transpiration, and the leaves recover as the evening cools. Watering already-moist soil at that point leads straight to overwatering, root rot and fungal problems. Check directly instead: push a finger two inches into the soil, and if it is moist, the wilting is temporary.
The target is consistent soil moisture, damp like a wrung out sponge, neither sopping nor bone dry, which also prevents blossom end rot. Several inches of organic mulch, wood chips, compost or shredded leaves, keeps soil temperature and moisture even through the season and keeps fruit off bare soil. Water at the soil rather than over the foliage, which delivers moisture where the roots need it and keeps leaves dry, denying bacterial leaf spot and cercospora the wet leaf surfaces they need.
If a plant yellows or wilts all over within days of planting, that is transplant shock: water adequately but not excessively, give afternoon shade if the sun is intense, and do not fertilize until it is clearly recovering, which takes two to three weeks.
Why do the new leaves come out wrinkled and crumpled?
Usually because of environmental stress while the leaf was developing inside the bud: cold nights, a sudden move into intense light, humidity stress or transplant shock. If it appears only on the first flush after planting or transplanting, the following flushes are typically normal, the affected leaves age and drop, and the plant carries on.
Watch the next two or three flushes. If new foliage keeps emerging wrinkled and malformed all season, suspect calcium availability. Calcium moves upward only in the transpiration stream, so it depends on consistent water and active transpiration, and soil that cycles between wilting-dry and heavily rewetted interrupts that stream and leaves new growth short. Before amending, get a soil test, because most soils hold plenty of calcium and the real problem is nearly always water management. Where a test does confirm a shortage, crushed oyster shells, gypsum or agricultural lime all raise soil calcium; oyster shell releases slowly over months, gypsum is available in the current season, and lime is fastest but also raises pH. Foliar calcium sprays are not harmful but do little, since spraying a leaf does not fix calcium transport inside the plant.
The leaf edges are turning black and crispy
Several different things produce that, and they need different responses.
Cold damage is common in spring and early summer, since peppers are very susceptible to cold. Rapid temperature swings or transplant shock show up as bleached, bronzed or darkened edges, and if the damage followed a cold night and the new growth is normal, the plant simply had a stress event and will recover.
Leaf scorch from rapid water loss hits plants moving from a shaded greenhouse or nursery into full sun. Acclimate over a week or two, water consistently, and give afternoon shade for the first few weeks.
Bacterial leaf spot, caused by several Xanthomonas species, also starts at the leaf margins, often with a wet-looking halo. It thrives in hot humid conditions wherever foliage stays wet, moves in water droplets and spreads on wet leaves. Once established there is no cure, because the bacteria live inside plant tissue, so prevention is the only effective approach: never water overhead, never water in the evening, and open the plants up with adequate spacing of 18 to 24 inches, removal of lower leaves as the plant grows, and thinning of crowded interior branches. If it appears anyway, remove infected leaves promptly and put them in the trash rather than the compost, and wash your hands and clean tools with a 10 percent bleach solution, one part bleach to nine parts water, before handling other plants. Copper products registered for edible peppers can be applied preventively to uninfected plants, but copper will not cure an established infection, so follow the label for rates, timing, intervals and the preharvest interval on the specific product.
The most important sanitation step is the one people skip: wash your hands and clean your tools before handling peppers if you have been using tobacco in any form, since tobacco carries tobacco mosaic virus and other pathogens that transfer on hands and tools. TMV causes mottled, distorted leaves and stunted growth, and peppers and tomatoes are its classic victims.
There are pale, almost transparent spots on the leaves of my new plants
On a plant you have just brought home, the usual answer is sunscald from a move that happened too fast. A seedling raised under glass has thin, soft leaf tissue, and a full day of direct outdoor sun burns patches of it outright. The scalded areas die and dry into thin, pale, papery spots that look almost translucent held to the light, and they will not wash or rub off.
Confirm it by what is not there. Sunscald spots do not spread to new leaves once the plant is acclimated, they carry no yellow halo, no visible fungal growth and no spore masses, and the rest of the plant looks normal. Bacterial leaf spot, by contrast, keeps producing new angular spots often ringed with yellow. Pale spotting on tender new growth also often fades on its own as the leaf hardens and darkens, so wait two or three weeks before concluding anything.
Damaged tissue does not repair itself, so the response is to look after the plant while it grows past the damage. Harden new plants off properly, an hour or two of direct sun the first day building up over a week or so. Water carefully and let the surface dry between waterings, since peppers do poorly in soil that stays damp. A dilute liquid feed at watering time supports the new growth that replaces the damaged leaves. Plants normally grow out of it and crop perfectly well.
If the spots persist or worsen, look at cercospora leaf spot, a fungal disease showing as round or slightly oblong spots with light gray, tan or pale centers and dark brown or purplish red borders. Early on the dark border is distinct and the center looks dry and papery; as it progresses the lesions enlarge, leaves become mottled with many spots, and they yellow and drop early. In a wet season it can defoliate a plant over several weeks.
Management is cultural, because fungicides work as preventives and not as cures. Keep foliage dry by watering at soil level only, never in the evening. Improve air circulation with 18 to 24 inch spacing, removal of lower leaves and thinning of crowded interior branches. Pinch or prune off infected leaves and put them in the trash rather than the compost, since the spores overwinter in debris, and clean up all fallen leaves and old plant material at the end of the season. Where cercospora has appeared in past years or the weather is very humid, sulfur or copper fungicides registered for edible peppers can be applied preventively to uninfected leaves before the disease normally appears, since once spots form the fungus is inside the tissue and a spray cannot reach it. Sulfur should not be applied above 85F, where it damages foliage. Consult the product label for timing intervals, which typically run 7 to 14 days, and for rates and preharvest intervals.
Most of my peppers have a sunken brown patch at the same end. What is that?
A brown patch that starts at the blossom end, the end away from the stem, and turns leathery, sunken and dark is blossom end rot. It is not a fungus and it is not contagious, so nothing you spray will reverse a patch already there. It is a calcium delivery failure inside the fruit, not a shortage in the soil. Calcium moves through the plant only in the transpiration stream, so when soil alternates between dry and saturated, the flow is interrupted and the fruit tip receives less than the rest of the fruit.
That is why it turns up on plants that look otherwise excellent and why it hits most of the crop at once: a big vigorous plant loading fruit in hot weather has the highest demand and the least tolerance for a dry spell followed by a soaking.
The fix is water management rather than a product. Keep the soil evenly moist instead of alternating drought and flood, mulch several inches deep to buffer the swings, and work organic matter into the bed so it holds moisture longer. Containers need particular attention because they dry fastest. Only where a soil test shows genuinely low calcium, or a pH low enough to tie it up, is an amendment worth adding, using lime, gypsum or crushed oyster shell at the rate the test recommends. Skip the calcium sprays sold for the problem: foliar calcium does not move into the fruit in any useful quantity despite being marketed for exactly this.
Affected fruit is safe to eat once you cut away the bad end. Pick it off so the plant puts its energy into the fruit that follows, and expect later fruit to be clean once your watering steadies.
Two things look like blossom end rot and are not. Sunscald leaves a pale, papery, sunken patch on the side of the fruit facing the sun, usually on a plant that has lost leaf cover, and the answer there is shade and foliage rather than water. Soft rots and anthracnose produce a spot that is wet, spreading and often bears visible spore masses.
The stems on my pepper plants are turning black. Are the plants dying?
Usually not. Dark purple to brownish black streaking on stems, and sometimes on the shoulders of the fruit, is normal pigmentation in many varieties. It is a sun response, the same chemistry that darkens the skin of an eggplant, and it shows up on plants flowering well with healthy green leaves. If the color lies flat along a stem that is otherwise firm and normal, you are looking at pigment.
What separates that from disease is texture, not color. Look closely and press gently: trouble looks sunken, raised and cankered, or water soaked and soft, and it girdles a stem or spreads visibly over days rather than sitting unchanged. Blackened tissue at the soil line on a young plant that then collapses is a different problem, usually a stem or root rot in soil that stayed too wet.
So watch rather than treat. Mark the date, look again in a week, and see whether the area is stable or expanding. Stable means pigment. If a plant does develop a genuine stem canker or wilt disease there is no home treatment that will save it, so pull it, keep it out of the compost, avoid replanting peppers, tomatoes or eggplants in that spot for a few years, and improve drainage before the next crop.
A yellow mold keeps growing on my potting soil. Will it hurt my pepper?
Almost certainly not. A yellow or orange growth on the surface of a container mix, often creeping up the inside of the pot, is usually a saprophyte, a fungus feeding on dead and decaying material in the mix rather than on living roots. It is breaking down bark and peat, not attacking your pepper. Scrape it off when it bothers you and expect it back, since scraping removes the visible growth and not the food source underneath.
Treat it as a message about conditions rather than a disease to cure. It appears where the surface stays wet, so let the top of the mix dry between waterings, improve air movement, and do not leave a full saucer under the pot. Those changes suit a container pepper anyway.
You do not need a fungicide for this and should not use one. If you have leftover bagged mix that repeatedly grows mold and you want to reuse it for seed starting, it can be heat treated: spread a shallow layer in an oven pan and hold it around 180 degrees for about half an hour, checking with a thermometer, or heat a small amount in a covered microwave safe container for a couple of minutes. Keep it below 200 degrees, because hotter treatment scorches the organic matter and makes the mix worse. This is worth doing for seedlings and rarely worth doing for an established plant.
When is a spray warranted on peppers?
Rarely, and not for most of the problems above. Yellow mold on the mix, blossom end rot, stem pigment and sunscald are all cultural, so a fungicide would add a residue to a food crop without touching the cause.
If you do meet a genuine pepper disease and decide a product is justified, identify the disease first, ideally with help from your local Cooperative Extension office, which can confirm it from a sample. Then use only a product whose current label names both peppers and that disease, follow the label rate, the protective equipment and the reentry interval, and respect the days-to-harvest figure, since that number is what keeps the fruit safe to eat. Store anything you buy away from children and pets. If the label does not name peppers, it is the wrong product no matter what the problem is.
Why are my poblanos so much smaller than the ones in the store?
Because size in peppers owes at least as much to the season as to the seed packet. A plant that ran into heat, drought, uneven watering or a cool spell at the wrong moment finishes its fruit earlier and smaller than the same variety would in a kinder year, and supermarket poblanos are grown under conditions close to ideal.
The part worth knowing is the sequence. A pepper reaches its full size first, and only then starts changing color. So leaving a small green poblano on the plant hoping it will bulk up while it reddens does not work. It will redden and it will still be small. Pick it once it looks like a usable pepper and cook it. Do not write the variety off on one season either; the same poblanos in a different summer can hand you a completely different result.
When should I pick hot peppers, and does waiting make them hotter?
Hot peppers are usable at every stage, so this is a preference question rather than a right-answer question. Green ones are perfectly good, and every week after that changes the fruit.
Waiting does raise the heat, by more than most people expect. A pepper left to ripen through to its mature red typically ends up around two to three times as hot as the same pepper picked green, and drying concentrates it further: dried pods can run anywhere from twice to ten times the heat of the fresh fruit they came from. A chile that seemed manageable in the garden can be a very different proposition in a jar of flakes six months later, and a fully ripe habanero deserves respect even from people who eat chiles happily.
With a plant carrying fruit at several stages, pick a few, taste them, and let your own tolerance set the schedule for the rest. Growing conditions shift heat as well: a plant that has been through heat stress and kept somewhat dry tends to produce hotter fruit than one that has been comfortable all season.
My jalapenos turned black on one side. Are they safe to eat?
Usually yes, and there is nothing wrong with the plant. A good many varieties develop a chocolate brown to nearly black cast on whichever side takes strong sun. That is normal pigment rather than disease, and those peppers are fine to pick and eat.
The blackening does carry a message about timing, since it tends to show on fruit that has been sitting on the plant a while, and a jalapeno left past maturity goes overripe and starts shifting color on its way to red. If you want classic firm green jalapenos, pick them as soon as they reach full size and gloss.
What is not normal is a black area that is soft, sunken, slimy, fuzzy or smells wrong. That is rot rather than pigment, and your thumb can tell the difference easily: firm and dry means pigment, soft or weeping means the compost heap.
Some of my habaneros have white patches. Rot or not?
Inspect rather than assume, because two different things produce pale patches. Sunscald leaves a bleached, papery, slightly sunken area where direct sun cooked the skin; the flesh underneath is often still sound, and if the patch is dry and firm you can cut it out generously and use the rest of the pepper promptly. Actual rot, which frequently moves into a sunscald patch later on, is soft and wet, sometimes carries white or gray fuzz, and spreads outward.
Judge each pepper on its own merits rather than condemning or clearing the whole batch. If a pepper is soft under the patch, weeping, or smells fermented or musty, throw it away rather than trimming it and tasting to find out. Peppers are not scarce enough to be worth the gamble.
How do I keep a big pepper crop?
Freezing is the easy answer and it suits peppers well. Rinse them, pull off the stems, and cut them up the way you expect to use them, taking out seeds and membranes if you want the heat dialed back. Spread the pieces out for a few minutes so surface moisture evaporates, or they freeze into one solid brick, then pack them into bags or rigid containers, press the air out, label them with the variety and the date, and get them into the freezer promptly. Thawed peppers go soft, so plan on cooked dishes rather than raw. Anything you will eat within the week can simply go into the refrigerator. Smaller hot peppers can also be strung into ristras for winter use.
Drying works well for thin walled hot peppers and, as above, makes them considerably hotter. Thick walled types such as poblanos and bell peppers do not air dry reliably and are better frozen.
Can I use a family cold pack recipe to can peppers?
No, and this is the one place on this page where we are not going to meet you halfway. Recipes that pack raw peppers into a jar, fill it with vinegar, tighten the lid and stand the jar upside down for a few weeks are widely shared, get handed down through families, and people report using them for years with no trouble. None of that makes them a canning process. A lid that pulls down after inverting is not evidence of a safe seal, and an untroubled history is not evidence either, because the failure here is rare and severe rather than common and mild. Peppers on their own are a low acid food, and improperly processed low acid food in a sealed jar is the classic setting for botulism, which you cannot see, smell or taste.
Use a current tested recipe instead, from the National Center for Home Food Preservation or your state extension service, and follow it exactly: its pepper and vinegar proportions, the vinegar strength, the jar size, the headspace, the processing method and time, and the adjustment for your altitude. Pickled peppers processed in a boiling water bath are safe when the recipe was built and tested for it. Plain peppers with no added acid need pressure canning, not a water bath. Enlarging the jar, shortening the processing or swapping one acid for another all break the recipe. If a tested process is not available to you, refrigerate or freeze the crop instead. Refrigerator pickles are genuinely good and ask nothing of you beyond keeping them cold and eating them within a few weeks.
How do I handle hot peppers without hurting myself?
Capsaicin is an oil. It does not rinse away under cold water, and it moves readily from fingers to eyes, nose and skin. Wear disposable gloves when you cut, seed or process hot peppers, habaneros above all, and keep your hands away from your face until they have been washed with soap and warm water, then with something oily such as milk or cooking oil, which lifts it better than water does. Take contact lenses out beforehand rather than discovering the problem afterward. Wash the board and the knife too, because the oil stays on both. Roasting or frying hot peppers in quantity puts capsaicin into the air and can make a kitchen genuinely unpleasant to stand in, so open a window and run the extractor fan, keep children and pets out of the room, and keep cut peppers and trimmings where a curious child or dog cannot reach them.
Can I save seed from my own peppers?
Yes, and peppers are among the easier crops for it, but dry the seed and do not soak it before storing. Seed taken from a wet fruit carries pulp, sugars and moisture, all of which feed the molds that kill it in storage, and seed that goes into an envelope even slightly damp is usually dead by spring.
For a couple of fruits nothing elaborate is needed. Let the peppers ripen fully to their final color on the plant, then to a slightly wrinkled stage indoors, cut them open and strip the seed off the central core. Pepper seed is dry to begin with and generally needs no washing. If you are processing a bucketful, a jug of water and a short pulse in a blender separates good seed, which sinks, from pulp and immature seed, which floats, but blending hot peppers aerosolizes capsaicin and is effectively making pepper spray in your kitchen. Do it outdoors or under an extractor, keep your face away from the jug when you open it, and wear gloves and eye protection. For hot varieties the hand method is safer and just as good. The heat is concentrated in the white membrane and the seed sits against it, so wear disposable gloves for any hot pepper seed work.
Spread the seed one layer deep on a plate, a coffee filter or a fine screen, somewhere warm, dry and out of direct sun, for one to two weeks. Never use an oven, a microwave or a dehydrator with a heating element, because anything much above 95F kills the embryo. It is dry enough when a seed snaps rather than bends.
Will it come true? Peppers pollinate themselves, which is why home saved seed is usually reliable, but bees do move pollen between plants, and outcrossing between peppers grown side by side typically runs from a few percent to a third and sometimes higher. If yours were the only peppers in the garden, the seed should come true. If several varieties flowered near each other, expect some crosses; they will still be edible and may be a good deal hotter or milder than the parent, which matters if you are cooking for people who are not expecting it. If the original plants were an F1 hybrid, the seed will not come true regardless of isolation. To keep a variety pure, grow one variety only, or bag a few flower clusters in fine mesh before they open and mark the fruit that sets under the bag.
Label the packet with the variety and the year, and keep it cool, dark and dry, in a jar with a silica gel sachet or a spoonful of dry milk powder if your house is humid. Pepper seed stays usefully viable for two to four years. When you sow, warmth is the single biggest factor: pepper germinates poorly at room temperature and reliably at 80F to 85F, so use a heat mat or the top of a refrigerator, and expect anywhere from seven to twenty one days. Move seedlings off the heat and under bright light immediately once they germinate, or you get long, floppy, pale plants.
Do peppers need anything different in sandy soil?
Sandy soil is not a problem in itself and it warms early in spring, which peppers like. What it does badly is hold water and hold nutrients, and both are fixable.
- Add organic matter generously and every year. Compost, well rotted manure, leaf mold and spent bedding all work, and organic matter is what lets sand hold water and hold onto the nutrients you apply. This is not a one time amendment; sandy soil burns through it.
- Mulch. Two or three inches of straw, chopped leaves or compost over the root zone cuts evaporation dramatically and steadies the moisture level, which is the best defense against blossom end rot.
- Water more often, not more heavily. Deep infrequent watering is good advice for clay and poor advice for sand, where a big soaking mostly drains past the roots. Aim for consistently moist, checking by feel two inches down.
- Split the feeding. Nitrogen and potassium leach quickly out of sand, so feed lightly every two or three weeks through the season, or use a slow release product, rather than one large dose at planting.
- Get a soil test, which tells you the pH, the phosphorus level and what is actually missing. Sandy soils are often low in magnesium and potassium and frequently too acid, or in coastal areas too alkaline, for peppers.
- Consider raised beds or containers if the sand is very deep and very free draining, since a defined volume of good mix is easier to keep evenly moist.
Your county extension office runs or refers soil testing and will interpret the results. Search for your state's land grant university extension service and your county name to find the current office rather than relying on a phone number from an old reference.
Can I put peppers in the same raised bed as blueberries and raspberries?
You can physically fit them, but it is a poor combination, and the reasons apply to a lot of mixed bed planning.
The pH problem is the big one. Blueberries need soil at pH 4.5 to 5.5, which is unusually acidic and normally has to be created and maintained deliberately. Peppers want 6.0 to 6.8. There is no overlap, so whichever plant you optimize the bed for, the other is starved, and you cannot amend for one without damaging the other. Iron and manganese also become excessively available at blueberry pH, which peppers do not enjoy.
Roots. Blueberries are shallow and wide rooted with fine surface roots and resent disturbance, while peppers need planting and pulling every year, and the annual digging cuts blueberry feeder roots exactly where they are densest.
Light and space. Raspberries throw up new canes freely, spread by suckering and shade whatever is under them, and peppers fruit poorly in shade.
Shared disease, which is the one people miss. Raspberries and peppers, along with tomatoes, potatoes, eggplants and strawberries, are all susceptible to verticillium wilt, a soil fungus that persists for years. Extension guidance for raspberry siting specifically advises against beds that have recently grown peppers or tomatoes, and the reverse is equally true.
Grow the peppers in containers instead, which also solves the light problem because you can put them where the sun is. A pepper needs a minimum of a five gallon pot and does distinctly better in seven to ten gallons, filled with a proper container mix, watered daily in high summer and fed regularly, because containers leach. Or give the peppers their own small bed at the correct pH somewhere sunny and keep the fruit bed for fruit. One last practical point: the acidifying fertilizers sold for blueberries, such as ammonium sulfate and elemental sulfur, should not be spread anywhere the peppers are rooting.
Is there anything in the old trick of burying a book of matches under a pepper plant?
No. It is folklore, and it was thin even when matches were different. The idea was that match heads supplied sulfur. The quantity was negligible even when heads contained more of it, and a pepper plant's actual sulfur requirement is orders of magnitude larger; and modern safety match heads are built around potassium chlorate and an oxidizer system, with the sulfur compounds largely on the striking strip rather than the head, so the premise no longer holds at all.
Sulfur deficiency does exist, mainly in sandy soils, high rainfall regions, and areas where reduced industrial emissions have cut the sulfur that used to arrive in rainfall. If a soil test shows it, the answer is elemental sulfur, gypsum or a fertilizer containing sulfate, at the rate the test recommends. And a caution, because this gets recommended to people with children: match heads are a genuine poisoning hazard for a toddler or a dog that digs one up, and a book of matches in a vegetable bed is litter. Leave them in the kitchen drawer.
The same goes for most folk additions. Epsom salts get recommended constantly, but magnesium sulfate only helps if your soil is short of magnesium, which a test will tell you; applied blindly and repeatedly it can push calcium and potassium out of balance and make blossom end rot worse rather than better.
I planted peppers in buckets of pure compost. Is that right?
Not quite, and the reason is drainage and structure rather than fertility. Finished compost is fine textured, holds a great deal of water, and settles and shrinks in a container until the air space roots need has largely gone. Peppers in a bucket of pure compost typically start well and then stall, with yellowing lower leaves and soft, sulking growth, because the roots sit in a wet airless mass. Composted manure adds fertility and salts but not structure.
A good container mix for peppers is roughly half a bulk ingredient that holds structure, such as a peat or coir based potting mix or a fine bark based mix; a quarter to a third good compost for fertility and biology; and a quarter perlite, coarse grit or coarse sand purely for air space.
Then check the practical things, which matter more than the recipe. Plenty of drainage holes, with the bucket raised on feet or bricks so they do not seal against a paving slab, and no gravel in the bottom, which does not improve drainage and raises the saturated zone into the root ball. Five gallons minimum per plant, and bigger is easier to keep evenly watered. A dark bucket in full sun cooks roots, so use light colored containers or shade the pot while leaving the plant in sun. Start feeding a few weeks after planting with a balanced liquid feed at label rate every week or two, easing off nitrogen once the plant flowers well. And water daily in high summer, sometimes twice, judging by the weight of the pot rather than the look of the surface. Containers in intense heat dry and overheat fast, and roots cannot escape into cooler soil the way they can in the ground, so check every two or three days during a heat wave. Shade cloth blocking 30 to 50 percent of direct sun lowers foliage temperature by 10 to 15F and substantially reduces heat stress in zone 9 and warmer.
A white substance like granulated sugar keeps appearing on my indoor peppers
Almost certainly mineral and fertilizer salts, and the cycle is the clue, because it tracks your watering and feeding rather than anything alive. Plants take up water with dissolved salts in it and lose most of that water as vapor, and what they cannot use is left behind, some of it excreted at the leaf margins overnight as droplets in a process called guttation, which dries to a crust. Under lights, with warm dry air and a plant transpiring hard, the drying is fast and the residue visible. Hard tap water and any fertilizer in the water both increase it sharply. Watering the soil and never the leaves does not prevent it, because the salts arrive through the plant rather than from outside.
The test: wipe a leaf with a damp cloth. Salt deposits dissolve and vanish, while insects, molted skins and fungal growth do not. It is worth ruling out the alternatives properly. Whiteflies are tiny white moth-like insects on leaf undersides that rise in a cloud when you brush the plant; if nothing flies, it is not whitefly. Mealybugs are white, cottony, waxy masses tucked into leaf joints, sticky to the touch and distinctly cottony rather than granular. Spider mites leave fine webbing on the growing tips with finely stippled, dull leaves. Powdery mildew is a dusty film spreading outward in patches rather than discrete grains, and it does not wipe off cleanly. Scale insects are small fixed brown or tan bumps on stems with sticky honeydew below them and often sooty mold in the honeydew.
Leach the pots two or three times a year by running water through until several pot volumes have passed out of the bottom, then let them drain fully. Use rainwater or filtered water if your tap water is very hard, and never use water from a domestic ion exchange softener, which replaces calcium with sodium and makes the problem considerably worse. Cut the fertilizer rate, particularly under lights in winter when growth is slow.
The little black flies, if you have them, are fungus gnats, and they are telling you the mix is staying wet at the surface. The adults are harmless and the larvae feed on organic matter and fine roots in the top inch, so the fix is cultural: let the surface dry between waterings, water from below if you can, cover the surface with a half inch of grit or fine bark, and put out yellow sticky cards. If they persist, a soil drench of Bacillus thuringiensis subspecies israelensis targets the larvae specifically and is fine on a food plant.
One food safety note, since these are peppers you intend to eat: harmless residue washes off and the fruit is fine. If you decide any of the pests above needs treating, use only a product whose label lists edible crops and indoor use, follow the stated interval between spraying and picking, and wash the fruit. A product labeled for ornamentals is not legal or safe to use on food.
My seedlings are flowering in their pots and the bottom leaves are yellowing
Take the two symptoms separately.
Pinch the flowers off while the plant is still in a pot waiting to go out. A young plant trying to ripen fruit stops putting resources into roots and shoots, and a transplant needs roots above all. You lose a week or two on the first picking and get a bigger, more productive plant for the rest of the season. This applies to plants that are pot bound, stressed or not yet in their final position; once a plant is well established in the ground or in its full sized container, leave the flowers alone.
The yellow lower leaves most likely mean the seed compost has run out, since most seed starting mixes hold little nutrition and are exhausted after three or four weeks. Nitrogen is mobile in the plant, so when it is short the plant moves it out of the oldest leaves into new growth and the bottom leaves pale and yellow from the tip back. Two other candidates are worth checking first: roots circling a pot that is now too small, and cold, since hardening off in an unheated greenhouse can easily put seedlings through nights in the forties, and peppers answer cold roots with yellowing and stalled growth.
A sensible feeding routine starts when the first true leaves appear, with a balanced liquid feed at half the label strength once a week. Fish emulsion is a good choice and a fish and seaweed blend gives a wider range of trace elements. Follow the label rate rather than inventing one, because too concentrated a solution burns roots, and be aware that fish products smell strongly for a day or two and can attract animals to the pots. On the numbers, the three figures on a fertilizer are the percentages of nitrogen, phosphorus and potassium; a 5-10-10 is not low nitrogen in absolute terms, simply lower relative to the other two, which is what a fruiting crop wants. A high first number causes the classic all leaves and no peppers outcome, which is why lawn feed should never go near a vegetable bed. Once plants are flowering, a feed with more potassium supports fruit set and ripening.
Excess nitrogen in hot weather is worse still, particularly on a plant already short of water: it burns foliage, causes premature leaf drop, and pushes soft growth that heat and disease damage easily. Switch to a balanced or lower nitrogen feed through the summer, and never fertilize a wilted or stressed plant. Water thoroughly first, wait a few days for it to recover, then feed.
Blossom drop, since it will come up. Peppers abort flowers when nights fall below about 60F, when days run above the low nineties with warm nights, when the plant is dry, and when the air is very dry or very still. The plant is self fertile, so indoors or in a greenhouse a gentle daily shake of the stems improves fruit set noticeably. None of that is a fertilizer problem, and feeding harder does not fix it. Hardening off properly prevents a lot of this too: a week to ten days of increasing outdoor exposure, starting in shade and shelter, coming in at night until nights are reliably above the high fifties, and going out in the evening or on a dull day rather than into midday sun.
When should I ask for a professional diagnosis?
If leaf damage is severe or rapidly worsening and you cannot identify the cause from the guidance above, or if a problem recurs year after year despite your efforts, contact your local county cooperative extension office. Give them a clear description of the symptoms, photographs or ideally a sample branch with affected leaves, and information about when the problem started and how it has progressed. They have regional expertise in local pepper diseases, pests and growing conditions, can recommend solutions suited to your climate and growing system, and can tell you whether the problem is significant in your region or relatively minor and self-limiting.
There are pale worms inside my peppers but no hole in the skin. What are they?
Pepper maggot, a fly larva about a quarter inch long. It leaves a tiny dimple where the fly laid the egg rather than a chewed entry, and cutting the fruit reveals internal rot or spongy tissue, often after the larva has already left. A caterpillar tells a different story: an obvious chewed hole and dark frass inside the fruit. Bt is useless here, since it acts only on caterpillars, not fly larvae. The home-garden controls are sanitation and exclusion: pick and destroy every infested fruit rather than composting it, since the maggot pupates in soil; rotate where peppers grow each year; and clear nightshade weeds nearby such as wild tomato, ground cherry, and horsenettle relatives, which host the pest between crops. Those steps alone cut the population substantially.
Should I water my peppers with Epsom salts?
No, not as a routine. Magnesium sulfate helps only where magnesium is genuinely short, which is uncommon for peppers, and dosing blind can lock up other nutrients and build salts in the soil. A real magnesium shortage shows as yellowing between the veins of older leaves while the veins stay green, and even then the fix belongs in a soil plan built on an actual soil test rather than a single supplement, since Epsom salts supply only magnesium and sulfur. Without a test, skip it and put the effort into balanced feeding and regular testing.
My transplants have barely grown in a month, and I dusted them for slugs. What went wrong?
Two separate things. The dusting first: carbaryl is an insecticide and does nothing at all to slugs or snails, and it is highly toxic to honeybees, so it has no place on a flowering food crop. If mollusks really are the problem, the bait class matters enormously for household safety: older metaldehyde baits are a severe poisoning hazard to dogs and children, while iron phosphate baits are the safer choice, used per the label. As for the stalled growth, it is almost certainly not pests. A month's pause after transplanting usually traces to transplant shock itself, to cold soil, since peppers are warm-season plants that simply stop in the cold, or to drainage, especially in clay amended with peat moss, which holds water heavily and leaves roots waterlogged. Check that water moves through the soil rather than sitting, soil-test if pH is in question, and consider buying replacement transplants for any spot that has not recovered, since a badly stunted plant may not fruit in time.