
Introduction
A favorite of home gardeners, tomatoes are easy to grow, and just a few plants will supply an abundant harvest.
About tomatoes
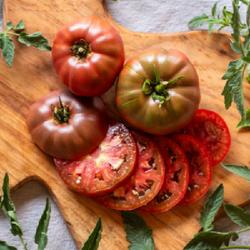
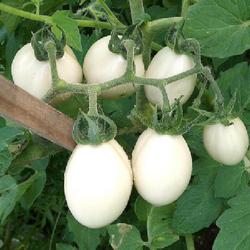
With hundreds of varieties to choose from, and more being introduced every year, there is a tomato for every garden situation and every personal taste. The size of the fruit is no indication of plant size -- tiny "currant" tomatoes might grow on huge, vining (indeterminate) plants, while large "beefsteak" varieties can be found on more manageable bush (determinate) plants. Newer hybrid varieties have been bred for disease resistance, but don't overlook heirlooms that are famous for their rich flavors. By planting early-, mid-, and late-season varieties, you can extend the harvest.
Choosing a site to grow tomatoes
Select a site with full sun and well-drained soil. In very hot climates, light afternoon shade may help prevent blossom drop. Prepare the garden bed by using a garden fork or tiller to loosen the soil to a depth of 12 to 15 inches, then mix in a 2- to 4-inch layer of compost.
Planting Instructions
If you don't purchase plants, start seeds indoors in flats or pots 6 to 7 weeks before the average last frost date, and set out transplants when the soil is warm and all danger of frost is past. Set up trellises, cages, or stakes at planting time. Dig planting holes 18 to 24 inches apart if you plan to stake or trellis the crops, 36 to 48 inches apart if the plants aren't trained. Pinch off two or three of the lower branches on the transplant and set the root ball of the plant well into the hole until the remaining lowest leaves are just above the soil surface. The plant will form additional roots along the buried stem. Water generously and keep the plants well watered for a few days.
Support Systems for Tomatoes
Tomato vines that ramble over the ground are much more likely to suffer damage from slugs, and the fruits are prone to rot wherever they touch the ground. Keeping fruit off the ground and exposed to the sun enhances ripening, and is especially important where the growing season is brief. Various support systems can be used depending on the type of tomato and your available space.
Understanding Plant Types
Indeterminate varieties continue to grow all summer and produce fruit over a long season, requiring staking or trellising. Determinate varieties stop growing once fruit has set and ripen their crop all at once; bush varieties may not require support, but most benefit from a cage or stake.
Tomatoes form shoots or "suckers" in the crotch where a leaf meets a stem. Pruning involves pinching off these suckers to limit the number of stems on the plant.
Bamboo Quadripods
Set bamboo canes into the soil at each plant, then lash them together at about 6 feet above the ground to create a series of quadripods down the bed. Fasten tomato vines to the canes with twine, tying at about every flower cluster. Pinch out most side shoots. For added strength, lay bamboo canes across the top to span the row of quadripods, greatly increasing stability and allowing the system to be adapted for other crops like cucumbers and beans.
String and Bar Trellis
A strong system favored by commercial growers. Use 2x2 stakes 8 feet long (buried 12 to 18 inches deep). Join the tops with a bar made of electrical tubing, flattened and drilled at the ends. Make a loose knot around the base of the tomato stem just below a sturdy leaf or shoot. Run twine to the bar and tie loosely, leaving about 2 feet of extra line at the top. As the tomato vine grows, wrap the leading shoot around the twine in a braiding pattern. If you space plants 18 inches to 2 feet apart, you can let a few side shoots grow and train each with a string. This system provides good air circulation and works well for cucumbers and pole beans too.
Wire Tunnels (Quonsets)
Create tunnels using 6-inch-mesh concrete-reinforcing wire, which comes in rolls. Cut 6-foot sections to make arches about 18 inches tall across 30-inch-wide beds. If you cut out the horizontal pieces along the bottom edge, you create pins to push into the soil. Space tomatoes 18 inches apart down the center. These tunnels are excellent for determinate varieties; with indeterminates, simply drape branches that creep into the row back over the top. The mesh size makes picking simple.
Ongoing Care
Provide an even supply of water all season. If staking or trellising, prune suckers to allow one or two central stems to grow on staked plants, two or three central stems for trellis systems. Apply a thick layer of organic mulch 4 or 5 weeks after transplanting. Contact your local County Extension office for controls of common tomato insect pests such as tomato hornworms and whiteflies.
Common Problems and Solutions
Physiological Fruit Problems
Sometimes fruit problems are not caused by insects or disease, but by weather, variety choice, or gardening practices. Three basic steps help prevent many issues:
- Supply 1 to 1 1/2 inches of water per week from rain or irrigation, and keep moisture levels consistent. Mulch with a 4- to 6-inch layer of hay or straw to conserve moisture.
- Keep plants warm but not hot. In early summer, protect young plants from cold with covers, especially at night. In mid- to late summer, provide afternoon shade to protect fruits.
- Feed carefully, avoiding high-nitrogen fertilizers. Work in a 2- to 3-inch layer of compost two weeks before planting, then apply a complete fertilizer (5-10-10) at recommended rates. Side-dress monthly.
Blossom-End Rot: Brown-black sunken areas appear on the blossom end of green or ripening fruit. Caused by fluctuating soil moisture and calcium deficiency (water transports calcium). Solution: Keep soil evenly moist with mulch, apply 1 1/2 inches water weekly, maintain soil pH around 6.5, reduce nitrogen fertilization, and mulch early in the season.
Blotchy Ripening (Graywall): Light green or clear blotches on green fruit that gradually turn yellow; fruit may be rotten inside. Caused by shade, cool temperatures followed by sunny weather, or excessive foliage. Solution: Grow determinate varieties, decrease nitrogen and increase potassium, and stake or cage plants for sunlight exposure.
Catfacing: Misshapen fruit with black scarred areas on the blossom end. Caused by low temperatures (below 65 degrees F during day, 55 degrees F at night) three weeks before flowers open, or high winds. Solution: Plant later in the season and protect transplants from cold and wind, or plant modern hybrid varieties resistant to low temperatures.
Fruit Cracks: Fruits crack around the stem end and along sides when ripening; cracks may be radial or concentric. Caused by abruptly alternating wet and dry periods; soft-fruited varieties like 'Celebrity' and 'Sweet 100' are particularly prone. Solution: Keep soil evenly moist with 4- to 6-inch mulch of hay or straw, don't overfertilize, or plant less-susceptible varieties.
Green (or Yellow) Shoulders: Shoulders on the stem end stay green or yellow and hard as rest of fruit ripens. Caused by chlorophyll not breaking down during high temperatures and direct sun. Solution: Most common in heirlooms lacking genes for uniform ripening; modern hybrids rarely develop this. Maintain good foliage cover or pick fully green tomatoes to ripen indoors.
Puffiness: Fruits lack internal jelly and feel hollow. Caused by incomplete pollination from temperatures too high (above 100 degrees F) or too low (below 55 degrees F), or by too much nitrogen or too little potassium. Solution: Set plants out after nighttime temperatures are consistently above 55 degrees F, use shadecloth in hot climates, protect from hot winds, reduce nitrogen, and plant resistant varieties like 'Celebrity' or 'Better Boy'.
Sunscald: Lighter-colored leathery patches on fruit; fruit usually rots. Discoloration is like a sunburn from exposure to hot sun, most likely on varieties that don't produce enough leaves. Solution: Avoid pruning leaves or stems while fruit is ripening, consider shading with shadecloth or row cover, and grow indeterminate varieties with thick foliage cover like 'Jet Star' or 'Big Beef'.
Zippering: Zipper-like marking running from top to bottom on fruit skin; disfiguring but fruit can still develop properly. Caused by temperatures below 55 degrees F when flowers are dropping off young fruit. Solution: Cover young transplants with floating row covers to reduce cold damage, or plant resistant varieties like 'Big Beef'.
Insect Pests
Tomato Hornworms: Large green caterpillars up to 5 inches long with diagonal white stripes, black spots, and a horn-like projection from the rear. Can consume large amounts of foliage. Control: Handpick caterpillars (the horn is harmless), or use Bt (Bacillus thuringiensis) when caterpillars are small (under 2 inches). If you see a caterpillar covered with grain-like cocoons, it has been parasitized by braconid wasps; leave it to allow new wasps to emerge and control other hornworms. Fall soil cultivation exposes overwintering pupae to birds and cold.
Flea Beetles: Tiny black insects (1/16 inch) that pepper young tomato leaves with small holes, resembling buckshot damage. Jump like fleas when disturbed. Damage is mainly to seedlings and young plants. Solution: Adult beetles overwinter in soil and garden debris; clean up at end of season. Cover young plants with row covers immediately after transplanting until well-established. Rotate tomato location. Trap crop strategy: plant arugula, mustard, radishes, or napa cabbage 10 feet away 2 weeks before tomatoes; insects prefer these, so pull them up when tomatoes are large enough.
Stink Bugs: Shield-shaped adults in various colors (often green or brown); nymphs similar but smaller and differently colored. Damage: Dimpled and deformed developing tomatoes with light yellow blotches or whitish cloudy spots; beneath discolored areas is spongy white tissue. Solution: Look for barrel-shaped egg clusters on leaf undersides and destroy; handpick adults and nymphs (wear gloves). Early morning, when sluggish, handpick into soapy water. For severe infestations, consult local Extension for pesticide options.
Aphids: Small, soft-bodied, pear-shaped insects in various colors. Feed by sucking plant juices; cause curled, distorted leaves. Solution: Encourage beneficial predators by including flowers among vegetables and minimizing broad-spectrum insecticides. Knock aphids off with strong water spray; use insecticidal soap, horticultural oil, or neem oil for severe infestations.
Fungal Diseases
Early Blight: Brown spots about 1/4 to 1/2 inch in diameter with characteristic concentric rings on leaves, stems, and fruits. Symptoms start on lower leaves and move upward; badly infected leaves turn yellow and drop. Warm, humid, or wet weather favors development. Solution: Clean up garden debris at end of season; rotate tomatoes and related crops (peppers, eggplant, potatoes) 2 to 3 years. Use mulch to prevent spore splash. Avoid overhead watering. Plant resistant varieties (look for "AB" designation). Consider preventative fungicide applications if regularly severe.
Late Blight: A devastating disease that can kill plants rapidly. Water-soaked, irregularly shaped spots about nickel to quarter size appear on leaves; fuzzy white mold forms on leaf undersides. Spots enlarge quickly, turn black, kill entire leaves, then spread to stems, eventually collapsing the plant. Cool nights, warm days, and wet weather favor this disease. Solution: Remove a few affected leaves immediately; destroy entire plants if widely infected (don't compost infected material). Good air circulation and drip irrigation help. Select late-blight-resistant varieties (look for "LB"). Use fungicide sprays preventatively if disease appears during favorable weather.
Septoria Leaf Spot: Small brown or grayish spots with dark margins on lower leaves first, usually after fruit set begins. Spots have yellow halos and often black specks in centers. Warm, wet weather favors development. Severely infected leaves turn yellow and drop. Solution: Keep plant tops dry, use mulch, avoid working among wet plants, and clean up garden debris. Rotate crops for 2 to 3 years. Consider preventative fungicides if severe in your garden.
Wilts (Fusarium and Verticillium): Soil-borne fungal diseases that block water-conducting tissues. Symptoms: lower leaves wilt, turn yellow, and drop; top of plant wilts; possible death. Fusarium worse in warm weather; verticillium favors cool, moist soils. In Fusarium, wilting often one-sided initially; in Verticillium, lower leaf tips show distinctive V-shaped yellowing. Solution: No chemical controls available to home gardeners. Pull up and destroy infected plants. Clean up garden well. Rotate crop locations. Best control: choose disease-resistant varieties; "F" or "F2" or "F3" indicates Fusarium resistance; "V" indicates Verticillium resistance.
How to harvest tomatoes
For best flavor, harvest tomatoes when they are firm and fully colored. Fruits will continue to ripen if you pick them when they are half-ripe and bring them indoors, but the flavor is often better if you allow fruits to ripen on the vine.
As the season winds down, keep watch for frost. Tomatoes on plants that have been hit by frost turn mushy and rot, but do not panic the first time frost is predicted while your vines are still loaded with green fruit. If you protect the plants through a night or two of light frost with old sheets, tarps, or burlap bags, the weather often turns warm again and you may gain a few more weeks of ripening. When a hard freeze is finally on the way, pick everything, even the small green fruits; they can be fried or pickled.
Large green tomatoes will ripen indoors. Tomatoes need warmth, not light, to ripen, so there is no need for a sunny windowsill. Set the fruits on a shelf out of direct sun where temperatures run 65 to 70 degrees F, and cover them with sheets of newspaper (or wrap fruits individually). The paper traps the ethylene gas tomatoes naturally give off, which hastens ripening; placing tomatoes in a paper bag with an apple or banana works the same way. Check every few days and remove ripe fruits or any starting to rot.
Heat can also work against ripening. Tomato fruits will not develop red pigment when temperatures stay above 86 degrees F, so in hot climates vine-ripened fruit may turn yellowish orange instead of red. Where summer and fall run hot, pick fruits at the pink stage and let them finish ripening indoors at cooler temperatures.
For much more information, check out our Tomatoes section of the Food Gardening Guide.
Frequently Asked Questions about Tomatoes
What do the letters after a tomato variety name mean?
They are a disease resistance code, and learning to read it prevents more trouble than anything you can spray. A name such as Celebrity VFFNTA tells you exactly what that variety has been bred to shrug off.
- A or EB: Alternaria, the fungus that causes early blight.
- C: Cladosporium, leaf mold.
- F: Fusarium wilt race 1. FF covers races 1 and 2 both.
- LB: late blight, a real advantage in humid climates.
- N: root knot nematodes, which nothing you spray will control.
- S: Stemphylium, gray leaf spot.
- T: tobacco mosaic virus.
- V: Verticillium wilt.
Choose the letters that match your own garden history rather than hunting for all of them on one variety. If a wilt has taken your plants two years running, V and F matter most. Resistance is not immunity, so the cultural measures below still apply, and many excellent tomatoes carry no letters at all.
How do I tell whether a variety is determinate or indeterminate?
The seed packet or plant tag states it. Determinate varieties are often labeled bush, compact, patio, or container, and are pictured in cages or with no support. Indeterminate varieties are labeled vining, staking, tall, or continuous, and are pictured tied to tall stakes or trellises. If the tag is silent, check the seed company or nursery website by variety name.
Do not rely on the variety name itself. Names come and go from commerce faster than the traits they denote, and a familiar name may no longer refer to the same genetics it did a generation ago. If you cannot find the information at all, indeterminate is the safer assumption for a retail nursery plant.
How many stems should I let an indeterminate tomato keep?
A vigorous indeterminate left completely free will develop ten or more stems and become an impenetrable tangle. One stem gives the tallest, most manageable plant with the largest individual fruits. Two to four stems is the practical range for most gardens, and more than four becomes hard to stake or tie.
To hold a multi-stem form, let a sucker develop from the first node above the first flower cluster, take a second from the next node above that, and keep any further stems as close to that cluster as you can. Side stems that appear higher up are naturally weaker and produce inferior fruit, so removing them costs you little. Suckers that appear a month or two before your expected frost will never mature and should come off entirely.
On every tomato, determinate or indeterminate, remove the side shoots that arise low on the plant before the first flowers appear. Leaving them fragments the plant's resources among competing growing points.
What is the right way to remove a sucker?
While a sucker is small and tender, grasp the base between thumb and forefinger and snap it backward. It breaks cleanly at the joint and the small wound closes quickly. Avoid cutting small suckers with a blade, because the stub left behind is a site for infection.
Once suckers turn thick and woody, use a clean sharp blade. Sanitize it between plants by wiping with a cloth dampened in a 10 percent bleach solution or 70 percent isopropyl alcohol. This is not fussiness: tobacco mosaic virus survives on a blade for hours, and cutting an infected plant and then a healthy one puts the virus straight into a fresh wound. One careless blade can carry the virus through an entire planting.
Do not overdo it. Leaves are the engine that ripens the fruit, and dense foliage shades fruit against sunscald. On determinate plants, removing growth above the first flower cluster does not redirect energy into larger fruit; it simply throws fruit away.
Can tomatoes catch a virus from cigarettes or from smokers handling the plants?
The handling route is real. Tobacco mosaic virus reaches tomatoes, peppers, and their nightshade relatives when a smoker handles the plants or when the plants contact tobacco itself. What makes it more than theoretical is how long the virus survives: it stays viable for years inside dried stem and leaf tissue, which is exactly what the tobacco in a cigarette is. A butt worked into the soil can be a source of infection, and once the virus is in a garden it spreads by handling and by insects.
Be careful about the claim you make to your family, though. Contact is the well established route, not smoke drifting through the air. That is a strong enough case on its own, and keeping smoking out of the growing area is a reasonable house rule.
What to do: wash hands with soap and water after handling tobacco and before touching healthy plants, keep cigarette butts out of beds and compost, remove and destroy plant debris rather than composting it, rotate tomatoes, peppers, and eggplants, and plant a variety carrying the T in its resistance code.
The classic symptom is a leaf mottled in alternating light and dark patches, with curling and malformed leaflets. Some strains also yellow the plant and cause dwarfing or distortion. Yellowing has other explanations, including Verticillium and Fusarium wilt, so take a sample to your County Extension office before you tear plants out.
Does putting a copper wire through the stem stop blight?
No. This is a rumor with nothing behind it, and gardeners who have tried it have found no effect. It also wounds the stem of a plant you want to keep healthy, which is a real cost against a benefit that does not exist.
What genuinely reduces blight risk: plant resistant varieties, work compost into the bed, rotate so tomatoes do not return to the same ground each year, mulch once the plants are in so water cannot splash soil onto the leaves, and remove the lowest leaves at the first sign of yellowing, since blight generally works upward from the bottom.
One of my tomatoes has brown edges along the leaves. Is it a virus?
Almost certainly not. Brown leaf margins are one of the least likely symptoms to be viral. Virus symptoms are patterned and systemic: they appear in the new growth first, affect the whole plant, and distort as well as discolor. Mosaics give mottled light and dark green. Tomato spotted wilt gives bronzed, cupped leaves with small dark ring spots and fruit with concentric yellow rings. Curly top gives a stiff, upright, yellowed plant with thickened inward curled leaflets that dies quickly. None of those is a neat brown band around the edge of otherwise normal leaves.
A water problem produces brown margins in almost every case, from either direction. Under watering starves the leaf edge first, so it goes tan and crisp. Over watering does the same by a different route, because saturated soil suffocates roots and damaged roots cannot move water however much is available. Excess fertilizer burns margins too, since the salts pull water back out of the roots, and that is the usual explanation when a plant browns within a week or two of being fed. Wind on a hot dry day will scorch margins in an afternoon.
Check the simple things in order. Push a finger two inches into the soil; it should be damp, not wet and not dust dry. Look at whether the pot or bed drains, recall what you fed and at what rate, and note whether the plant sits in a windy spot or against a reflective wall. Then let the plant tell you the rest: water evenly and deeply, hold off fertilizer, and watch the new leaves expand. Clean new growth means it was a passing cultural problem. Stunted, distorted, or spotted new growth means something progressive that is worth identifying properly.
White or pale spots are spreading across my tomato leaves. What are they?
Take a leaf into good light with a hand lens before deciding, because several different things produce pale spots and each calls for a different response.
- Powdery mildew if the spots have texture, looking dusted or felted with white powder you can rub off. Most common in dry climates, greenhouses, and still air.
- Sunscald if the spots are smooth, bleached, papery, and confined to leaves in direct afternoon sun while shaded foliage is untouched. Classic after a plant is moved abruptly into full sun or pruned hard.
- Spider mites or thrips if the pale areas are a fine stipple of tiny dots and the leaf looks dull, silvered, or bronzed. Turn it over and look for fine webbing and moving specks, or for slender insects and black frass. Very common on patio containers in hot dry weather and often mistaken for disease.
- Edema if the spots are small water blistered bumps on the undersides that later turn tan and corky, following wet soil and humid air. No treatment needed beyond better watering and air movement.
- Spray or hard water residue if the marks are chalky, sit only where droplets landed, and wash off.
Two possibilities matter more than any of those, because they are what usually turns out to be spreading. Septoria leaf spot gives many small round spots about an eighth of an inch across, gray to tan centers with dark margins and tiny black dots visible under a lens, starting on the lowest leaves and moving up. Early blight gives larger brown to black spots with concentric rings like a target, surrounded by a yellow halo, also starting low and moving up, plus dark sunken lesions on the stem.
And one you must be able to recognize because it is different in kind. Late blight produces large, irregular, greasy looking gray green or brown blotches, often starting at leaf tips and margins rather than as neat spots, sometimes with a faint white fuzz at the lesion edge on the underside in humid weather, along with dark stem lesions and firm brown greasy patches on green fruit. It kills a plant in under a week in cool wet weather and it spreads to entire neighborhoods and to potatoes. If you think you have it, remove and bag the plants immediately and notify your county Cooperative Extension office, because regional outbreaks are tracked.
Whatever it turns out to be, remove affected leaves into the trash rather than the compost, take no more than about a third of the foliage at once, open up the crowded interior, water at the base in the morning, and mulch the soil surface so spores cannot splash up.
My tomato is yellowing and declining and nothing I spray helps. What else could it be?
These are the causes people chase fungicides over for weeks.
Herbicide injury is the biggest one. Tomatoes are extraordinarily sensitive to growth regulator lawn herbicides, and the picture is unmistakable once you know it: new growth cupped downward or twisted, leaflets narrowed and strap like or fernlike, stems flattened or split, and fruit that comes in small, pointed, and hollow. There are two routes. Drift or vapor movement from a lawn treated nearby on a warm day travels further than people expect, which is why a herbicide sprayer should never be the same sprayer you use on tomatoes. And carryover, where clopyralid or aminopyralid residues survive in manure, hay, straw, or grass clippings from treated pasture, pass through composting intact, and injure tomatoes a year later. If you brought in manure, straw, or clippings, test before using them: sow a few bean or pea seeds in a pot of the suspect material and a pot of known clean mix and compare the seedlings after two or three weeks. Plants sometimes grow out of a light exposure, but there is no treatment and no quick way to clear the residue.
Black walnut is next. Walnut roots release juglone, and tomatoes are among the most susceptible plants there is. A tomato inside the root zone, which reaches well beyond the branch spread, yellows, wilts in the afternoon despite moist soil, and often dies at first fruit set. Leaves and hulls in compost do the same. As a practical minimum, keep tomatoes 50 feet from the trunk, and further where you have the room. The only real fix is distance or a container.
Root problems are the third group. Fusarium wilt yellows and wilts one side or one branch at a time, and a stem cut lengthwise near the base shows a brown streak in the wood just under the surface. Verticillium is similar but more even and slower. Root knot nematodes stunt a plant that has plenty of water and fertilizer, and pulling it up shows small knots on the roots. All three are managed by rotation and by the V, F, and N letters, not by anything you apply.
Finally, some leaf curling is not a problem at all. Physiological leaf roll, where leaflets roll upward and inward while staying firm and green, is a common response to heat, heavy pruning, or fast growth, particularly in paste varieties. It costs no yield. The difference from herbicide injury is that leaf roll affects mature leaves and leaves them normal in shape and color, while herbicide injury distorts new growth as it forms.
My plants wilted during a week of heavy rain. Will they recover?
They can, if the roots are still alive. Shallow topsoil over clay saturates in heavy rain, air is driven out of the root zone, and roots suffocate even though water is everywhere. The plant wilts because the root system cannot function, not because it is dry, and drainage will fix that.
The trap is that wet soil also favors Fusarium wilt, Verticillium wilt, bacterial wilt, and southern blight, which can infect roots already weakened by waterlogging. Those do not go away when the soil dries, and an infected plant should come out.
To tell the difference, cut a stem low on the plant and look inside. A waterlogged plant shows healthy vascular tissue; a vascular wilt shows brown or black discoloration in the stem. For bacterial wilt specifically, stand the cut end in a glass of water for a few minutes; it produces a milky ooze that clouds the water. For next season, raised beds or French drains lift the root zone above the clay.
Should I prune off foliage damaged by frost?
Yes. Once it is clear what was killed, remove the frosted foliage and damaged branches. Tomatoes respond by branching and pushing new growth as the weather warms, and cutting the dead tissue away directs energy there rather than into tissue that will not recover. The setback is temporary and the plant catches up quickly once warmth arrives.
Tomatoes set into cold soil below 45 degrees Fahrenheit, or set out without hardening off, suffer the same kind of damage without any frost event at all.
Why do my flowers drop without setting fruit?
Tomato flowers are white, which is normal; the problem is when they fall without setting.
Temperature is the single most critical factor. Above about 90 degrees Fahrenheit, tomato pollen loses viability, so flowers look healthy and abundant but cannot fertilize. Below about 55 degrees at night, plants also hesitate to set. The productive range is roughly 65 to 85 degrees. In a region with predictably hot summers this often means the first flush of flowers drops and fruit finally sets when temperatures moderate in late summer. The plant is not damaged, and once one fruit sets, others usually follow quickly.
Pollination also needs pollen actually moved from anthers to stigma. Tomato flowers are self fertile and often self pollinate on air movement, but in still conditions the pollen may not move. Bumblebees are excellent tomato pollinators because they vibrate the flower while working it.
Drought stress causes flower and small fruit drop as the plant redirects energy to survival, and inconsistent watering makes it worse. Heavy nitrogen does the opposite kind of damage, producing dense foliage at the expense of flowers.
How do I hand pollinate tomatoes in a sunroom or greenhouse?
Where pollinating insects cannot reach the flowers, you have to supply the vibration yourself. Gently tap or shake the flowering stem with a finger or a small brush in the morning, on a dry day, when the pollen is powdery rather than damp. Tap each flower cluster briefly and repeat every day or two as new flowers open. It is not completely effective, but consistent tapping through the flowering period gives a reasonable crop.
How do I know a tomato is ready to pick?
The most reliable sign appears before color does. Look for a darkening band around the shoulder of the fruit, just below where the flower was. This breaker stage shows up weeks ahead of full color, and the band may be dark green, dark red, or purplish depending on variety. A fruit with darkened shoulders has reached mature status and will finish ripening whether it stays on the vine or comes indoors.
Uniform pale or yellowish green from top to bottom means the opposite. That fruit has not entered the ripening phase, is still accumulating sugars and flavor, and will be bland if picked. Leave it.
What is the best way to ripen tomatoes indoors?
Wrap each fruit individually in plain newspaper. That insulates it from temperature swings, holds the ethylene the fruit gives off around it, and keeps ripening fruits from touching each other and spreading rot. Use the plain sections rather than colored ink, and avoid plastic bags, which trap moisture.
Store the wrapped fruit somewhere cool, around 60 to 70 degrees Fahrenheit, such as a garage or basement. Do not refrigerate; cold halts ripening and ruins the texture. Cool, slow ripening actually develops deeper flavor than rushing it at room temperature. Check every few days and pull out anything with soft spots before it spreads. When most have colored up, bring them into a warm room about a week before you plan to eat them.
A frost killed the plants and the vines are still loaded with green fruit. Can I save any of it?
Often, yes. Pull the whole plant and hang it upside down in a well ventilated place out of direct sun, such as a garage, basement, or shed. The inverted position lets air circulate around all the fruit and keeps moisture from pooling at the stems, and the plant's stored resources keep feeding the fruit for a while. Cut a very large plant into sections and hang each separately.
Judge the fruit, not the plant. Anything with visibly dark shoulders will continue to color even though it is mostly green, just more slowly than it would have on a living plant. Check every two or three days and bring fruit indoors as it reaches full color. Discard anything that softens or shows decay, since it will not improve and will spread.
Fruit that is uniformly green with no shoulder darkening will not ripen under any conditions, because it never entered the ripening phase. It is not wasted, though: firm unblemished green tomatoes pickle well, and picking them frees up air circulation for the promising fruit above.
If you plan to can or pickle green tomatoes, work from a tested recipe from a trusted source such as the National Center for Home Food Preservation. Acid levels and processing times are what make a home preserve safe, and those are not details to improvise.
Can I grow a full sized tomato in the pot it came home in?
No. A nursery pot is sized to get a plant to the point of sale, not to grow it. A full sized tomato needs at least a three gallon container, and five to ten gallons is much better in hot weather; indeterminate varieties do best at ten gallons or more, determinates at five to ten. In anything smaller the roots fill the pot within weeks and the plant is then permanently either too dry or too wet, because the small volume of mix dries out in hours and then stays saturated when you water heavily to compensate. That whiplash is what yellows and crisps the foliage, and it is also why blossom end rot is so common in small pots.
Repot into fresh potting mix rather than garden soil, teasing the outside of the root ball apart if it has gone solid, water until it runs from the bottom, then let the top half inch dry before watering again. Judge the outcome by the new growth and remove leaves that are already dead.
What should I fill a tomato container with?
A commercial potting mix formulated for containers. Peat moss on its own is a common mistake: it carries no nutrients, and once it dries out completely it sheds water rather than absorbing it. Prepared mixes combine peat or coir with perlite or sand for air pockets, add wetting agents so the peat rewets, adjust the pH, and often include slow release fertilizer. Save leftover peat for amending garden beds.
Container material matters too. Plastic is light and cheap. Wooden barrels look better but eventually rot, so line them or set a plastic pot inside. Avoid galvanized metal for anything you intend to eat: tomatoes are acidic, and the organic acids their roots produce can slowly leach zinc from the galvanized coating, which is the same interaction behind the restrictions on galvanized metal for food contact surfaces in commercial kitchens. Metal also heats badly in sun and can cook the root zone. Use metal containers for ornamentals instead.
A dark plastic pot in full afternoon sun can reach root damaging temperatures as well. Shading the pot while leaving the plant in sun helps more than anything you can pour on it.
My container tomato is yellowing. Which problem is it?
Where the yellowing sits on the plant tells you what is happening.
- Only the oldest, lowest leaves, with everything above green: normal. The canopy shades them out. Snip them off, which also improves air movement at the base.
- General across the whole plant including new growth: water or nitrogen. Check that water actually runs out of the drainage holes, that the pot is not standing in a saucer, and that the mix has not turned into a dense sour mass. Nitrogen shortage pales the whole plant evenly and is very common in containers by midsummer, since every watering leaches some out.
- Between the veins on lower and middle leaves, veins staying green: magnesium deficiency, much more common in containers than people realize. Nitrogen goes uniformly pale; magnesium leaves a green skeleton of veins in a yellow leaf.
- Lower leaves yellowing with brown spots that carry concentric rings and a yellow halo: early blight, not a nutritional problem at all.
Feed containers with a balanced water soluble fertilizer at about half label strength every week or two rather than a full dose occasionally. Never exceed the total rate on the label.
How much sun and warmth do tomatoes actually need?
Eight to ten hours of direct sun a day to grow well and set fruit. Less light means fewer flowers and fewer tomatoes, so in a bright room or sunroom, put the plant where the sun is direct and as unobstructed as you can manage.
Warmth matters as much. Above 90 degrees Fahrenheit the pollen goes sterile and flowers will not set even if they are pollinated, and in extreme heat plants drop flowers and stop producing. Where that is routine, provide afternoon shade or shade cloth through the hottest weeks and plan your harvest around the shoulders of the season. Nights below 50 degrees slow growth; tomatoes prefer nights in the 60s or above. An unheated sunroom that drops into the 50s at night will grow tomatoes slowly rather than kill them, and growth resumes when it warms.
Do tomato seeds need any special treatment before sowing?
No. Tomato seeds are among the easiest to start and need no stratification. Use a seed starting mix, which is light, free draining, and usually sterile, and sow about a quarter inch deep, roughly the diameter of the seed. Deeper sowing only delays germination and gives the seed longer to rot.
Keep the mix damp like a wrung out sponge, never waterlogged, and cover the container with plastic to hold humidity until the seedlings appear. Warmth is what matters: aim for soil around 70 to 75 degrees Fahrenheit. Below 60 degrees, germination stretches from a week or so to several weeks, and every extra day is another day for rot to take hold. Seeds do not need light to germinate, so keep the covered tray in bright indirect light rather than direct sun, which can overheat the soil through the plastic. Remove the cover as soon as seedlings emerge, because they rot quickly underneath it.
If nothing has come up after three weeks at proper warmth, the seeds are lost. Discard them, clean the container, and start again.
My seedlings are tall, thin, and falling over. What went wrong?
Not enough light. A seedling searching for light keeps elongating, and the longer it searches the thinner and weaker the stem becomes.
Give 14 to 16 hours a day under fluorescent or LED grow lights positioned two to three inches above the top leaves, and raise the lights every few days as the plants grow. Lights too far away let stretching continue; lights too close without airflow scorch the leaves. Add a small oscillating fan on low. Air movement strengthens stems by giving them slight physical stress to grow against, and it reduces damping off at the same time.
A leggy seedling is not ruined. Tomatoes root along a buried stem, so strip the lower leaves and plant it deep, which turns the weak length of stem into root system.
What is damping off and how do I stop it?
Damping off is a fungal rot that kills seeds and seedlings, caused mostly by Pythium, Phytophthora, and Rhizoctonia species, which thrive in cool wet conditions and crowded trays with poor air movement. Before emergence it shows as a fine white or gray fuzz on the surface, often with a musty smell. After emergence it appears as a water soaked soft rot right at the soil line, just below the seed leaves, and the seedling wilts and collapses.
Prevention is the practical control, and overwatering is the single most common mistake behind it. Sow at spacing that keeps seedlings from touching, water sparingly and from below rather than overhead, make sure the container drains completely, keep air moving, and let the surface dry slightly between waterings. Remove collapsed seedlings promptly so the fungus does not reach their neighbors.
Is a heat mat or grow light setup a hazard?
It can be, and this is worth taking seriously in a basement or a crowded seed starting shelf. Water and electricity together are a shock hazard, and a heat mat run continuously without temperature control can overheat.
Use only a heat mat with a built in thermostat or one plugged into a thermostat controlled outlet, and never run it without temperature monitoring. Put a waterproof tray between the mat and anything that can drip on it, and keep the mat away from the path of overhead watering. Position grow lights so they cannot fall into water trays. Use ground fault protected outlets where the location allows, inspect mats and cords periodically for cracking or exposed wire, and replace anything that shows wear.
Can I save seed from my own tomatoes?
Yes, if the variety is open pollinated. Open pollinated and heirloom varieties breed true, so saved seed produces fruit of the same size, shape, color, and flavor. First generation hybrids, marked F1 on the packet, do not. Seed saved from an F1 produces a range of plants resembling one or other parent line, often with different fruit, lower yield, and reduced disease resistance. Catalogs and packets always state which a variety is.
To save seed, scoop the seeds and gel from a fully ripe fruit into a container and let it sit covered for two or three days at room temperature. That fermentation breaks down the gel coat, makes cleaning easy, and may reduce transmission of some seed borne bacterial diseases, though it is not a complete disinfection. Rinse thoroughly, rubbing the gel off with a fingertip, and dry the seeds on a plate or paper towel in an airy spot out of direct sun for one to two weeks. They are dry when they shatter rather than bend.
Store dried seed in an airtight jar in the refrigerator at 40 degrees Fahrenheit or below, where it stays viable four to five years. At room temperature you get two to three.
Be aware that bacterial canker, bacterial spot, and tobacco mosaic virus can all ride on or in tomato seed without marking it visibly, and bacterial canker in particular cannot be cured in the growing plant. Hot water and chemical seed treatments reduce that risk, but the correct temperature, duration, and concentration depend on the pathogen and the variety. Ask your cooperative extension office for the current protocol for your region, or buy commercially treated seed, rather than mixing your own concentration for seed destined to become food.
How should I prepare the soil for tomatoes?
Work organic matter into the top 8 to 10 inches before planting. Sandy soil loses water and nutrients too fast and needs compost or aged manure for retention. Clay compacts and saturates, and benefits most of all: spread four to five inches of finished compost, aged manure, or shredded leaves and dig it in thoroughly. Adding organic matter to clay improves drainage as well as water holding, which sounds contradictory but is what happens when the structure opens up.
Peat moss conditions soil well, but coconut coir performs identically for tomatoes without the cost of draining peat bogs, and finished compost, aged bark, leaf mold, and shredded leaves are all equally effective. Choose on local availability and price.
None of these amendments fixes acidic soil, and eggshell folklore will not either. If a soil test comes back at 5.5 or lower, add lime at the rate your cooperative extension office recommends for that result. Since peat, coir, and compost all acidify slightly as they break down, pair them with the lime in the same amendment rather than adding lime afterward. Be careful with wood ashes in general, and especially while a crop is standing: their effects are drastic though short lived, and they can hurt a crop already in the ground.
Is it safe to use manure in a tomato bed?
Only aged or composted manure. Fresh manure from horses, cattle, chickens, and other livestock harbors pathogens including E. coli O157:H7, Salmonella, Listeria monocytogenes, Campylobacter, and Cryptosporidium, which survive in soil for weeks or months. Even though tomato fruit does not rest on the soil, contamination still travels by rain splash onto foliage and fruit, on hands and tools during harvest and pruning, and on soil particles settling on ripe fruit.
FDA food safety guidance specifies a minimum 90 day interval between applying fresh manure and harvesting any food crop whose edible part does not touch soil. Most gardeners work their beds from March to May for a June through September harvest, which does not leave that interval. If you do apply fresh manure, plan on at least 120 days before harvest, which for a spring application means waiting until August or later.
Composted manure, whether commercially bagged and labeled as composted or hot composted at home, kills most pathogens through heat. Aged manure, meaning a pile left undisturbed outdoors for at least a year through multiple seasons, achieves substantial reduction as well. Once manure is aged or composted, there is no timing restriction: apply it at planting or during the season.
Is manure tea safe on tomatoes?
Only from finished compost or well aged manure, and only as a soil drench. Started from pathogen free feedstock, the liquid carries nutrients and not the organisms that cause food borne illness.
Manure tea made from fresh manure is not safe, and this is the point where older gardening advice goes badly wrong. Steeping does not kill pathogens; it extracts soluble nutrients into the water while the organisms stay alive. The month of steeping that older sources recommend provides no pathogen reduction at all. Applied as a drench, it spreads contamination to the soil and plant base where hands and tools reach it. Applied as a foliar spray it is worse still, because the spray creates an aerosol you can inhale, contacts skin, eyes, and mouth directly, and settles onto the fruit you are going to eat. Never make manure tea from fresh manure, and never spray any manure based preparation, aged or not, onto tomato plants.
Is the soil near my house or my raised bed lumber safe for food?
Two hazards are worth checking before you plant.
Lead from old paint. Soil beside painted structures and older houses, particularly on the side where water drips off the gutters and runs down the wall, accumulates lead from deteriorating paint, and tomatoes take it up into fruit and foliage. Have the soil tested; many extension services offer this. If it comes back elevated, site the bed elsewhere, or build a raised bed filled with clean imported soil, which physically isolates the roots from the ground below. Wash harvested fruit thoroughly to remove soil particles, and peeling reduces intake further.
Arsenic from old pressure treated lumber. Residential pressure treated lumber predating 2004 was generally treated with chromated copper arsenate, which leaches arsenic into soil, especially in acidic conditions. Do not use it for any bed where food will grow; repurpose it for ornamental beds or pathways. Modern pressure treated lumber uses copper based preservatives without arsenic and is much safer, though copper still accumulates in soil over time. Untreated cedar, redwood, or another decay resistant wood is the best choice for a vegetable bed.
How often and how deeply should I water?
Deeply and less often, rather than lightly and daily. Deep watering sends roots down into the amended soil; frequent shallow watering keeps them in the top inch or two, where they stress the moment the weather turns. In the absence of rain, water every two or three days, aiming for one to two inches a week depending on heat and soil. Sandy soil may need it every other day in midsummer; clay may need a full soaking only twice a week even above 90 degrees Fahrenheit. Test by pushing a finger two or three inches into the soil at the base of the plant.
Apply the water to the soil around each plant rather than overhead. Wet foliage is what fungal disease needs. Water in the early morning so incidental wetting dries as the day warms, and avoid evening watering, which leaves foliage wet all night. Mulch two to three inches deep over the root zone, kept three or four inches back from the stem, and it will moderate soil temperature, hold moisture, stop soil splash, and suppress weeds all at once.
Containers are different only in frequency: water when the top inch is dry, which in midsummer often means daily, and expect water to run out of the bottom, which is normal and necessary.
What should I feed tomatoes, and when?
Nitrogen drives leafy growth early. Work a balanced fertilizer such as 10-10-10 into the soil before transplanting, or side dress around the base about three weeks after planting when the plant is 12 to 18 inches tall. Then stop: do not apply nitrogen heavy fertilizer after about mid July in northern zones or mid August in the South. Late nitrogen produces a magnificent plant with very few tomatoes, which is the single most common feeding mistake.
Once flowering starts, shift to something lower in nitrogen and higher in phosphorus and potassium, such as 5-10-10 or 0-10-10, which is what most fertilizers sold for tomatoes provide.
Rather than guessing at any of this, test. A basic soil test through your county extension office tells you which nutrients your bed actually needs and how to read the result, and a bed that has received amendments for years is exactly the sort of place worth testing before adding anything else.
Does Epsom salt prevent blossom end rot?
No, and it can make the problem worse. The claim is that Epsom salt supplies magnesium and prevents blossom end rot, and it fails on both counts. Most garden soils have adequate magnesium, and blossom end rot is not a magnesium or even a calcium deficiency in the first place. It is a calcium transport failure caused by inconsistent soil moisture. Magnesium and calcium compete for uptake, so adding extra magnesium can antagonize calcium movement into developing fruit.
If a soil test does show a magnesium deficiency, which is rare, the fix is dolomitic limestone as a soil amendment, not a routine Epsom salt drench.
What actually prevents blossom end rot?
Consistent soil moisture, through the whole fruit development period of roughly 50 to 70 days from flower to ripe fruit. Calcium moves into the fruit dissolved in water moving up the plant. When the soil swings between saturated and dry, that flow stalls, the developing fruit cannot get enough calcium into its tissue, and the tissue at the blossom end collapses into the familiar dark sunken pit. Mulch and drip irrigation work so well because they buffer the soil against exactly those swings.
A fruit that already has it cannot be cured; you are preventing it in the fruit still to come. If a soil test genuinely shows low calcium, add ground limestone or dolomitic limestone at the recommended rate before next season rather than mid crop, because it works far too slowly to help the current planting.
Rot is appearing on the shoulder of the fruit rather than the bottom. Is that the same thing?
No, and the fix is different. Rot on the shoulder usually starts as sunscald, with fungal infection moving into the damaged tissue afterward. The fruit colors up over the lower two thirds while the exposed top stays yellow, and left on the vine the damaged area turns into a black rotted patch. Picking at that stage and finishing indoors is a reasonable salvage.
There is no treatment, and what prevents it is leaf cover. Keep the plants healthy enough to carry as much foliage as possible over the ripening fruit. Anything that costs a plant leaves, whether disease, heavy pruning, or a shortage of water, exposes fruit to direct sun and brings this on.
My greenhouse tomatoes rotted at the stem end before ripening. Was it the seed or the soil?
Almost certainly neither. The description points to a fungal or bacterial disease, with gray mold a strong candidate, since it causes fruit rot more often than gardeners expect and frequently shows as a stem rot with fruit dropping before it ripens. Several other diseases produce very similar symptoms and they are genuinely hard to tell apart by eye.
The greenhouse itself is the likeliest factor. Tomatoes want air moving freely and an atmosphere that is warm and dry, and a greenhouse supplies the opposite: extra humidity, still air, and leaf surfaces that stay damp. Ventilate aggressively, space plants further apart than feels necessary, prune to open the plants up, water the ground rather than the leaves, and stay out of the rows while the foliage is wet, since handling wet plants spreads fungal and bacterial disease more efficiently than almost anything else. Mulch, go easy on nitrogen, water consistently with clean water at air temperature, and do not plant into ground that grew tomatoes, potatoes, eggplants, or peppers the previous season.
Why do my tomatoes wilt in a hydroponic system?
Not from wilt disease. Fusarium and Verticillium are soil borne and cannot reach plants in a sterile solution, so wilting in hydroponics points to environmental stress instead.
Look at the roots first. Healthy hydroponic roots are white to light tan and firm; dark, mushy, or foul smelling roots mean root rot, usually from inadequate aeration. Increase bubbling or circulation. If the reservoir is above 68 degrees Fahrenheit, cool it, because warm water holds less dissolved oxygen and favors rot organisms. Check that rockwool, clay pellets, or coir is moist rather than soggy; the space between the particles is where the oxygen lives.
Then check pH and electrical conductivity. Tomatoes want pH 6.0 to 6.5; outside that range they cannot take up calcium, magnesium, and potassium properly and will wilt and yellow even in a fully fed solution. A high EC reading means the solution is too salty for the roots to draw water from at all, which looks like dehydration but is the opposite problem, and partial water changes with fresh solution correct it.
Finally check leaf undersides for spider mites, aphids, and whiteflies, which appear suddenly in enclosed systems and cause exactly this picture.
Ants are swarming my tomato plant. Are they eating it?
Almost certainly not. Very few ant species feed on plant tissue. What the ants are after is honeydew, the sweet waste that aphids excrete. Ants tend aphid colonies the way people tend livestock, protecting them from predators in exchange for the honeydew, and once you look it will be obvious: ants running the stems and leaves, and clusters of soft bodied aphids, pale green to brownish, close by.
So the aphids are the problem and the ants are the symptom. Control the aphids and the ants lose their reason to be there. The same goes for whether it will spread to peppers, beans, onions, and cucumbers: what spreads is the aphids, so check those crops on new growth and leaf undersides.
Chewed foliage points somewhere else entirely, because neither ants nor aphids chew. Aphids pierce and suck. If a branch has been visibly munched, keep looking for a caterpillar or a beetle.
What are the tiny tick-like bugs clustered on my plants?
Very small, dark, faintly spider-like creatures sitting in a cluster are usually newly hatched stink bugs or the young of the leaf footed plant bug. Nymphs of both cluster at first and genuinely look more like small spiders than like the adults they become; stink bugs develop the shield shape later, which is the identification to wait for.
No beneficial insect matches that description, so you are not risking a helper by acting. Hand picking is effective while they are still clustered, since you can take a whole hatch at once.
How do I control aphids and other pests without reaching for a spray?
Work up from the gentlest method and stop as soon as one works.
- Accept a little damage. A vigorous, well watered, well sited plant shrugs off insect pressure that would cripple a struggling one, so ordinary good culture is itself pest control.
- Blast them off with water. A strong jet knocks aphids off, and knocked-off aphids largely do not return. Aim under the leaves and into the joints, and repeat daily. This disperses the ants at the same time.
- Let the predators arrive. Ladybugs and especially their larvae eat aphids in quantity, and they typically show up a week or two behind the pest. That lag is exactly why holding off on sprays pays: spray in that window and you kill the arriving predators too, and then you have to keep spraying forever.
- Hand pick and scout. For caterpillars and larger insects, walking the rows regularly is a complete control method in a home garden, not a token gesture.
- Insecticidal soap. A registered insecticidal soap built from fatty acids works on soft bodied insects. Be clear about the trade-off: there is no way to hit only the pests, and soft bodied beneficials in the spray path die too.
Should I make my own soapy water or detergent spray?
No, and this is a deliberate departure from advice you will find in older sources, including some of ours.
Dish and laundry detergents are not made to go on plants. They are formulated differently from product to product and reformulated without notice, and they strip the waxy coating that protects tomato foliage, which is what produces the burned, scorched leaves people report afterward. There is no reliable rate anyone can give you, because the strength of the bottle in your kitchen is not a known quantity, and mixing a pesticide for a food crop out of an unlabeled household product means there is no harvest interval and no safety data behind what you have made.
A registered insecticidal soap does the same job with a tested formulation, a stated rate, and a label that covers food crops. It is inexpensive, and it is the right version of the same idea. The same reasoning rules out kitchen mixtures of bleach, tobacco, mouthwash, and the rest for disease: they are unregistered pesticide uses with no tested rate, they routinely damage tomato foliage, and some carry real risk to you.
There are striped caterpillars inside my fruit. What are they and what stops them?
That is a fruitworm, the larval stage of a moth that lays its eggs on or near the fruit. Three options, in increasing order of intervention.
Scout and pick. Go over the plants frequently and remove every worm you find. At home garden scale this works.
Bacillus thuringiensis. Bt is the targeted biocontrol for caterpillars, and the mechanism dictates how you use it. It is a naturally occurring bacterium that poisons the gut rather than the surface, so the caterpillar has to keep eating treated tissue for it to work. Nothing happens the instant it lands. In exchange you get real selectivity: it affects caterpillars and leaves other insects, bees included, unharmed. Coverage of the surfaces the larvae are actually feeding on is what determines whether it works.
A broad spectrum insecticide. The blunt instrument, and on a flowering crop it carries a specific cost: broad spectrum insecticides are lethal to bees, and bees pollinate the flowers that become your tomatoes. Treat it as a last resort rather than a starting point.
If I do spray something, how do I do it safely on a crop I am going to eat?
Tomatoes are food, so the rules are stricter than for an ornamental, and all of this applies to organic products too, including insecticidal soap and Bt.
- Use only a product whose current label names tomatoes and names the pest or disease you actually identified. The label is the law and it is also the only current source; a product recommended years ago may have been reformulated or had its home garden registration withdrawn.
- Apply at the label rate. More is not better, and excess causes leaf burn.
- Observe the preharvest interval, the number of days the label requires between spraying and picking. On a crop you harvest continuously this is the most important number on the label, and it applies to every fruit on the plant, not just today's ripe ones.
- Observe the reentry interval before anyone goes back into the treated area, and wear whatever protective equipment the label specifies.
- Do not spray open flowers or apply where bees are foraging. Treat late in the day when bee activity has dropped, if the label allows.
- Spray in still air so nothing drifts, store products in their original labeled containers out of reach of children and pets, and dispose of unused concentrate through your municipal household hazardous waste program rather than down a drain.
- Wash harvested produce before eating it.
Identify the problem before any of this. Fungicides do nothing against bacteria or insects, insecticides do nothing against fungi, and nothing sprayed on a plant will fix a pot that is too small, a magnesium shortage, sunburn, edema, herbicide drift, or a virus. If you are unsure, your county cooperative extension office will identify a sample, often free, and tell you what is currently registered for that problem in your state.
Do not use a product left over from years ago without confirming its active ingredient is still registered for food crops, since several once common ones no longer are.
Are tomato leaves and green fruit poisonous?
Yes, in the sense that matters for a household with children, pets, or livestock. Tomato foliage, stems, and unripe green fruit contain tomatine, a steroidal alkaloid that irritates the mouth, throat, and digestive tract and causes gastrointestinal upset, nausea, and lethargy. At higher exposures there can be systemic effects including tremors and muscle weakness. Ripe fruit is safe; tomatine drops sharply as the fruit colors up.
Handling the plants is low risk for a healthy adult. The real hazard is what you leave lying around. Children who chew on foliage or seedlings can get gastrointestinal irritation, and dogs, rabbits, horses, goats, and sheep can all become ill from browsing prunings or young plants. Seedlings are tender and palatable, which makes trimmings from thinning particularly worth clearing up.
So collect prunings and culled seedlings and put them where children and animals cannot reach them, rather than leaving them in loose piles in the garden. Do not compost them in an open pile that pets can dig in, and never spread a pile containing tomato trimmings into a pasture or animal enclosure. Bagging them for the trash is the simplest answer where you have grazing animals. Do not brew tomato leaf tea, and do not eat green tomatoes raw regardless of size.
My favorite tomato variety has disappeared from the catalogs. What do I grow instead?
Seed companies retire varieties constantly, and the usual answer is a newer line from the same breeder with the same intent. When Better Girl left the market, beefsteak types like Better Boy and Big Girl covered the same ground; 'Burpee Big Early' is gone, but a mid-season beefsteak such as Brandywine or a modern early beef-type hybrid delivers the same large, meaty, early fruit. Contact the seed company to ask whether a variety is discontinued or only out of stock for the season, and match days to maturity, growth habit, and use (slicing, paste, cherry) rather than chasing the old name.
What does late blight look like, and can I treat the soil to stop blight?
Soil treatment does not work, and bleach in particular does nothing useful: early blight overwinters in plant debris and seed, and late blight (Phytophthora infestans) disperses by air, so no soil drench prevents either. Late blight arrives late in the season as water-soaked leaf and stem spots that turn brown, with white cottony growth beneath the lesions in wet weather, and olive-colored greasy patches on fruit; it runs hardest at 60 to 70 degrees F with humidity above 90 percent. Defense is cultural first: remove all affected material at season's end, grow in containers of fresh mix where blight repeats, and choose resistant cultivars, using the catalog letter codes described above; late blight resistance genes are now available from specialty seed houses, and Celebrity is a dependable resistant standby. Where wet growing seasons make blight routine, a preventive fungicide labeled for late blight on tomatoes must go on before infection, since nothing cures a leaf already infected; products vary by state and year, so confirm the label covers late blight on tomatoes and follow it exactly, or ask extension which products are registered locally.
Can I grow tomatoes near a black walnut tree?
Not close to one. Black walnut roots release juglone, a toxin that stunts or kills nightshades outright, and tomatoes are among the most sensitive plants there are; peppers, eggplant, and potatoes are equally at risk. The toxic zone reaches well past the dripline, out to roughly one and a half times the tree's height, and 50 to 60 feet from a mature trunk is the practical safe radius. Cutting the tree down does not help soon, because juglone persists in soil for years after the tree is gone. Rake walnut leaves and nuts out of the garden, and never compost them into anything destined for vegetable beds. Where distance is impossible, grow tomatoes in containers set away from the root zone, or in a raised bed with a barrier that keeps their roots out of the soil below.
How do I time tomatoes in desert or tropical heat?
Above about 90 degrees F tomato pollen goes sterile and fruit set stops, so hot-climate growing is entirely about timing around that ceiling. In the low desert the real planting window is mid-February to mid-March, giving plants 65 to 70 days to establish, flower, and set before extreme heat; an April planting will mostly sit idle until September. The cool season, roughly October through April, is the second window, and tomatoes are technically perennial in frost-free heat: nursed through summer under 50 percent shade cloth with heavy mulch and steady water, a plant resumes production when temperatures break. Even under shade cloth, keep 6 to 8 hours of direct sun. In a tropical climate, favor morning sun with afternoon shade and plant into whatever cooler window exists. Heat-tolerant varieties stretch the season: Heatwave sets fruit to about 95 degrees, and Early Girl and Celebrity perform reliably in desert conditions. In a cold short-season area the problem inverts: wait for the last late frost (well into May in high-desert towns), start from transplants, and pick early or determinate varieties by their days-to-maturity figure.
Tiny black bugs are punching small round holes in the leaves. What are they?
Flea beetles, most active in late spring and early summer. Resist the weekly broad-spectrum spray: products like carbaryl kill pollinators along with pests, and a flowering crop needs its bees. Treat only when damage is genuinely significant, never during bloom, and use an insecticide labeled for flea beetles on vegetable crops, following its label for rate and timing. Healthy transplants usually outgrow moderate flea beetle damage.
How do I keep stink bugs off my tomatoes?
Layer the defenses. Interplant repellent herbs and flowers: marigold, chrysanthemum, garlic, lavender, mint, and thyme. A plain daily water spray for a week discourages bugs that are settling in. A trap planting of sunflowers, buckwheat, sorghum, or millet nearby pulls them somewhere you can deal with them away from the crop. Clean up all garden debris in fall, because that shelter is where they overwinter. If pressure still overwhelms these measures, ask your extension service for the chemical options currently registered for food crops in your area rather than guessing, since registrations change by region and season.
Why do my tomatoes have white rings inside and a hard, mealy texture?
That combination points to high temperatures or potassium shortage during fruit growth, sometimes with whitefly feeding on top. Check leaf undersides for tiny white insects; treat whiteflies with a neem-based product per its label, and start prevention early next season with neem or row covers. Get a soil test before amending, foliar-feed with a kelp-based fertilizer for the next fruit set if potassium is short, and use shade cloth through peak heat in hot regions. The unaffected portion of the fruit is still fine to eat.
I planted tomatoes far too close together and they are five feet tall. Move them?
No; digging productive plants mid-season trades a crowding problem for transplant shock. Instead, lean every other plant outward and tie each to a support that slopes away from the row, so the row reads as a V from the end. Light and air reach the foliage, and the roots never know anything happened.
Something bit the tops off my plants overnight. What was it, and what actually resists deer?
Deer and woodchucks both top tomato plants and both return once they have found a garden. Confirm the culprit by tracks, droppings, or a dawn watch, then either fence (6 feet minimum for deer) or use a repellent formulated for that species, reapplied as its label directs. For the vegetables themselves, do not rely on resistant-plant lists: hungry animals eat almost anything, and tomatoes, peppers, and beans are preferred food. Resistance lists (spruce, juniper, holly, lilac, tulips, yucca, and the like) are for the ornamental perimeter, not the crop. If more than a little of a plant is gone late in the season, replacing it with a quick determinate variety often beats waiting on recovery.
Why are my tomatoes mushy and flavorless?
Three usual causes: heavy or uneven watering near harvest, which dilutes flavor and splits fruit; ripening days above 90 degrees F, which soften it; and refrigeration, which ruins both flavor and texture, because tomatoes suffer cell damage below about 54 degrees F, after which sugars degrade and leak. Store whole tomatoes on the counter, never in the refrigerator.
What variety are my striped tomatoes, and do they need special care?
Stripey covers several cultivars. 'Marvel Striped' bears large heart-shaped yellow fruit streaked orange, thin-skinned and juicy. 'Green Zebra' bears small two-inch striped green fruit with excellent flavor. 'Tigrella' bears small red fruit striped yellow and orange, sweet and fruity. 'Mr. Stripey' bears large ridged-shouldered red fruit striped yellow to pink, mild and low-acid. All are indeterminate, so they produce all season, and none needs anything unusual: full sun, consistent water, and a compost mulch.
Can a butterfly garden sit next to the vegetable garden without wrecking it?
Yes. Butterfly caterpillars are mostly host-specific and mostly uninterested in vegetables: parsley, fennel, and dill feed swallowtail caterpillars, and the tomato hornworm is a sphinx moth, not a garden butterfly you invited. The one real crossover is the cabbage butterfly and cabbage looper on cole crops, and a lightweight row cover over those beds excludes them. Plant extra host plants in the butterfly bed as a buffer and the egg-laying concentrates there. A true hornworm on the tomatoes has a rear hook and feeds only on tomato and tobacco family plants; handpick those, and relocate rather than kill the lookalike caterpillars that wandered in from the flowers.