


Planting Fundamentals
The key to a thriving garden is getting plants off to a strong start. Whether you're transplanting seedlings, sowing seeds directly, or establishing groundcovers, understanding fundamental planting techniques will significantly improve your success rate.
Preparing to Plant
Before planting anything, prepare your planting area. For flower and vegetable beds, spread 1 to 2 inches of compost over the area and loosen the soil with a spade or digging fork, mixing in the compost as you go. Rake the area smooth and remove stones, sticks, and other debris. For detailed soil preparation guidance, see Garden Preparation.
For groundcover plantings over larger areas, eliminate all existing weeds and grass before planting. For large areas, use an herbicide, rototiller, soil solarization (laying clear plastic over moistened soil for 4 to 6 weeks), or a rented sod-stripping machine.
Calculating Spacing and Plant Count
Proper spacing ensures plants have room to spread and reach their mature size. For groundcovers, calculate the number of plants needed by determining each plant's maximum width at maturity. Space plants so the distance between them is about equal to their maximum width. If plants are very slow growing, space them slightly closer.
As a quick reference for groundcover spacing:
- 100 plants spaced 6 inches apart cover about 20 square feet
- 12 inches apart, they cover approximately 85 square feet
- 18 inches apart, they cover about 200 square feet
When spacing groundcovers or other plants, arrange them in zigzag rows so they are equal distance from their neighbors. Spaced properly, most groundcovers will spread and cover the soil between them by the third growing season.
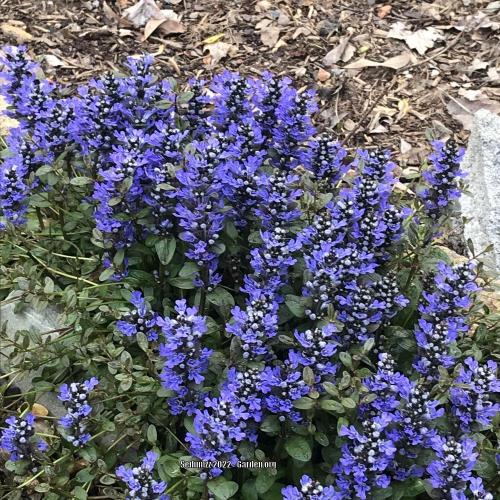
- Bugleweed (Ajuga reptans Chocolate Chip)
- Uploaded by sedumzz
Digging Holes and Planting Depth
Dig holes to the same depth as, and two to three times wider than, the plant's root ball. This wider hole makes it easier to spread roots and backfill without compacting the soil.
When placing a plant in the hole, position it so that it grows at the same soil level as it did in its container or nursery bed. The top of the root ball should be level with the soil surface. This is critical for most plants; planting too deep can lead to stem rot and other problems.
For trees and shrubs, do not plant deeper than the root flare (where roots begin to spread from the trunk). For trees that have been planted too deep, see Planting Trees and Shrubs.
Handling Roots
Before planting, water plants thoroughly a few hours ahead of time. When planting from containers, gently tip the plant out of its pot without pulling on the stems. Untangle any circling or bound roots with your fingers; gently straighten them. If roots are severely circling, make two or three shallow cuts on the outside of the root ball with a knife to encourage outward growth.
For bare-root plants (common with trees, shrubs, and perennials), spread the roots radially in the hole before backfilling, ensuring good soil contact. Never allow roots to dry out; keep them moist until planted.
Backfill and Firm
Spread the roots in the hole and backfill with the soil that was removed, firming the soil gently around the plant as you go. Press the plant gently into place to eliminate large air pockets. Do not compact the soil excessively, which can reduce water penetration and root growth. For trees and shrubs, use only native soil for backfill; do not amend the backfill even if your garden soil is poor.
Watering and Mulching
Water plants thoroughly immediately after planting to settle the soil and establish soil-to-root contact. This is one of the most important steps in ensuring success.
Once planted, apply 2 to 3 inches of organic mulch, such as shredded bark, around the base of the plant. If using landscape fabric under groundcovers, cover it with 1 to 2 inches of mulch. Pull mulch 6 inches away from plant stems to prevent rot and pest issues.
Maintain even soil moisture until plants are established, usually one to two growing seasons. Pull weeds as they appear and replenish mulch as it breaks down.
Direct Sowing Seeds
For vegetables and herbs that can be direct seeded (such as beans, peas, lettuce, radishes, basil, and carrots), make rows or patches using a cultivator or hoe. Press soil lightly after seeding to create good soil-to-seed contact, which is essential for germination. Water well but gently to avoid washing seeds away.
For small-seeded plants like greens and certain herbs, broadcast seeding (scattering seed across an area rather than in rows) is effective and space-efficient. You'll need to thin seedlings after germination, but this method saves significant garden space. For detailed guidance on seed starting, see Seed Starting.
Transplanting Seedlings and Starts
When transplanting seedlings or plant starts into the garden, use a hand trowel to dig a hole at the appropriate depth and width. Plant seedlings at the same depth they were in their container, with the exception of tomatoes, which can be planted deeper since they will root all along the stem.
Firm the soil around the seedlings and water well. Keep transplants well watered until they are clearly established and resuming vigorous growth.
Garden Layout Approaches
There are several strategies for arranging plants in your garden bed, each with different benefits:
Row Planting
Traditional straight-row planting works well for large-scale production and makes mechanical cultivation and harvest easier. However, for home gardens, rows waste space between rows and require more weeding and maintenance.
Interplanting (Intercropping)
Interplanting takes advantage of different plant heights, root depths, and growth rates to use space more efficiently. For example:
- Plant cool-season vegetables (spinach, radishes, lettuce) among slower-growing warm-season crops (tomatoes, zucchini) spaced 2 to 3 feet apart. By the time the larger plants shade out the greens, you'll have finished harvesting them.
- Plant nitrogen-fixing peas on a trellis in the middle of a bed with lettuce and greens along the sides. The peas transfer fixed nitrogen to the soil where greens can use it, and the greens don't compete with the peas for space.
- Combine deep-rooted plants (like parsley or cabbage) with shallow-rooted, feathery-topped plants (like onions) so they access nutrients from different soil layers without shading competition.
Succession Planting
Instead of planting an entire bed at once and harvesting all at once, succession planting staggers sowings so harvests are continuous:
- Plant in seasonal sequences. Start with a cool-season crop, then follow with warm-season crops, then fall crops, such as spinach to bush beans to kale in a single bed during one season.
- Plant small patches of the same vegetable every 2 weeks throughout the season (lettuce, bush beans, cilantro). Plantings mature on a staggered schedule, providing a steady harvest rather than a glut.
When succession planting, try broadcast seeding in blocks rather than rows, which saves additional space. Even in northern areas, successive sowings of fast-maturing crops like bush beans can produce harvests through fall.
Polyculture Beds
Polyculture beds combine vegetables, annual flowers, and herbs based on their combined root depths and canopy heights. The goal is to always have something growing in the bed, with plants maturing and being harvested at different times:
- Plant tall, deep-rooted plants next to shorter, shallow-rooted companions to avoid competition.
- Example combinations: dill with peppers, nasturtiums with summer squash, leeks with bush beans.
- As plants mature and are harvested, fill the void with new plants.
Tools for Planting
The right tools make planting easier and more efficient. Essential tools include a spade for larger holes and soil loosening, a hand trowel for smaller transplants, a shovel for bulk soil work, and a garden rake for smoothing and leveling. Landscape fabric, mulch, and soil amendments complete the basic kit.
For detailed guidance on tool selection and use, see Garden Tools.
Seasonal Considerations
Fall planting can be highly successful for permanent plants (trees, shrubs, perennials). Cooler air temperatures and warm soil allow newly planted roots to establish before winter dormancy, often with less watering needed than spring plantings. However, timing matters: in cooler zones (5 and below), September is the best month; in zones 6 to 8, plant between mid-September and mid-November; in zones 8 to 10, planting can continue through fall and into winter.
For more on fall planting strategies and plant selections, see Fall Garden Care.
Tips for Success
-
Prevent weeds early: For groundcovers, lay water-permeable landscape fabric before planting. Overlap edges by a few inches and anchor with pegs. Make crossing cuts in the fabric to plant through openings.
-
Speed establishment: After planting, scatter granular fertilizer or composted manure over the area, choosing a formulation for your plants and following label directions.
-
Know your soil: Have soil tested and amend based on results (pH, nutrients). For lawns, a 4- to 6-inch layer of topsoil amended with compost is ideal; see Lawn Care for seeding and sodding guidance.
-
Firm gently: Adequate soil contact is essential, but excessive compaction restricts drainage and root growth.
For related topics, see Landscape Design for design strategies, Garden Preparation for bed setup, and Planting Trees and Shrubs for woody plant specifics.
