
Introduction
An evergreen with scale-like leaves, arborvitae (Thuja) is a popular choice for hedges because of its tall, narrow growth habit. It can also be used as a focal point in a mixed border of shrubs and flowers and is frequently used in foundation plantings.
About arborvitaes
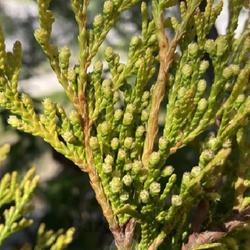
Eastern arborvitae (Thuja occidentalis), also called eastern white cedar, and its cultivars are among the most commonly planted. This native of eastern North America grows wild in moist woods. While the straight species can grow as tall as 40-60 feet, the more widely planted cultivars have more restrained growth habits and make better landscape plants. 'Nigra', also known as 'Dark American', is a popular selection that keeps its deep green color all winter long; it grows 10-20 feet tall and 4-6 feet wide at maturity. 'Smaragd', also called 'Emerald Green', is finer textured and slower growing, reaching 10-15 feet tall and 3-4 feet wide. Where space is limited, 'Holmstrup' is a good choice, growing about 10 feet tall and 3 feet wide. Not all cultivars are columnar. 'Woodwardii' makes a globe-shaped shrub 4-8 feet high and 5-10 feet wide. 'Little Giant' has a similar growth habit but gets only 2-4 feet tall and wide. 'Golden Globe', at 2-3 feet tall and wide, makes a great accent with its bright gold foliage. Most eastern arborvitae are hardy in zones 4-7.
The western native, giant arborvitae or western red cedar (Thuja plicata), is larger and faster growing than its eastern relation, but not as cold hardy, growing well in zones 5-7. One of the most common cultivars is 'Green Giant' which has a fast growth rate (up to 5 feet a year under good conditions) and is tolerant of drought. It reaches 30-50 feet tall and 12-20 feet wide.
Oriental arborvitae (Thuja orientalis, now more correctly Biota orientalis) is the least hardy, to zones 6-11, and is best adapted to the south and southwestern parts of the country. Growing 18-25 feet tall and 10-15 feet wide, it is useful for hedges and as a specimen. There are many cultivars available with varying growth habits.
Special features of arborvitaes
Good for hedges and screens
Evergreen
Choosing a site to grow arborvitaes
Arborvitae grows best in full sun, but will tolerate light shade. Giant arborvitae is the most shade tolerant. All prefer fertile, moist, well-drained soil.
Planting Instructions
Container grown plants and balled and burlapped plants can be set out throughout the growing season. Spacing will vary with the species and cultivar. Dig a hole only as deep as the root ball and 2 to 3 times as wide. If your soil is in very poor condition, amend the soil you've removed from the hole with a small amount of compost. Otherwise don't amend it at all. Carefully remove the tree from the container and set it in the hole. If you are planting a balled and burlapped plant, remove as much of the burlap as you can and snip off the wire basket if present. Fill in around the root ball with soil until the hole is about half filled. Then firm the soil and water thoroughly. Fill the hole with the remaining soil and water again. Form a raised ridge of soil around the outside edge of the hole so it acts like a berm to help hold in water. Spread mulch 2-3 inches deep over the root zone, but keep it several inches away from the trunk.
Ongoing Care
Give plants regular watering until well established, especially for the first growing season. When you water, be sure to put on enough water to soak the entire depth of the rootball, then let the top few inches of soil dry out before rewatering. Shear plants to shape and control size in early spring or early summer.
Frequently Asked Questions about Arborvitaes
How fast does arborvitae actually grow?
The fast growing selections, given everything they want, put on roughly thirty to thirty six inches a year, and they widen at a similar rate rather than only gaining height. That is what a nursery means by rapid growth in this genus, and 'Green Giant' is the cultivar that reaches it.
Read that as a ceiling rather than a promise. It assumes full sun, soil that drains, steady water through the first few seasons, and no root competition from established trees. In heavy clay, in shade, or on a hot exposed site with irregular water, half that figure is more realistic. The globe types and the dense screening cultivars are far slower by design, which is why they hold their shape without much work.
Two things follow. Space a screen at the plant's mature width rather than at the size it is when you set it out, because plants crowded shoulder to shoulder shade each other's lower branches and go bare at the bottom permanently. And do not push growth with heavy fertilizer to make a hedge fill in sooner, because you get soft growth that flops in snow and burns in winter wind.
Two plants of the same cultivar bought at different sizes generally stay different sizes, and no amount of feeding will close the gap.
How do I prune arborvitae so it gets thicker?
Prune lightly, prune every year, and prune early. Early spring, just as new growth is starting, is the window. Take about four or five inches from every branch tip, working over the whole plant. That forces buds behind each cut, which thickens the outside while pushing new growth at the tips. A plant given this treatment annually stays dense and green all over; a plant never touched gets thin and shows its brown interior.
The rule you cannot break is that arborvitae does not resprout from old bare wood. Every cut has to leave green foliage behind it. Cut back into the leafless interior and that section stays bare for the life of the plant, because there are no dormant buds there to break. This is why hard renovation pruning works on many shrubs and fails badly here, and it governs almost every other answer on this page: a hole in an arborvitae is usually permanent.
To even up two plants of different sizes, work slowly. Plant the new one and leave it entirely alone until the following spring, taking a few inches off the larger one now and a few more next spring. Never take a large amount at one time or you will expose bare branches you cannot fix. Give it a year and the two will be near enough to match. If you must make a bigger cut on an established plant, do it in late winter before growth begins, and keep it within the green.
The interior is brown but the tips are green. Is that a problem?
Almost certainly not. Arborvitae is evergreen but its individual leaves are not immortal. The oldest foliage, deepest inside the plant nearest the trunk and on the undersides of branches, dies and sheds on a cycle, turning tan or bronze and dropping, sometimes in quantity. You notice it as a brown or yellow core under a green shell, and a plant can look distinctly scruffy for a few weeks while it happens. Its signature is that the browning is interior while the outer tips stay green. Some shows up every spring and some in fall.
The annual light pruning described above is the cosmetic answer, since forcing growth behind the cuts fills the outer shell and hides the interior. You can also spray water into the middle of the plant to rinse out the old debris, which has the side benefit of discouraging spider mites in the dusty, dry spaces there.
What is not normal is browning that starts at the outside, spreads across whole branches, or works up from the base. That pattern is worth investigating, and the entries below cover the usual causes.
The bottom two feet turned black or brown. What causes that?
Where the damage sits tells you a lot, and if every plant in the neighborhood shows the same band, it is almost never disease.
Dog urine is the classic cause of damage confined to the lower foot or two on one side of a plant, and it burns foliage outright. Diseases very rarely restrict themselves so neatly to the bottom of a plant, so if a dog uses that spot, that is almost certainly the answer. Cut the dead foliage out. New growth may come from the trunk there, though on an older plant it may not. The reliable fix is denying access, and a temporary fence around the plant for a season usually breaks the habit.
Deer browse stops at a level height, as though the animals simply could not reach higher, and the browsed area looks ragged and torn rather than neatly dead. Arborvitae is very palatable to deer, and in winter with shallow snow cover they eat it heavily. Rabbits leave a similar line at the height of the snowpack, but their cut twig ends are sliced at a sharp angle rather than torn or browned.
Road salt splashed from traffic bleaches the lower foliage on the street side of a planting.
Winter injury tends to fall on the south and west sides, where foliage warms in the sun and then refreezes, and it looks burned rather than browsed.
Fertilizer salts. Granular fertilizer thrown by a rotary spreader carries much further than people expect, and a load of lawn fertilizer landing in a hedge burns it. Drop down to a drop spreader near the hedge, or shield the plants.
Sooty mold over scale insects. Scale feeding on the branches produces honeydew and a black mold grows on it, looking exactly like tar smeared on the foliage. Check twigs and small branches for the scale itself, which looks like small immobile bumps. Treating the scale clears the mold, which is only a symptom.
Weather and site. Some blackening follows sharp temperature swings, prolonged humidity, or poor air movement between crowded plants, and it is not always explainable. Where the plants are otherwise growing well and the damage is confined to a few lower branches, this is usually in the ugly but harmless category.
Fertilizing a stressed plant is not the answer and can make things worse. If you want certainty, cut a sample and take it with a photo of the whole hedge to your county extension office, or have a licensed arborist look at it. That matters more for a hedge of thirty plants than for one shrub, since a treatable pest caught early is worth finding.
New plants lost their lower branches over winter. Will they come back?
Work out what you are actually looking at, because the two cases differ. If the branches are still there and only the foliage is gone, tip pruning those branches by a few inches can push new growth along them. If the branches themselves are gone, the plant may in time produce new branches from the trunk in that zone, but it is slow and not guaranteed.
Where rabbits are the cause, a cylinder of hardware cloth around the base of each plant, tall enough to clear the deepest expected snow and pushed into the ground, is the durable fix. Repellents wash off and need reapplying all winter. Hold off on fertilizer in spring for a recovering plant, and do not feed at all past midsummer, since late feeding pushes soft growth that will not harden before cold weather.
The top is browning and shedding after the cold set in. Will it come back?
The top is the most exposed part of the plant: it dries fastest in winter wind, sees the most sun on a cold bright day, and holds the last, softest growth of the season. Late growth that never hardened before a sudden hard freeze gets nipped, and winter burn from wind and winter sun acting on frozen roots produces the same appearance.
Two worse causes belong on the list because they need a different response. A top that dies while the rest of the plant is fine can be a root problem, and root problems show at the top first because it is the end of the longest water column. Waterlogged soil, a root ball left in burlap or wire, a plant set too deep, or a girdling root will all do it, so scrape the mulch and soil away from the base and find the point where the trunk widens into the roots; it should be at or just above grade. Also check for a stem canker, a sunken discolored patch on the stem below the dead section, since everything above a canker dies regardless of weather. And look for browsed tips and gnawed bark at snow line.
Whatever the cause, do nothing until growth restarts in spring. Winter damaged foliage often looks worse in March than the plant actually is, and buds that appear dead in February frequently break in May. Scratch a twig with a thumbnail: green underneath means live wood. When growth is clearly underway, prune each dead branch back to a point where live green foliage remains, or remove the branch entirely at its origin. Do not shear the whole plant back into the interior hoping it will refill. The practical answers to a dead top are to accept a flat topped plant, to select a nearby vertical shoot and train it up as a new leader, or to replace the plant.
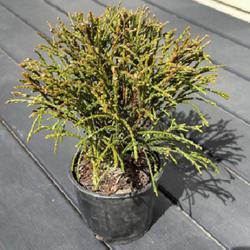
One identity check is worth making. Weeping and threadleaf plants sold in this general shape are frequently not arborvitae at all but threadleaf false cypress, and a few of the golden threadleaf forms bronze noticeably in winter as a normal varietal trait, greening up again in spring. Take a piece of foliage to a good nursery or your county extension service, because it changes what to expect.
Ice and snow pushed my arborvitae over. What can I do?
Before you buy stakes, work out which of two different injuries you have, because they need opposite treatments.
Go to the base of the worst plant and look at where the trunk enters the ground. If the whole plant is tipped over as a unit, with the soil cracked, heaved or mounded on one side and the root ball lifted slightly on the other, the roots have failed and the plant is leaning. That needs staking. If the base is firm and undisturbed and the individual stems of a multi stemmed plant have spread apart like a hand opening, that is splaying, and staking the outside of it will not fix it.
Splaying is much the commoner of the two, because most popular varieties grow as several upright leaders from a single base and heavy wet snow or a coating of ice forces those leaders outward until the wood at the crotch takes a set. The fix is to bring the stems back together rather than pull the whole plant one way. Use a wide, soft, non abrasive strap, or a length of old hose over a wire, wound in a loose spiral up the plant from about a third of the height to about two thirds, snug enough to hold the stems upright and no tighter. Do not use bare wire, string, or thin cord, all of which cut in. Work the stems back gently over several minutes rather than hauling them, since a crotch splayed for a full season will crack if you force it.
For a genuine lean, three stakes driven outside the root zone, roughly two feet from the trunk and evenly spaced, with soft wide ties running to the trunk, is the right rig. Straighten the plant in stages rather than all at once: take up some tension, leave it a few weeks, take up more. A tie set fairly low does most of the work and a second higher up controls the top. If the root ball is loose in its hole, tread the soil back firmly around it before you stake, and fill any depression so water does not pond there.
Two rules apply to both cases, and both are about the ties rather than the tree. Check them every few weeks, because a strap that is comfortable in April is cutting into bark by August. And take everything off within one growing season, or at most two for a large leaning plant. Supports left longer girdle the trunk, and a tree held rigid never develops the trunk taper and root strength that lets it stand on its own; a permanently staked plant is one that will fall over the year you remove the stake.
A plant that has been nearly flat for a season may not come fully upright, and it is worth deciding early whether it is worth the effort. Arborvitae is inexpensive, a replacement will be vertical for the whole of its life, and in a long row a replacement catches up in a few years. If a stem is cracked at the base, or the plant has been horizontal long enough that the foliage has reoriented, replacement is usually the better call.
The lasting fix is preventive and takes ten minutes a plant. Before winter, tie susceptible multi stemmed plants with a soft strap spiraled up the outside, and remove it in spring. After a heavy snow, brush the plants off with an upward motion of a broom, lifting the branches to shed the load rather than beating down on them, which snaps frozen wood. Do not try to break an ice coating off, since ice bonded to foliage takes the foliage with it and the plant is better left to thaw. And when you shovel or plow, do not pile snow onto evergreens; a plowed pile is heavier and denser than anything that falls out of the sky.
How big a container does an arborvitae need?
Bigger than most people expect, and bigger than the pot the plant arrives in. For a six foot arborvitae, aim for something around the size of a half barrel or larger, roughly two feet across and close to that deep. A twenty-two inch container is workable for a plant that size and is at about the lower end of what will hold it well; a five or six foot plant wants something in the twenty to twenty five inch range, and anything smaller will need watering constantly and will limit the plant.
Container volume is doing three separate jobs, which is why erring large pays off:
- Root room. A nursery grows plants under conditions no garden can match, with irrigation and feeding managed daily. On a terrace the plant has to get by on what the pot holds, so it needs more of it.
- Water reserve. A large volume of soil dries out more slowly, which turns daily watering in hot weather into something manageable. Arborvitae is unforgiving about drying out, and browning from a missed week does not grow back where it happened.
- Winter insulation. This is the one gardeners underestimate. Roots in the open ground are buffered by the whole mass of soil around them; roots in a pot are exposed on every side and swing with the air temperature. As a rough planning rule, treat a container plant as roughly two hardiness zones less hardy than the same plant in the ground.
Use a container with real drainage holes and stand it on feet so water can leave, since arborvitae will not tolerate sitting in it. Choose a pot that survives freezing: wet mix expands as it freezes and splits terracotta and thin glazed ceramic, while thick plastic, fiberglass, foam and wood hold up. A tall narrow evergreen in a pot is also a sail, so anchor, weight, or group them against a heavier base. Fill with a free-draining bark based potting mix rather than garden soil, which compacts in a pot. Water thoroughly enough to wet the full depth of the root ball, as described in Ongoing Care above, and check the pot rather than the calendar in summer. Every three or four years expect to lift the plant, shave an inch or two off the outside of the root ball, and put fresh mix back, or roots will circle, girdle and decline.
Finally, choose the plant for the pot. The narrow, slower growing selections described earlier on this page suit containers much better than a vigorous cultivar that wants to be thirty feet tall, and one of the compact globe forms is easier again if the container has to stay a manageable size.
How do I get potted arborvitae through the winter, especially on a balcony?
The reason most of them die is the roots, and it is the thing most winter advice mentions last. Roots are the least cold hardy part of a woody plant. In the ground they are insulated by an enormous mass of soil that freezes slowly, shallowly, and rarely to the temperature of the air. In a pot on an exposed balcony they are surrounded by cold air on every side and can freeze solid, right through, at the actual air temperature. An arborvitae rated hardy to a very cold zone is at the edge of what it can take in a pot in a zone five or six winter, and on a windy west facing balcony several floors up it is past the edge.
So insulate the pot, not the top of the plant. In order of how much they help: use the largest containers you can manage, because volume is thermal mass; group the pots together and push them against the building wall, out of the wind, which is both warmer and more sheltered than the railing side; wrap the outside of the group with insulation, whether bubble wrap, foam board, burlap stuffed with leaves, or a cardboard box lined with foam sheet, and cover the soil surface too. Setting the pots inside larger empty pots with insulation packed between the walls works well and looks tidier. An unheated garage or a sheltered corner for the worst weeks is better still. Do not wrap the foliage in plastic.
Water matters, and the usual guidance is muddled. An evergreen keeps transpiring all winter, slowly, and it cannot replace what it loses if the root ball is bone dry or frozen solid, so go into winter with the pots thoroughly watered, ideally soaking them well before the first hard freeze. Through the winter, water on a mild day when the soil is actually unfrozen, around the middle of the day so it soaks in before dark; roughly once a month is a reasonable starting point, adjusted by feeling the soil. Do not pour water onto a frozen root ball, and do not let pots stand in a saucer of water that freezes into a block.
Wind is the second killer, and it is why plants that survived the cold still come out brown in April. Foliage loses moisture to dry winter wind and frozen roots cannot resupply it. A burlap windbreak on the exposed sides, a screen, or simply moving the pots into the sheltered corner does more than anything you can spray, and the top should stay open with air moving.
On anti-desiccant sprays, the evidence is genuinely mixed. Some trials show a modest benefit on broadleaf evergreens, others show none on conifers, and applied at the wrong temperature or too heavily they can damage foliage or interfere with the plant's own hardening off. If you use one, choose a product whose current label names arborvitae or conifers, apply it in the temperature range the label specifies, on dry foliage, before the hard freezes, and reapply only as often as the label says. Treat it as a small supplement to shelter and water, never as a substitute, and know that none of them fix a frozen root ball.
Skip fertilizer after midsummer. And if the balcony is very exposed, consider whether arborvitae is the right plant at all: it is thirsty, wind sensitive and moisture loving, and a juniper, a mugo pine, a dwarf spruce or a boxwood in the same pot will take the site far better.
How deep and how wide do the roots really go?
Depth is the easy part. Arborvitae are shallow and fibrous rooted, with the great bulk of the root system in the top foot to eighteen inches of soil and very little going deeper. There is no taproot to speak of on an established plant. That is why they blow over in saturated ground and high wind more readily than a tree of the same size with a deeper anchor, and why they suffer so quickly in drought.
Width is where the old rule of thumb misleads people. The common guideline, that roots spread about as far as the branches and only a little beyond, is not right. Root systems on established woody plants routinely extend to two or three times the radius of the canopy, and on a narrow columnar plant whose canopy is only three or four feet across the mismatch is at its most extreme. Assume the roots of a mature 'Emerald Green' reach very much further than the green part you can see. That matters near paving, near a boundary line, and above all near a septic system.
Can I plant an arborvitae hedge near a septic system?
Two answers, and the first is not about plants. Find out exactly where the system is before you dig anything. The county or state health department almost always holds the as-built drawing filed when the system was installed, and a septic contractor can locate a tank and lines in an hour. Digging planting holes over a system you cannot see risks the tank lid, the inlet and outlet baffles, and the distribution lines, and an old or deteriorated tank lid is a genuine physical danger to stand on. Call 811 before you dig as well, since that free service marks utilities, though note that it does not mark private lines and does not mark your septic system.
Then the planting itself:
- The distinction that matters is between the tank and the drainfield. A sound tank is a sealed vessel, so the risk near it is mostly mechanical, from roots working into joints, the inlet and outlet, and the lines running to and from it. The drainfield must never be planted with anything woody, because it is designed to leak water and nutrients into the soil and that is precisely what roots go looking for. Grass is the recommended cover over a drainfield, and nothing else.
- The usual working rule is to keep a woody plant at least as far from the system as the plant will eventually be tall, and further for anything vigorous or moisture loving. On that basis ten to fifteen feet is too close for a fifteen foot arborvitae. 'Green Giant' is not the safer alternative it is sometimes offered as: it reaches thirty to sixty feet and puts on several feet a year, which makes it a worse choice near a septic system, not a better one.
- Watch the naming. 'Emerald Green' is the trade name for a cultivar properly called 'Smaragd'. What is sold as Thuja pyramidalis is not a separate species but a loose nursery label attached to various narrow upright forms of the same eastern arborvitae, so buying it does not reliably get you a different root system. A narrower top does not mean narrower roots.
If the hedge must go on that line, move it so it clears the tank, the lines and the field by the mature height of whatever you plant. If it cannot be moved, use a non-woody screen there: ornamental grasses, a run of tall perennials, or a fence or trellis with annual climbers, none of which sends a woody root into a pipe joint. A physical root barrier is sometimes recommended, but it must be installed to depth and inspected, and it is second best to putting the plant somewhere sensible. If the system is old, ask the contractor who locates it whether it is near replacement, because nothing is more dispiriting than a mature hedge dug out five years later to reach the field.
My plants came balled and burlapped. Do I take the wrapping off?
Yes. Take off the burlap, all of the twine, and any wire basket, and there is one further step that matters more than any of it.
- Find the root flare before you decide how deep to dig. The flare is where the trunk widens and the first structural roots come off it, and it belongs at or just above the finished soil level. On nursery stock the flare is very often already buried two to six inches deep inside the root ball, from the way the plant was potted or dug. This is why the old instruction to set the plant at the level it is sitting at now is the single commonest cause of a tree planted too deep. Scrape the soil off the top of the ball until you find the flare, and measure your hole from there. A shallow rooted evergreen planted too deep dies slowly over several years and is virtually never diagnosed at the time.
- Dig wide, not deep. Two to three times the width of the root ball, with the sides roughened rather than smoothed, and undug soil under the ball so the plant cannot settle.
- Get the plant into the hole first, then remove the wrapping, which is easier and stops the ball breaking up. Cut every tie away, especially any wound around the trunk, then cut the burlap from the sides and remove all of it. Natural burlap eventually rots, but at unpredictable speed, and treated or synthetic burlap does not rot at all; either can hold a root ball dry while the soil around it is wet. Anything left wound around the trunk, including a nursery label or a staking strap, bites into expanding bark and strangles the plant, and that happens surprisingly fast on a vigorous young shrub.
- Cut any circling roots to break the circle, since roots that circle never expand into the surrounding soil and the plant starves.
- Backfill with the soil that came out of the hole. Filling the hole with something better than the surrounding ground makes a container of good soil that roots decline to leave.
- Water it in as you backfill to settle the soil rather than tamping hard, then mulch two to three inches deep over the root zone and pull the mulch back off the trunk.
- No fertilizer in the planting hole. A newly planted evergreen needs water and time, not feeding.
- A run of new evergreens planted in summer is a watering commitment for two full growing seasons. A deep soak once or twice a week in the absence of rain beats a daily sprinkle, and it does not stop in September, since an evergreen going into winter dry is an evergreen that browns in February.
How should I water a newly planted arborvitae?
Aim for evenly moist soil, neither soggy nor dry, and think in terms of one deep watering a week while the plant is actively growing. Frequent shallow watering is counterproductive: it never penetrates the whole root ball, and it can keep the surface wet while the interior dries out. Water deeply, let it drain completely, then water again when the top few inches have begun to dry. Push your fingers down a few inches before watering rather than working to a calendar. Apply three or more inches of natural mulch across the root zone, pulled back from the trunk. Keep this up through the establishment period, typically three to four years.
An easy way to concentrate water over the roots is to mound soil into a ring about 12 inches out from the trunk, making a basin. Do not pile soil against the trunk itself. Fill the basin, let it drain, and fill it again.
Dormant plants still need water. Roots keep growing as long as soil temperature stays above 40 degrees. If your soil freezes solid you can stop until spring; if it stays unfrozen, water every seven to ten days through the dormant season.
My newly planted arborvitae are dying. What should I check?
This is usually a planting or establishment failure rather than disease, especially when a conifer grew away strongly for a couple of months and then began browning. That initial growth came largely from reserves the plant brought from the nursery; browning starts when those run out and the plant becomes dependent on roots it has actually grown into your soil.
The color itself is a clue. Foliage that dries to a light tan or straw brown, crisp to the touch, generally means water did not reach it. Foliage that goes dark brown to blackish and stays limp or soft usually means roots sitting too wet and rotting, or sooty mold on the surface. Either way, look at the roots. Check in this order:
Water, in both directions. Do not judge from the surface. Dig a small hole beside the root ball, six inches or more deep, and get a hand into the soil beside and just under the edge of the ball. Too wet feels heavy, cold and slick, holds the shape of your fingers when squeezed, and may smell sour; water standing in your test hole, or soil still saturated a day after rain, confirms it, and the answer is to stop watering entirely. Too dry shows as soil that is dusty or hard, crumbles without holding together, and has shrunk back from the edge of the ball. That needs deep soaks delivered less often.
Whether water is reaching the root ball at all. This is a separate failure that catches people who are watering diligently. A root ball that once dried out hard, especially a peat-based container mix, shrinks away from the surrounding ground, and water applied afterward runs down the gap and straight out the bottom. The ground around the plant reads as nicely moist while the ball inside stays dry as a brick. Test by pushing a finger or a thin probe into the ball itself rather than the soil beside it. If it is dry, water slowly and directly onto the top of the ball in several passes until it is wetted through, and firm the soil against its sides to close the gap.
Planting depth. The root ball should sit at soil level or slightly higher. Buried too deep is the commonest planting error and it kills slowly over one to three years. On a plant set only a couple of months ago, lifting and resetting it higher is very achievable, but choose the moment: not during a heat wave or a hard freeze, and not while the plant is already badly stressed. Wait for mild damp weather, water well beforehand, keep the root ball intact, and settle it so the flare sits proud of the soil.
Wrapping and circling roots, as described above.
Drainage and the site. A plant set in a low spot that collects runoff will be waterlogged no matter how carefully you irrigate. A hole dug into compacted ground with smooth sides acts as a container that roots will not leave and water will not drain from. Reflected heat from a wall or paving, and constant drying wind, both raise water demand beyond what a small new root system can supply. And a plant grown under nursery shade cloth then planted straight into full unbroken sun will scorch while it adjusts. Each of these needs the situation changed rather than the plant treated.
One side of my arborvitae is brown after a hot dry summer
The scorched foliage on the sun-exposed side will be replaced as the tree puts out new growth. Tidy up by cutting back only to where live green growth begins; cutting past the green into bare brown wood leaves a permanent gap. If the branch itself is alive, it will fill in from the green back toward where you cut.
The underlying issue is usually watering. If you have been watering frequently but shallowly, the roots never developed deeply and they dry out fast in heat. Switch to one deep soaking a week during the growing season.
Why are branches drying on plants near a salted road?
Drying does not identify one cause, so inspect before treating. Look at soil moisture at root depth, drainage, recent weather, road exposure, and the location and timing of symptoms. Drought dries the root zone and wind increases water loss; winter injury appears after cold, sun and wind; road salt damages foliage or roots near treated pavement; and saturated soil stresses roots and produces decline that resembles drought.
Look for clues such as injury on the road-facing side, salt residue or splash, damage concentrated on exposed winter growth, persistently wet soil, or signs of insects or disease. Pests and diseases require a specific diagnosis. Do not apply a pesticide based only on browning, and any product you use must carry a current label for the target, for arborvitae, and for the site, along with any applicable restrictions. Established plants may recover if living buds and roots remain, but tissue that is already brown and dry will not turn green again. For road-salt exposure or persistent decline, document the site and get a local diagnosis before adding fertilizer, amendments, or pesticides.
Do I need to fertilize, and can coffee grounds substitute?
Established arborvitae in reasonable soil often need no feeding at all. If the hedge is making normal growth and the foliage is the expected color, fertilizing may add nothing. Base the decision on plant performance and a soil test interpreted for your site, rather than a fixed spring or fall schedule, since excess fertilizer can injure roots through salts or create a nutrient imbalance. If a test or documented symptoms support feeding, choose a formulated product whose current label covers the plant and site, and follow that label. Fertilizer is not a treatment for winter browning, drought damage, salt injury, pests, or disease.
Coffee grounds are not a dependable fertilizer substitute and are not a reliable way to acidify soil or correct a nutrient problem. Test the soil first and use only a recommendation suited to the result. Do not add grounds or other amendments as a rescue treatment for unexplained decline.
My hedge browned in its first year and a neighbor says mites. What should I spray?
Nothing yet. A first year hedge that browns is far more often a root and water problem than a pest problem, and spraying an unidentified cause across a dozen plants is money spent on the wrong thing. Work through the pattern of the browning and the planting and watering checks above first, then test for mites properly.
The paper test. Hold a sheet of white paper or a white envelope under a branch, well inside the plant, and rap the branch sharply several times. Look closely for a few seconds. Mites are specks the size of a grain of dust that move. A few are unremarkable; dozens on every sample means a real population. Also look for very fine webbing in the crotches of the inner branches and for a dull, bronzed, faded cast to the foliage rather than clean brown patches.
The timing detail almost every general article gets wrong on this plant. The mite on arborvitae, juniper and spruce is usually spruce spider mite, and unlike the two-spotted mite of houseplants it is a cool season species. It is most active in spring and again in fall and typically goes quiet through the hottest part of summer. So the standard advice to hose plants down in July and August aims at the wrong window: scout and act in late spring and early fall, and be aware that a plant browning in July may have been damaged by a population that peaked in May.
What works, in order. A strong jet of water directed into the interior of the plant, repeated every few days during an active period, knocks populations down remarkably well and costs nothing. Horticultural oil and insecticidal soap both work by contact, which means thorough coverage into the center of a dense evergreen and a repeat application after about a week, since neither leaves residue and neither touches eggs. Read and follow the label: oils in particular are not to be applied to drought stressed plants or in high heat, generally not above about 90 degrees, and they will strip the waxy blue bloom off junipers and blue spruce if those are nearby.
What makes mites worse matters more than what makes them better. Broad spectrum insecticides, including carbaryl and the common pyrethroids, kill the predatory mites and small insects that hold spider mites in check, and outbreaks routinely follow their use. So do drought stress and dusty conditions. Mites are not insects, they are arachnids, and most insecticides do not control them, which is why a general purpose insect spray recommended for mites is likely to make the problem worse.
And if the trees are dead, be honest about it. Scratch the bark on a brown branch; if there is no green anywhere and the twigs snap dry, that plant is gone and is a replacement rather than a rescue.
There are cocoons like little pine cones with a grub inside. What are they?
Bagworms, and two things decide the outcome: timing, and the fact that arborvitae does not grow back from bare wood.
The bag is built by the caterpillar out of silk and bits of the plant it is eating, which is why it looks so convincingly like a small cone made of arborvitae foliage. The caterpillar lives inside permanently, dragging it along and leaning out of the open end to feed. There is one generation a year in most of the country: eggs overwinter inside the bags of the females, hatch in late spring, and the tiny larvae spread by spinning down on silk threads and drifting on the wind, which is how they arrive on a new planting.
On when Bt works, which is where standard advice needs correcting. Bacillus thuringiensis is genuinely a good tool against bagworms, it is specific to caterpillars, and it spares bees, birds and beneficial insects. But it only kills small, actively feeding larvae and it has to be eaten. Once the bags are an inch long and the caterpillars are large, Bt gives poor results no matter how carefully it is applied. It is the treatment for early summer, roughly a couple of weeks after the young larvae appear. Spinosad is the more effective option against larger larvae. Apply either strictly to the label, thoroughly enough to coat the foliage where the caterpillars are feeding.
For this year, handpicking is the treatment, and it is better than it sounds. Every bag you remove now is one caterpillar; every bag you remove over fall and winter is a female's egg mass containing hundreds of eggs. Removing bags through the dormant season is the single most effective control available to a homeowner on plants small enough to reach, and it takes the following year's population down enormously. Snip the silk band cleanly rather than pulling, since the band can girdle a twig if it stays. Put the bags in a sealed bag in the household trash, or drop them in soapy water. There is no need to burn them, and open burning is unsafe and prohibited in many places.
Do not prune yet. Pruning while you are still fighting the infestation removes foliage the tree needs to recover, and you cannot yet tell what is dead. Wait until next spring, see what pushes new growth, then cut out what stays bare.
The hard truth about conifers and defoliation. A deciduous tree stripped by caterpillars generally refoliates and shrugs it off. Arborvitae, hemlock, juniper and spruce carry almost no dormant buds in old bare wood, so a branch chewed back to brown twigs stays brown permanently, and heavy defoliation can kill an arborvitae outright rather than merely setting it back. Expect a permanent thin patch where the damage was worst, and plan to let surrounding growth fill it over several years rather than cutting into bare wood.
Check everything nearby, since bagworms feed on a long list of hosts and will move through a new planting. Go over the rest of the bed plant by plant now, and again in late fall when the leaves are down and bags on deciduous plants stand out against bare branches. Next spring, watch from late spring onward for tiny new bags about a quarter inch long standing upright on the foliage. That is the window when a treatment actually works.
There are patches of white webbing all over my arborvitae. Are these whiteflies?
No. Whiteflies do not spin webs, so whatever is making webbing is something else, most likely either spiders or spider mites.
Spiders are the more common and entirely harmless answer. Dense evergreens are prime spider habitat, and sheet web and funnel web spiders build conspicuous white patches in them, especially visible on a dewy morning. They do no damage and are eating pest insects. If the webbing is in discrete patches, fairly coarse and structured, and the foliage around it is a healthy green, leave it alone.
Spider mite webbing is much finer, more like dust or haze caught in the branch crotches, and it comes with foliage that looks dull, faded, bronzed or stippled rather than green. Settle the question with the paper test described above, then treat as above if it is mites.
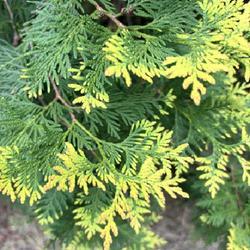
Since people often are not certain whether the shrub is an arborvitae or a juniper, it is worth settling that too, because it changes what else to watch for. Arborvitae carries its foliage in flat, fan-like sprays that lie in one plane. Juniper foliage is either fine overlapping scales on rounded branchlets or short sharp needles, and mature junipers usually carry small dusty blue berry-like cones. Junipers also get juniper webworm, which ties needles together with silk into loose brown tunnels and browns the interior of the plant. If the webbing is binding brown needles together rather than draped across green ones, look up webworm rather than mites.
My arborvitae has two competing leaders. Should I remove one?
This is a genuine judgment call and deserves an honest answer rather than a confident one.
The concern is real: a tree that splits into two trunks low down carries a higher risk of one side breaking out under snow or ice load, especially where the two trunks meet in a tight V with bark pinched between them.
But the remedies have costs. Cutting out one leader on a mature plant leaves a badly one-sided shrub, and because arborvitae will not regenerate from old wood the remaining leader has to fill that space with new growth over years, if it manages at all. The result may never look better than what you have. Lashing the two together is worse as a long term measure: it constricts the trunks as they thicken and it stops the plant flexing in wind, which is how a tree builds the strength that keeps it standing.
On a healthy plant where a failure would not hurt anyone or anything, leaving it alone is often sensible and accepting the shape costs nothing. Where it matters, get a certified arborist to look at the union in person; they can assess whether the connection is sound or has included bark, and can install a proper cable and brace if support is warranted, which is a different thing from lashing two trunks with rope. If the plant sits somewhere prominent and its shape is the whole point, replacing it with a single-leader plant is often a better use of the money than a drastic cut. Any cutting belongs in late winter, before growth starts.
How far apart should I space them, and will they take morning sun only?
For a solid unbroken hedge of 'Emerald Green', three feet apart measured center to center, which is close enough to knit into a wall within a few years. For a row that stays as distinct plants with the wall visible between them, five feet apart; at four feet they will touch eventually, and at six they read as separate exclamation marks rather than a group. Give the row at least three feet of clearance from a house wall, measured from the trunk, so the plant is not growing into the eaves drip line and you can get behind it to paint. Spacing otherwise varies with species and cultivar, so check the mature width of what you are buying.
On light, arborvitae are sun plants. In full sun they stay dense to the ground; in shade they thin, the interior opens, growth slows, and a plant on the shady side of a building leans out toward the light and never straightens. Two to four hours of gentle morning sun on an east wall is genuinely marginal. It will not kill them, and you may get a passable plant for some years, but expect a thinner, slower, looser plant than the picture in your head, and a leaning one if the wall is tall.
The size objection is the more serious one. 'Emerald Green' tops out around fifteen feet with a spread of three to four feet, which against a single story wall is too big for a foundation planting. Shearing it annually to keep it below the windows works for a while and then leaves you with a plant that is bare where you cut it.
If you are looking at alternatives for that spot, each comes with something attached:
- Yew is the best of them for morning sun and it shears beautifully, and it is also seriously poisonous. The foliage, the bark, and the seed inside the red fruit all contain the toxin, it does not lose potency as the clippings dry, and it is dangerous to people, dogs, and above all to horses and livestock. That is not a reason never to plant one, but if you have small children, or a paddock anywhere near where clippings might go, choose something else, and never dispose of yew trimmings where livestock can reach them.
- Rhododendron is also toxic to people and pets in all its parts, and it needs acid soil and will sulk badly in anything else.
- Japanese holly is a good sheared evergreen in part shade, but check your own state before buying it, since it is listed as invasive in parts of the mid-Atlantic and Southeast where birds spread the seed into woodland.
- Boxwood is the classic answer for this situation, and the caution is boxwood blight, which is established in many areas and can defoliate a planting quickly. Buy from a nursery participating in a blight compliance program, choose a resistant cultivar, and do not shear it while the foliage is wet.
And one thing that decides this for many people: deer eat arborvitae. In deer country an unprotected hedge is browsed into a bare stemmed line up to about five feet from the ground, and it does not grow back from that wood. If you have deer, either fence the planting, plan on repellents from the day it goes in, or plant something they leave alone.
Is arborvitae safe around pets and livestock?
Arborvitae foliage is toxic to pets and livestock if eaten in quantity. That is worth knowing if you keep grazing animals, chickens, or pets that chew on plants, and it is a reason to site a hedge away from a paddock fence line and to clear up prunings rather than leaving them where animals can reach them.
What is golden biota, and is it the same plant?
The shrub sold as golden biota, and often labeled Thuja orientalis, is now placed in a separate genus as Platycladus orientalis, oriental arborvitae. It is not a true Thuja, though it is closely related and shares most of its cultural needs.
Two practical consequences. Labels, catalogs and older references still use the old name, so you will find the plant under both, and searching the current name gives better results. And advice written specifically for Thuja species, particularly on pests and diseases, does not always transfer, so treat it as a guide rather than as gospel. Everything above about watering, planting depth, wrapping, and the refusal to regrow from bare wood applies to it in full.
When is a foliar blight the actual answer?
Only once the checks above are genuinely ruled out. Foliar blights do occur on this group, favored by prolonged warm wet weather and poor air movement around crowded plants. A blight tends to show a pattern: discrete spots or lesions, discoloration progressing along individual shoots from the tip or the base, small dark fruiting structures visible on affected foliage with a hand lens, and damage that spreads while the plant is otherwise well watered and well planted.
Cutting out dead and clearly affected material is worth doing either way, for the look of the plant and for air movement, remembering to cut back only to a point where live green foliage remains on the shoot.
On fungicide, be cautious and sequential. A fungicide does something only if a foliar disease is genuinely present, and it does nothing whatever for a root problem, a watering problem, or a planting depth problem, which is why identification comes first. Which products exist and which are approved for ornamental conifers varies considerably by region, so get the problem identified locally by a plant clinic, a horticultural adviser, or an experienced nursery, and use only a product whose label covers this kind of plant and this use where you live. Read and follow that label.
Can I grow arborvitae from seed or cuttings?
Both work, with expectations set in advance.
From seed, know two things. Seedlings will not match a named cultivar: if your trees are a selected form, the seedlings will be variable, some upright, some loose, some slower, and none of them reliably the plant you collected from. For a matched hedge, buy cutting-grown plants; for a windbreak, seed is fine. And germination is modest, around thirty percent, so sow generously and do not read a half empty tray as failure.
Collect the cones once they have ripened to brown and are beginning to open, then let them dry somewhere warm until they release the small winged seeds. Green or fleshy blue cones are not ready, and blue fleshy structures usually mean an oriental arborvitae with immature cones, or a juniper rather than a Thuja at all. Seed taken green does not germinate.
To stratify, soak the seed in water overnight, put it in a plastic bag with moist potting soil, seal it, and refrigerate for thirty to forty days, then sow into fresh potting soil, barely covering the seed. Spring sowing is standard. Keep the medium moist and the temperature warm, in the mid to upper 70s through the day and dropping into the high 60s or low 70s at night. Viable seed comes up in about twenty days. Give seedlings bright light without harsh midday sun and grow them on in pots for a couple of years.
From cuttings, expect losses. In late summer, cut pieces from the outer branch tips, trim off the terminal tip, and strip the foliage from the lower portion. Dip the base in rooting hormone and set it in moist, well-draining soil. A cold frame or cool greenhouse works, or a container indoors covered with a vented plastic bag to hold humidity. Make extras, and be patient, since roots take time.
I was also told to plant Bradford or Cleveland pears. Any concerns?
Both are cultivars of Callery pear, which now has a complicated regulatory status in many parts of North America, with some areas restricting or prohibiting it for its invasive tendencies. This varies significantly by state and locality, so check your own regulations. If you already have an established tree there is no need to remove it, but for future planting look into its status where you are and choose accordingly.