


Why Grow Fruit Trees
Everyone knows that homegrown vegetables taste better than store-bought, but that's especially true for fruit. Tree-ripened fruits are sweeter and more flavorful because you can harvest them when they're ready, not when a packer or shipper decides they should ship. Most gardens have room for at least one or two fruit trees, especially dwarf varieties. With rising food costs and a desire to grow more of your own food, fruit trees make sense.
Fruit trees are a long-term investment, though. They're prolific and bearing for many years once established, but don't expect instant results. Most fruit trees require two to five years from planting to first harvest. A standard apple tree typically takes two years to start fruiting and four years to reach full production. Times to bearing vary: apricots typically need two to five years, peaches three to four years, pears and plums four to six years, and sweet cherries five to seven years. Trees on dwarfing rootstocks generally begin fruiting earlier, often within a few years.
Choosing Your Site
Sunlight is essential. Most fruit trees need at least eight hours of direct sun daily to grow and fruit their best. Early morning sun dries dew off foliage quickly, minimizing diseases; midday and early afternoon sun improves fruit flavor. Plant fruit trees far enough from shade trees to provide adequate light and to avoid root competition.
Your site should have good air drainage. Avoid low spots and areas enclosed by buildings or shade trees, where cold air settles, causing trees to suffer from winter cold and spring frost injury. Understanding your local frost patterns is critical. In northern areas, plant hardy fruit trees such as apples, American plums, and sour cherries on a south-facing slope to receive extra heat. Avoid planting early-blooming, frost-sensitive fruits like peaches and apricots in south-facing areas because they may bloom too early and the blossoms will get killed by spring frost. A north-facing slope is better for these fruits and for all fruits growing in hot summer areas. Select a sloping location where cold air will drain into lowlands and a late spring frost won't harm your blossoms.
In hot, dry climates, avoid south or southwestern slopes, or give trees plenty of irrigation. East- and west-facing slopes have intermediate effects. In areas with strong winds, choose a site protected by existing plantings or buildings, or plant a windbreak.
Soil Conditions
Soil type should be a major consideration in choosing a site. Once you plant a fruit tree, it will remain in the same spot for many years, so it pays to examine and prepare soil carefully before planting. Even if this means delaying tree planting by a year, you'll gain back that year in increased tree growth and health.
Fruit trees need well-drained soil. Avoid low areas where water puddles during rains. If you don't have well-drained sites, you can install drainage tiles or build raised mounds or beds (6 to 8 inches high and as wide as the mature tree's spread) where you'll plant the trees. To make mounds, mix equal parts soil from other areas of the yard with compost.
You will also need at least 3 feet of soil depth for trees on dwarfing rootstocks and at least 5 feet for standard-size trees. If you think your soil is shallow, dig a hole or use a soil auger to check. Watch for soil that suddenly becomes very clayey; this will restrict water drainage and root growth.
Loam soils, clay loams, or sandy loams are better for fruit trees than very sandy or heavy clay soils. Different fruit tree rootstocks are adapted to different conditions. In general, peaches, sweet cherries, Japanese plums, and apricots do better in sandy soils; apples, pears, tart cherries, and European plums do better in heavier soils.
Have your soil tested, preferably the season before you intend to plant your trees. If necessary, add lime or sulfur to correct the pH to a range of 5.5 to 7.0, suitable for most trees. Add phosphate or potash fertilizers if phosphorus or potassium levels are low. All fruit plants will be healthier if the soil contains high levels of organic matter, so turning under a green manure crop or two before planting helps considerably.
Avoid planting nematode-susceptible stone fruits (peaches, plums, cherries, and apricots) where vegetables recently grew or where nematode levels are high. Plant these trees where a grass cover crop or lawn grew for the previous 2 years. Two years without broad-leaved plants almost completely eliminates root knot and lesion nematodes as well as verticillium wilt. If you must plant stone fruits where vegetables grew recently, choose an area where corn has grown. Have your soil tested for nematodes before planting. If high levels are found, plant a trap crop of marigolds the season before planting the fruit trees. Choose varieties like 'Tangerine' or 'Nemagold', plant them 6 to 7 inches apart to form a solid stand, and keep them weeded. In early fall, pull up the marigolds with roots included and destroy them. Then plant a winter rye cover crop for additional protection and till it in early spring before planting trees.
Planning Your Home Orchard
Don't let tempting catalog pictures lure you into quick decisions. Spend time planning before you order trees. Call your local nursery or county extension office to find out what weather problems and fruit diseases are troublesome in your area, and which types of fruits, varieties, and rootstocks are best adapted.
Climate and Hardiness
Plant varieties adapted to your climate. Determine the hardiness zone for your area and select fruit trees that will grow well there. However, you can often create microclimates in your yard by planting near buildings or fences that protect trees from winter cold; this may allow you to grow a tree that's marginally hardy in your area. On the other hand, if your trees are in an exposed spot, even a variety that's hardy in your area may suffer winter injury.
Most deciduous fruit trees need a minimum amount of "chill" in winter to grow and fruit well the following season. Chilling requirement is the total number of hours below 45 degrees F needed while the tree is dormant. If you live in a warm-winter area, you'll need to know the chill-hour requirements for the varieties you want. Some areas are too warm in winter to grow certain types of fruits. In the South and mild West, choose apples such as 'Anna', 'Beverly Hills', 'Dorsett Golden', or 'Pettingill' that require only 200 to 300 chill hours. 'Gravenstein' requires 700 hours, while 'Red Delicious' and 'McIntosh' require even more.
Tree Size
Determine how much space you have available. Most fruit trees come in varieties that are dwarf, semi-dwarf, and standard. Dwarf trees stay about 8 to 10 feet tall and are perfect for small yards. There are even dwarf fruit trees, such as columnar apples and figs, that fit well in containers, allowing you to move them as needed. Semi-dwarf trees grow about 10 to 15 feet tall and are more productive than dwarfs. Standard-sized trees grow 20 feet or more and are most productive. Sketch out how much room you have in your yard to determine which type of fruit tree you should purchase.
Dwarf and semi-dwarf trees are either grafted or "genetic" dwarfs. Grafted trees have a hardy rootstock with the desired variety grafted onto it. Genetic dwarfs have been bred to grow in a dwarf form (usually less than 8 feet tall) on their own rootstock.
Pollination and Variety Selection
Most fruit trees grow best with at least two different varieties planted to ensure cross-pollination. The varieties should bloom roughly at the same time in spring and have compatible pollen. Check fruit tree catalogs for varieties that can pollinate each other. Some fruits, such as apricots, most peaches, and some special varieties like 'Northstar' sour cherry and genetic dwarf 'Stella' cherry, are self-fertile, so you only need one tree. Look for self-fertile fruits and varieties if you have limited space.
Also consider disease resistance. To reduce maintenance time and costs, select varieties that are disease resistant. These will help you reduce the need for spraying to produce a good crop.
Planting Fruit Trees
In most parts of the country, fruit trees should be planted in early spring. Where winters are mild (USDA Zone 7 and warmer), fall is the preferred planting time. This allows roots to become better established before the trees leaf out the following spring.
Plant the trees the day you get them, if possible. If weather conditions delay planting, keep the roots moist. Bare-root trees will be wrapped in moist peat or similar material; leave this intact and add water as needed. Water balled-and-burlap and container trees as needed. Soak bare roots in a bucket of water for a few hours before planting.
Digging the Hole
Dig planting holes a few inches deeper and two times wider than the roots spread. Make sure the hole size matches the type of rootstock. For bare-root trees, set the tree atop a small mound of soil in the center of the planting hole, and spread the roots down and away without unduly bending them.
Set trees on standard rootstocks (including genetic dwarf varieties) with the graft union a few inches below soil level to reduce root suckering. Set trees on dwarfing rootstocks with the graft union several inches above the soil; if the union is buried, the variety could root and overcome the rootstock's dwarfing effect.
For container trees, lift the plant out of the container prior to setting the rootball in the hole. Eliminate circling roots by laying the rootball on its side and cutting through the roots with shears.
Backfill and Initial Care
Don't add fertilizer of any kind to the planting hole or drastically change the soil texture. Never add any materials that might burn the roots, such as chemical fertilizers, fresh manure, or mothballs. Compost can be mixed into the planting hole only if the soil is very poor, and then add no more than a few shovelfuls, as it can change soil texture and cause poor drainage.
Set the tree a little bit higher than you ultimately want it. Mound the soil up slightly (3 to 4 inches high and 1 foot in diameter) around the trunk to help drainage and reduce crown rot problems. Cut off any broken roots and any extra-long roots. Spread out the roots in the hole and tamp the soil around them firmly. Air pockets around the roots can kill trees.
Surround the trunk of each tree with a 14-inch mouse and rabbit guard before filling the hole completely. Place the guard so that the bottom 2 inches will be below ground when the hole is filled with soil. Pour 2 gallons of water around each newly set tree to thoroughly soak the soil.
Pruning at Planting
Prune spring-planted trees only if it was not done at the nursery. Wait until early spring to prune fall-planted trees if necessary. When pruning, cut the trees off at about 30 inches from the ground, just above a bud. This pruning helps adjust the tops to the root system, which was pruned during transplanting.
If the tree has branches, remove any that are less than 18 inches off the ground. If any strong branches above this height arise from the trunk at a wide angle and in desired positions, you can leave them but cut them back by one-half. Cut all narrow-angled branches off, even if you're left with few or no side branches. Buds on the trunk will grow into side branches that you can train to better angles.
Pruning and Training
The primary objectives of pruning fruit trees are to create a strong tree form and to maximize the harvest. Pruning stimulates new growth, controls tree size, and improves the size and quality of the fruit. Producing luscious fruits demands lots of energy from the sun, and one goal of pruning is to help all the limbs on your tree bask in as much sunshine as possible. Keeping branches open to light and air also speeds drying of leaves and fruits, decreasing diseases, and allows sprays to penetrate if spraying is needed.
Pruning also strikes a balance between shoot growth and fruit production, so important in ensuring that your tree bears the largest and tastiest fruits year after year.
Young Trees: Creating the Framework
The first years a fruit tree is in the ground are important to its future performance. It's then that the tree should form its permanent framework. Your goal is to help your tree produce branches that are strong enough to support their future fruit loads and to develop branches that won't cross or shade each other.
Three main tree forms predominate: open center, central leader, and modified central leader. The ideal form for a particular tree depends on your preferences and the plant's natural growth habit.
Central Leader System: This system is used on apples, pears, and sweet cherries. It creates the classic Christmas tree shape with a strong central branch and many smaller lateral branches growing from it. The central-leader tree has a leader with branches growing off it; these branches are shorter near the top of the tree.
Open Center System: This system is commonly used on peaches, nectarines, plums, sour cherries, and apricots. The central leader is removed and the center is open with three to four main limbs spaced around the trunk. Many smaller-sized branches emerge from the main limbs to create a rounded shape. An open-center tree has a vase shape made up of three or four leaders growing off the trunk in an outward and upward direction.
Modified Central Leader System: This system is also used on apples and pears. It has a central leader but also three to four other main branches that have equal importance. It's a good system for curtailing the growth of a large tree, making it easier to harvest. The modified-central-leader tree starts with just a central leader, but when it grows to about 7 feet, you stop its growth by bending it over (which slows growth) or cutting back to a weak side branch.
Branch Selection
The tree you get from a nursery may be a single upright stem (a "whip"), or a "feathered" tree with some side branches. If your new tree is a whip, shorten it by a third to a half to promote branching. For a feathered tree, save well-placed branches and completely cut away all others. Always cut broken stems and dead or diseased wood back into healthy tissue.
Begin branch selection the first season. Start with the first branch about 2 feet from the ground, then space higher ones about 6 to 8 inches apart. Strive for a spiral arrangement of branches so that each branch has room to spread. Choose branches that make wide angles (45 to 60 degrees) with the central leader, because such branches are most firmly anchored to the stem.
For an open-center tree, once you have selected three or four branches, cut the central stem off just above the topmost branch. The tree then continues to grow upward and outward along the branches, now officially leaders (but not central leaders). As these leaders grow, make sure that none of their side branches originates so low that they interfere with each other.
If your tree is a central-leader or modified-central-leader type, induce the central leader to keep making new branches by cutting off about a third of the previous season's growth each year while the plant is dormant. If dormant-season pruning doesn't produce enough branching options, tip prune leaders during the growing season. Cut back the leader by a few inches each time it grows a few inches above the point where you want a side branch. The uppermost bud that remains after cutting back usually grows to become an upright shoot, a continuation of the leader. Lower buds grow out to produce side branches. Select new side branches that are well spaced along the leader and firmly anchored to it.
The central leader on both central-leader and young modified-central-leader trees should remain as the dominant and most upright stem. If the leading stem should grow into two equally vigorous stems, remove one of them immediately and completely. Also, don't let the central leader fruit in its first few years and don't let it bend over, because both circumstances would weaken its growth.
Branch Angle Techniques
Branches that form a 45 to 60 degree angle with the trunk produce more fruit and are less likely to break under stress than ones at narrower angles. To widen the angle of otherwise desirable branches, wedge a notched stick between the branch and trunk to spread them apart. Install the spreaders in late winter and remove in late summer. Alternatively, take fishing line with weights attached and tie them to ends of smaller branches needing to grow more horizontally. After one year the branches will naturally be growing at the right angle and the spreaders can be removed.
Suppose a sprout is emerging in a perfect position to become a side branch, except that it forms a narrow angle with a leader. Widen the angle by inserting a clothespin or toothpick as a wedge between the sprout and the leader. If no side branch is growing where you want, cut a notch into the bark above a bud to make that bud produce a shoot. If a well-positioned side branch is trying to grow more vigorously than the leader, weigh it down just above the horizontal to slow its growth.
Making the Cuts
Don't randomly shorten branches; remove them all the way to their bases. Start by locating the branch bark ridge, a raised area on the upper surface where the branch meets the trunk or larger branch. Begin your cut just outside this ridge, angling it down to the outside of the branch collar, the bulge that forms at the base of the branch where it intersects with the trunk. Leaving the branch collar intact will help the cut close over more readily. Don't cut branches flush to the trunk, and don't leave stubs.
To avoid tearing the bark as you cut through a heavy branch, divide the cut into three steps. Cut first from the bottom, 6 to 8 inches out from the location of the final cut and half way into the branch. Make the second cut from the top, about an inch further out than the first cut. The branch will break off once this second top cut reaches the area of the first bottom cut, and a stub will remain. Remove the stub in one cut just outside the branch collar.
Prune twigs back to within one-quarter inch of a bud that points in the desired direction, usually toward the outside of the tree.
Mature Trees: Pruning for Production
Even after your tree starts bearing well, it will need annual pruning, but for different reasons than when it was young. Prune an established, mature tree to keep it from growing too large, to keep it healthy, and to keep it bearing regular crops of high-quality fruit.
Contain the growth of an overgrown tree by cutting back a few large branches either to where they begin growth or to weak side branches. Ideally, start pruning your tree to limit its size before it reaches full size. You can do this in two ways. Shorten the leader to a weak, horizontal side branch. Or, bend the leader over and weigh it down to weaken it. Use one of these techniques before it grows as high as you want your tree to grow.
Balancing Growth and Fruit
Skillful pruning strikes a good balance between shoot growth and fruit production. How much pruning is needed depends on how and where the particular tree bears its flowers and fruits. At one extreme are trees such as peach and nectarine. They bear fruit only on stems that grew the previous season, so they need fairly severe annual pruning to stimulate a flush of vigorous new shoots for the next year's crop. Apple trees, at the other extreme, produce fruit on long-lived, very short, knobby branches called spurs, so they need little such stimulus. Many fruit trees lie between these two extremes.
Each year, shorten some stems and remove others completely. Shorten stems where you want increased branching. Remove stems completely where you do not want regrowth, such as where stems are overcrowded. Complete removal is also the way to deal with water sprouts. These vigorous, upright stems shade lower stems and are not very fruitful, so cut them right to their bases as soon as you notice them.
Pruning also balances crops by removing potential fruits. Especially with trees that produce large fruits such as apples and peaches, individual fruits tend to be undersized and less sweet if the crop is too heavy. Also, a heavy crop one year can result in a light crop the following year. By removing some stems that would have borne fruit, pruning prevents crop production only in alternating years and maximizes production of better fruits in terms of size and sweetness.
Timing and Techniques
The most important time to prune is late winter before you see any signs of new growth. Prune off damaged limbs as well as branches that grow too close to the main branches. Thin out crowded and crossing twigs. Trim back by two-thirds the new growth at branch ends and from the central trunk (leader).
In midsummer, remove all new shoots that grow straight up or down from the limbs and from the base of the tree. If the main trunk is forked, remove the weaker shoot.
Don't prune in fall, so as not to stimulate growth or leave fresh cuts open to winter injury.
For detailed guidance on specific fruit types, see Pruning.
Watering and Mulching
During the first two growing seasons, water the trees deeply (6 to 8 gallons of water per tree) about once a week if there's been little or no rain. Don't apply less water more frequently, as that will encourage shallow rooting.
Irrigate bearing fruit trees if they receive less than 2 inches of rain during any 2-week period between bloom and early fall. If no rain has fallen for 2 weeks, add 1 gallon of water per square foot of rooting area, which extends several feet farther out than the tree's dripline. For young trees, make a moat around the base so the water stays in the root zone. On older trees, water at the drip line. Measure rain and sprinkling with open containers on the ground.
The most critical time to water is during fruit expansion, but don't apply more than 2 inches. Excessive watering can cause fruit to expand too much and be more prone to rot. In arid summer regions, this means watering once every two to four weeks.
Spread 4 to 6 inches of mulch around the trees to their dripline to conserve moisture and control weeds. You can use bark mulch or other attractive mulches and plant non-competitive flowers (spring bulbs and shallow-rooted annuals) around the trees. Before spreading straw mulch, let it sit and wet it several times to encourage weed seed germination.
Thinning Fruits
Most fruit trees produce more fruit than the tree can support. While the tree will naturally shed some fruit during an early summer drop, you may need to thin more than nature does. Thinning fruits eliminates diseased or insect-infested fruits, reduces fruit load, prevents branches from breaking during the summer from excessive weight, and prevents alternate-year bearing, which is common on some fruit tree varieties.
Wait until after the natural drop to thin your fruits. The fruits should be about 1 inch in diameter when you're thinning them. Leave the largest, healthiest-looking fruit on the tree, and favor fruits located towards the outside and upper portions of the tree. These will receive the most sun and produce the best quality fruits. If it's a light bearing year, thin less. Thin more during heavy fruit set years.
Spacing guidelines for thinning common tree fruits:
- Apricots, Cherries, and Plums: thin to 2 to 4 inches apart
- Peaches and Nectarines: thin to 3 to 5 inches apart
- Apples and Pears: thin to one or two fruits per cluster, spaced 6 to 8 inches apart
Fertilizing
Supply fertilizer and abundant organic matter during the first few years to get the trees off to a good start, but keep in mind that heavy or careless applications of fertilizer can damage the trees. To avoid burning the new root system, wait 6 weeks after planting to fertilize. Then apply a fertilizer containing 1/10-pound of actual nitrogen in a wide band 1 foot out from the trunk. It's best to apply a nitrogen source separately and adjust phosphorus and potassium according to soil test results, although a complete fertilizer can also be used.
During the second growing season, make two fertilizer applications: one when growth begins in spring and one in early summer. Apply about 1/8-pound of actual nitrogen each time, if growth was in the desired range last year.
Established fruit trees require little fertilizer other than organic matter. From the third season on, apply only enough nitrogen to produce the desired amount of growth. Bearing trees that produce crops on 1-year-old branches (peaches, apricots, and Japanese plums) should make 15 to 18 inches of terminal growth per season. Those trees which bear mainly on spurs (apples, pears, cherries, and European plums) should make no more than 10 to 14 inches of terminal growth per season.
Excess nitrogen can cause poor fruit bud set, poor fruit color, delayed fruit maturity, and softer fruit, which is more prone to rot. Time fertilizer applications so that nitrogen will be released when growth is starting in spring and when fruit buds are forming in early to midsummer.
Apply an organic fertilizer, such as compost or aged manure, or a complete commercial fertilizer such as a 10-4-4 if growth is poor. The best time to apply fertilizer is in early spring. Don't fertilize in late summer or you'll stimulate new growth which may be winter injured and you'll delay the tree hardening off for winter.
Established trees usually don't benefit from phosphorus applications in most soils, and excess phosphorus can cause zinc deficiency. Potassium may be deficient on alkaline soils high in calcium and magnesium. Potassium deficiency reduces fruit size, sugar content, and storage time; it can be recognized by small, bluish-green leaves with yellowed or dying edges. Zinc and boron must be applied frequently on western, alkaline soils. These are best applied as foliar sprays; ask your county Extension Service agent for details.
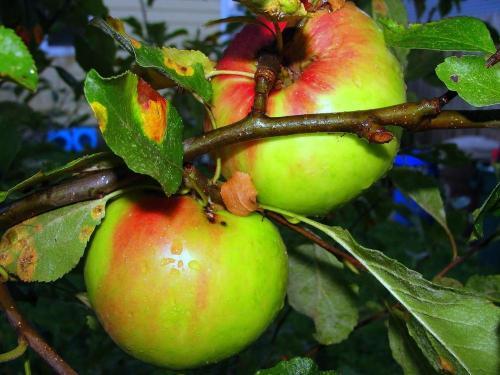
- Apple (Malus domestica 'Jonathan')
- Uploaded by keithp2012
Stone Fruits: Peaches, Plums, and Apricots
Stone fruits have unique requirements that distinguish them from apples and pears. Understanding these will help you grow productive peach, plum, and apricot trees.
Chilling and Bloom Timing
Peaches, nectarines, Japanese plums, apricots, and sweet cherries need specific chilling hours in winter. If you live in a warm-winter area with insufficient cold, choose low-chill varieties. In cold climates, these stone fruits can suffer from late spring frosts because they bloom earlier than hardier fruits like apples.
Training and Pruning
Stone fruits, especially peaches and nectarines, bear fruit primarily on one-year-old shoots, which means they need fairly severe annual pruning to keep producing. The traditional recommendation is to prune enough off a peach tree so that a bird can fly right through the branches. This differs significantly from apple trees, which fruit on long-lived spurs and need much lighter pruning.
Train stone fruit trees to an open center form to maximize light penetration and air circulation. Japanese plums respond well to open center training as well, while European plums can be trained to a conical shape with a central leader.
Fruit Thinning
Stone fruits often set more fruit than the tree can ripen to good size and flavor. Thin fruits when they're about the size of a marble, following the spacing guidelines above. Japanese plums benefit from moderate fruit thinning; European plums should not be thinned unless the crop is especially heavy.
Common Stone Fruit Diseases and Pests
Peach Leaf Curl: This fungal disease causes puckered, reddish distortion of new leaves and can defoliate trees. It's most serious in areas with cool, wet springs. Dormant oil sprays applied in late fall and again in early spring before bud break provide effective control.
Bacterial Spot: This disease infects peaches, nectarines, cherries, and plums, causing small black spots on leaves, stems, and fruits. Warm temperatures, rain, and wind encourage its spread. Control includes pruning annually to promote good airflow, cleaning up all dropped fruits and leaves in fall, avoiding excessive nitrogen fertilization, and growing disease-resistant varieties.
Plum Curculio: This "snout beetle" often rivals the codling moth as a fruit grower's headache in the midwest and eastern United States. Capable of damaging almost all tree fruits, plum curculio causes injuries throughout the growing season. Early in the year, around petal fall, overwintered beetles cut semicircular scars in fruit as they feed. These puncture wounds scar and deform the fruit. The beetle then lays eggs in some of these wounds. The eggs hatch into grublike immature forms that tunnel in the developing fruit, causing infested fruit to fall in late spring, well before it has ripened. Pick up fallen fruit in late spring or early summer to clear the main source of new crop beetles. Prune and train the tree to open up and accept more light; plum curculio hates light and thrives where vegetation is dense. Control of adult beetles as they awaken and move to trees in spring is also recommended. Shake the branches to dislodge the beetles, which tend to drop when disturbed. They can be collected on sheets placed under the tree.
Orchard Pests and Diseases
Growing fruit trees does involve some insect and disease management, but integrated pest management strategies can help you harvest abundant fruit with minimal spraying. The key is to understand the pest's lifecycle and habits and to use a full arsenal of countermeasures to thwart their activity.
Codling Moth
No discussion of fruit-loving insects can avoid the codling moth, the proverbial "worm" in the wormy apple or pear. Larvae tunnel into the fruit in search of its nutritious core, but in doing so, they destroy the flesh of the fruit.
Codling moths start the season within a silken cocoon, hidden in and around fruit trees. The following spring, adult moths emerge, usually around the time of full bloom. Over the next few weeks, female moths lay eggs on the leaves and young fruit. It's the second generation of the moth, typically occurring in mid to late July, that worries apple and pear growers. Eggs are laid directly on the fruit. One to two weeks later, eggs hatch and the young larvae tunnel into the fruit.
Monitoring and Spray Timing: Use attractant pheromone traps to monitor codling moth activity. Time your sprays based on trap captures rather than using a calendar schedule.
Spray Options: Sprays of kaolin clay are effective and low-impact. Bacillus thuringiensis (Bt) sprays are moderately effective. Make the first spray 15 days after petal fall begins, then repeat at 5-day intervals. At least three sprayings are needed.
Cultural Controls: After larvae have finished feeding on the fruit, they wander to flaps of bark or other protected sites to pupate. Provide an "artificial bark flap" such as a band of corrugated cardboard or burlap on the trunk. The caterpillars will use the band as a resting site to complete pupation. Check the bands at least every two weeks and destroy collected pupae, or the codling moth caterpillars may transform to adult moths and escape before you get to them.
Thinning is often a desirable practice in promoting larger fruit and steadier production. It also controls codling moths. Young caterpillars have great difficulty holding on as they cut into the fruit, and their success is even more limited once sites where two fruits touch are removed.
Fruit Flies (Apple Maggot and Cherry Fruit Fly)
Fruit flies, such as the apple maggot and cherry fruit flies, are common orchard pests. Apple maggot, also called the "railroad worm," tunnels inside apples (less commonly hawthorn, cherries, pears and other fruit) and creates meandering brown streaks. Damage also occurs when the adult insect lays eggs in the fruit, causing puckered wounds on the fruit surface.
Yellow panels are very attractive to the flies during the first couple of weeks after they become active. Use yellow sticky cards to detect when the insects are active and when sprays are most appropriate. These traps also can be used to control these insects. Later, red sticky spheres resembling oversized apples can be hung on trees as super attractants to female flies as they seek places to lay eggs.
Cleaning out infested fruit is critical. Pick over cherries as completely as possible and destroy apples showing the "stings" of apple maggot so that developing insects in fruit are destroyed. Fruit flies also breed on the fruits of wild plants. If these pests are problems, consider destroying any nearby wild hosts.
Other Pests
Aphids are abundant on all types of fruit trees. Usually they infest the shoots and the young leaves in spring. Horticultural oils should control them. One or two applications prior to bud break will cover and smother overwintering eggs and prevent spring attacks. These treatments also help to control other pests that overwinter on the tree, such as leafrollers and mites.
A host of other insects visit backyard orchards, including various caterpillars, pear slugs, and leafhoppers. Their needs are usually modest and don't seriously threaten your harvest. Even if a few insects do get into the fruit, the transformation of your fruit to jam or juice does wonders toward eliminating this worry.
Dormant Oil Sprays
Dormant oil sprays applied in late fall (after leaves have fallen) and again in late winter (before bloom) provide broad-spectrum control of overwintering pests and diseases. These safe, organic options kill eggs and overwintering insects while the tree is dormant.
Sanitation
Some time spent in garden cleanup now will pay big dividends in fewer insect and disease problems down the road. Pick up and dispose of all fallen fruits to provide fewer places for insects and diseases to overwinter. Apple maggots are a good example; the larvae tunnel into the fruit where they remain until it drops, then they crawl out to pupate in the soil for the winter. If you scoop up the dropped apples regularly, you'll dispose of the apple maggot larvae at the same time.
Raking up and disposing of leaves also helps to reduce problems. For example, apple scab is a fungal disease that overwinters on infected foliage. Getting rid of the fallen leaves reduces the amount of fungus that will be around to cause problems next spring.
Don't put these collected leaves and fruits in your compost pile unless you can make "hot" compost that reaches high temperatures. Most home compost piles don't heat up enough to reliably kill off pests and diseases. If you have obviously infected or infested plant material, bring it to a municipal composting program, since large-scale operations heat up to high enough temperatures to neutralize pest problems.
Seasonal Care Through the Year
Summer Care
While most pruning of fruit trees is done in late winter, summer has its own chores: remove any dead, diseased, or broken branches, cut out suckers and water sprouts before mid-summer (see Pruning and Training above), and pinch back other new growth to stimulate more fruit buds to form for the future.
Inspect your fruit tree bark, branches, leaves, and developing fruits often. Look for signs of insects and diseases and apply the appropriate organic controls. It's usually easier to control pests if you act before or just as they are getting established, than to control them after they have caused lots of damage.
During summer, keep trees watered deeply and infrequently rather than shallowly and frequently. This encourages deep rooting. Water trees on sandy soils every 1 to 2 weeks providing enough water so it sinks 2 feet into the soil. On clay soils, water every 2 to 3 weeks. The frequency will vary depending on weather conditions. Water less during rainy periods and more during droughts. Too much or too little water can cause fruit drop.
Fall Care
Each fall, fruit trees begin to harden up in preparation for winter. Growth slows and metabolic changes take place that enable plants to withstand much lower temperatures without damage. Help the plants harden by allowing their growth to slow. Don't apply too much fertilizer or apply it past midsummer because high nitrogen levels will cause continued growth. Don't water from early fall on, except when less than 1 inch of rain has fallen during a 2-week period. Mow around the fruit trees less often in early fall to allow the lawn or groundcover to compete and help slow tree growth.
As the growing season draws to a close, take steps that will help your trees weather the winter months in top condition. Sanitation matters most now: pick up all fallen fruit and rake up dropped leaves, as described in the sanitation section above, so pests and diseases have fewer places to overwinter.
Pull back mulch from around the tree trunks in early fall to keep voles (meadow mice) from setting up housekeeping there. Voles do damage by girdling the bark at the base of the trees; if they chew through it around the entire circumference of the tree, the tissues that conduct water and nutrients are severed and the tree dies. To make your trees less hospitable to voles, mow grass and vegetation around the trees so that the voles have less protection from predators.
Winter Care
During the winter, desiccation can cause as much injury to plants as cold temperatures. Water trees well in late fall, after they are dormant, but before the ground freezes, if the weather has been dry.
Paint tree trunks white in late fall to prevent winter sunscald. This damage, often worse than that from absolute cold, occurs when unshaded trunks heat up to high temperatures during the day, then rapidly cool to very low temperatures at night. Combine 1 part interior white latex paint to 3 parts water, and spray or brush this mixture on trunks up to the first main limb. Rabbit and rodent repellents can be mixed into the paint to prevent these animals from feeding on the bark in the winter.
For voles and rabbits, wrap the lower trunk with a cylinder of 1/4-inch mesh hardware cloth, pushing the bottom few inches into the soil so voles can't tunnel under. Make the cylinder tall enough to extend a foot or so above the average snow depth, since rabbits will happily dine from atop the snowpack. White plastic spiral tree guards also work and protect against sunscald at the same time. Hardware cloth guards can stay in place year-round (just make sure they're not constricting the trunk as it expands), but plastic guards should be removed each spring so they don't shelter borers.
Deer love to browse on fruit buds in winter. Repellents may give some protection but will need to be renewed periodically over the winter. Repellent sprays can be made from blended raw eggs and water, then diluted in a sprayer. The most effective (and unfortunately most expensive) solution for serious deer problems is appropriately designed fencing. Snow or wire fencing around individual prized trees can work, as can a variety of repellent sprays. Start using deer repellents now so that deer will learn to stay away from those plants while they still have other food sources. During the winter reapply repellents using a variety of sprays to confuse the deer and hopefully keep them away.
One of the keys to surviving winter is entering it as healthy as possible. Fruit trees continue growing new roots as long as soil temperatures are above 40 degrees F, so keeping them well watered while the soil is still warm is important.
Related Topics
For general planting guidance, see Planting Trees and Shrubs. For broader pest management strategies, see Pest Control. For information on berries and other small fruits, see Growing Berries. For nut trees, see Grow Nut Trees and Yes, You Can Grow Chestnuts.
For depth on individual fruits, our how-to-grow guides cover apples, pears, cherries, figs, citrus, persimmons, and pawpaws.


